Sha Gehma Shrine: Difference between revisions
No edit summary |
m (Text replacement - "| item = Spirit Orb<br>" to "| reward = Spirit Orb | item = ") |
||
| (25 intermediate revisions by 14 users not shown) | |||
| Line 1: | Line 1: | ||
{{Infobox|shrine | |||
{{Infobox| | | image = [[File:ShaGehmaShrine.jpg|258px]] | ||
| image | | caption = | ||
| game = ''[[The Legend of Zelda: Breath of the Wild|Breath of the Wild]]'' | | game = ''[[The Legend of Zelda: Breath of the Wild|Breath of the Wild]]'' | ||
| inhab = [[Sha Gehma]] | | inhab = [[Sha Gehma]] | ||
| location = In the [[North Tabantha Snowfield]] of the [[Tabantha Tundra]] | |||
| pointsint = | | pointsint = | ||
| item = [[ | | reward = [[Spirit Orb]] | ||
| | | item = [[Royal Broadsword]]<br>[[Small Key]] | ||
| type = [[Shrine of Trials]] | |||
| related = | | related = | ||
| walkthrough = [https://www.youtube.com/watch?v=3m1dRYyBgTM Video Walkthrough] | | walkthrough = [https://www.youtube.com/watch?v=3m1dRYyBgTM Video Walkthrough] | ||
}}<section begin=summary /><includeonly> | }}<section begin=summary /><includeonly> | ||
Shift and Lock<br><br> | ''Shift and Lock''<br><br> | ||
'''Requirements:''' None<br> | |||
</includeonly><section end=summary /> | </includeonly><section end=summary /> | ||
'''Sha Gehma Shrine''', also known as '''Shift and Lock''', is one of the many [[Shrine of Trials]] from ''[[The Legend of Zelda: Breath of the Wild|Breath of the Wild]]''. | |||
==Requirements== | |||
{{Shrine}}{{Clear|left}} | |||
The shrine is found at the very north end of the [[North Tabantha Snowfield]]. The shrine is guarded well as there are three [[White-Maned Lynel]]s in the area surrounding the shrine. | |||
The shrine provides southbound access to the Tabantha Tundra, being the north counterpart to the southern [[Rin Oyaa Shrine]]. | |||
==Shift and Lock== | |||
The first chest can be found on the higher ledge to the left. Climb up high enough and then use the [[Paraglider]] to reach the chest, which contains a [[Royal Broadsword]]. | |||
A second chest can be seen, with a large magnetic block on top of it. Use [[Magnesis]] and grab the metal block. Lift it upwards so that it is above the moving blocks. When one of the moving blocks is below it, release Magnesis and then quickly change to [[Stasis]]. Freeze either the block or the moving platform, which will give Link enough time to drop down and open the treasure chest to get a [[Small Key]]. | |||
Use the small key on the locked door and then run over to the altar to meet with [[Sha Gehma]] to get a [[Spirit Orb]]. | |||
==Gallery== | |||
<gallery widths="400px" heights="220px"> | |||
File:Sha-Gehma-Shrine-1.jpg|<center>Glide over to the treasure and grab the [[Royal Broadsword]].</center> | |||
File:Sha-Gehma-Shrine-2.jpg|<center>Raise the metal block with [[Magnesis]].</center> | |||
File:Sha-Gehma-Shrine-3.jpg|<center>Drop it so it lands on the moving platforms.</center> | |||
File:Sha-Gehma-Shrine-4.jpg|<center>Use [[Stasis]] and freeze the block.</center> | |||
File:Sha-Gehma-Shrine-5.jpg|<center>Drop down and open the chest to get the [[Small Key]].</center> | |||
</gallery> | |||
{{Listbox|Breath of the Wild Shrines|hide=hide}} | |||
{{Listbox|Breath of the Wild Hebra Locations}} | |||
{{Cat|Breath of the Wild Shrines}} | {{Cat|Breath of the Wild Shrines}} | ||
{{Cat|Breath of the Wild Hebra Locations}} | |||
Latest revision as of 12:50, July 22, 2023

Games | ||
Location | In the North Tabantha Snowfield of the Tabantha Tundra | |
Inhabitants | ||
Items | ||
Rewards | ||
| Attributes | ||
|---|---|---|
Type | ||
| Guides | ||
Walkthrough | ||
Sha Gehma Shrine, also known as Shift and Lock, is one of the many Shrine of Trials from Breath of the Wild.
Requirements
The shrine is found at the very north end of the North Tabantha Snowfield. The shrine is guarded well as there are three White-Maned Lynels in the area surrounding the shrine.
The shrine provides southbound access to the Tabantha Tundra, being the north counterpart to the southern Rin Oyaa Shrine.
Shift and Lock
The first chest can be found on the higher ledge to the left. Climb up high enough and then use the Paraglider to reach the chest, which contains a Royal Broadsword.
A second chest can be seen, with a large magnetic block on top of it. Use Magnesis and grab the metal block. Lift it upwards so that it is above the moving blocks. When one of the moving blocks is below it, release Magnesis and then quickly change to Stasis. Freeze either the block or the moving platform, which will give Link enough time to drop down and open the treasure chest to get a Small Key.
Use the small key on the locked door and then run over to the altar to meet with Sha Gehma to get a Spirit Orb.
Gallery
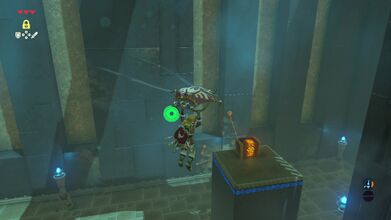
Glide over to the treasure and grab the Royal Broadsword. 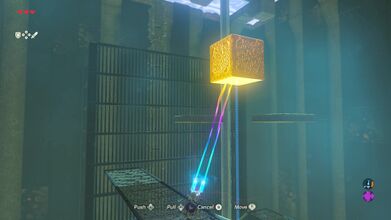
Raise the metal block with Magnesis. 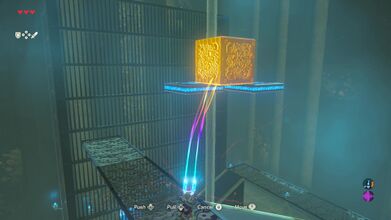
Drop it so it lands on the moving platforms. 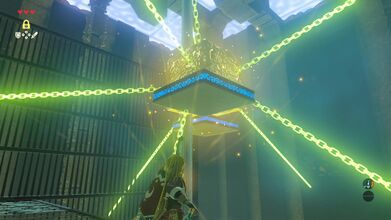
Use Stasis and freeze the block. 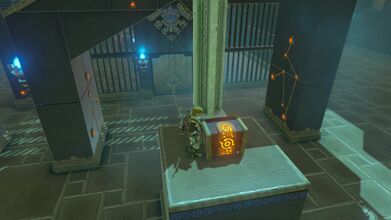
Drop down and open the chest to get the Small Key.


