- Chapter 1 – Mercay Island
- Chapter 2 – Temple of Fire
- Chapter 3 – Ocean King Part II
- Chapter 4 – Temple of Wind
- Chapter 5 – Ocean King Part III
- Chapter 6 – Temple of Courage
- Chapter 7 – Ghost Ship
- Chapter 8 – Ocean King Part IV
- Chapter 9 – Goron Temple
- Chapter 10 – Temple of Ice
- Chapter 11 – Ocean King Part V
- Chapter 12 – Mutoh’s Temple
- Chapter 13 – Ocean King Part VI
12.1 Isle of the Dead
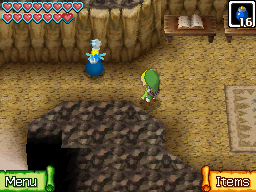
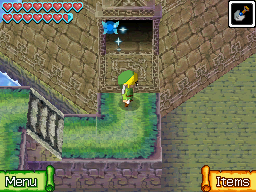
Sail over to the Isle of the Dead, the island located at the northeast part of the Northeastern Quadrant. Once you arrive, enter the cave and you’ll find a series of books. You can read some of them to get some backstory, and tips on the overall design of the island. One of the books states that there is a treasure right in this room. Walk to the left side and exit the cave.
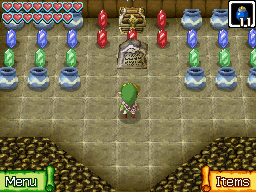
At the west side of the room, use a bomb against the flat wall to the north to blast open a hole. The area is littered with rupoor, including big rupoor that will take away 50 rupees. You should use your Bow to get rid of the Keese in the room so that they don’t bump you into the rupoor. Make your way through the narrow passage and at the north end of the room, you’ll be treated with an assortment of treasure. Collect the rupees and then open all four treasure chests. Climb the steps on the right for easier access to the exit.Optional: Secret Treasure


In the first cave at the Isle of the Dead, blast a hole in the wall at the west side and make your way through the Rupoor maze. The Treasure Map is found in one of the treasure chests.Optional: Treasure Map #28


In the first cave at the Isle of the Dead, blast a hole in the wall at the west side and make your way through the Rupoor maze. The Courage Gem is found in one of the treasure chests.Optional: Courage Gem #18


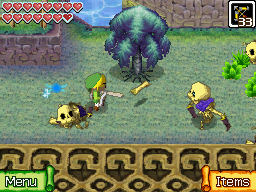
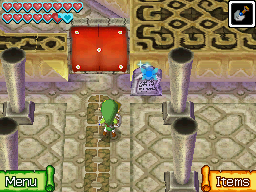
The main part of the island is littered with enemy Rupee-Likes and Stalfos. It’s a good idea to get rid of most of them so they don’t bother you. If you enter the massive temple at the northeast corner of the map, you’ll find a pair of stone tablets. Read them to find that this temple is a maze and you need to know the correct path. (The correct path is Up, Right, Right, Up, and Up). However, you would only learn that by navigating the rest of the island. There are some goodies to collect if you search the rest of the island, so you can progress how you’d like.


The tablet on the right gives you the hint you need to progress on the rest of the island: “The sacred tree grows from the king’s chin. West 13 and north 7”. Exit the temple and make your way to the southeast corner of the island. The shape of the island is that of a King wearing a crown, with the eye, mouth, and chin being in that southeast corner. The tree found here is the sacred tree mentioned on the tablet. Walk to the west 13 squares and then north 7 squares. Use your shovel to dig a hole in the ground to find an underground cavern.


Bomb the wall ahead and read the tablet to get another hint. Collect all the rupees and be sure to open the treasure chest to get a gem. Navigate through the rest of this cave, avoiding the moving boulders that are in your path.
After using the Shovel to find a secret underground passage, bomb the north wall and open the treasure chest here to get the Power Gem.Optional: Power Gem #18


After going through the underground cavern, resurface near the King’s Eye and open the nearby treasure chest to get the Treasure Map.Optional: Treasure Map #29

Back outside, you want to use that hint we just got. Stand by the King’s Eye, which is the small gap on the higher platform. Walk directly to the west and aim to the west with your bow and arrow. Shoot an arrow to hit a switch, triggering the orb. This will cause the gate at the northwest corner of the island to open up.


Run over and you can examine all of the gravestones here. A few of them have words that are worn out. Reading them, you will find the proper order to make it through the Phantom Corridor. Return to the Temple at the northeast corner of the map. Now head through using that order we just learned. North, East, East, North, and North.
Run up to the pedestal and speak with the fourth knight, Brant. After talking to him, head up the steps and open the treasure chest that is outside to get the Regal Necklace. This necklace will allow you to make it by the Cyclone in the Northeast Quadrant that protects the entrance to the Isle of Ruins. Return to Linebeck and set sail.


We just picked up two Treasure Maps, and now that we have the Regal Necklace, we can also get the Sunken Treasure near the Isle of Ruins. Sunken Treasure #24 – Northeast Quadrant – West of the Isle of Ruins, the treasure contains a ship part. Sunken Treasure #28 – Northeast Quadrant – Northwest of the Isle of Ruins, the chest contains a random treasure. Sunken Treasure #29 – Northeast Quadrant – West of Maze Island, the treasure contains a ship part.Optional: Sunken Treasure
12.2 Isle of Ruins
Sail over to the Isle of Ruins. As you draw near, the Regal Necklace will cause the Cyclone to disappear, allowing you to dock. Once you arrive go ahead and enter the cave and defeat the Zora Warrior. Read the tablet if you’d like and then exit the cave.


Our goal is to make it all the way over to the temple at the northwest corner of the island. In order to do so, you’ll have to jump across the small island maze at the southwest corner. This area is also flooded with Rupee-Likes, so get rid of them with your sword, or by using bombs or arrows. Some of the gaps are bit too wide for you to jump across, so you’ll have to go the long way. Eventually make it over to the bridge that leads up a screen.
Once you reach the northwest part of the island you can hop off the ledge and head to the west. There is a red Rupee-Like and after defeating it, you can dig up the soil spot here to get a Big Green Rupee!Optional: Big Green Rupee

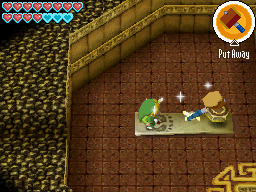
Jump off the ledge and run to the right. There are two sets of steps here. Take the path to the north and make your way across this winding pathway, avoiding the boulders. This path will eventually lead you to the temple. Walk inside and at the far end of the room speak with the third knight, Bremeur. After chatting with him he will open up another pathway.


Exit the temple and you’ll find that a bridge has been extended. Run over to the bridge and head eastward. Defeat the Miniblins that are along the path and continue eastward until you cross a bridge and reach the northeast portion of the island.
We now want to reach the pyramid at the far northeast corner of the map. Just run east across the bridges. There are some Stalfos that toss bones at you, but it is best to just ignore them. The one at the end is a bit harder to avoid, so you can take him out with an arrow.


Inside the temple, you’ll have to navigate the first floor, avoiding the boulders and some arrows. Shortly after the arrows, watch out for the trapdoor at the east end of the room. Climb up and get by the Stalfos and head up the steps to reach the second knight, Doylan. He will give you the King’s Key and tasks you with bringing it back to Bremeur.
Make your way back to the northwest corner of the island, this time taking the north path. There are some Stalfos that appear while you are heading north and they can give you some trouble. Shoot them with arrows and continue along the path. Once you arrive back at the temple, place the King’s Key into the hole and it will cause water to drain across the entirety of the island, revealing a lower level of the island that you can now navigate.


With the water level on the island now lowered, there is a new cave for us to reach near the northwest part of the island. Do not leap down to the lower level. Instead, backtrack towards that initial bridge that Bremeur had extended for us. From here make your way down to the cave that is indicated on your map. Inside, collect the rupees and open the chest to get the Wisdom Gem.Optional: Wisdom Gem #19


Now leap off the ledge to the lowest level of the island, indicated by the lighter color on the map. Make your way eastward to the northeast part of the island.
Once you reach the northeast part of the island at the lower level after draining the water, run to the right so you are just southwest of the massive pyramid. Open the treasure chest here to get a Big Green Rupee.Optional: Big Green Rupee

Our next goal is to reach the Pyramid at the southeast part of the island. Once you run southward you’ll find some large stationary boulders. Walk to the right and push the boulder out of the way. Climb the two sets of steps and push the other boulder to the left. It will drop down the ledge, ramming into another boulder, and revealing a pathway. Lift the rock and head down a screen.


Climb the steps to find a large boulder. Push it up once and then push it to the right. It will travel across the bridge and break the boulder in the distance. Lift the rock that is in the way and head up a screen. Open the treasure chest to get the final Wisdom Gem.Optional: Wisdom Gem #20


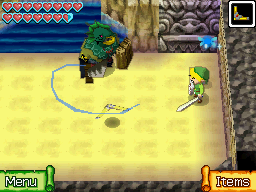
Climb the steps and you’ll find a boulder. Push it to the right once and then push it down, causing it to roll down and into another boulder. In this area there are a number of Stalfos, but it is best to just avoid them. Run to the right and make your way to the entrance of the pyramid. Inside, climb the steps and speak with the first knight, Max. He will offer a trial to you and will open up a path forward. Go ahead and exit the pyramid.


Back outside run to the right where Max has opened the door. There is a red door here next to a stone tablet. The solution to opening the door involves a puzzle at the southwest part of the island. Now that the water has drained, this area has turned into a maze. Fortunately, you don’t actually have to complete the puzzle. You can just draw the appropriate symbol on the door. Skip ahead a few paragraphs to see an image with the proper symbol. There are however, a few optional goodies for us to collect now that the water is lowered.
Just northwest of Max’s Temple, climb up the steps and stand on the floor switch. This will extend a bridge, opening a quick path to the southwest portion of the island. Make your way there and then drop down to the lower level. Be careful of all the Rupee-Likes that populate this area. There are several stone tablets found throughout this area. Each of them has a star next to them, followed by a direction. The actual location of the statue is associated with the peg that is on the red door.


- * – Travel east of me. All begins and ends with me.
- ** – Travel south from me.
- *** – Travel northwest from me.
- **** – Travel southwest from me.
- ***** – Travel north from me. The path of the stars will reveal the crest.
At the northeast corner of the maze, head up a screen and you’ll find a treasure chest that was previously underwater. Open it up to get a Power Gem.Optional: Power Gem #19

Return to the Bremeur’s Temple at the northwest part of the map. From here, cross the bridge that Bremeur extended and once again make your way to the far east of the island, staying on the higher platform. Just southwest of Doylan’s pyramid, there is a treasure chest that was previously underwater. Open it up to get the Courage Gem.Optional: Courage Gem #19


Just northwest of Doylan’s pyramid, there is a small platform that you can jump across. Make your way around to the northwest side of Mutoh’s Temple and you’ll find a treasure chest that contains a Big Red Rupee.Optional: Big Red Rupee


Return to the southeast part of the island and make your way over to the Red Door. We now want to draw the symbol based on the puzzle that we just solved.
- Start at the top-left.
- Draw a line to the top-right.
- Draw a line to the bottom-right.
- Draw a line to the center.
- Draw a line to the bottom-left.
- Draw a line back to the top-left.
Run ahead and head up a screen to find two Zora Warriors. Defeat these two beasts just as you’ve always done and finally, head up and enter Mutoh’s Temple.


Now that you have collected all 20 Wisdom Gems, you can travel to Spirit Island and present them to the Spirit Shrine. However, at this point it is literally at the other end of the world and while it’s always nice to be fully prepared, you might want to take care of this after Mutoh’s Temple.Optional: Spirit Island Upgrade
12.3 Mutoh's Temple
Run past the crystal switches and take the path to the right. Based on the different floor tile, you can find that the wall here can be bombed. Do so and run up, but be careful of the hidden trap ahead. The path to the north is blocked off by a pit. We need to return to the entrance of the dungeon and drop a bomb next to the crystal switch on the right. Before it detonates, quickly run to the path we just traveled on. Once it blows up and hits the switch, a bridge will appear across the pit. Quickly run across it before time expires.


Make your way to the north end of the room and a pair of Stalfos will appear. Defeat them both and a bridge will connect to the platform at the north end of the room. Walk over and step on the floor switch to light the torch. We now want to backtrack to the entrance of the dungeon. We can take the path along the east perimeter, but be careful of a hidden trapdoor near the entrance.
Next we want to make our way along the west side of the room. Similarly, if you hit the crystal switch near the entrance, a bridge will appear temporarily across the pit to the west. This one is a bit trickier, as you have to navigate across several moving platforms. Disregard the two platforms that are nearby, as you actually want to pay attention to the platform at the west side of the room. Look at your map and as soon as the platforms just starts to move to the east, that is when you want to toss a bomb near the left crystal switch.


Carefully cross the first two moving platforms and then watch out for the hidden trapdoor. If you time it properly, the next moving platform will appear right when you arrive, allowing you to get onto it immediately and reach the bridge. There are two more Stalfos found here. Defeat them and cross the bridge that appears. Step on the floor switch to light the torch. The spikes nearby will fall, allowing you to head down the stairs.
This is a massive room that we will be revisiting several times. For now we are cut off from much of the room. Defeat the two Stalfos and walk southward. Climb up the steps to get back to Floor 1F.

Avoid the Shell Spinners here and climb the steps to get up to the next floor.
Open the door to the right and make your way through the maze. This area is filled with Rupee-Likes and the path to the left will lead to a treasure. Take the path to the right and leap off the ledge. Climb up the steps to reach the top floor.


Defeat the two Stalfos in this room, as well as the Rupee-Like. Open up the treasure chest to get the dungeon item, the Hammer. Return back down to Floor 2F.


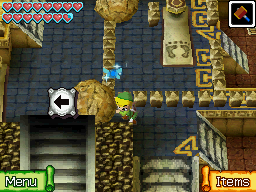
Use the hammer to hit the rusty switch on the floor. This will pound it into the ground, causing the door to open up. Stand on the footprints and then smash the pillar. This will cause Link to ricochet up to the higher ledge. Repeat this a few more times and you’ll reach a platform with Shell Spinners. Now that you have the hammer, you can smash them to defeat them. Leap off the ledge and head down the stairs.

Defeat the Shell Spinners here and then smash the floor switch. Make your way down the steps to get back to the large Floor B1.


Run to the left and climb the steps to find a boulder. Push the boulder off the ledge to the right so it collides with the other boulder, revealing a pathway. Run to the northwest part of the room and the door will close behind you. Defeat the two Stalfos that appear, which you can now more easily do so by smashing them with the hammer. When the door opens, head down to the floor below.


Smash the two floor switches and the spike roller will begin to move. Wait for it to move to the left and run by it. Step on the moving platform and use the hammer to smash all of the Stalfos and floor switches that are on the sides of the room. Step onto the next moving platform and continue to smash the switches and enemies. At the very bottom, smash the floor switch on the right and the spike will begin to move. Climb up the steps and open the chest to get a Small Key. You can then head up the nearby steps to get up to the previous room.


At the southwest corner of the room, there is a treasure chest, just south of the spike roller. Open it up to get the Courage Gem.Optional: Courage Gem #20

Step on the floor switch and the nearby doors will open up. Run to the north end of the room and use the small key on the locked door. Hit the pyramid symbol and it will cause the water to be drained from the room. Make your west to the west side of the room on the lower level and you’ll see some X’s and O’s. We want to turn all nine of the boxes so they are O’s. Use your hammer and just smack the middle box and all nine of them will turn. If you mess up, you’ll have to piece it back together, but it shouldn’t give you much trouble.


Make your way to the west side of the room and use the catapult to reach the higher platform. Break the acorn if you need some arrows and then your attention towards the southeast. You can shoot an arrow at the pyramid symbol, causing the water to rise up into the room once again. At the southwest portion of the room you will find another three by three grid of X’s and O’s. You need to make all the tiles X’s or O’s – it doesn’t matter which. Just swing away until they are all the same and it will cause a door to open up.


Run to the right and head up the bridge. From here if you look to the west, you can see that pyramid symbol. Shoot it with an arrow to lower the water level. Break the pots and then head down the steps to get back to Floor B2.
You will find a four by three grid here and once again you just want to make all of the tiles either X’s or O’s. It doesn’t matter which one is which. Once you’ve done so, a bridge will appear. Cross the bridge and head up the stairs to get back to the previous floor.

Run to the right and you can make a mental note of where the X’s and O’s are on this grid. Use the hammer on the catapult and launch yourself up twice. Break the acorn to get some arrows if needed. Pull out your boomerang and aim it to the east. Hit the arrow orb to cause it to turn and face southward. Now shoot it with an arrow and it will send an arrow towards the pyramid symbol, causing water to appear.


Cross the bridge and you’ll find a grid pattern up here as well. You need to match it to the grid pattern that is now underwater. Shoot the arrow symbol again to lower the water level. You can see the grid down below, so use your hammer to match the grid above so that they are identical. This will cause the door to the west to open up.
Drop off the ledge and catapult yourself to reach the opened door. Drop down and be sure to run to the west to find a treasure chest that contains a Big Green Rupee. Now climb the steps to the northwest and push the boulder out of the way. Keep pushing the boulder to the west until it sits on the catapult. Then use the hammer to send it up to the higher platform. Then push the boulder to the east, so it rolls off and breaks the other boulder.


Open the treasure chest here to get a small key and then catapult yourself up to the higher platform. Jump off the ledge and make your way over to the northeast corner of the room. Open the locked door and continue onward to where the boulder is. Launch it up to the higher platform and then catapult yourself up there. Continue catapulting this boulder up several times until it lands on the gray tile on the highest platform. Catapult yourself up and then push this boulder to the left, breaking the other boulder. Run over and open the treasure chest to get the Boss Key. Drop down directly south of where the treasure chest is and head down the staircase.


Place the Boss Key on the platform and then pull out the Hammer. Smash the Stalfos that appear on each side of the room as you ride the platform down. Grab the Boss Key and open the locked door. Catapult yourself up and head down the steps. Leap off the ledge and examine the stone tablet to create a warp portal to the entrance. Once you are ready, head down the steps to take on the dungeon boss.


Eox is a giant soldier that takes up both of the screens on the Nintendo DS. If it isn’t obvious enough, the giant red bolts that are on its body make up the boss’ weakness. The area has four catapults and you need to use these to launch yourself in the air. While in the air, use your hammer and repeatedly smash at the various red bolts on the boss. Each time you hit a red bolt, that part of Eox will crumble and after enough hits, its outer shell will fully disappear.


During this phase Eox will try to smash you with its arm and on occasion, will also shoot arrows out of the holes near its head. The boss however is incredibly slow and its attacks are very easy to dodge. The bolts that are on the backside of Eox are a bit trickier to get to. Simply run right in between Eox’s legs and then catapult yourself from the other side.
After all of the initial bolts are broken and Eox has been reduced to just its inner skeleton, another set of large bolts will appear on the front of its body. During this phase you want to once again leap up and strike the bolts with the hammer. After hitting a bolt it will turn to blue. After a while the bolts will turn back to red, so you have to be quick. Hit all four bolts to make them all blue and Eox will tumble to the ground.


During this last phase, just the head of Eox will bounce on the ground. Watch out for the arrows that it will shoot out in various directions. Wait until Eox has moved closer to you and then use a catapult to launch yourself up and land on top of the head of the boss. Slash away at the crystal on top of its head. Repeat this process until Eox has been defeated.


After Eox has been defeated, you will get two more minutes of sand into your hourglass. If you have been following the guide in full, this gives us the full 25 minutes, the maximum amount of time you can hold in the Hourglass. Be sure to open up the treasure chest to get the final heart container, bringing our health to a maximum of 16 hearts! Walk down the steps and speak with Mutoh. After talking to him, he will open up a portal. Be sure to grab the Aquanine that he leaves for you!


- Chapter 1 – Mercay Island
- Chapter 2 – Temple of Fire
- Chapter 3 – Ocean King Part II
- Chapter 4 – Temple of Wind
- Chapter 5 – Ocean King Part III
- Chapter 6 – Temple of Courage
- Chapter 7 – Ghost Ship
- Chapter 8 – Ocean King Part IV
- Chapter 9 – Goron Temple
- Chapter 10 – Temple of Ice
- Chapter 11 – Ocean King Part V
- Chapter 12 – Mutoh’s Temple
- Chapter 13 – Ocean King Part VI
