- Chapter 1 – Great Plateau
- Chapter 2 – Dueling Peaks
- Chapter 3 – Hateno Village
- Chapter 4 – Zora’s Domain
- Chapter 5 – Vah Ruta Dungeon
- Chapter 6 – Goron City
- Chapter 7 – Vah Rudania Dungeon
- Chapter 8 – Gerudo Town
- Chapter 9 – Vah Naboris Dungeon
- 9.1 – Dungeon Map
- 9.2 – 1st Terminal
- 9.3 – 2nd Terminal
- 9.4 – 3rd Terminal
- 9.5 – 4th Terminal
- 9.6 – 5th Terminal
- 9.7 – Thunderblight Ganon
- Chapter 10 – Rito Village
- Chapter 11 – Vah Medoh Dungeon
- Chapter 12 – Captured Memories
- Chapter 13 – The Master Sword
- Chapter 14 – Hyrule Castle
- Chapter 15 – The Champions’ Ballad
9.1 Dungeon Map
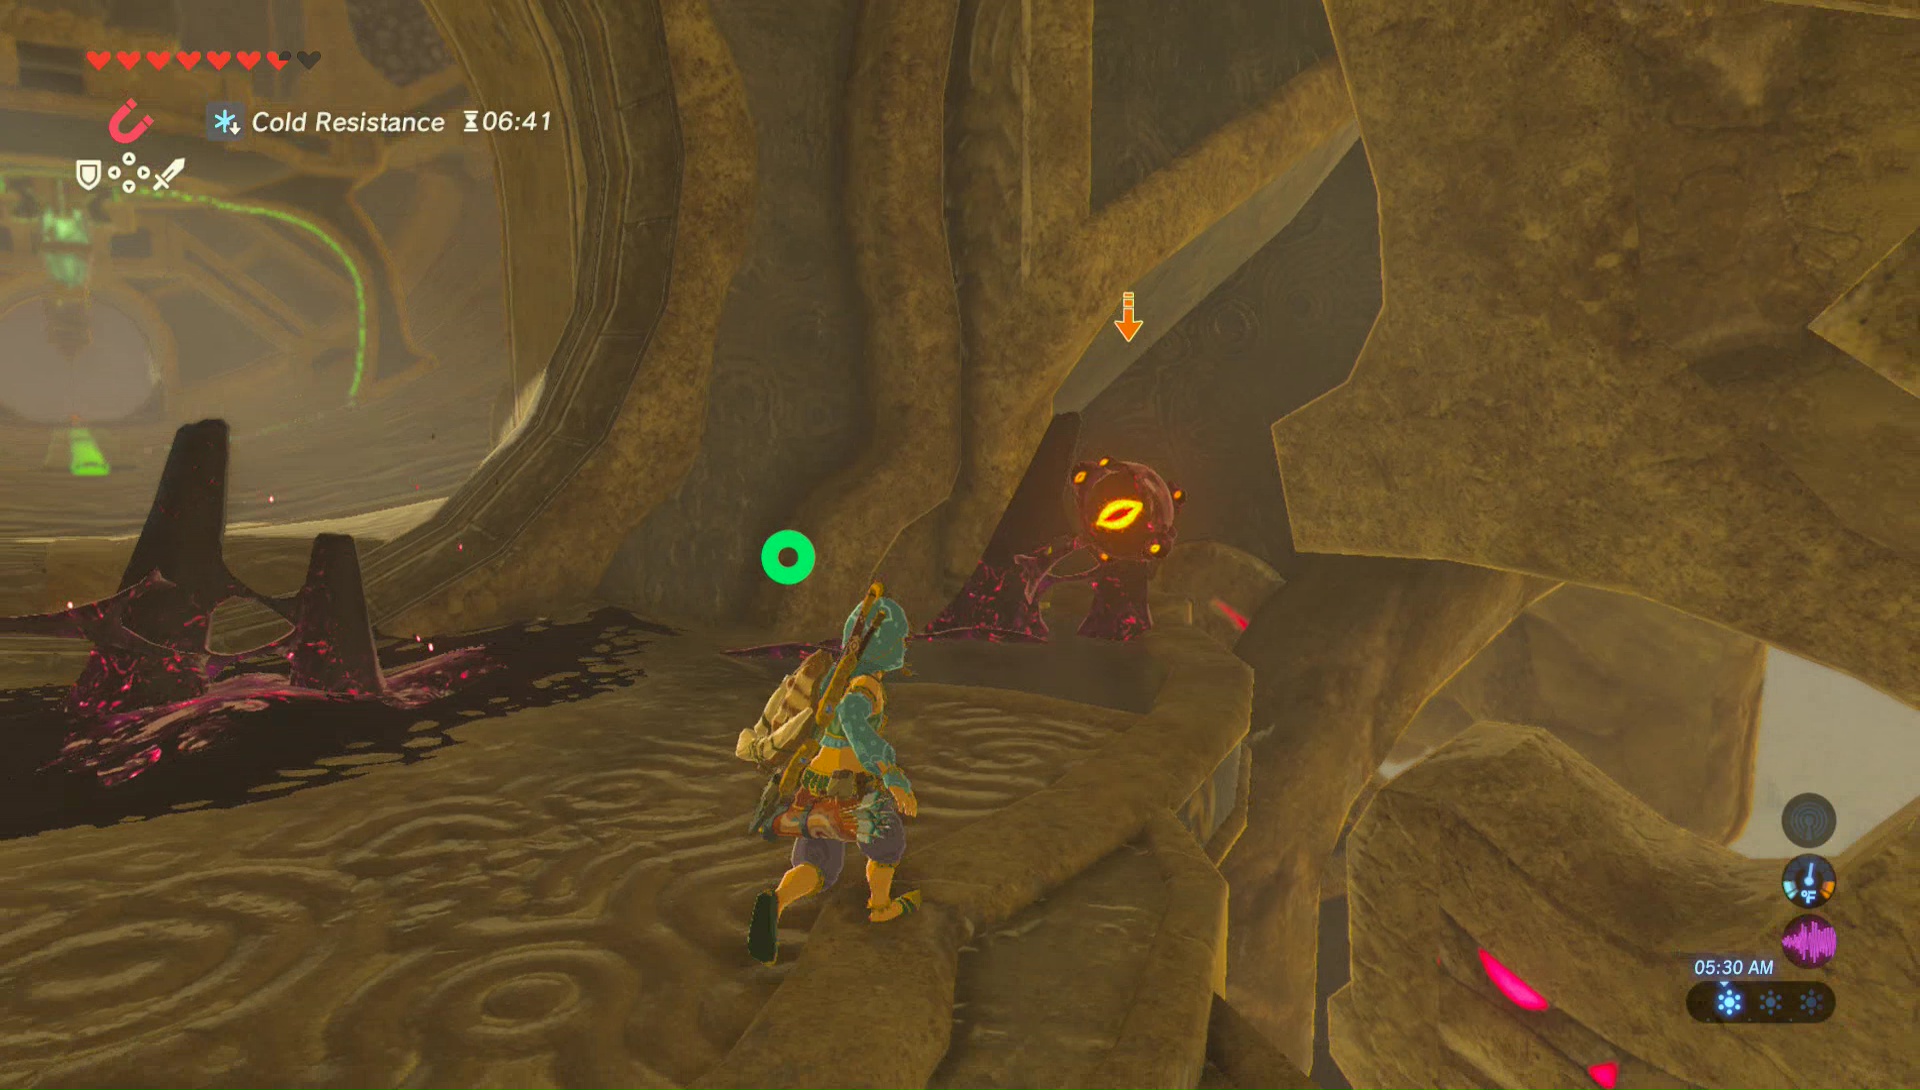
Right from the start, run ahead and defeat the guardian. Run to the other end of the room and then climb the steps. You’ll see some malice in the way, so defeat the eye located at the right.

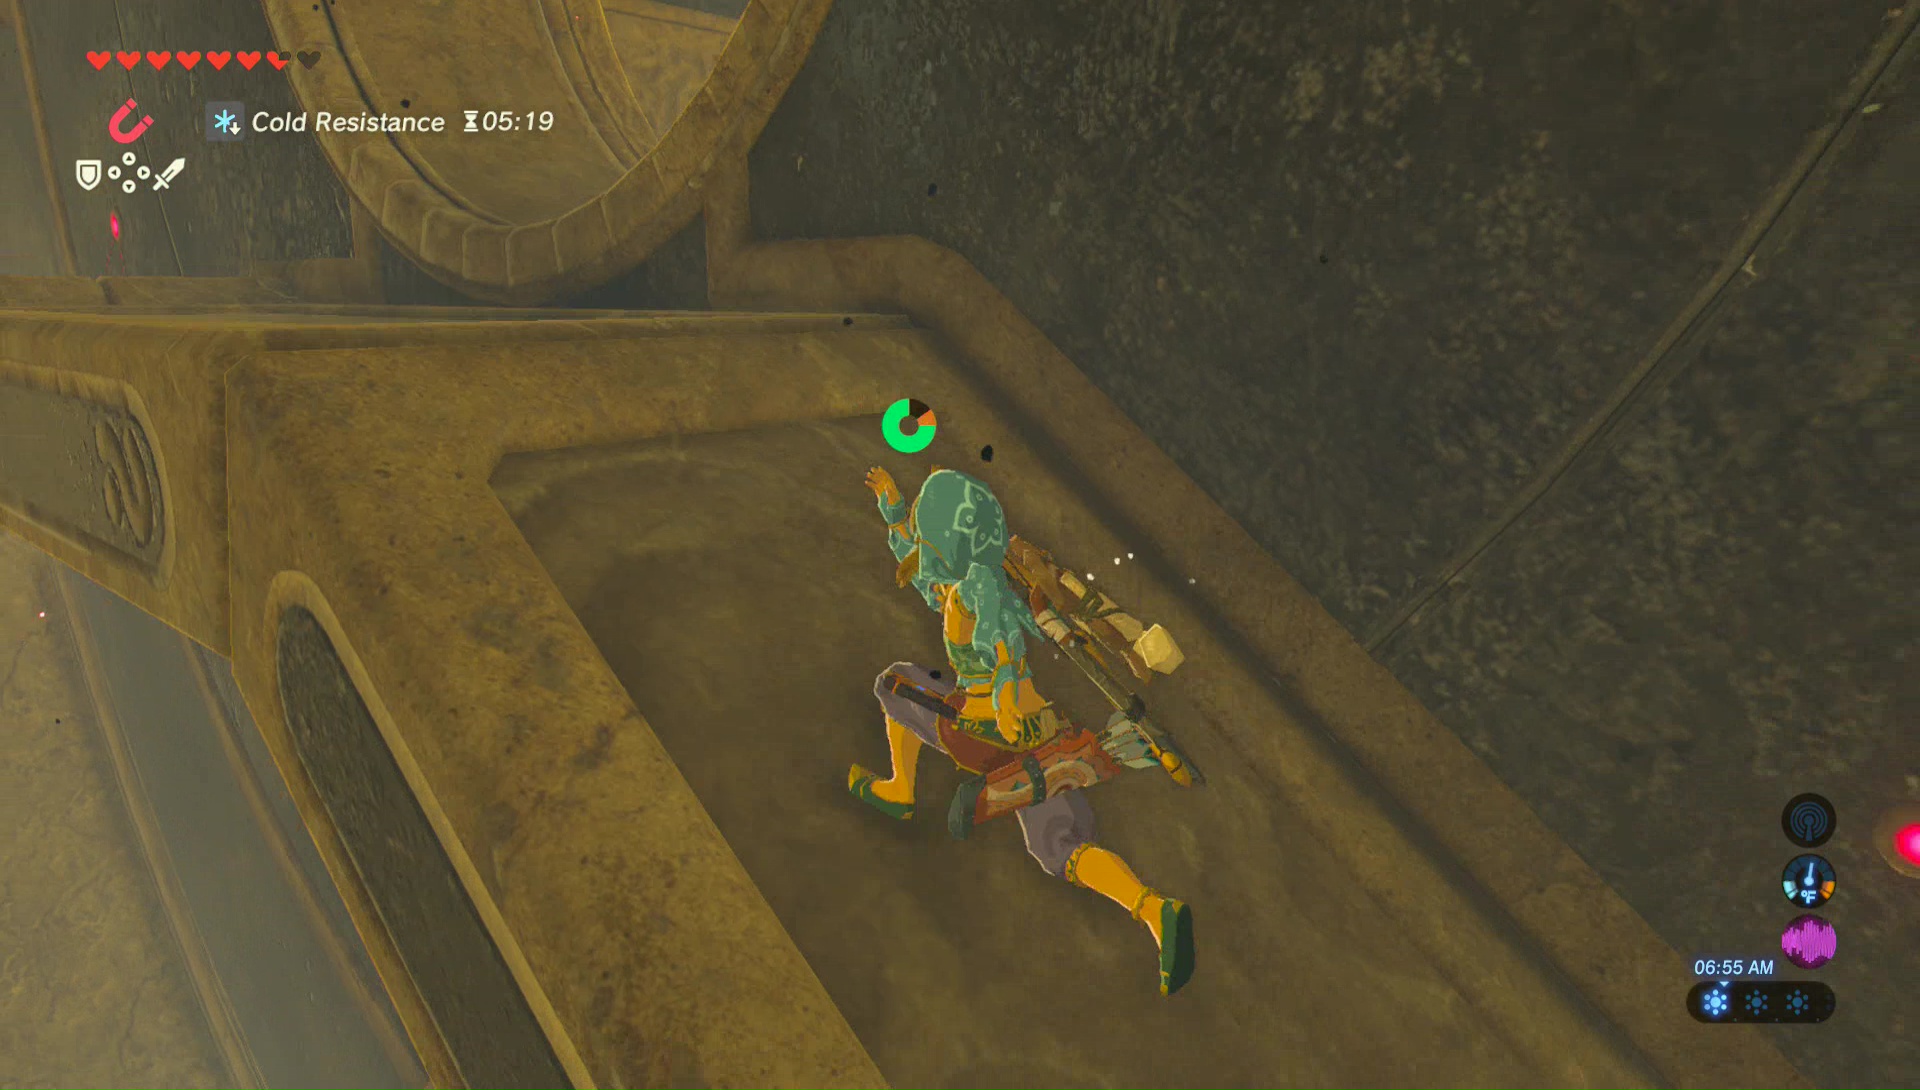
Walk into the massive open room. This will be referred to as the main room for the duration of this chapter. We want to walk back to the other side of the dungeon, but on the second floor. If you glance just to the right, there is a ledge you can climb up. Do so and then make your way over to the pedestal. Place your Sheikah Slate on top to get the Dungeon Map.

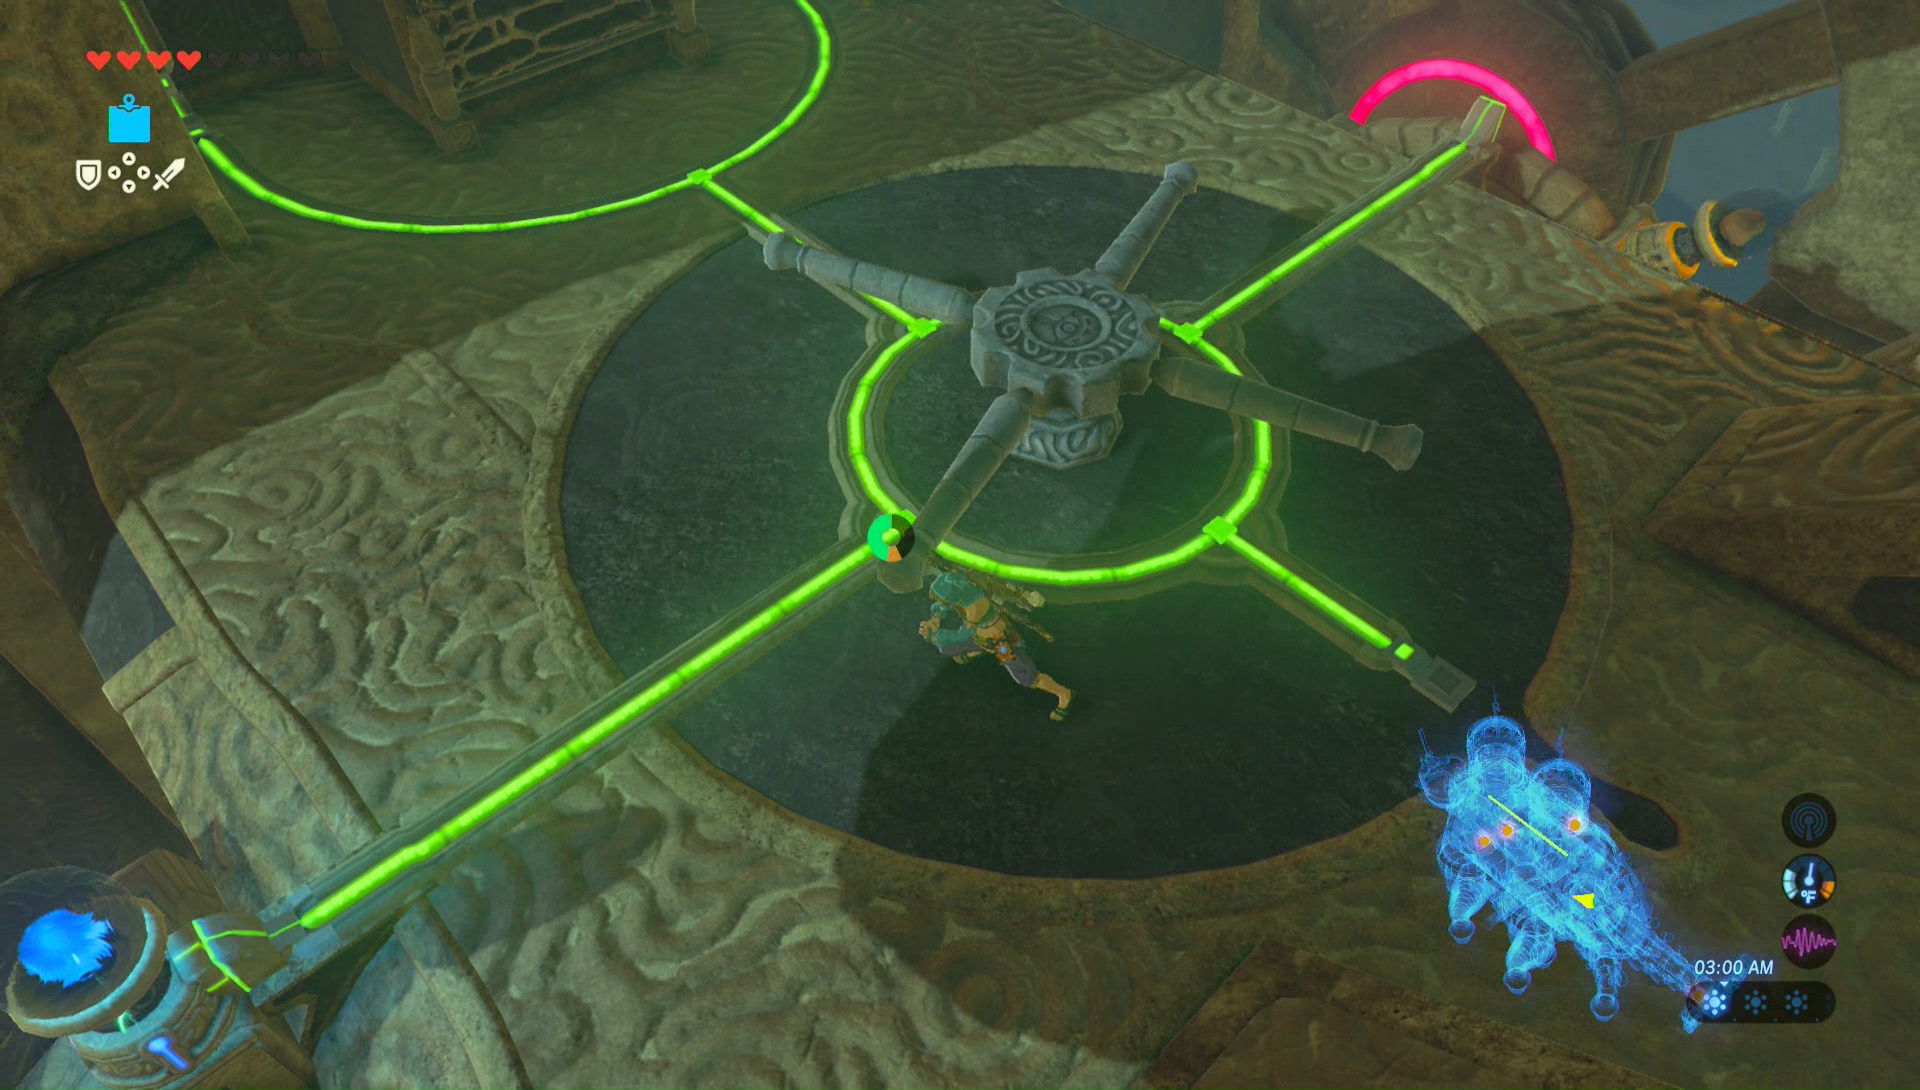
Look at the dungeon map and you’ll find that there are three parts of the center room that can be turned. Each of them can be turned 90 degrees. This makes for a lot of different combinations, but fortunately, we actually don’t need to turn the map that often.
Also, while looking at the map, note that the animal pictured is a camel. I will refer to the front of the camel as the side with the long neck, so make a mental note of that.
9.2 1st Terminal
The first terminal is right here in the main room. Of the three movable cylinders within the dungeon, the terminal is located on cylinder one that is closer to the camels back. However, it is stuck within a large cage. If you closely examine the cage, you’ll see that it appears like it is closed off on all sides. However, the bottom is actually open. We just need to rotate the cylinder so that the bottom faces an opening.
If you look around the room, you’ll notice that there are a few large circular windows that lead to the exterior of the dungeon. On the cylinder related to this first terminal, there is a window that is open. Rotate the back cylinder, until the bottom of the cube is facing that hole in the wall.


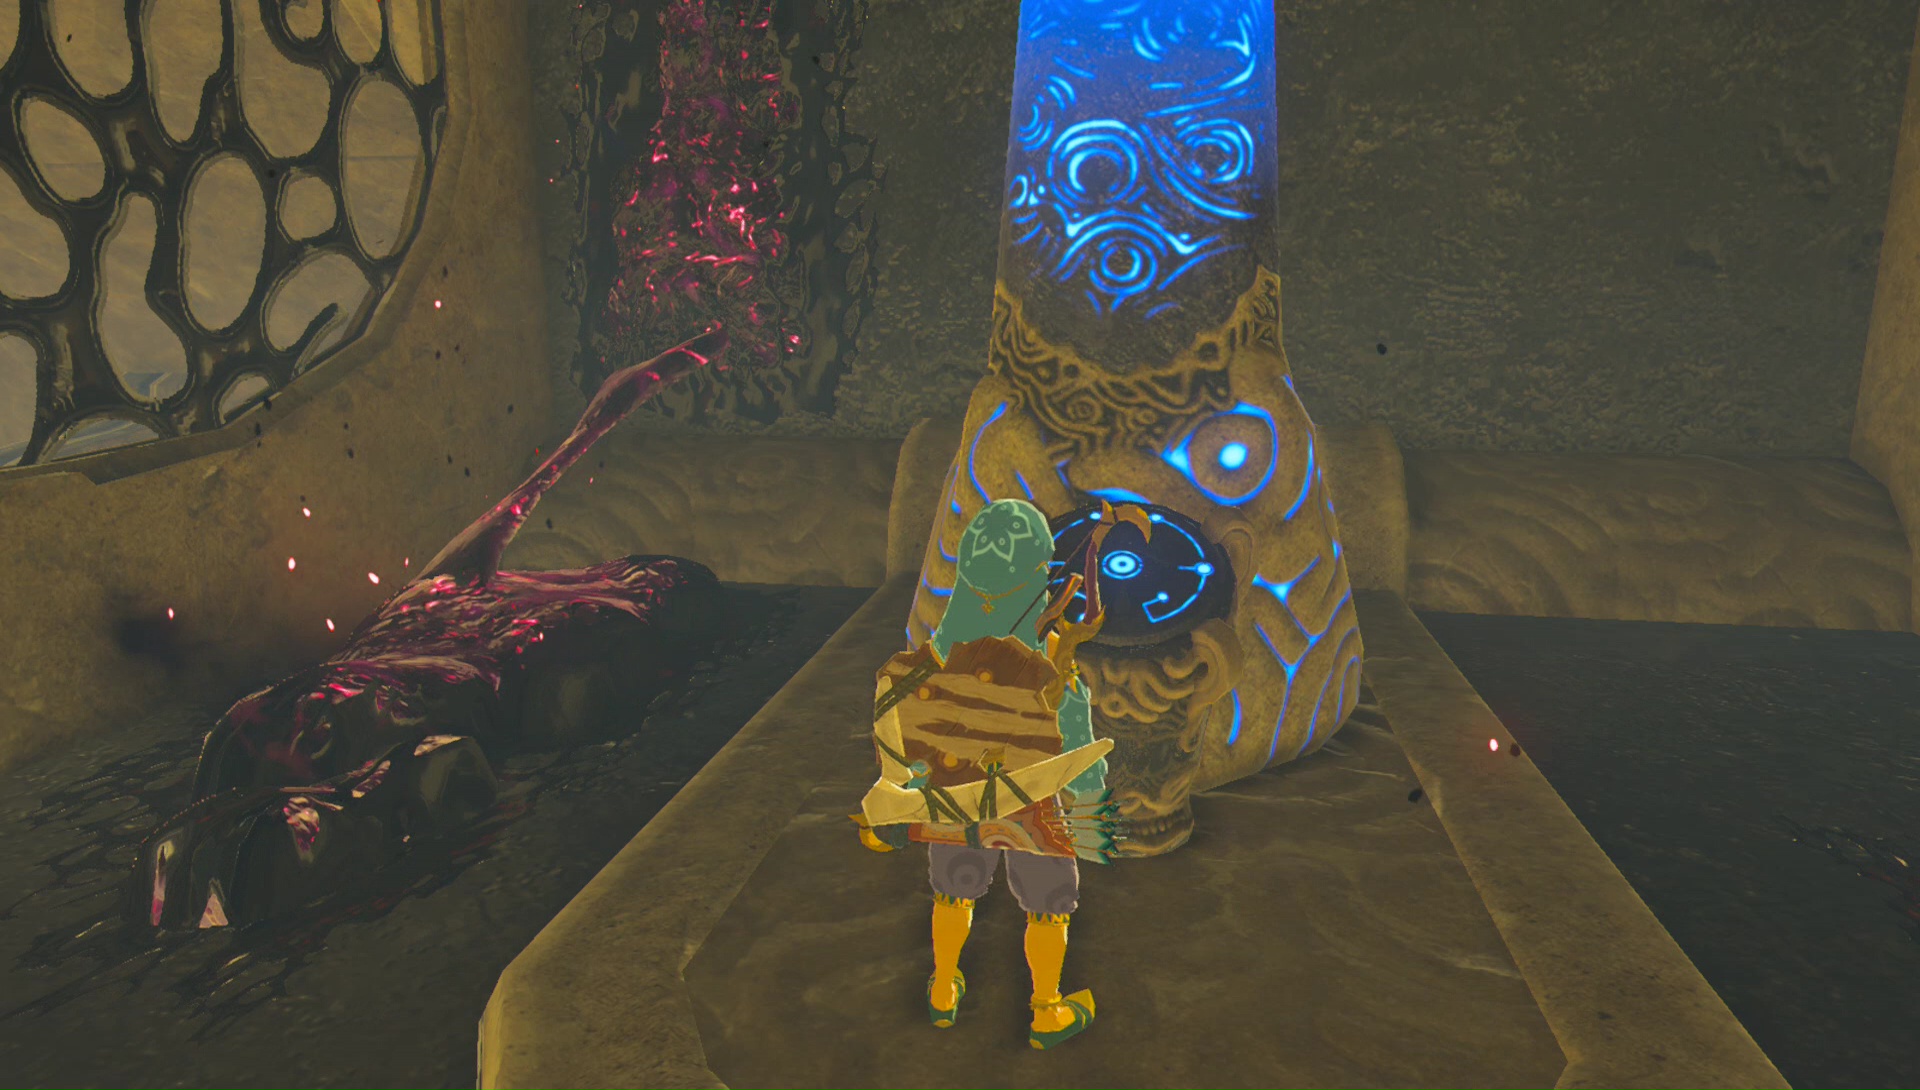
We now need to reach that hole from the outside. Just rotate the middle cylinder so that you can exit the room through the hole on that same side of the room. From there, run around and enter the cube from the outside. You will need to rotate the back cylinder until the terminal is right side up. Place your Sheikah Slate inside to activate the terminal.

9.3 2nd Terminal
When looking at the map, you’ll see that on each side of the cylinders, there is a circuit line. This is associated with an electricity path. We want rotate all three of the cylinders so that the circuit line for all of them is at the top of the map. This will turn them green, indicating electricity is flowing through that circuit. This will also spin the large wall that is at the front of the camels body.
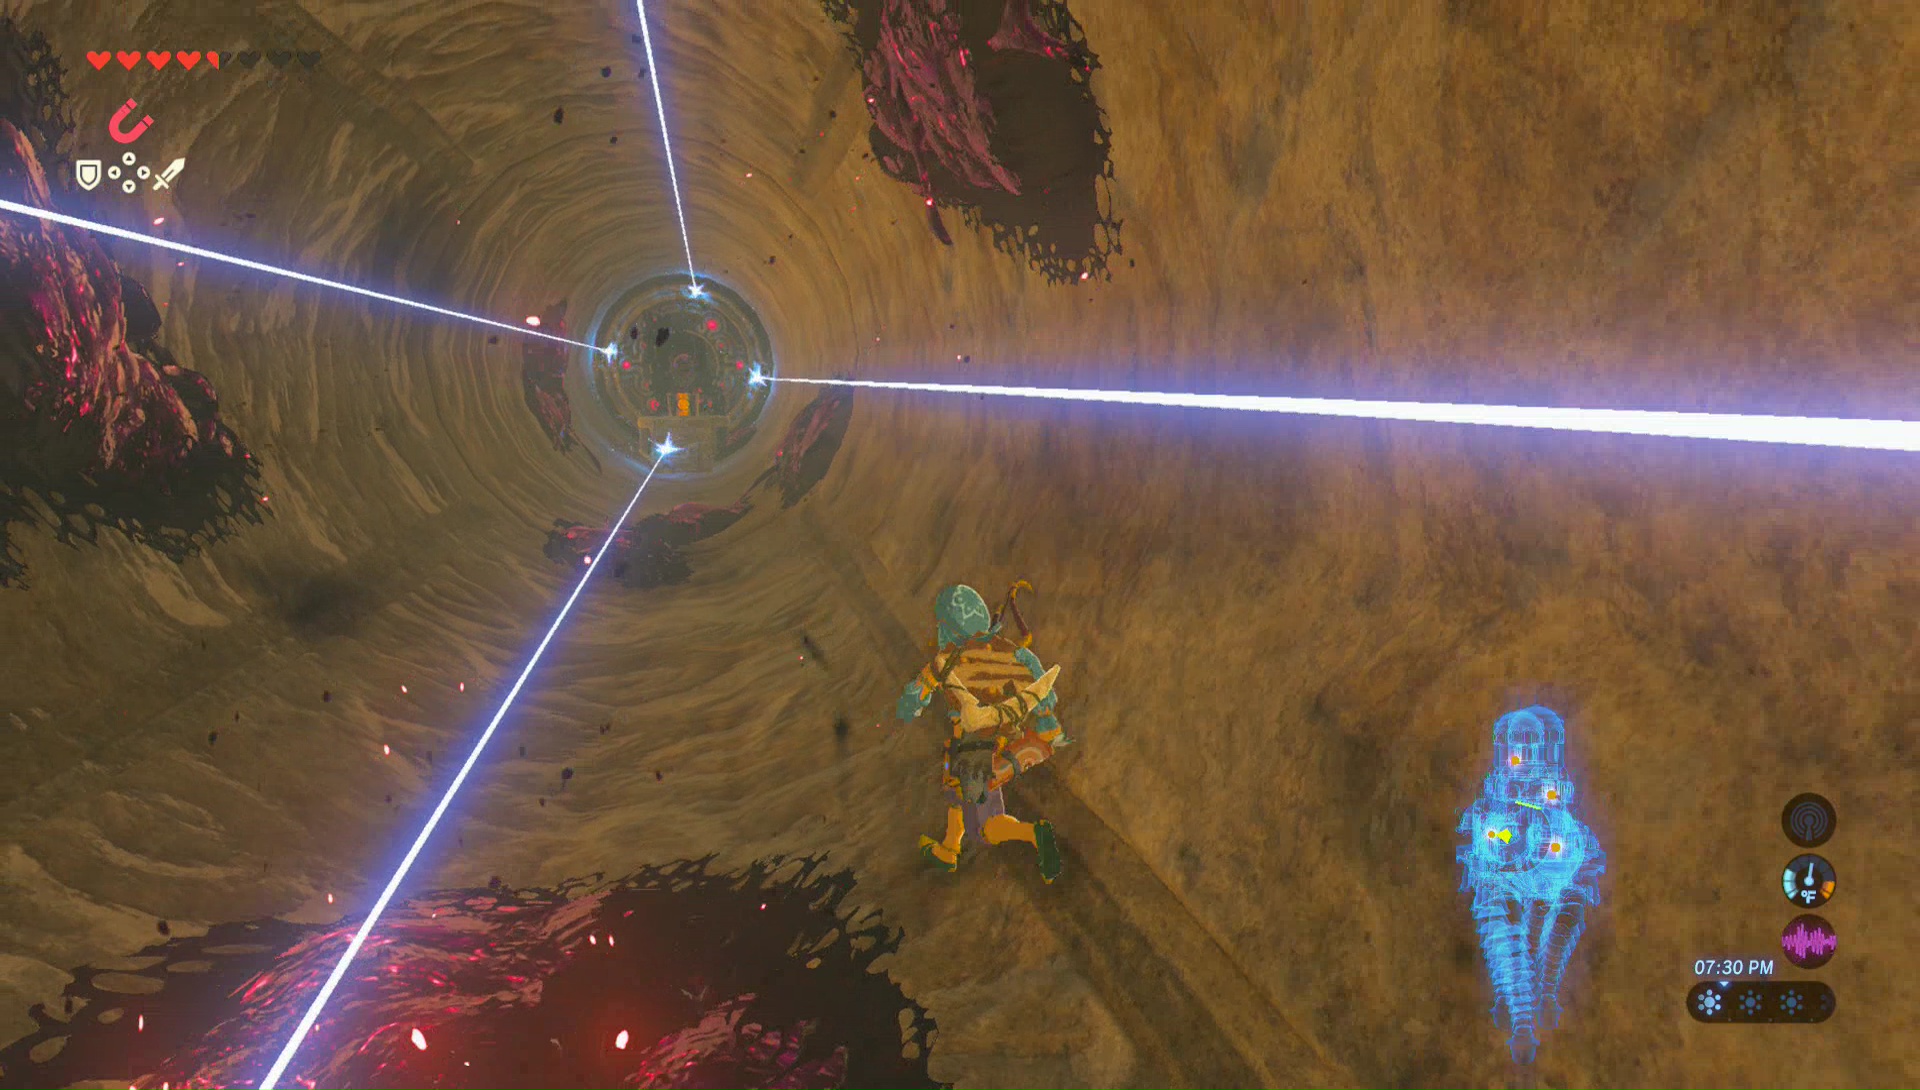
There are two holes within this spinning platform, one of them has a platform associated with it, while the other does it. We want to ride the hole that does NOT have a platform associated with. Step into it and let it ride its way to the top of the room. From there, you want to drop immediately down, landing on the platform that I just mentioned. This will briefly give you an opportunity to sneak through a hole in the middle of the spinning wheel.

Run down this corridor and avoid the malice and the lasers that are shooting at you. At the end of the path, jump over and open the treasure chest to get a Knight’s Shield. Then use an arrow or a remote bomb to destroy the glowing eye. Return back to the central room.
This time step into either of the two holes on the large moving wall and allow it to take you up to the top of the room. Once there is an opening, jump through to get to the front of the camel.


You will notice a cross handle on the ground that can be turned. You will also see that the lines are solid green, indicating that there is power flowing to this part of the dungeon. As you turn the cross handle clockwise, a gear right next to the cross handle is also rotating. This gear has a bulb on one of its sides. You want to keep turning the cross handle, until the bulb is facing upward, even with the green light. This will cause the bulb to glow blue, indicating that there is power flowing to it.


You then want to turn the cross handle counter-clockwise. This won’t effect the bulb we just put in place. There is a second gear on the other side of the platform and this one also has a bulb. Repeat the same process until the bulb is glowing blow. This will cause the neck of the camel to turn vertically, and a elevator will appear. Right the elevator up to the camel’s head and activate the second terminal.


9.4 3rd Terminal
Drop down and return to the hole that leads to the main room. Wait until one of the holes comes up and then walk through. There are two holes on this rotating wall, and one of them has a platform just beneath it. Wait until the one with the platform comes up, and then drop down onto the moving platform.


Run up to its highest point and wait until it raises you close to the ceiling. When you are at the point where you are about to slip down, leap off of the platform and use the paraglider to get over to the platform that is just off the wall. On one side you will find the terminal waiting for you. Go ahead and make your way over to activate it.


9.5 4th Terminal
Now make your way to the backside of the camel, still on this highest ledge of the main room. You will see a series of objects that are on rails. You can use Magnesis to move these objects along the rails that they are on. Since we have electricity flowing to this area, we want to arrange the four moving objects so that electricity flows through all four of them and powers the back of the camel.

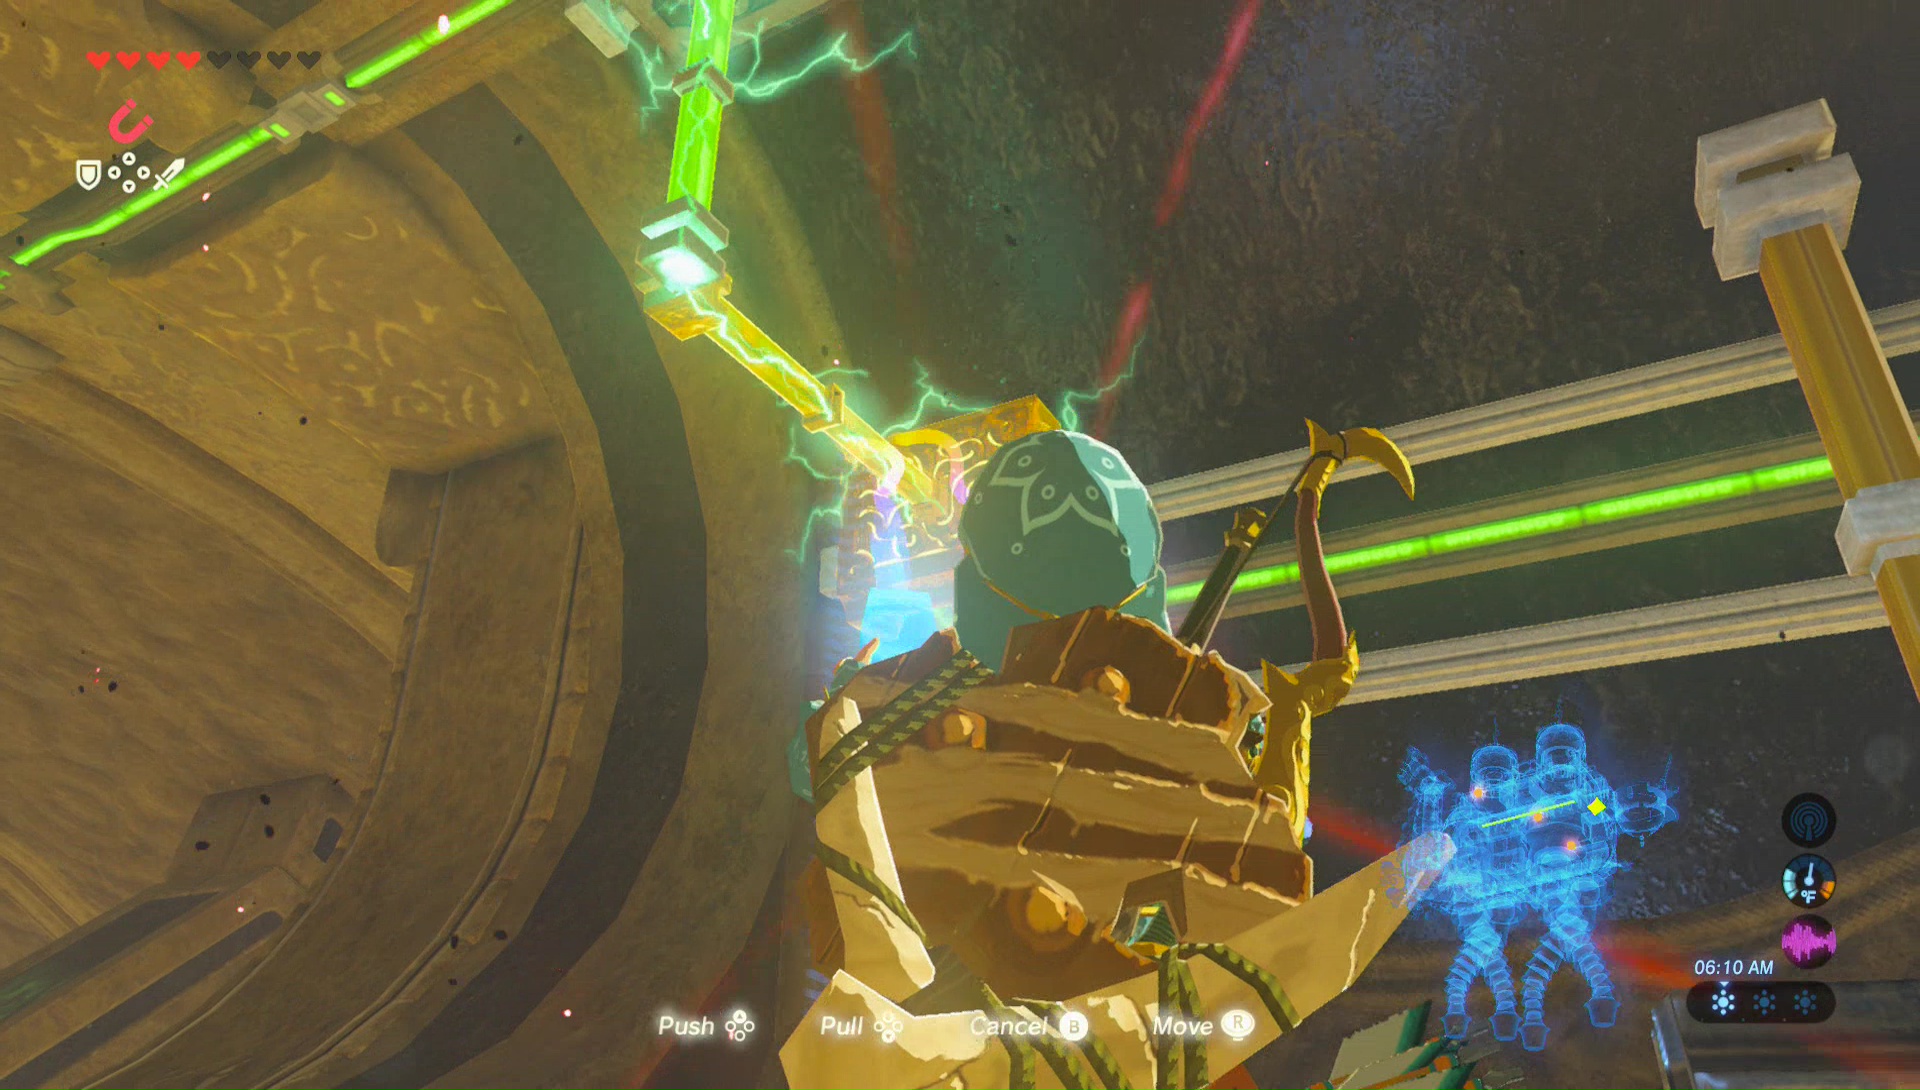


This will send the back of camel upward, creating a staircase to the top area of the dungeon. However, we don’t quite have enough time to run to the very back of the camel. So what you want to do is move one of the objects to break the electric circuit, and then quickly fix the circuit. The camel will go through the full motion of retracting, and then it will create the ramp again. Going through the full motion will give you ample time to run up the ramp.

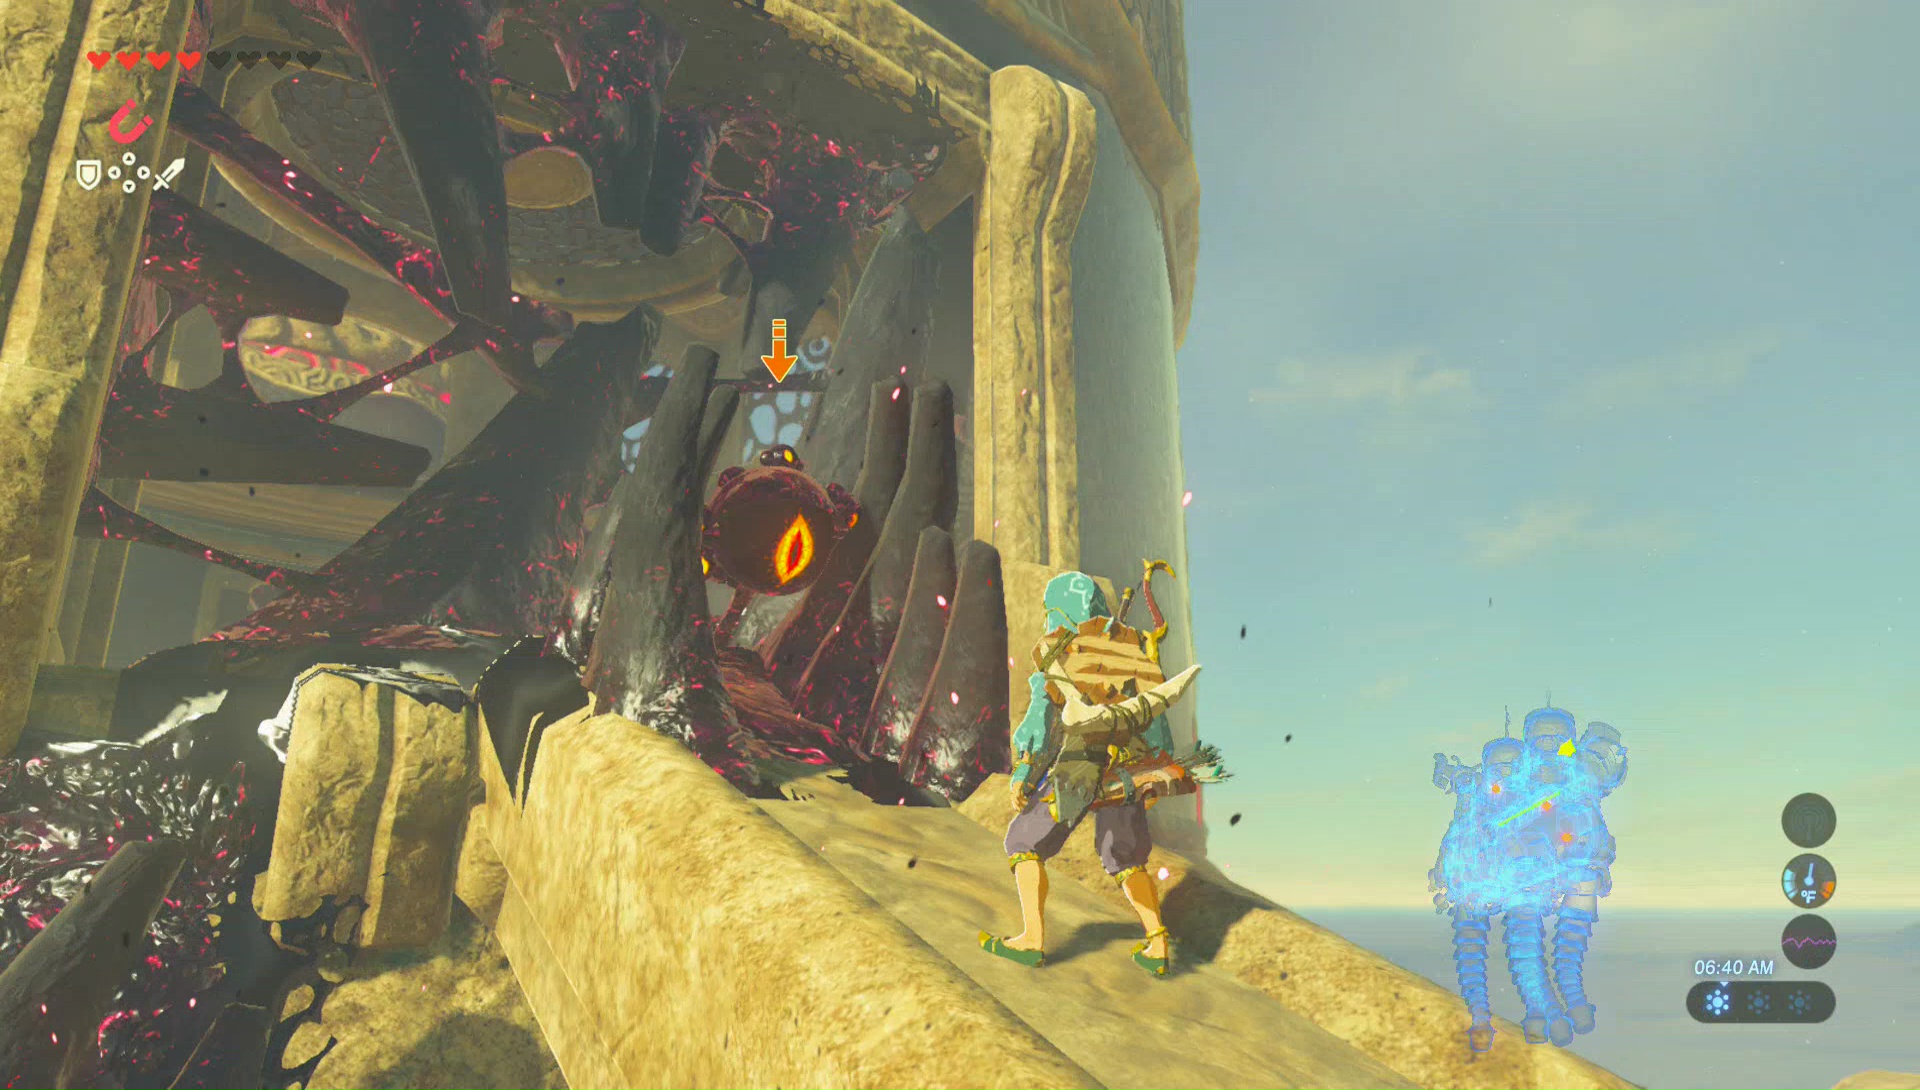
At the top of the ramp, you will see a glowing eye. Shoot it with an arrow and it will destroy all the malice in the area. Run forward and kill the glowing eye in the next area as well. The large ramp will appear and it will carry you down below. Be sure to open the nearby treasure chest to get an Ancient Screw.
At the very bottom of this room destroy the glowing eye so that the enemies do not get in your way. Ride the platform back up and you’ll see an energy sphere. These objects have the ability to power nearby circuits. Lift up the energy sphere and carry it up to the top floor.


Drop the energy sphere so that it right next to the bulb, and it will power the circuit, causing a nearby platform to move. In the next area, shoot the glowing eye that is hanging below to destroy all the malice. A small guardian will appear, so be sure to take care of it. Right where the malice was located, you’ll find the terminal, so go ahead and activate it.


9.6 5th Terminal
From the previous terminal, ride the platform up to the top floor and you’ll see a second energy sphere. Grab it and then make your way to the platform that is moving back and forth in between the two humps of the camel. This time you want to just drop straight down when the moving platform is not in front of you. You will find a square hole here, so drop all the way down through it. Here you will take on a pair of small guardians. Defeat them to open up the nearby gates.


The final terminal is located right behind the gate here. Place the energy sphere on one of the circular platforms. You will now need to climb back up either of the two elevators to get back to the upper area. Grab the second energy sphere and drop down below. Place the second sphere on the circle and then run over to activate the final terminal.


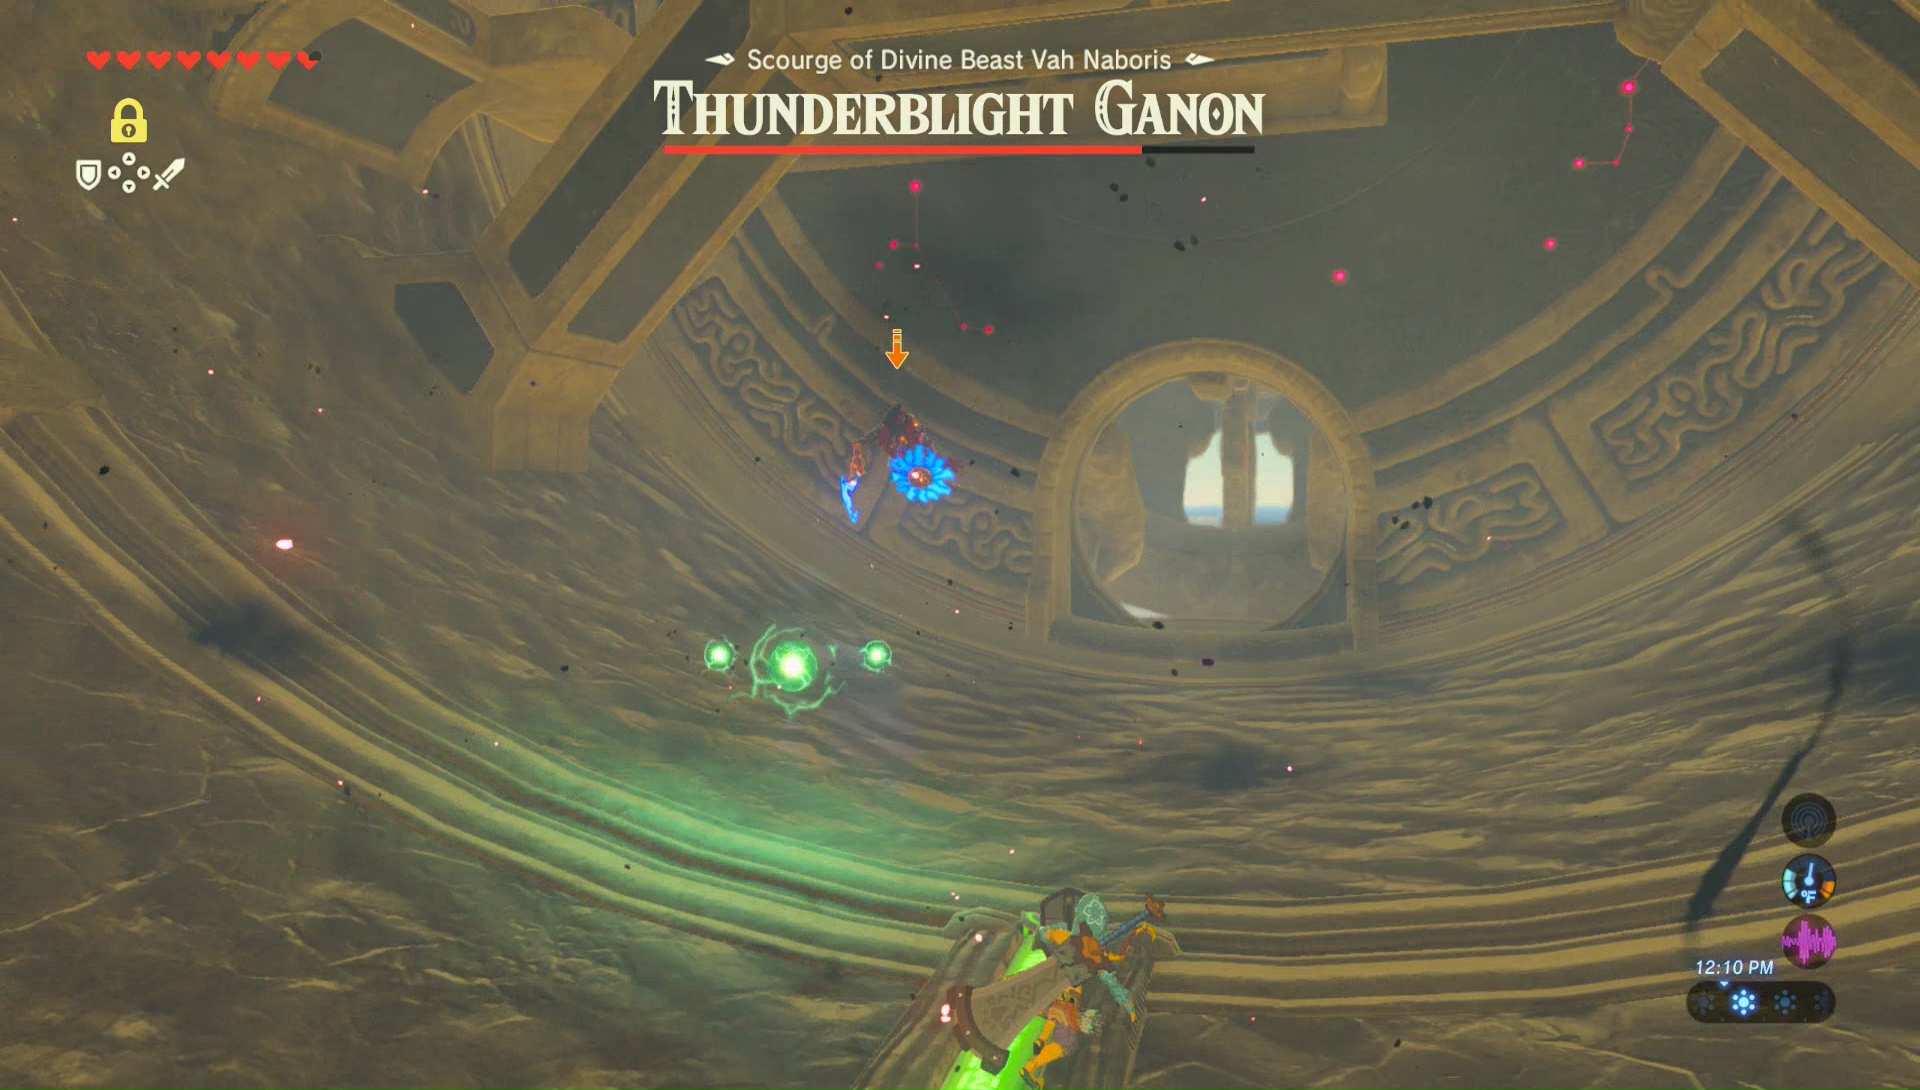
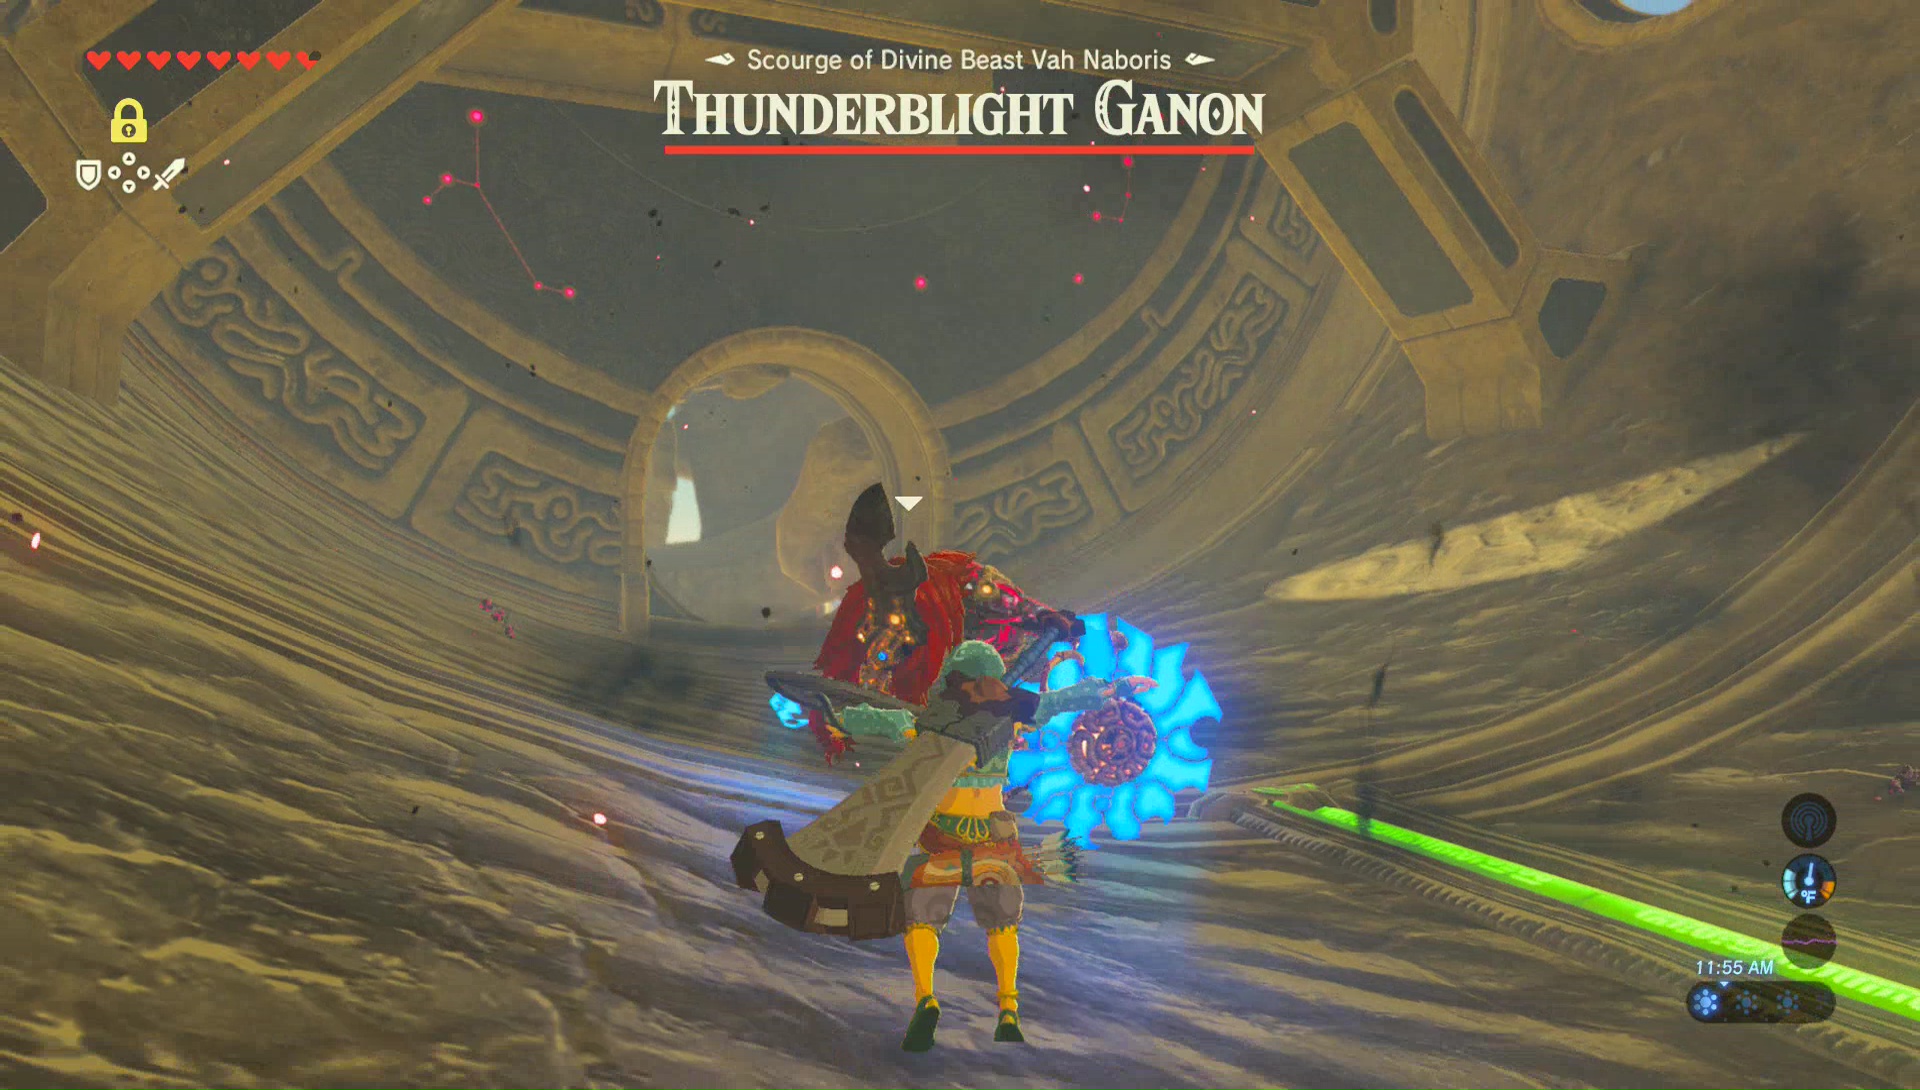
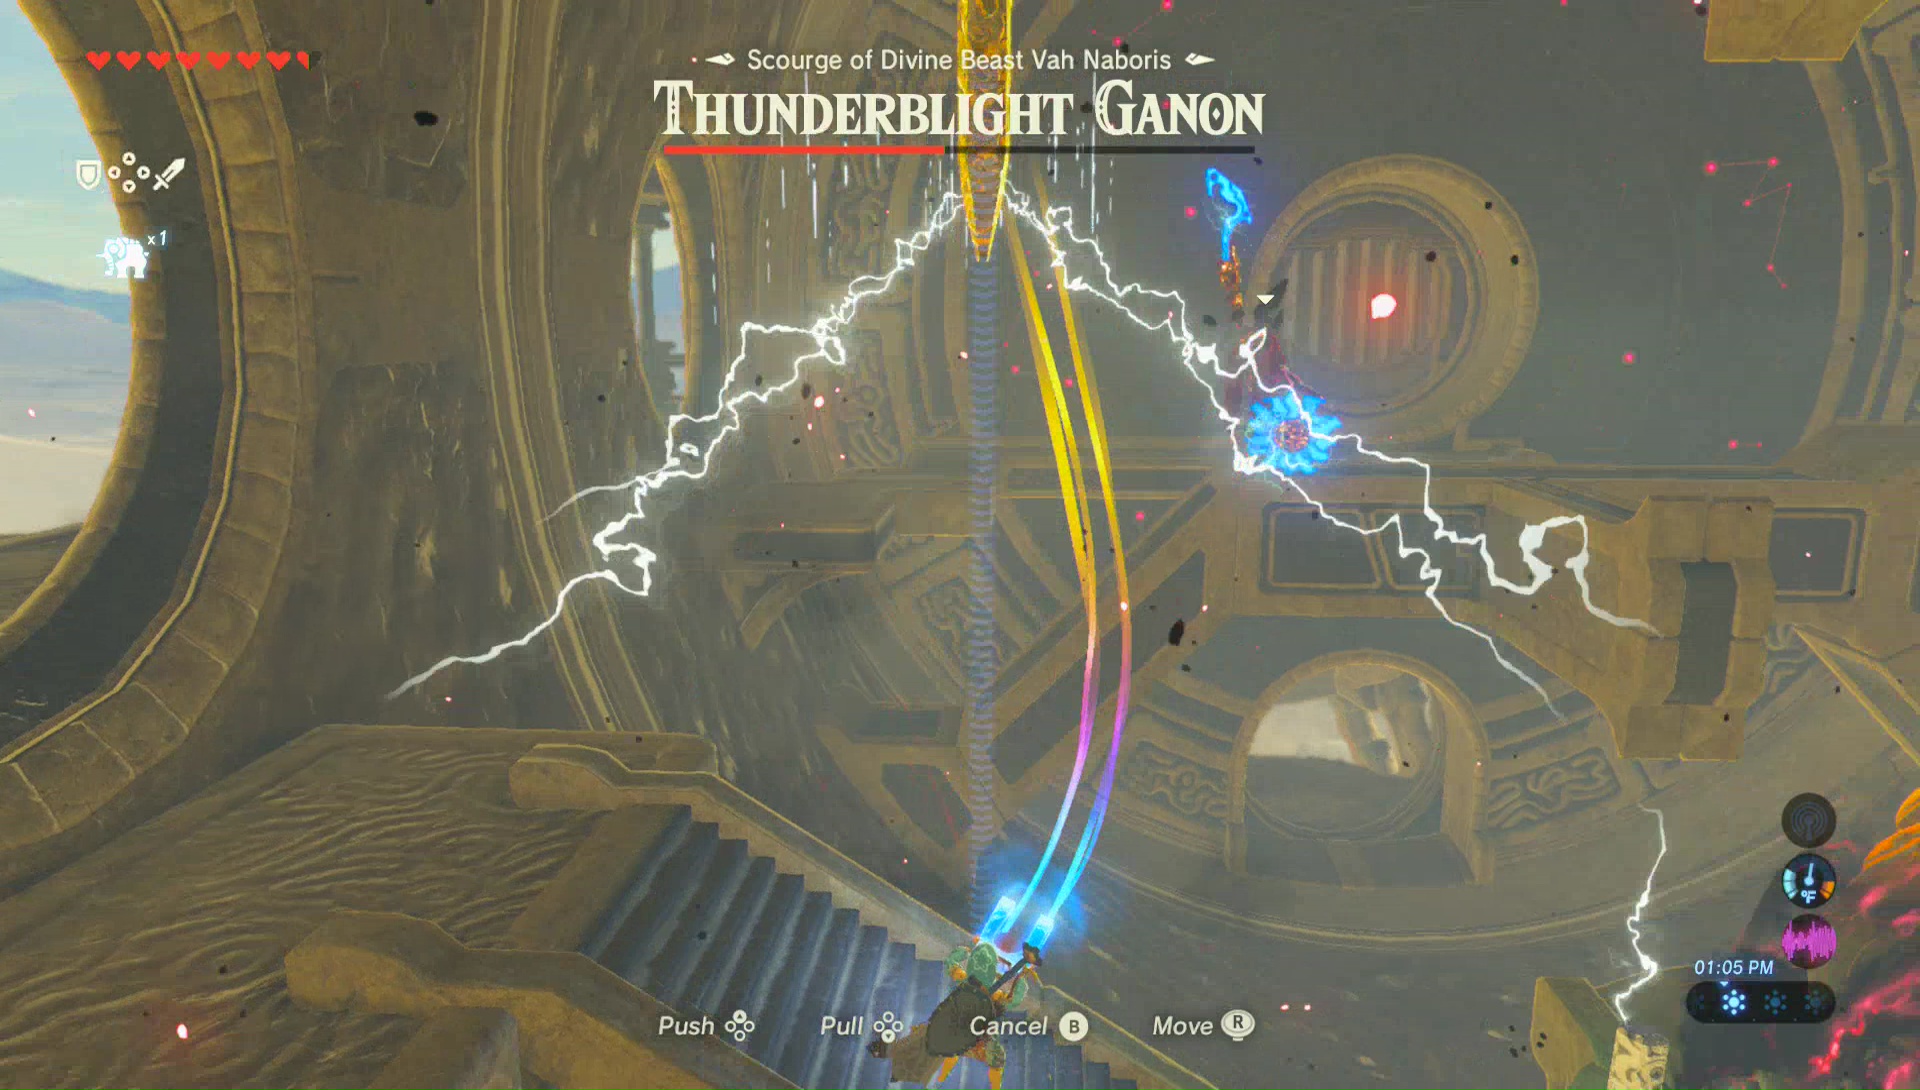
9.7 Thunderblight Ganon
While you had to use your Gerudo wardrobe for the Gerudo Town region, you don’t, and shouldn’t for this battle. Wear your best armor for your best defense.
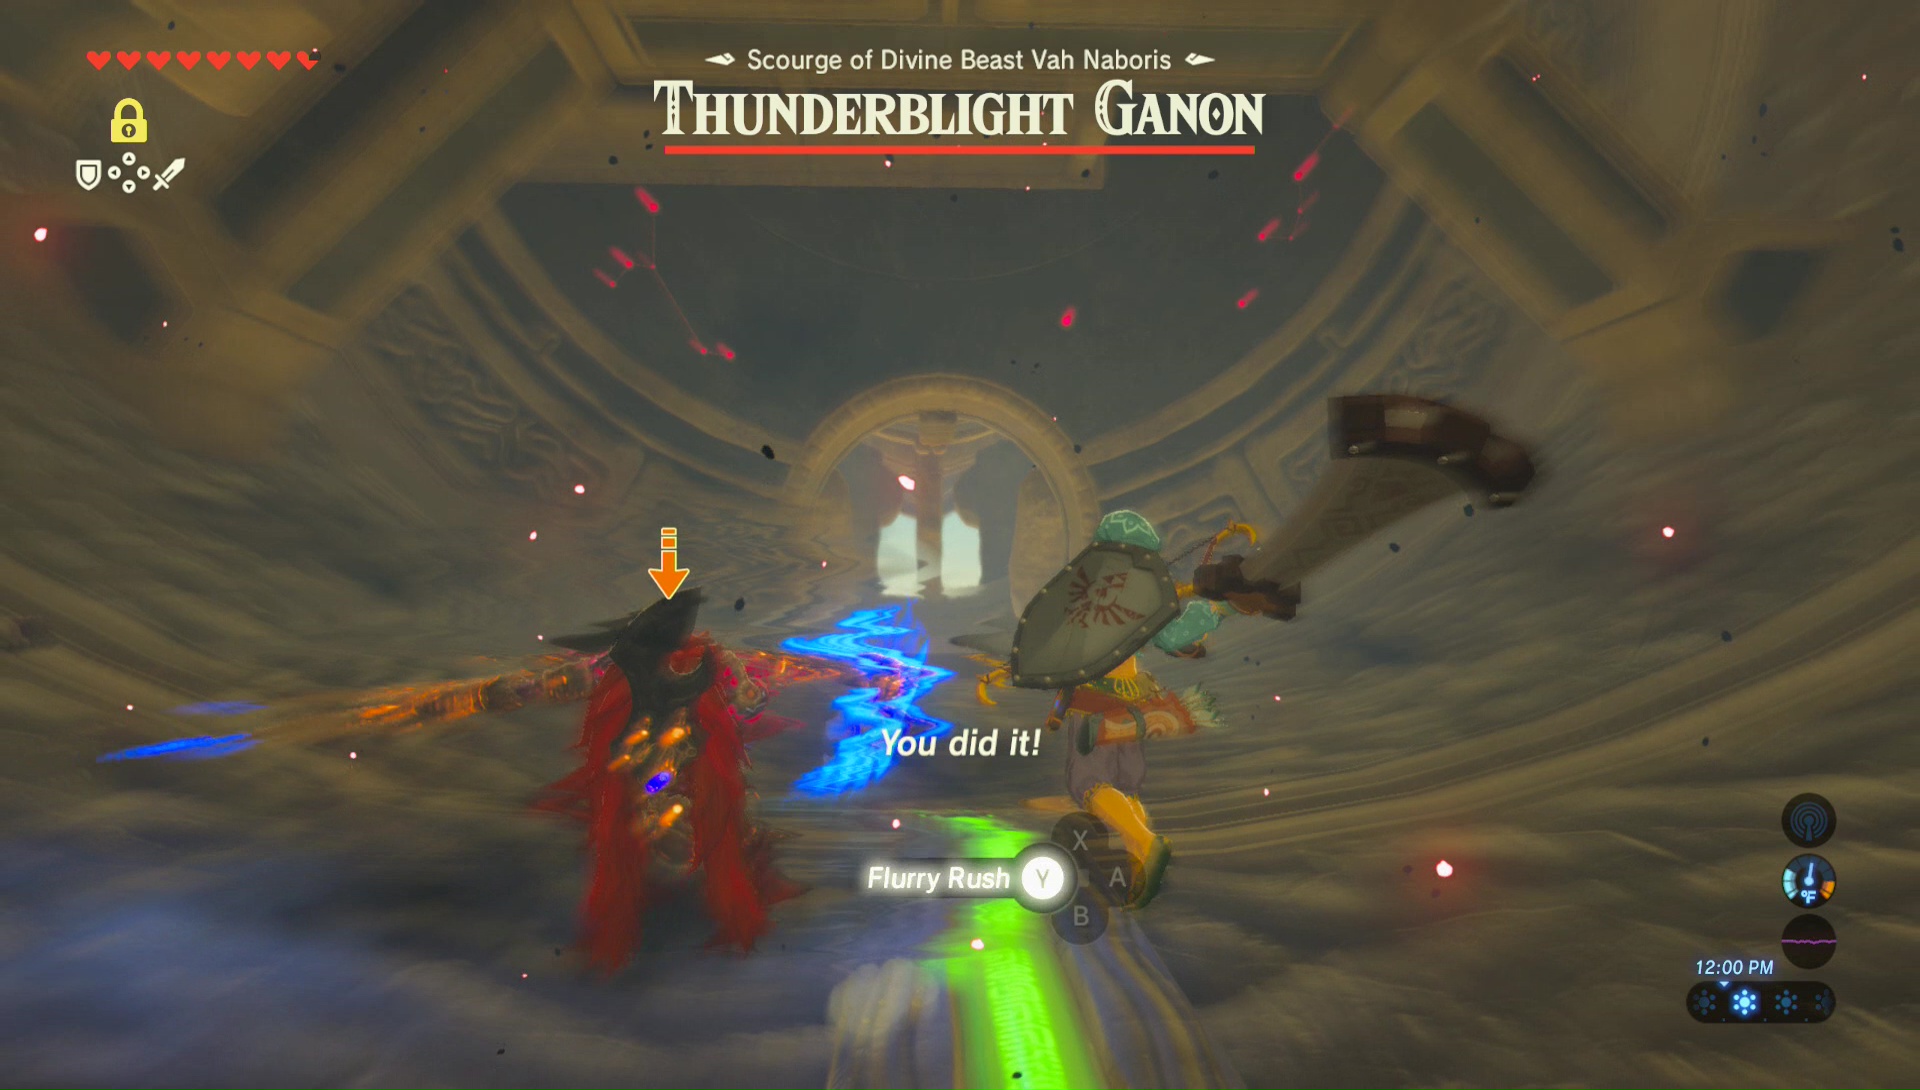
During the first phase of the battle, I recommended staying on the bottom floor where there is the most space to work with. Thunderblight Ganon has two attacks during this initial phase. The first will have him throw some green projectiles at you and these can be easily avoided by just moving to the site. His other attack involves him quickly moving around the room, warping to three spots in a matter of a second, with the third spot being right next to Link. He’ll then deliver a viscous sword slash. The best method to attack him during this phase is to hold out your shield, and just before he’s about to attack you, do a backflip. If you time it right, you can do a Flurry Attack. Equip your best two-handed weapon to do the most damage. Repeat this method until half his health is gone.

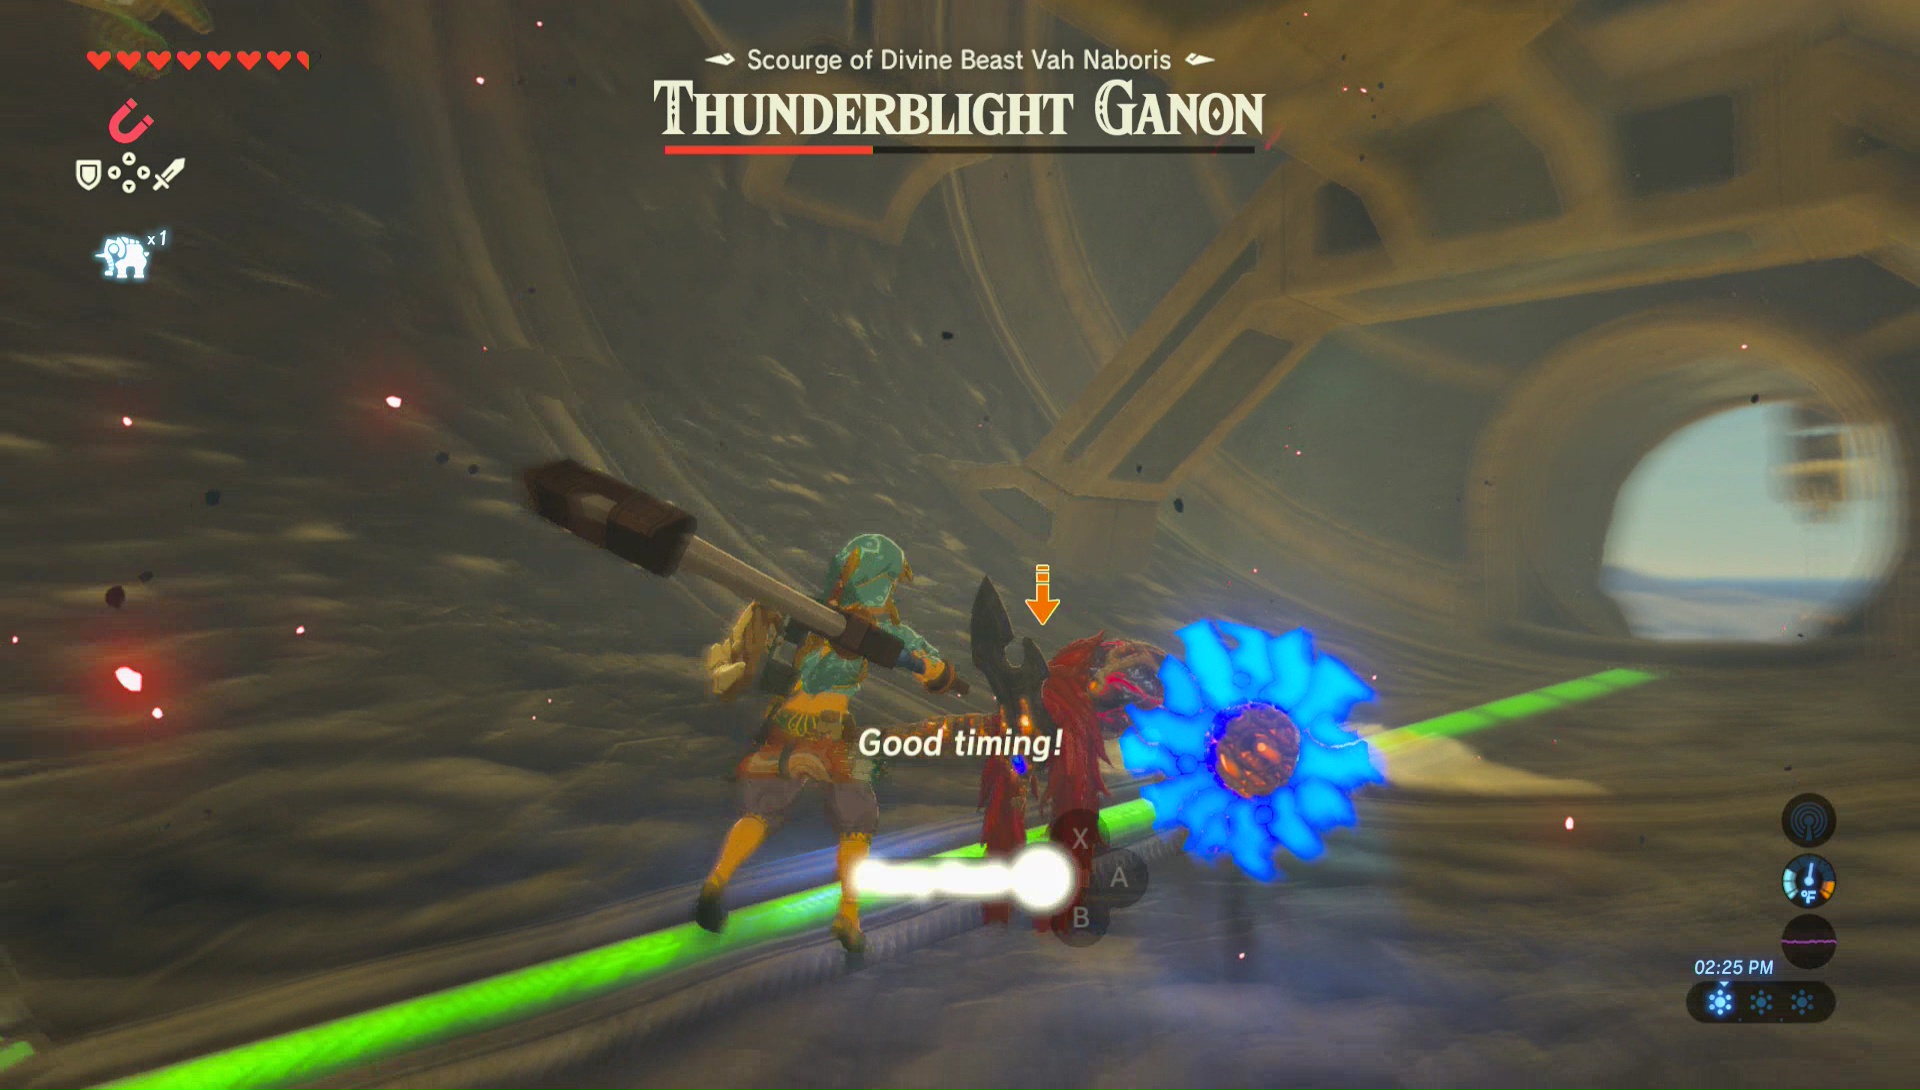
The second phase of the battle involves Thunderblight Ganon dropping several stakes into the ground and then electrifying them, along with a small area right around them. You want to use your Magnesis ability here. Right when he tosses the stakes into the ground, run away so you aren’t immediately near any of them. Then use your Magnesis to grab one to the stakes before it disappears. Lift it up and push it towards Thunderblight Ganon to cause damage. I personally find this easier to do from a higher elevation as oppose to the ground floor. This phase only lasts one attack.

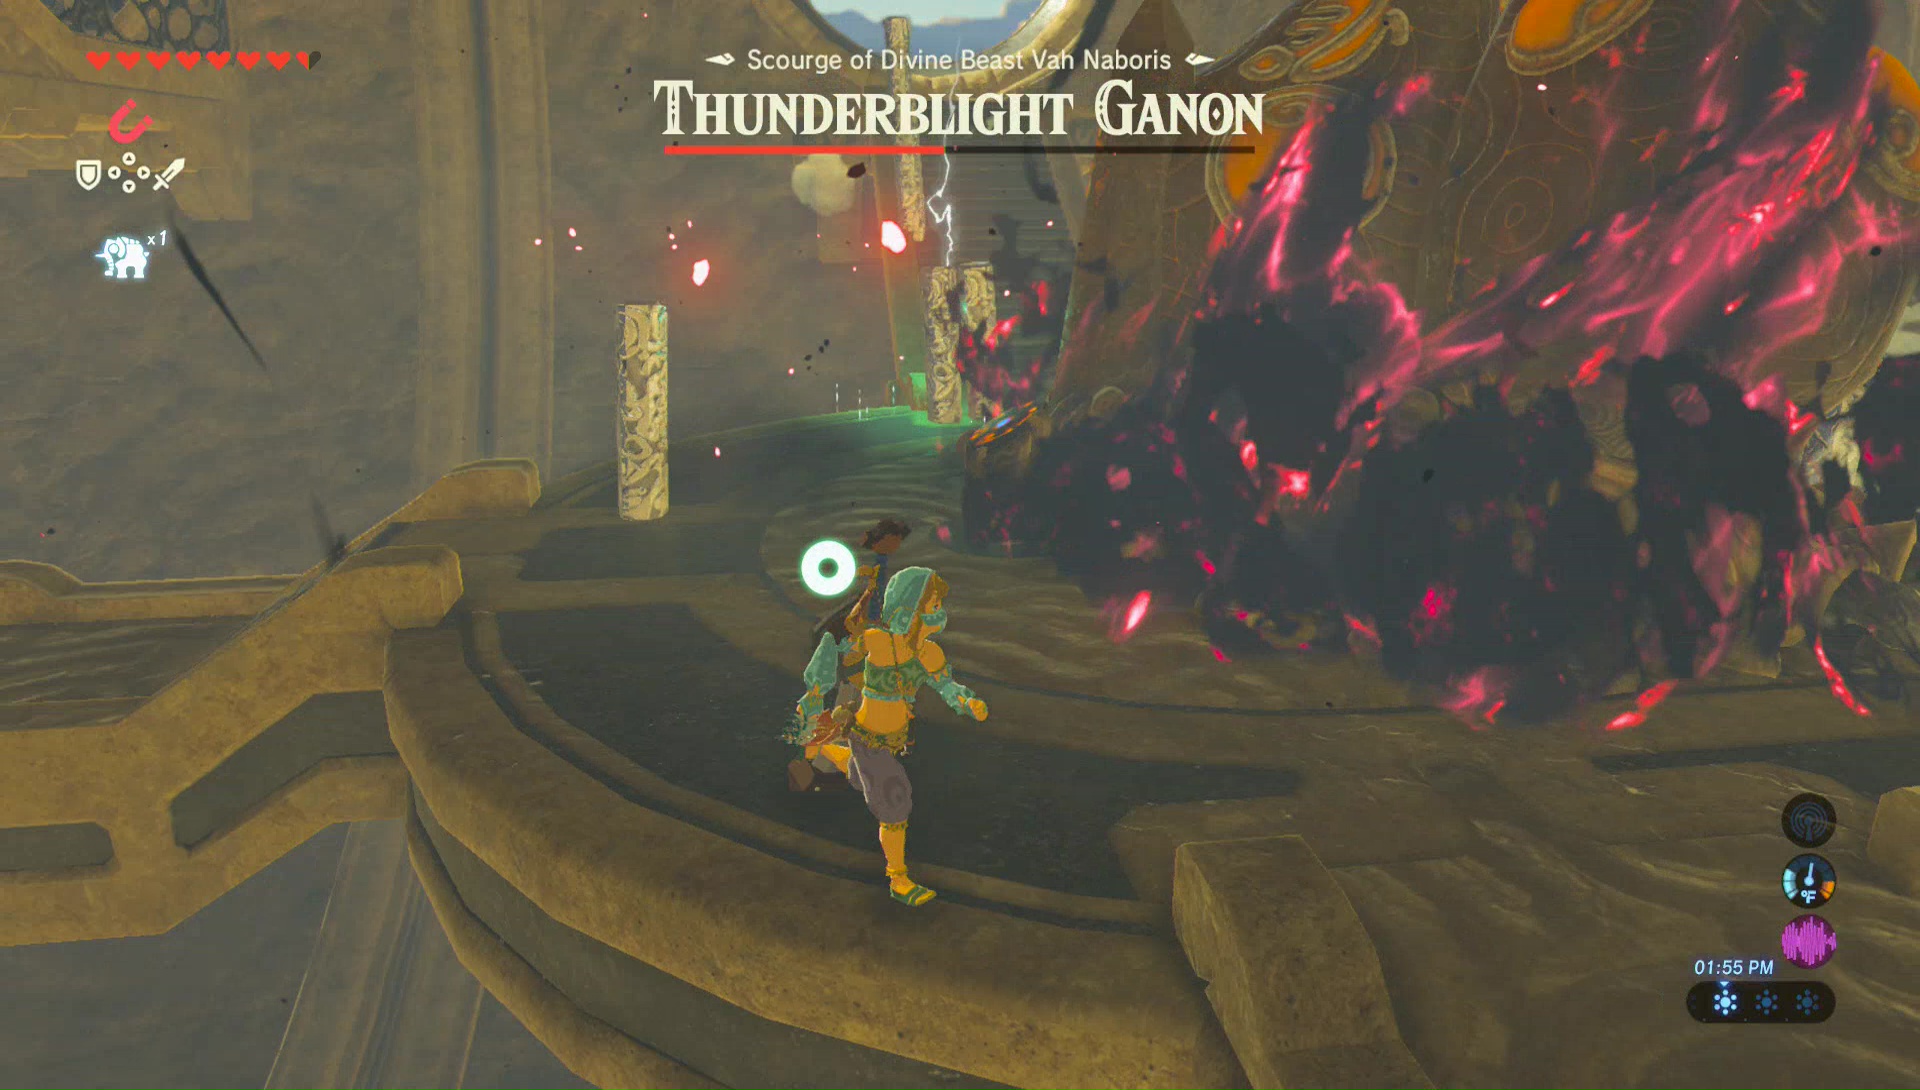
During the third phase, I recommend dropping back down to the bottom area. This phase is similar to the first phase, except Thunderblight Ganon is now electrified and hyper-aggressive. If you have a metal shield, be sure to un-equip it. You will want to do a lot of running away during this phase, avoiding at all costs his electric attacks. When he does his warping attack, instead of slashing once, he will slash three times in a row. Thus, if you are perming a backflip to do a Flurry Attack, if you do not time it perfectly, he will almost certainly hit you on his second or third sword slash. When his sword and shield are electrified, I would recommend just running away. Wait until the electricity goes away, and then try to perform a perfect timed Flurry Attack.

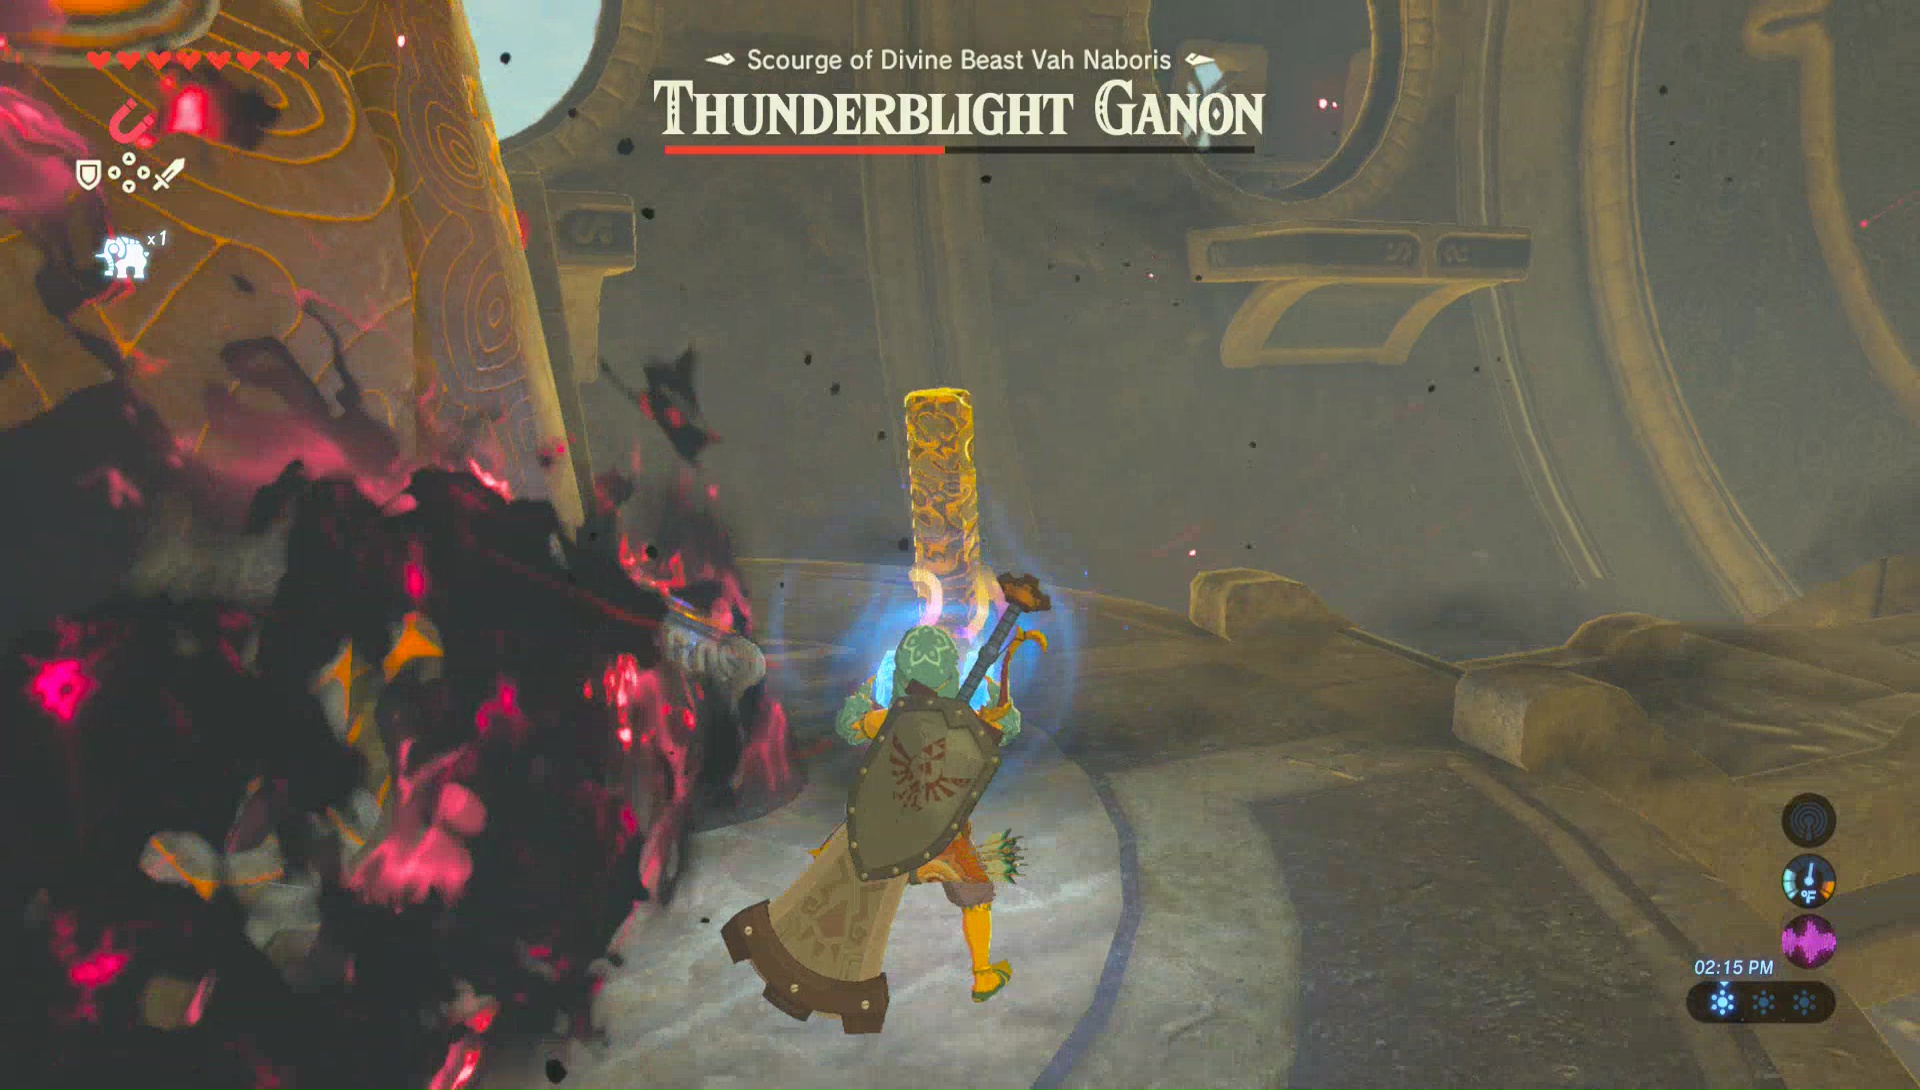
When Thunderblight Ganon’s health is low, he will perform a charged laser shot at you. I would avoid try to do a perfect shield deflect of this, and instead, just run away. Hide behind a pillar so that the laser does not harm you.
You’ll have to just keep at it. I find this battle to be significantly more difficult than the other forms of Ganon, but with enough trial and error, you’ll eventually get it.
