- Chapter 1 – The Beginning
- Chapter 2 – The Forest Realm
- Chapter 3 – Tower of Spirits 2
- Chapter 4 – The Snow Realm
- Chapter 5 – Tower of Spirits 3
- Chapter 6 – The Ocean Realm
- Chapter 7 – Tower of Spirits 4
- Chapter 8 – The Fire Realm
- Chapter 9 – Tower of Spirits 5
- Chapter 10 – The Sand Realm
- Chapter 11 – Tower of Spirits 6
- Chapter 12 – The Dark Realm
8.1 Goron Village
If you haven’t already, leave the Tower of Spirits for the Snow Realm. Ride on northward and take the first right turn to venture into the Fire Realm. Drive forward and you’ll hear a loud noise as rocks shoot out from the volcano. Be careful as you ride forward, as many of the rocks will land on the train tracks. Shoot these rocks with the cannon and they will blow up.


There are two known stops that can be accessed here. The first one is the Goron Targeting Range but, because of the recent eruption, they are closed. Ride eastward and stop the train at other marked location on the map, Goron Village.

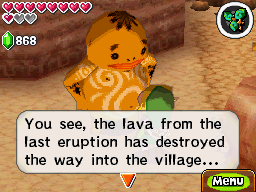

Upon entering the village you’ll see that it isn’t in the best of shape. You can run around and talk to some of the villagers, but you cannot get to the main part of town. Climb up the path on the left and head to the west part of the village.
Walk to the north and open the treasure chest to get a random piece of treasure. Walk to the west and you’ll see a series of boulders rolling down. If you watch carefully you’ll notice a pattern to the boulders. They come two in a row, then one, then two, then one, etc… Since the path curves, if Link stands in some corners, the boulders won’t be able to hurt him. Time your movements and run past the boulders when you can or hide against corners of walls when you can’t. Work your way to the west side of this area, dodging a series of rolling boulders.


Run to the southwest corner of the map. Pull out the whip and use it on the wooden poles to swing across the gap. Walk up north and you’ll see another gap, so swing across the wooden pole with the whip. Immediately upon crossing, you’ll bump into a new enemy known as a Fire Baba. These plant like enemies will try to bite Link and will also shoot fire out of their mouth. Use the boomerang or whip to cut the head off from the rest of its body, and then finish it off with the sword. Alternatively, you can just use bombs to defeat them. Walk over to the northwest corner of the map, defeating more Fire Babas as you go. You’ll eventually encounter a Stamp Station; stamp Niko’s Stamp Book for the 14th stamp! Backtrack all the way to the southwest corner of the map and run back over to the nearby switch we saw.
Optional: Goron Village Stamp Station


Activate the switch at the southern portion of the area and quickly run to the west part of the area. Pull out the whip and swing across the gap, using the wooden poles. Run across the bridge before time expires.


Walk up to the north to enter a new part of the village. Talk to the Goron and tell him you’d like to reach the Fire Sanctuary. Turns out in order to do this, you have to meet the Goron Elder, but there is currently no way to reach him. After he finds out that Link has a train, he agrees to meet you there. Leave this area and head east.
Use the whip on the wooden poles to get across the gap. Walk up the stairs and open the treasure chest to get a random piece of treasure! Now run south and follow this higher ledge to the center of the map. Right near the center of the map, jump off the ledge to the south. Run to the south a bit and open the treasure chest here to get a piece of treasure!Optional: Two Pieces of Treasure


Jump off the ledge, and head back east to the main part of town. Run all the way back to the train and on your way, a scene will show a goron talking to Kagoron, the special Goron that we just met up with. After they talk, we find out that Kagoron wants to get Link a Freight Car for his train! Kagoron wants Link to use the freight car to bring something back that is cold enough to cool the lava. Jump back on the train, and let’s set our path back to the Snow Realm.


8.2 Mega Ice
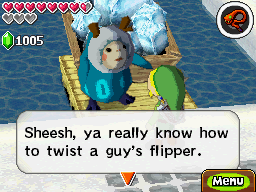
Our next destination is all the way in Anouki Village! Once you arrive, run to the northwest to find an Anouki standing near the water. He talks about something known as Mega Ice, but unfortunately the water in Anouki Village is no longer useful as it has been contaminated by chuchus. After hearing that you have a passenger car, the Anouki will ask if you can take him to someplace with fresh water. Agree to do so and he’ll head off for the train. Run on over and jump aboard.


Trace a path to Wellspring Station to the east. Remember, you have a passenger on board now, so you cannot afford to get hit too many times and you cannot make sudden stops. Once you arrive the Anouki will head off to the water. Walk over to the water yourself and talk to the Anouki. In thanks for bringing him here, the Anouki will give Link another Force Gem! This will cause the Snow Rail map to light up and create some new Spirit Tracks!


The new tracks that are formed don’t offer any new rabbits or new stations, but they do however offer the third warp point. Located just east of Anouki Village, you will find Warp Gate C on the new tracks. Activate it and this will connect you to the Ocean Realm just east of the Ocean Sanctuary. There are numerous Force Gems that we’ll soon be able to get, and thus this Warp Gate will be useful, so be sure to activate it once you get a chance.
The Anouki needs time to make the Mega Ice. In the meantime, run to the northwest part of Wellspring Station and pull out your whip. Use the whip to swing across the wooden poles to the east to get to the northeast part of the map. Open the treasure chest here to get some rupees!Optional: A Few Rupees


Enter the house on the right side of the map. Exit the house immediately and then run back to the Anouki to find some Mega Ice. For the low cost of 25 rupees, the Anouki will load up some Mega Ice on your freight car. If you repeatedly decline the offer, he will lower the price to 10 rupees. If you still say no to the deal, the Anouki will eventually give you the Mega Ice for free! The Anouki will then explain some things about Mega Ice. When transporting it, you need to be careful of enemies or sudden stops, as it might cause some of the ice to fall out. Also, since Link is carrying ice, it will melt when he is in warm places, so Link needs to move quickly. Walk back over to the train and you will see the ice already loaded on your cart. Jump on the train and head off to Goron Village back in the Fire Realm.


Once you enter the Fire Realm, you’ll notice there is now a third dark train that is located right next to the Goron Targeting Range. This prevents us from heading directly to the Goron Village, so we’ll have to take an alternate path by heading north at the first juncture. Avoid the two dark trains in this area as you navigate your way to Goron Village.


8.3 Fire Sanctuary
Once you arrive at the Goron Village, run to the west and speak with Kagoron. After telling him that you have the Mega Ice, Kagoron will work with the Gorons and cool down the lava so that the path to the north is now open!
The Goron Elder is at the highest cave in the village. Run on over and talk to the Goron Elder. You will be joined by the elder’s grandson who tells the elder of the work that Link did for the village. The Goron Elder will then move aside, revealing a passage behind him. Walk through the passage to enter another cave.


There are several fire keese in your path. Have Link run around and either use the boomerang or the whip to get rid of the keese. Walk to the north and use your whip to swing across the gap. Step on the switch and a bridge will appear, leading to the east side of the cave. There are several pots here, some of which are shaking, signifying that there are some Like-Likes here. These guys are incredibly annoying so your best bet is to just avoid them. If you do choose to fight them the whip actually works quite well against them. Alternatively, if you have the bombs, toss one into its mouth while it is trying to suck you in.


Climb the steps and then walk all the way to the left. Open the treasure chest here to get a random piece of treasure. Walk back to the right and head up some stairs. Continue north and you’ll enter the Fire Sanctuary!
Run to the north and defeat the fire keese here. You’ll bump into several more fire babas in this area. Remember, bombs are the best way to defeat them. Alternatively, you can use your whip or boomerang to cut of its head. This will make it easier to finish them off with your sword.
Walk to the east and you’ll see several torches as well as several fire babas. Defeat all the annoying fire babas first, and use the boomerang to light up all the torches. Lighting up the first three torches will create a bridge in the center of the map. Lighting up the bottom two torches creates two more bridges.
Climb the nearby steps, and then cross the bridge to the left. Walk to the northwest corner and open the treasure chest here to get a random piece of treasure. Cross the bridge to the north here and you’ll find a Stamp Station, so mark your stamp booklet with the 15th stamp!Optional: Fire Sanctuary Stamp Station


Return to the middle of the map and then head right across the bridge in the center. Keep running to the right and you will find numerous face statues. Tap the stone tablet and you’ll hear a story about two men falling in love with one woman. After rivalry over the woman, the friendship shone like a light, uniting the pair…it was as if a door had been unlocked.


A strange tablet indeed, but it does give a hint to the puzzle. Look around at the eight face statues here and you will see that all the ones on the outside are staring right at the middle one, except for the one on the right. Stand in the middle between the middle statue and the one on the right and play the Song of Light (Purple, Yellow, Orange, Turquoise, Silver). This will cause a crystal to appear and it will shine at the door above, opening it up.
Walk inside and speak with Embrose, the Lokomo of the Fire Sanctuary. After some small talk agree to play a duet with him, just like the other Lokomos. First let Embrose show you the song, which goes: Purple, Yellow, Purple, Yellow, and then Turquoise. It’s quite hard and the rhythm is a bit complicated. It might take a lot of practice, but keep trying it out and then perform the duet with Embrose. After finally successfully completing the Song, the Fire Rail Map will start to glow revealing a ton of new Spirit Tracks!


Embrose gives Link advice to talk to some of the villagers before heading to the Fire Temple. Leave the Sanctuary at the southwest corner and you’ll be back in the cave. Jump off the ledge on the left and then exit to get back to the main part of the village. The Goron Elder will tell you that the gate to the Fire Temple is locked by three locks. There are three monsters that stole the keys. The Elder mentions that the villagers may know more about the monsters.
Leave the house and talk to the Goron in the house to the left to find out the monsters don’t like certain noise. The noise is one short noise, and then one long one. This is a hint to use the train whistle against these monsters. Another one of the Gorons in one of the houses tells you not to try to get behind them, but rather, hit them straight on.


The Goron on the east end of the village is in need of 10 blocks of Mega Ice, as his house is still blocked off with lava. Agree to bring him ice, but you don’t necessarily have to do this right now if you don’t want to. Now that we have the freight car and have access to the Fire Realm, there are nine new Force Gems we can collect. These are completely optional though, and if you’d like you can skip right ahead to the Fire Temple in section 8.5.


8.4 Force Gem Galore
This part of the walkthrough is entirely optional. If you’d like to continue along with the main quest, you can head straight to the Fire Temple at this point; just skip down to section 8.5 of the walkthrough. Now that we have the freight car and access to the Fire Realm, there are a ton of side quests we can take part in. This includes the collection of numerous force gems and, in turn, access to several new stations, rabbits, treasures, warp gates, and more.
There is still some lava on the east end of Goron Village, so why don’t we get rid of it? Talk to the nearby Goron here and he seems down because he cannot get to his house. Agree to bring over some Mega Ice and return to the train. Ride back westward to the Snow Realm and stop at Wellspring Station. You’ll get a letter in the mail and it is from Ferrus. Don’t mind this for now as we’ll get to it in just a bit. Talk to the Anouki here and purchase some Mega Ice. Then head back to the train and board. Ride your train and make your way over to Goron Village. You need to arrive with at least 10 units of Mega Ice. Run on over and talk to the Goron on the east side of the village near the lava. This will cool off the lava and the Goron will be delighted since he got now reach his home. In exchange for your work, you will be rewarded with Force Gem #6. This will open up some new tracks that lead south of the Goron Target Range. You’ll be able to access a new Warp Gate and capture your first desert rabbit!.
Optional: Force Gem in Goron Village


There are three mountain rabbits that we now can capture since there are no longer dark trains roaming the northern area of the map. From Goron Village travel west just a bit and then take the path northward. Just continue riding northward, passing the first intersection and when you come to the next intersection, turn right. The first mountain rabbit is just to your left, so hit the boulder and then capture the Rabbit with the rabbit net. Ride northward and the tracks will soon turn to the west. The next rabbit is located on the north side of the tracks, just before the tracks turn to the south. Capture it to get the 2nd Mountain Rabbit! The next rabbit is located on the southeast side of the tracks, directly west of the Goron Target Range. Ride on over and break the boulder for Mountain Rabbit #3.Optional: Mountain Rabbits #1, #2 & #3


Let’s now navigate the new tracks that were opened up by Force Gem #6. Travel directly south of the Goron Target Range and when the tracks turn to the west keep an eye out at the southeast corner. A rabbit will peak its head out from behind a boulder. Hit the boulder and capture your First Desert Rabbit!Optional: Desert Rabbit #1


Ride westward from Desert Rabbit #1 and activate Warp Portal D. Pull the train whistle and ride forward and you will be warped over to the Ocean Realm. Our force gem quest begins nearby at Papuchia Village so ride on over. There is a woman in Castle Town who has been talking constantly about fish and coincidentally there is a Fish Merchant in Papuchia Village. Once you arrive run over to the woman on the west side of the village. She’ll call over so go and talk to her. She offers to sell you 20 Fish for 50 rupees. She tells you that you cannot just leave the fish out in the sun and also to watch out for birds. Head back towards the train. Set a path back to the Forest Realm and then back to Castle Town. Once you enter the Forest Realm it seems random what types of enemies will appear. You’ll either see two dark trains at the north part of the tracks near Castle Town or you’ll encounter snurgle and new enemy Tanks. The snurgle are especially attracted to the fish that you are carrying, so be sure to get rid of them quickly. The tanks are new enemies that you may have already encountered in the overworld. They usually come in groups of two or three and they will shoot cannons out you. Each tank takes two hits to defeat. If you see a cannon being shot at you, shoot it before it hits your train. Make your way all the way to the train station and stop at Castle Town. Once you arrive run over to the person in the center of town near the small waterfall. The man will call you over once you are close by. After hearing that you have fish, agree to give them to him and she’ll reward you with Force Gem #7! This gem opens up some new tracks at the east end of the Forest Realm. These new tracks will allow Link to reach the Grass Rabbit #10 and Ocean Rabbit #8! Jump back on your train.Optional: Preserving Fish (Force Gem)


There are two new rabbits that we can now capture from the new Spirit Tracks that were unlocked. From Castle, ride towards the Tower of Spirits and then head south towards the new tracks. Turn to the west and keep an eye out on the south part of the tracks. Blast at the boulder here and capture the 10th and final Grass Rabbit! Travel to the east and you’ll enter the Ocean Realm. The track only extends briefly into the Ocean Realm. The Ocean Rabbit can be found at the southwest of the tracks. Now that we have all 10 grass rabbits, we can finally make our way to the Rabbitland Rescue to get a reward. You will be rewarded with some treasure pieces for your hard work. They aren’t the cheap treasure either, these are the expensive ones that are worth 500 rupees at Linebeck’s Trading Post. Your next rabbit quest is to collect all 10 rabbits from the Snow Realm. We’re almost there actually, but for now, just head back to the train.Optional: Grass Rabbit #10 & Ocean Rabbit #8


Our next force gem quest begins over in Castle Town. Ride towards Castle Town and stop the train at the station. Run over to the cucco man at the northwest part of town. His cuccos have grown and it is now time to sell them. He offers to sell you 5 of them for 50 rupees. Agree to purchase them and they’ll be put on your train. Remember the man back in Aboda Village who wanted to raise cuccos? Well, that is our next destination so jump back on board the train. Set the course for Aboda Village and be sure you do not get hit by any enemies on your way or else you will lose cuccos. Once you have arrived run over to the Man at the northwest part of the village and show him the cuccos. He is happy, but he wants 10 cuccos all together. This means we’ll have to make a second trip to Castle Town to pick up some more cuccos. Ride on over, purchase 5 more cuccos for 50 rupees, and safely bring all 5 cuccos back to Aboda Village. Once he finally has 10 cuccos, he will be so delighted that he will reward you with Force Gem #8! This gem will restore some tracks that are north of Aboda Village. The highlight of these new tracks is Warp Gate E, which will connect the Forest Realm to the Fire Realm.
Optional: Cucco Pen (Force Gem)


If you collected the “Cucco Pen” Force Gem above, use the travel towards the new Warp Gate E; otherwise, make your way to Goron Village via existing tracks. Along the new tracks you will find two new enemies. One is a big skulltula, which you may have already encountered. These larger skulltulas take two hits to defeat. You will also find Tektites right near the warp gate. These spider like enemies will climb on the walls and will jump and try to land on top of your train. One cannon shot will do them in. When you pass by the warp gate pull the train whistle, and then ride right through to get to the Fire Realm. Continue along the tracks and make a stop at Goron Village. If you haven’t already, stop your train at the Goron Village station. While at Whittleton Village, you may have overheard that they were in need of some iron to forge new axes. Well, you can purchase some right here in Goron Village! On the west part of Goron Village, pay some rupees in order to get Iron from the Goron. Run back to the train and take off. The path to Whittleton is a bit distant and there really are no good shortcuts at the moment. You can take warp gate A or B if you’d like, or even the new tracks that were formed from Force Gem #5. However, the best route is through the Tower of Spirits. You need to make sure that you have five units of iron when you make it to the Village. Once you arrive at Whittleton speak to the villager just west of the station. He is happy and will give Link Force Gem #9. This gem will unlock some tracks just west of the Forest Temple. These are really completely useless as there is nothing of interest here other than it being a small shortcut.
Optional: Goron Iron (Force Gem)


One of the Anouki back at Anouki Village was in need of some lumber, as well as somebody that can be of use as a builder. Well, we can knock out one of those things right here in Whittleton Village. Talk to the lumber man and purchase some Lumber for 100 rupees. Then head back to the train. We also need a handy man that can help build the fence for us. The Bridge Worker should be able to do the trick. The last we saw of him, he was still at the Trading Post in the Forest Realm. Use the train and ride on over to the Trading Post. Speak with the Bridge Worker, who apparently hasn’t moved for days now…and he’ll jump on board. Use Warp Gate A to get to the Snow Realm and then travel to Anouki Village. Once you arrive with the Bridge Worker, speak with the Anouki and he will give you a treasure for bringing the Bridge Worker. Since you’ve brought the lumber as well, he is so happy that he’ll reward you with Force Gem #10. This new gem will restore spirit tracks west of the Snow Temple and will actually be of good use!Optional: Anouki Lumber (Force Gem)


The tracks that have opened because of the “Anouki Lumber” Force Gem will allow us to reach a new rabbit. Jump on the train and make your way to the northwest part of the map. Watch out for the dark train as well as the armored train that are patrolling the tracks here. Once you reach the new tracks keep an eye out for the north side of the tracks as the rabbit will pop its head out from behind a boulder. Capture the rabbit with the rabbit net to get the 8th Snow Rabbit.
Optional: Snow Rabbit #8


If you continue to the far reaches of the tracks created by the “Anouki Lumber” Force Gem, you’ll arrive at what is known as Snowdrift Station. The outdoor portion of this station consists of a lot of snow, some fencing, and a bunch of white wolfos that come up from underground. Defeat any enemies that pop up and maneuver around the fencing to get to the northwest part of the map. Enter the cave and you’ll find yourself in a dungeon like area. This place is known as the Snowdrift Station Dungeon. You’ll see a stone tablet straight ahead and it warns you that you shouldn’t get the order wrong. This tablet is referring to the five switches that are just to the north. Don’t hit the switches as we need to first learn the proper order. There are four staircases on your map along with a few freezards roaming around. Let’s start off by heading to the northeast corner of the room and head down the stairs. Note: Exploring each Chamber is not required; head down to the Main Chamber section if you’d like to skip them. This room is dark but there are ice torches that light up the room. Walk to the west and you’ll see an unlit torch that is actually in some water. Use the boomerang to light it up and then create a path of ice with your boomerang. Continue lighting a series of torches with the boomerang as you head west, north, east, north, and then west. You’ll eventually come to a stone tablet. Read it and it says…don’t hit the false one in the middle. This is a clue that of the five switches on the floor below, you do not need to hit the one in the middle. Walk to the north and then all the way to the east. Jump off the ledge and head back up the stairs to get to the main chamber. Our next spot is the southeast chamber, so walk on over and head down the stairs. Walk to the right and then up where a door will shut behind you. This water filled room has several octives in the water and a few ice keese floating around. Keep the boomerang out and get rid of the ice keese. Stun the octives while creating paths of ice to walk on. Go around the room creating ice while defeating all the octives. Once all the enemies have been taken care of, the doors will open up. Create a path to the north and get back on land. Walk up and read the stone tablet here and it says…the second switch from the left is the third switch to hit. Be sure to remember that and then head back south. Cross the water and then climb the stairs to get back to the main chamber. Run over to the southwest chamber and head down the steps. This room is very straight forward but can be a bit frustrating. There is a switch once you enter the floor and stepping on this switch will open up a door within the room, but only for a short period of time. You have to race across the ice making sharp, efficient turns in order to get to the door before the timer run out. It might take you several tries to get the hang of it, but once you’ve got it down, you’ll make it passed the door. Walk forward and read the third stone tablet and it says…the first and the last are on the ends. Now head back south and backtrack up the stairs to get back to the main chamber. Let’s now head to the top-left part of the room and head down the stairs to enter the northwest chamber. Walk to the right and you’ll see what looks like a rather intimidating block pushing puzzle. The goal here is to push the block around on the ice in order to get it into the water on the right. The best order is to push it as such: North, East, South, West, South, East, North, and then East into the water. Jump on top of the block and you’ll find there are four octives in the water, as well as some annoying arrow shooters coming from the north wall. Use the whirlwind to propel yourself across the water. Also use the whirlwind to deflect the rocks of the octives back at them. As you are crossing the water, you can face northward with your shield and it will block the arrows that are being shot towards you. It can be rather annoying, but eventually you’ll make your way across to the right and surface on the land. Run up and read the stone tablet here and it says…the second one and the fourth one are next to each other. Climb up the steps and run back to the west side of the room. Climb up the steps to resurface at the main chamber. We now have all four clues and they are as follows: 1. Don’t hit the false one in the middle. If you use all the clues then you can solve the puzzle. From left to right, the proper order is 1st, 4th, 2nd, 5th. Stand on the higher platform and carefully trace a path with your boomerang so it hits these four switches in this particular order. Properly hitting the four switches will cause a bridge to form. Cross it and head north. You will find a tiny room filled with freezards and there is ice on the ground! Stay in a corner with your shield facing the center of the room and then slash your sword at the freezards. They will move at fast speeds across the ice but they will also begin to shed some of their protective ice. Keep slashing away until you weaken the freezards. A faster way to defeating freezards is by tossing bombs at them. Once all four freezards have been defeated, walk up north and open the treasure chest to get a extremely rare piece of treasure! This isn’t just some regular treasure. This is an Alchemy Stone, which alongside the Regal Ring, is the rarest of all treasure. They are worth 2,500 rupees at Linebeck’s Trading Post. You can also trade in an Alchemy Stone in order to get Golden Train Parts! That is about all there is to the Snowdrift Station, so exit the dungeon and return to the train.
Optional: Snowdrift Station


2. The second switch from the left is the third switch to hit.
3. The first and the last are on the ends.
4. The second one and the fourth one are next to each other.


The next force gem that we can collect stems from a letter that we got in the mail from Ferrus. If you haven’t gotten it yet, just stop by any village with a mailbox and you will get the letter. It shows a picture of a bomb train in the snow, with the forest in the background. Ferrus tells you to find him here and pick him up. The exact location of where Ferrus is just southeast of the Snow Temple. He is along the vertical tracks that are just east of the Snow Temple. He is near the southern part of this area and on the east end of the tracks. Ride around in this area and you will hear his camera clicking. Once you pick up Ferrus you’ll find out that his destination is Aboda Village to visit Alfonzo. Use either Warp Gate A or B in order to quickly get to the Forest Realm. From here just ride straight towards Aboda Village. Once you arrive Ferrus will head off to find Alfonzo. Follow suit and enter Alfonzo’s house. Ferrus is really excited and even asks to get Alfonzo’s autograph. It turns out that Ferrus is completely wrong about Alfonzo and he wasn’t a legendary engineer, but rather a legendary swordsman. In any case, Ferrus rewards you with a Force Gem, which restores tracks just west and north of Castle Town that lead to the Snow Realm. These are just more useless tracks whose only purpose is a shortcut along the tracks.Optional: Ferrus' Force Gem


If you’ve been following along in the walkthrough, you should have collected 15 stamps in Niko’s Stamp Book. If you have done so, run on over to your house and speak with Niko. He is happy that you have collected 15 stamps and in return, he will give you the Engineer’s Clothes. These are actually the same clothes Link had at the beginning of the game, but it is kind of cool to be able to use them. You can come back to Niko at anytime and switch between Link’s green tunic and the engineer’s clothes. That’s about all there is to do here, so let’s jump back on the train.
Optional: Engineer's Clothes


The next force gem quest begins back at Papuchia Village. Ride on over to the Ocean Realm and stop at Papuchia Village. Once you arrive, run on over and speak with the Wise One who is in the large building at the center of the village. After going through her usual round of questions, tell her you are having bad luck and she will offer to sell you a Vessel for 50 rupees. Purchase it and then head back to your train. It has been quite awhile since you met with Steem, the Lokomo at the Snow Sanctuary, but if you have spoken with him you would know that he is looking for something nice to decorate his chamber. The Snow Sanctuary is our destination but since you are carrying this expensive vessel, you cannot allow any enemy at all to hit you, or else the vessel will break. Using Warp Gate C to the east is the fastest way to get to the Snow Sanctuary, but it isn’t the easiest as you’ll encounter some pirate ships. Alternatively you can use Warp Gate A or B within the Forest Realm. Whichever route you take, ride on over and safely stop at the Snow Sanctuary. Once you arrive Steem is waiting there right for you. Talk to him and he’ll be happy you brought him a nice vessel and will give you Force Gem #12! This gem will restore some tracks at the north end of the Snow Realm! Leave Steem’s sanctuary and run all the way back to the train.
Optional: Steem's Decoration


Let’s check out the newly restored tracks at the north end of the Snow Realm. Ride on over and at the very end of the tracks you will find a station. Once you come to a stop you’ll be at a place known as Slippery Station. There are a bunch of ice chuchus running around here. Use your boomerang to stun them and finish them off with your sword. Enter the cave here to find another mini dungeon. Once you enter you’ll see a few stone tablets. Read the one on the right to find you are at a skating rink. There are three courses: Amateur, Pro, and Champion. These courses obviously correspond to the switches to your left. The bottom of the three switches is the Amateur Course. Step on the switch and a door at the north end of the room will open up. Just like in the Snowdrift Station Dungeon, the door is on a timer and you have to run across the ice and get there before it closes. The Amateur one is not too hard, just try to make as sharp of turns as possible as you run towards the door. Once you’ve successfully made it, open the treasure chest here to get a big gold rupee. These things are worth 300 rupees! Step in the blue warp portal to be sent back to the entrance. The middle of the three courses is the Pro Course. This is basically the same as the Amateur one, except the door is at the top-right part of the map and you have slightly more time. You need to try to cut corners as best as you can. There are also spots where there are breaks in the ice and there are regular platforms. If you run on to these platforms you will be able to move a bit quicker through the course. Once you’ve successfully reached the end, open the treasure chest to get a rare piece of treasure. Step into the blue warp portal to be sent back to the entrance. The top of the three courses is the Champion Course. Once you step on the switch, the door at the bottom-right part of the room will open up. You have to run across the entire room and you must cut every corner as best you can. Whenever there are breaks in the ice, use them to pick up a few valuable seconds in the race. Remember, the more you run in a straight line, the better you will do. After a bunch of tries you will eventually get it. Once you do so, open the treasure chest here to get another uber rare Alchemy Stone! Step into the blue warp portal to be sent back to the entrance. That’s all there is to do here at the Slippery Station. Leave the skating rink and then run back over and board the train.
Optional: Slippery Station


8.5 Enter the Fire Temple
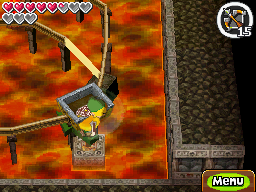
From Goron Village, ride eastward and you’ll go through a small cave. This cave is filled with three of these much smaller cave dwellers that are easily defeated with some cannon shots. Once you exit the cave, you’ll see the three monsters that are holding the keys to the Fire Temple. They act similar to other trains as they follow a set path and their next turn is shown.


Remember the advice that the Gorons gave; do not try trailing them, just head straight on. Once you are in direct path of a monster and get its attention, pull your train whistle with a short pull followed by a long pull. This will cause the monster to be stationary while it closes its ears. Use the cannon to shoot the monster and get the first key!


There is not much different about the process to get the remaining keys. Just be patient with the route the monsters take as it can be annoying when they are going in different directions. Once you have collected all three keys the door will open to the Fire Temple, so trace a path and ride inside.
8.6 Fire Temple
After some small talk with Princess Zelda, walk up through the door to enter the main part of the Fire Temple. Continue walking straight up and defeat the several fire keese nearby. You’ll see two locked doors and a closed door; just head left for now and make your way around the corridor.


This area is filled with spikes on the floor and a rotating set of flames. Carefully maneuver around the spikes and the flames as you make your way around this room. Once you get to the northwest part of the map walk to the south and the door will shut behind you. There are three skeleton enemies known as Stalfos. They will jump when Link tries to swing his sword at them. Keeping slashing at them and soon you’ll be able to land a hit. The whip also works great against these guys. Once all three have been defeated the door to the bottom will open up.
There is a stone tablet here that hints the trapped doors in this room are symmetric to the other side of the map. The trap doors are easily distinguished on the ground here, but not so much on the other side of the map. Make sure to note on your map where the symmetric trap doors are. There are enemies in this area known as Winders. They are invincible to Link’s attacks so just try to avoid them. Maneuver around the trap doors and up the stairs to get to the 2nd floor.
Jump onto the cart here and it will move Link around the room to a nearby treasure chest. Open it up to get a small key. Jump on the cart again and then walk back down to the first floor.


Walk back south and turn around the corner. Walk up the stairs here, but don’t jump down. Instead, pull out the boomerang and hit the switch that is to the northeast. This will cause a circular platform to fall to the floor. Pick it up and carry it to the right side of the room. There is some lava nearby that Link cannot jump onto. Instead, toss the platform onto the lava and then Link can use this to get across the gap.
There is a block in the corner and some fire that blocks your way on the right. Pull the block down two spaces, then push it right one. The block will cover Link from the fire that is coming out of a statue at the corner of this area.


Run to the southeast part of the room and you should have noted on your map where the trap doors are. If you haven’t, the path to get across is to go down, then left, then up, then left, and then down twice. From here you can run to the right and open the treasure chest to get some red potion. Then run all the way to the left and then head up to get back to the 2nd floor.
There is another cart here but, if you look at the path, it is a bit trickier.
Optional: Piece of Treasure


As you ride on the cart you’ll notice switches that Link can hit along the way. Hit both switches that we see, which will allow the cart to ride all the way to the northwest part of the map. Defeat the stalfos enemy here and open the treasure chest to get another small key. Ride the cart back to the staircase and head back down to the 1st floor.


Run south and around the corner. Then head north, climbing the stairs. Make your way over to where the two locked doors were. Use small keys on both of the locked doors and you’ll find two switches. If you hit one of the switches, it will activate but only for a short while. You don’t have the time to run to both switches and hit them with your sword. The best way to go about this is to stand right in front of the closed door and trace one long path so the boomerang hits both switches. Alternatively, you can use bombs if you have the bomb bag. Once the door is opened head up to get back to the 2nd floor.
Walk up to fight a mini-boss battle with a giant turtle known as a Heatoise. Also in the room are those electric winders that will stay around the edge of the room. Slash at the head of heatoise, and it will then hide under its shell and start spinning towards you. You need to lure it so that it will spin into a winder. Once the heatoise hits the winder, the heatoise will be stunned for a short moment, which will allow Link to slash away at head of heatoise. Repeat this process until heatoise has been defeated. Afterwards a treasure chest appears and it contains the Bow and Arrow!


Walk to the right and break the chestnut in order to get some more arrows. Target the red switch on the wall with your bow and arrow, which will cause a bridge to form. Walk across and head back down to the 1st floor of the dungeon.
Use the bow and arrow to shoot the blue arrow orb that is across the gap. This will shoot the arrow to the right and hit another orb, which will shoot the arrow to hit the red switch, creating a bridge that Link can cross. You can optionally jump over to the right side and open the treasure chest to get a random piece of treasure!


Slash at the blue arrow orb so it faces northward. Pick it up and walk to the edge of the platform on the left. Toss it over so it lands on the platform across the gap. Use your bow to shoot an arrow at this orb which will eventually hit another red switch, creating a platform for Link to cross.


Run over and hit the orb once again until it faces west. Pick it up and toss it to the platform to the north. Shoot an arrow at the orb and this will hit another switch creating yet another platform for Link to cross. Run across the bridge and head down the stairs to get to the Basement 1.
There is a stone tablet here, but all it says is that you need a small key. Go down the staircase to get to Basement 2 and the door will shut behind you. There is a chestnut here that feeds endless amounts of arrows if need be. Use the bow and arrow to defeat the four stalfos that appear on both sides of the lava. Once all four have been defeated the door below will open up.


Fill up with arrows if need be and then walk to the south. Shoot an arrow at the orb to the left and this will hit a switch, which will lower the lava flames on the right side. Use the whip on the wooden poles to cross the gap on the right side and get to the top-right part of the room.
Walk around the room and defeat the two stalfos that are in your way. There are a series of platforms above the lava here. Use these platforms and wait until they rise and lower; then jump on over to the northeast part of the map. Open the treasure chest here to get a random piece of treasure. Pull out the whip and use it at the wooden pole below and continue along traveling southward by whip. Step on the switch here and it will open the nearby door allowing for easier access.


Carefully walk to the left as you pass the moving spikes. At the far left, wait until the spike is moving downwards and quickly follow it. Turn onto one of the side routes so you don’t get hit when the spike travels back upwards.
Walk to the east and open the treasure chest to get a random piece of treasure. To the right you’ll see two unlit torches as well as two fire keese. There are an unlimited number of fire keese in this area as they’ll keep coming from underneath the lava. Use the boomerang and trace a path so that it hits the fire keese, but then afterwards hits the two unlit torches. When the boomerang defeat the fire keese, the flame will stay with the boomerang and it will light up the two unlit torches.
A platform falls on top of lava just to the area at your left. Run on over, avoiding the moving spike once again. Jump on over to the circular platform and then jump to the north. Walk up the stairs to get back to Basement 1.
Walk down a bit and the doors will close behind you. Two more heatoise will appear. However, now that we have the bow and arrow, these turtles are just a joke. Two hits to their head with arrows will do them in. After both heatoise are done away with, open the treasure chest here to get a random piece of treasure.


There are four tablets here and they have useful information that will help you solve a puzzle later in the temple. The tablets read (From left to right):
1. Aim for the eye above second.
2. Aim for the eye above first.
3. Aim for the eye above fourth.
4. Aim for the eye above third.
This translates to 2-1-4-3, so jot that down on your map. Head down the staircase on the left to get back to Basement 2.
Walk around the corner and defeat the two stalfos that are located here by using either your sword or the bow and arrow. Walk north and you’ll see a switch. If you step on it the door to the left will lower and you’ll see a switch. However, once you walk off the switch the door closes. Walk to the north and grab the blue arrow orb here and bring down. Strike it so that it is facing to the left. Line it up so that it is just north of the ground switch, and right of the wall switch. Step on the ground switch to open the door and then shoot an arrow at the blue orb. This will drop a circular platform.
Lift up the platform and carry it northward and toss it on the lava spot. Walk back and pick up the blue orb from below and then stand on the circular platform. Once the lava blows the platform upwards, jump off to get to the northwest part of the map.
Toss the orb aside for now and get rid of the few fire keese in this room. There are two switches found in this room as well. Hit the one at the bottom-right and this will cause a wooden pole to appear elsewhere in the large room, for easy access through the dungeon. The switch at the top left can be activated or deactivated, and it will cause lava to come from the ground in the three holes.


There is a large statue in the middle of this room, with wall switches on the left and on the right. Hit the blue orb that faces diagonally and make sure it faces northeast. Pick it up and toss it in the lava just south of the statue. Hit the other blue orb so it is facing to the left and toss it in the lava on the right of the statue.
Now walk back to the circular platform. Wait until the lava pushes it upward and then grab the circular platform. Toss it so that it sits on the lava just west of the statue. Step on top of the circular platform and pull out the bow. Hit the switch just north of where you are standing and this will cause all three parts of the lava to push upwards. Use the bow and hit the wall switch that is connected to the pillar in the middle. Then use the arrows to hit the blue orb below the pillar, and it will shoot an arrow hitting the other orb, and then the other wall switch. This will cause the door at the top-left part of the map to open up. Run over and open the treasure chest to get a small key!
Run back to the southeast part of this area and jump down. Use the whip on the wooden pole to swing across the gap and then head north towards the staircase to get back to Basement 1.
Use the small key on the door to the left and walk around the corner to get to a cart. Pull out the bow and arrow and then jump on the cart. Link will remain on the cart and go in a circle as long as he doesn’t do anything. When you travel over the area at the south part, you’ll see that there are four wall switches just above the tablets on the ground. If you remember the order the tablets told you, it was 2-1-4-3. So go around the room over and over and hit the wall targets in this order. The 2nd one, the 1st one, the 4th one, and then the 3rd one. If you run out of arrows, hit the switch at the top of the cart path and it will send you back to the top-left corner of the room where there is a chestnut with arrows.


Once you’ve hit all four switches in the proper order, the track will shift, allowing Link to reach a new area in the center of the map.
Optional: Fire Template Stamp Station


Head down the stairs on the middle platform to get to Basement 2. Walk down a second flight of stairs to get to Basement 3.
Check out the map along the wall on the left. Mark the five spots that are shown on your own map as well.
Jump across the blocks to the left and pick up the bomb flower. Jump back to the right and toss it so that it blows up the boulder. Pick up the circular platform and toss it on top of the lava here. Jump on the platform and then into the cart.


Ride the cart and along the way you’ll see three switches. However, if you marked the spots on the map, you only want to hit two of them. Hit the first switch you see and then the third switch you see. Hitting the proper switches will guide Link to the north side of the room.
The tablet here tells you to carry the boss key by cart. Walk southwest of the tablet and you’ll see the big key just to your left. Use the whirlwind and send the boss key into the cart here.
Optional: Piece of Treasure


Jump into the cart and ride around. Hit the first and second switch with your sword. Skip the third switch and then hit the fourth switch using the bow and arrow. If you’ve properly hit all switches, Link and the big key will safely land on the platform right next to the big lock. Pick up the key and use it on the big lock. (If you messed up, just jump off the ledge to the right and use your whip to get back to the carts.) Walk down the steps to get to Basement 4.


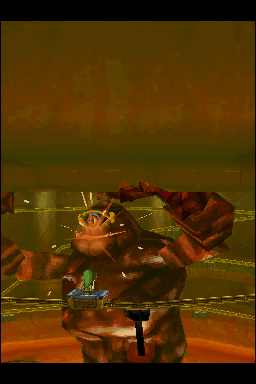
Break all of the pots here to get some hearts and some arrows. Tap on the tablet and it will take you back to the temple entrance. Once you are ready for the boss battle, head up the stairs to the north to take on Cragma, Lava Lord!
Upon entering the boss arena the door will shut behind you. The giant boulder on the ground will come alive and reveal the boss Cragma, a freaking giant rock lava monster.
During the first phase of the battle Cragma will try to smash Link with his right fist while boulders of lava are also falling from the ceiling. When Cragma is gearing up to punch Link, a part of his body will start to glow. Pull out the bow and shoot an arrow at this glowing spot. Cragma will when clutch his fists together and try to smash Link with two hands. Roll out of the way to avoid this damaging attack.
The massive attack will cause a huge boulder to fall to the ground. The next thing you need to do is stand near the boulder and Cragma will try to smash you with his right fist. Quickly roll out of the way and Cragma will smash the boulder to create a circular platform. Pick it up and run over to the right side of the room. Toss the platform onto the small area of lava and then jump onto it. From here you can jump onto the moving cart.


Ride around on the cart and have your bow and arrow equipped. Look for the various shiny parts of Cragma’s body as you are riding on the cart. Whenever you see a shiny spot, that is a weak point, so use the bow and arrow and hit the weak spot. After hitting several weak spots, you’ll climb to an even higher rail. At this point, aim for the eye of Cragma and nail him, causing his massive body to fall to the floor. Once Link reaches the ground, run and slash away madly with your sword until Cragma gets back up. If you miss Cragma’s weak spots while riding on the cart, the boss may grab Link and toss him back to the bottom area of the room.


This next phase is very similar to the first phase, but the only difference is that Cragma doesn’t wait as long to smash his arms and lava boulders fall a lot more frequently. Look for loose arrows that are left from falling boulders as you’ll need more for the next go around on the cart part of the battle. If you are low on health, use any potions you have may have, break the pots in the corner of the room, or play the song of healing to use your fairy. Repeat the same process of hitting his weak spot to make a boulder appear. This will cause Cragma to break the boulder, which you can then lift up the circular platform and toss it on the lava to the right. Once on the cart, repeat the same process of hitting its weak spots and eventually hit its eye. Cragma will come crumbling to the floor once again, at which Link can finish him off with some sword slashes.
Ride around on the cart and use your bow and arrow to hit all the weak points of Cragma. After hitting all its weak points, hit Cragma in the eye and it will come crashing down. Slash away with your sword once again. Repeat this entire process until Cragma has been defeated.
As usual a force gem appears, followed by a statue. Power flows to the Spirit Tracks and it will repair the top floor area of the Tower of Spirits! The Fire Rail Map will glow and create a path to the Tower of Spirits.


Open the treasure chest to get another Heart Container and then step into the warp portal to be taken to the dungeon entrance. Climb on board the train and take off towards the Tower of Spirits! That concludes the 8th chapter of the Spirit Tracks Walkthrough!
- Chapter 1 – The Beginning
- Chapter 2 – The Forest Realm
- Chapter 3 – Tower of Spirits 2
- Chapter 4 – The Snow Realm
- Chapter 5 – Tower of Spirits 3
- Chapter 6 – The Ocean Realm
- Chapter 7 – Tower of Spirits 4
- Chapter 8 – The Fire Realm
- Chapter 9 – Tower of Spirits 5
- Chapter 10 – The Sand Realm
- Chapter 11 – Tower of Spirits 6
- Chapter 12 – The Dark Realm
