- Chapter 1 – Parapa Palace
- Chapter 2 – Midoro Palace
- Chapter 3 – Island Palace
- Chapter 4 – Maze Palace
- Chapter 5 – Ocean Palace
- Chapter 6 – Hidden Palace
- Chapter 7 – Great Palace
2.1 Death Mountain
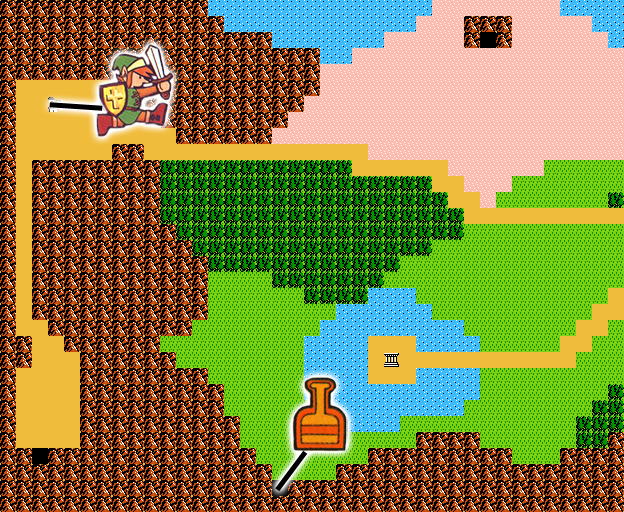
Our next destination is a cave outside of North Palace, along the southern mountain wall. Now that we have the Candle, we can see inside of it. Duck down to block the rocks of the Octoroks and kill them. Grab the Magic Container at the end of the cave. This does the same thing as a Heart Container, but it increases your magic gauge instead. Leave the cave and heard north to Tantari Desert.

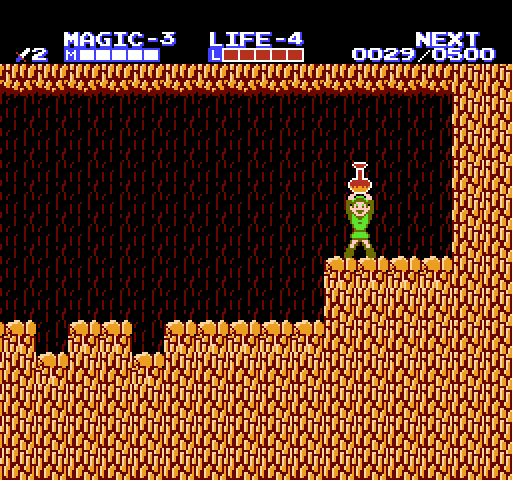
Enter the cave at the far north of the desert. Try to kill the Ache before crossing the lava pits; it can easily knock you in them if you aren’t careful. You’ll encounter a Red Goriya at the end, so jump over its boomerangs and slash at it like mad before they come back. Grab the Trophy and head west to the Town of Ruto.


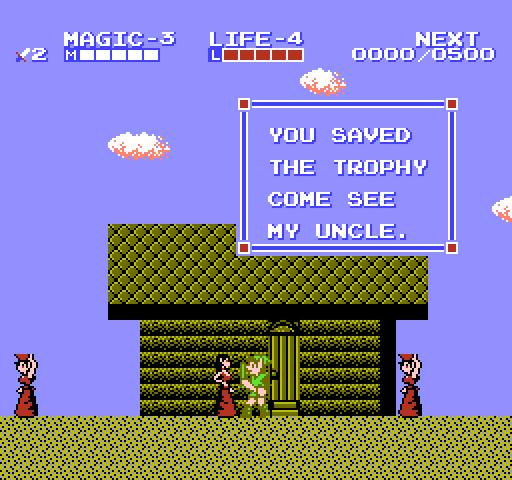
Walk into the house and go down the stairs. The Wise Man will give you a new Spell, Jump. This lets you jump basically twice as high, and is the least demanding to your magic gauge. It will be used a lot from this point on. When you’re done, make sure to recover any lost health and/or magic in town, and head down the path south.
Walk down the path and enter the cave. You won’t be able to see in here if you haven’t acquired the Candle from Parapa Palace. Also, the third and final action scene in the cave requires Jump at the end if you want to get to get on the high cliff. Keep going and leave the cave, and you’ll arrive in Midoro Swamp.
The palace is nearby, but we need to do several errands first before we enter it. Our first destination will be the woods, so start going east.
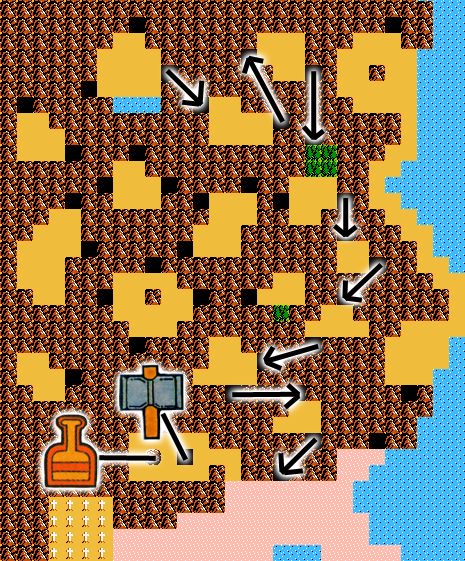
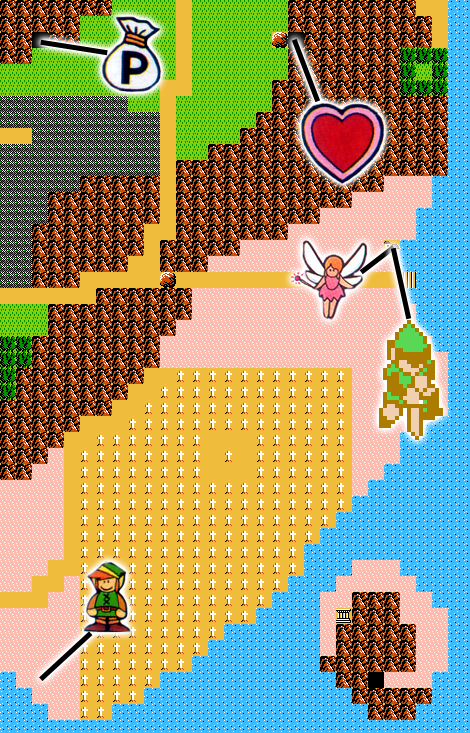
Use the map below to find out the exact spot on where Bagu’s house is.
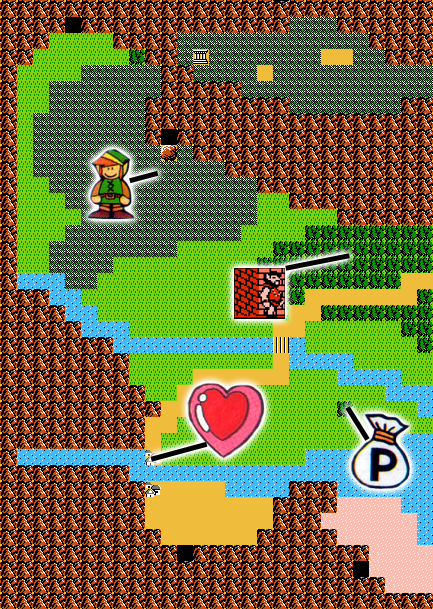
If you go left into the lone forest right after leaving the cave, you’ll find a fairy. Grab it if you need health (since it restores it completely). Go into the swamp and walk near the boulder. A note, you move a little slower in swampy areas. Six 1UPs, known as Link Dolls, reside in Hyrule, and you can only grab each one once. This will help us get through Death Mountain, especially for new players. Go east into the woods.


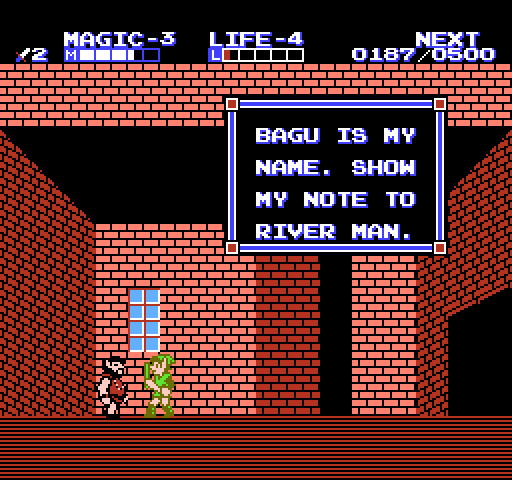
Go east into the woods and use the map to find Bagu’s house. Action scenes full of Megmats surround his house, though. Go inside his house and talk to him. With that done, go to the Water Town of Saria. On the way south, enter the lone forest and grab the Point Bag. Go east across the bridge and into the other lone forest for a fairy if needed. Enter Saria.
If you talk to the man as soon as you walk in, he’ll say that “Eyes of Ganon” are everywhere. When you talk to random people walking by, there is a chance that they will turn into a purple Ache and try to kill you. At the beginning of the second section of town, walk into the little house. Duck down under the table and press the button and you’ll find a Mirror. Return to the first section of town.


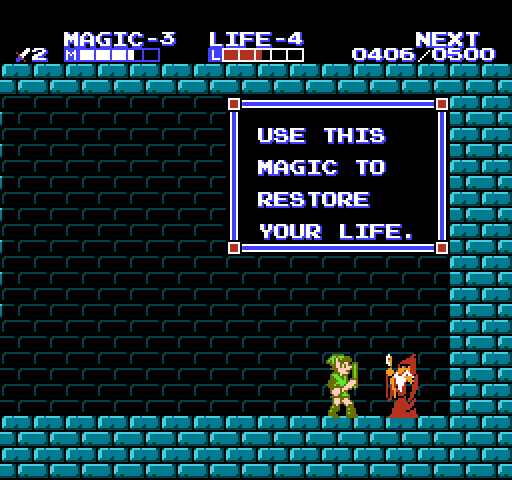
Talk to the lady in purple that comes out of her house and she’ll be happy that you found her mirror. Walk inside and talk to the Wise Man. He will give you a new Spell, Life. This Spell will restore a portion of your life if you have enough magic to use it. Go to the third section of town and go in the small house. The River Guard will let you pass since you know Bagu. Proceed across the new bridge and go into the cave to enter Death Mountain.
Use the map for directions so you don’t waste your time getting lost. This first cave is full of Bots and Red Moblins. Simply kill all of them and leave the cave. The next cave has two stair-like pillars full of Octoroks with a Blue Goriya in the middle. Leave the cave and keep going. This next cave is by far the most dangerous one. It also introduces the elevator, which will be featured in several rooms in Death Mountain. The Daira is a dangerous enemy; kill them instead of avoiding them. Leave the cave. Go into the cave on the right instead of the left. This one is full of Bago-Bagos and a bridge above lava. When you get out, enter the next cave.


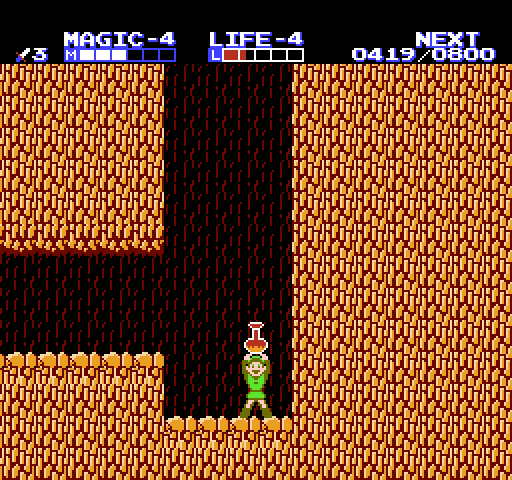
Enable the Jump Spell if you have enough Magic. Jump on the higher platforms and grab the Red Potion (it would be wise to use the Life Spell now). A Red Daira is below the platforms, and it throws axes unlike its orange counterpart. Leave the cave and go into the next one. Shortly after you enter you’ll be greeted by a Blue Goriya. There are also a few Aches in the room, so try to dodge them and keep moving. In the next cave you’ll encounter several Bits and two Orange Dairas. Leave this cave and go into the last one. This one seems mirrored to the last one, but it has Bots instead, and a Red Potion is at the bottom. Leave Death Mountain and go into Spectacle Rock.
In the first room you’ll encounter a Red Goriya and two Purple Aches, making this room very difficult. You’ll then encounter three Megmats and an Orange Daira in the room after that. Go down the elevator (going further leads to a dead-end full of Octoroks). Go left when you get down. This path leads to a dead-end full of Octoroks also, but it has a Red Potion. Go east and you’ll arrive in a room full of lava. Let the Myu jump into the lava since it can easily knock you in the lava. In the last room an Orange Daira will try to attack you, followed by a red one. Grab the Hammer, and leave.


After leaving Spectacle Rock, use the Hammer on the rock and go down the hole. Grab the second Magic Container and leave. Go all the way east to the coast and go into the cave that is furthest east. Do not fall into the lava for you will die, but since we have the Hammer now that won’t matter much anyway. Keep going north and go onto the bridge. Beware, there is a Red Daira on it. Thought they were all gone didn’t you? Anyway, once you get across you’ll end up in a graveyard.
Walk a little down the shoreline south and you’ll run into a scene with a Link Doll. Grab it and head north onto the path. Break the boulder and head west. Remember that cave in the swamp? We can enter it now with the Hammer. Go inside, but beware, there are a few Dairas in here. They won’t leave you alone, will they? At the end of it is the Water of Life. Go all the way back east, and go into the Town of Mido. We will find a new Spell, and Sword Technique as well.


The first open house you see contains a man that tells you to talk to Error in Ruto. Use the Jump Spell to get inside of the church when you walk by it. Talk to the Knight inside and he’ll give you a new Sword Technique, the Downward Thrust. Near the beginning of the second section of town, talk to the old lady in purple that comes out of her house. Give her the Water of Life and go inside. The Wise Man will give you a new Spell, Fairy. Make sure to recover your health and magic, and head northwest.


After going north, there are two caves. First go into the one on the right with the boulder in front of it. This cave is rather short, and it has a Heart Container at the end. Go out and go to the cave on the left this time. You’ll find a Point Bag with 200 points at the end. Go south onto the small trail squares in the middle of the swamp. You’ll find a Red Potion, which you can use to restore your life as well. Keep heading west through the swamp until you find Midoro Palace.


The battle scenes in the swamp can be annoying. Worst of all, you move about half as fast in swamp areas, making it even harder to reach the palace. It is okay if you don’t get to the palace with maximum health and such. If you are close to a level up, train in the swamp area a little. It is wise to enter the palace at the highest levels you can muster right now. Enter Midoro Palace.
2.2 Midoro Palace
(Click image below to view a full-sized map of the Palace)

Slash the statue to get either a Red Potion or a Iron Knuckle to fight. Our first means of business is to get two Keys. Go all the way down on the elevator and go right. Destroy the Bots and go up the stairs made of blocks. The statue on the wall shoots beams at you, so watch out. The next room has several platforms in the air and two Mace Throwers. When you get to the end of the room, grab the Key and backtrack up one floor on the elevator. Go through the left passage.


Go through the room while killing the Ropes. A Bubble is in here, but have no fear. Now that you have a stronger sword and the Downward Thrust, you can kill them with ease. Jump and use it on them and hold down so Link will kill them by himself. In this room, you’ll encounter some Bots and two Blue Stalfos. Duck down and slash their legs to hurt them, and grab the Key at the end. Go up one more floor and take the left path once again.


The path is filled with Bots and Dragon Heads. Eventually you’ll reach a room filled with lava and bridges of blocks. A Key is on one of these bridges, so grab it. Kill the Bots before they have a chance to knock you into the lava. Jump across the gap with the bot dripper at the right time, it is very easy to die there. In this next room, there are two Orange Iron Knuckles and a Bubble. Use jumping and slashing to easily kill the Iron Knuckles. Go down the stairs and slash at the statue on the wall to get a Red Potion.
Go down the elevator and take the left passage. Go through the locked door and continue to head west. Avoid the falling blocks in this room and try to grab the Point Bag if you can. If you missed it, that’s okay. You’ll have another chance to get it in a bit. Use Jump and slash the statue to get a Red Potion if needed. This room contains two Red Iron Knuckles. Red ones are stronger, but not much harder. Go through the locked door and get the Handy Glove!


Backtrack all the way to the elevator. In the room with the falling blocks, grab the Point Bag if you didn’t before. Go down the elevator, but upon entering the new room watch out for the Moa flying around. Destroy the two Orange Iron Knuckles and go into the next room. This room has several Stalfos in it along with statues shooting beams at you from the walls. Keep going east (don’t go down the elevator yet). You’ll encounter Tinsuits in this long hallway, and a Mace Thrower at the end. Grab the last Key and go down the elevator we just passed.
Climb the stairs of blocks and defeat the Bots and Mace Thrower. The Point Bag here is very risky, but can be gotten easily with a Downward Thrust.
The path up ahead contains Tinsuits, a Blue Stalfos, one Orange Iron Knuckle and two Red Iron Knuckles. As usual, use jumping and slashing to kill the Iron Knuckles. Prepare to fight the palace boss, Helmethead.
Enable Shield and keep attacking his head. After his two helmets come off it will expose his real face. However, the other helmets will begin to fly around and shoot at you once they come off his head. This will distract you from hitting Helmethead. Keep attacking his head until he dies.


Snag the Key Helmethead leaves behind and go unlock the door. Place the Crystal on the statue as usual and you will get a free level up. At this point I hope you have at least a Level 3 on all three categories at least. Leveling up will be harder later in the game. Continue to the next chapter, Island Palace!
