- Chapter 1 – Zelda’s Rescue
- Chapter 2 – Eastern Palace
- Chapter 3 – Desert Palace
- Chapter 4 – Tower of Hera
- Chapter 5 – Hyrule Castle Tower
- Chapter 6 – Dark Palace
- Chapter 7 – Swamp Palace
- Chapter 8 – Skull Woods
- Chapter 9 – Gargoyle’s Domain
- Chapter 10 – Ice Palace
- Chapter 11 – Misery Mire
- Chapter 12 – Turtle Rock
- Chapter 13 – Ganon’s Tower
13.1 Reaching the Tower
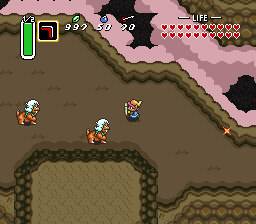
After completing Turtle Rock, it is now time to take on Ganon’s Tower. Just walk to the left two screens, defeating or avoiding the enemy Lynels along the way. Ganon’s Tower is located in the Dark World, corresponding to location of the Tower of Hera in the Light World.

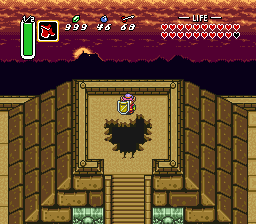
Walk up to the tower and the seven maidens will break the seal to the tower, revealing a staircase and allowing Link to enter the final dungeon.

13.2 Ganon's Tower
During this first portion of Ganon’s Tower, there are two distinctive routes that Link can take, both which end up at the same location. Link can travel down the steps at the top-left or the top-right of this room, but only needs to take 1 of the 2 paths. This guide will cover the easier of the two, so take the staircase at the top-left of the room.


There is a key on top of one of the torches in this room, but it isn’t actually needed. Simply ignore it and head left a screen. Lift the pot at the southeast corner of the room to find a small key.


There are four moles in this room that Link can hammer. Hit two of them so that you can push the central block, causing the door to open. Head onward to the left a screen.
Pull out the Hookshot and use it to reach the platform in the center of the room, and then once again to reach the southwest platform, and then to the eastern platform. Use the Hookshot again to reach the larger platform at the south end of the room.


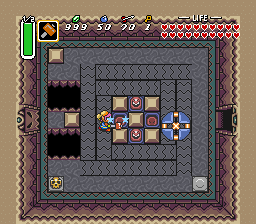
The locked door to the right just leads to the Dungeon Map, so you can ignore it. Hit the crystal switch to lower the blue blocks. Use the Cane of Somaria to place a red block right next to the crystal switch. Then walk to the south end of the room and use the cane a second time, causing the block to burst, hitting the crystal switch and raising the blue blocks. Continue down to the next room.


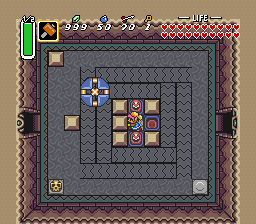
There is a small key at the southeast part of this room, so grab it if you need one. Use the Cane of Somaria to place a block down to the left of the crystal switch. Walk to either the northeast or southeast part of the room and use the cane again, causing the blue blocks to lower. Use the small key and head through to the next room.


Hit the crystal switch and then carefully make your way over to the warp portal on the right side of the room. Carefully walk through this room and you’ll find a lone block on the left side. Push it to the left, causing a treasure chest to appear on the other side of the gap. Hookshot across and open it to get a small key. Use the key to head through the nearby locked door.


There are a series of warp tiles in this room and each time you’ll have a few options as to which one you want to step on. From the entrance of this room, step on the tiles in the following order.


-Step on the warp tile to the right.
-Step on the warp tile at the bottom-left.
-Step on the warp tile at the bottom-left of the room.


Then walk to the northeast corner of the room and step on the warp tile. Step onto the adjacent warp tile and then back your way east a screen.


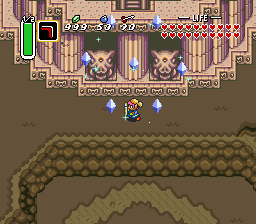
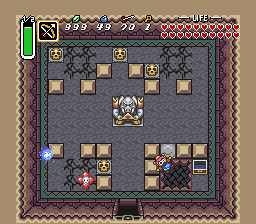
Here you will find yourself in a large open room. NOTE: If from the dungeon entrance your initially went down the staircase to the top-right, you would have ended up entering this room from the right. Make your way to the top of the room and you’ll find two skull pots. ONLY lift the top of the two pots.


Now make your way to the top of the screen, but don’t go through the door. Look to the right and you’ll find a torch. Use the fire rod to light the torch and a pathway will be illuminated. You can then use the hookshot on the skull pot below to quickly reach the pathway. Quickly maneuver through the room before the torch goes out. If the torch does go out, you can always use the Ether Medallion to temporarily see the pathway. Once you reach the end of the pathway, head up through the doorway.


Lift the pot at the southeast part of the room and open the treasure chest to get some arrows. Place a bomb on the cracked floor to blow open a hole in the ground and then drop down to the floor below.

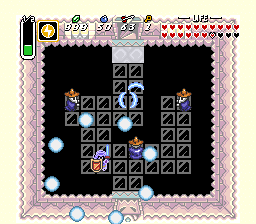
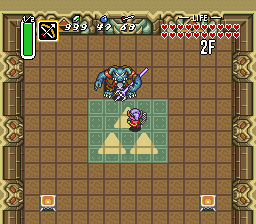
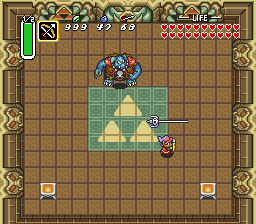
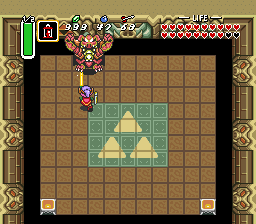
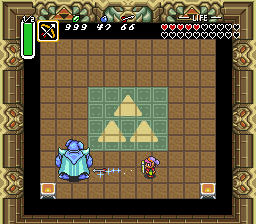
Here you will fight the Armos Knights once again, but this time the ground floor is solid ice, making it slippery to maneuver around. If you have the Silver Arrows, a single shot will defeat each of the knights. After defeating them, head up through the door that opens.


Open the treasure chests here to get some bombs, arrows, and the Big Key. Walk down and to the left a screen. You can dash into or blowup the northern wall to find a fairy fountain, but then head up the steps to reach the higher floor.


Push the block out of the way and open the treasure chest to get the Red Mail, which will lower the amount of damage that Link takes. Walk up through the door to get back to an earlier room and then climb the steps to get back to near the dungeon entrance.


With the big key in hand, climb the steps and head up to the floor above. Use the hookshot or an item to hit the crystal switch and make your way through this room. Push the block at the top-left portion of the room to open the door and then head down a screen.


In this room you will need to use arrows to defeat the two goriyas. The blade traps could get in your way so if it helps, you can push the stone statue to block them off. Shoot both goriyas with arrows and head through the door that opens up.


Defeat two more goriyas and then continue up two screens. Climb down the steps and head up where there are two hidden eyegores. Hit the crystal switch and then defeat the enemies. Lift the pot to find a floor switch, which will open the door. Backtrack to the top part of the room and head right a screen.


In this room you can use the Magic Cape to safely walk by, or just carefully dodge the cannon balls that are shot your way. At the right side of this room there is a secret room beyond the cracked wall. In order to make it across, Link must stand directly south of the two blocks on the right, facing upward. Use the pegasus boots to dash into the blocks, sending Link flying across the gap. Place a bomb to blowup the wall, revealing a fairy fountain. Hookshot back across the gap and head up the stairs.


Defeat the four enemies in this room and then continue onward. Using bombos is a good way to defeat them without taking any damage. In the next room there are three more enemies, so take care of them as well and continue to the next room.


Three more enemies, along with a pair of beamos. Defeat them and head down through to the next room. This time there is some ice, but just defeat the two enemies and continue to the next room. Defeat the enemies here and head left a screen. Continue left another screen and you’ll face some familiar foes in the form of Lanmolas.


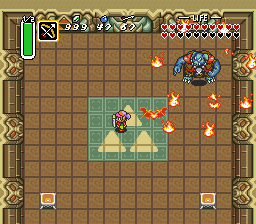
The Lanmolas battle is just as it was a long time ago, except there is now a statue in the room as well that will shot fireballs at you. If you have the golden sword, two sword slashes will defeat each of the enemies. Alternatively, a single silver arrow will defeat them. Walk up a screen and then up to the next floor.


There are three wizzrobes in this room, as well as an invisible pathway. When the wizzrobes appear, use the ether medallion to defeat them all at once, as well as to temporarily illuminate the path. Carefully walk south through the door.

Run through this room and head up along the right side. There are more wizzrobes here and the best bet is to once again use the ether medallion. Use the pegasus boots and dash up to the top of the room before heading east a screen.


The first thing to do in this room is to walk around and lift all the skull pots so they aren’t in your way, and so that you can also collect some magic. You’ll have to light all four of the torches in this room and then quickly run to the door at the south end of the room. I would suggest starting with the top one and then moving clockwise around the room. You can get it done with the lamp, but the fire rod does it make it much easier.


In the next room be sure to lift the pot at the top-right to fill up your magic and then carefully climb the steps. On the higher floor you’ll have to light the torches in the four corners of the room. I would suggest using the lamp to first light the bottom-right and then the bottom-left torches. Then circle back to the center of the room and use the fire rod to light the final two. You must do this quickly as the floor will collapse after a period of time. With all four torches lit, head up through the door.


Defeat the two enemies here and one of them will drop a small key. You can open the treasure chests here if needed to replenish your bombs and arrows. There is a crack against the southern wall and you’ll need to bomb it, while avoid the blade traps. A well timed throw will cause the bomb to move along the moving platform and blow open the wall.


Hit the crystal switches to reach the treasure chest in the center of the room which contains a small key. Use the key on the locked door and continue onward.


Jump off the ledge and battle with Moldorm once again. If you have the golden sword, it will only take two sword slashes to defeat the enemy. Just like before though, you can be knocked door to the lower level. If that happens just climb the steps at the top-right of the room and repeat the process. With Moldorm defeated, use the hookshot to reach the treasure chest at the south end of the room. Push the blocks out of the way and head left a screen.


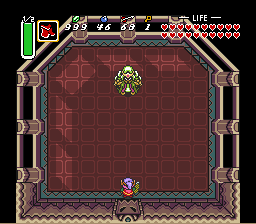
This room has moving platforms, blade traps, and bumpers. Your best bet is to use the magic cape and quickly run through it. At the top of the room climb the steps to reach the higher floor. Walk left and head through the locked door to take on the boss, Aghanim.


The battle with Aghanim is almost identical to the first fight. The only different is that Aghanim will split into three. However, the darker of the three shadows indicates which is the real Aghanim. Just like before you need to repel the blue orb back towards Aghanim to harm him.

While the other two forms of Aghanim are fake, you can hit their blue orbs in the direction of Aghanim to harm him as well. Just like before, the real Aghanim will occasionally move to the top-center of the room and aim downward, indicating he is about to shoot lightening.


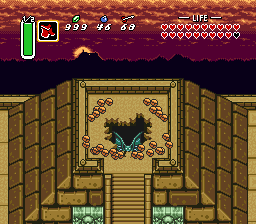
After just five hits, Aghanim will be defeated and Ganon will appear. Link will then use his bird and will be taken to the Pyramid of Power where a large hole will be created.

13.3 Final Battle
Before taking on the final battle, Link should have full hearts and full magic. You should also acquire both the golden sword and silver arrows to make the battle considerably easier. It’s also a good idea to fill your bottles up with blue potion, or at least a few fairies. Once you are ready to go, drop down into the Pyramid to take on Ganon.
Immediately when you fall down the hole, strike Ganon with a sword slash before he starts to talk. During the early part of the battle Ganon will swing his trident around and then toss it to other parts of the room. He’ll then teleport and catch the trident, repeating the process. During this process just try to get enough sword slashes in while avoiding the Trident.

After Link has hit Ganon enough times, Ganon will start to summon Blazing Bats and will send them flying out towards Link. In between attacks keep trying to sneak in sword slashes. Repeat this process a number of times until Ganon has moved onto the next phase.


Ganon will eventually start to summon a blazing bat immediately, sending it in a direct line towards Link. After Ganon teleports around the room, try to get an initial slash in with your sword. Hitting him before he summons a blazing bat will cause him to leap into the air and pound the ground. This will cause the top portion of the room to collapse. Repeat this process four times, and after four successfully hits, Ganon will have turned the battlefield into an island.

Right after the fourth hit, Ganon will cause the two torches to go out. Throughout the rest of the battle Link will need to use the lamp or fire rod to light up the two torches in order to see Ganon. NOTE: after Ganon has stomped on the ground for the fourth time, the bottom-left torch will go out first. If Link is quick enough and re-lights the bottom-left torch BEFORE the bottom-right torch goes out, this will cause the bottom-right torch to stay lit for the remainder of the battle. This makes is considerably easier as Link will only need to light a single torch.

During this final phase of the battle, Link will first need to light the two torches. With the torches lit, Link will be able to deliver a sword slash to Ganon, causing him to turn blue. Pull out your silver arrows and shoot Ganon. Repeat this process until you have hit Ganon four times and he has been defeated.

- Chapter 1 – Zelda’s Rescue
- Chapter 2 – Eastern Palace
- Chapter 3 – Desert Palace
- Chapter 4 – Tower of Hera
- Chapter 5 – Hyrule Castle Tower
- Chapter 6 – Dark Palace
- Chapter 7 – Swamp Palace
- Chapter 8 – Skull Woods
- Chapter 9 – Gargoyle’s Domain
- Chapter 10 – Ice Palace
- Chapter 11 – Misery Mire
- Chapter 12 – Turtle Rock
- Chapter 13 – Ganon’s Tower
