- Chapter 1 – Great Plateau
- Chapter 2 – Dueling Peaks
- Chapter 3 – Hateno Village
- Chapter 4 – Zora’s Domain
- Chapter 5 – Vah Ruta Dungeon
- Chapter 6 – Goron City
- Chapter 7 – Vah Rudania Dungeon
- Chapter 8 – Gerudo Town
- 8.1 – Wasteland Tower
- 8.2 – Gerudo Canyon Stable
- 8.3 – Kara Kara Bazaar
- 8.4 – Gerudo Town
- 8.5 – Karusa Valley
- 8.6 – Gerudo Desert
- Chapter 9 – Vah Naboris Dungeon
- Chapter 10 – Rito Village
- Chapter 11 – Vah Medoh Dungeon
- Chapter 12 – Captured Memories
- Chapter 13 – The Master Sword
- Chapter 14 – Hyrule Castle
- Chapter 15 – The Champions’ Ballad
8.1 Wasteland Tower
Our next destination is far southwest portion of the map where we will meet with the Gerudo Tribe. Before heading directly to the Gerudo Town, we want to uncover the Wasteland Tower. There are a variety of ways to reach this tower, none of which I find particularly easy. This method is my suggested path. Warp on over to the Keh Namut Shrine, located at the west end of the Great Plateau.
From here, leap off of the Great Plateau heading westward. While you are paragliding down, you will see what is a resemblance of a road. Glide down towards this direction. Once you arrive on the road, you can head north to a bridge, but that takes you towards Central Hyrule. Right near the bridge though, you’ll find some Bokoblins that are riding horses. You can defeat the bokoblin and grab a horse, making this next part a bit faster.
You want to follow the path southward. The path kind of blends in with your surroundings and since we don’t have a map, it can be quite easy to get off track in this initial portion. Fortunately this clears up in just a bit. Make your way southwestward as you follow the path. You might reach a sign for the Gerudo Canyon Stable, advising you to stop by before entering the desert. We will make note of that.


Continue in this direction and if you turn to the left, you will see a shrine in the distance. I suggest stopping off at the Jee Noh Shrine to open up the save point.
From the Shrine, it’s a fairly direct path northward. At this point, the path turns more into a valley, sitting between two much larger mountain ranges. The Sheikah Tower is on top of the mountain to the west, but for now there is no real easy way to get to it, unless you have some significant Stamina upgrades. Continue following the path northward.
As you travel northward, you’ll see these small pillars that are just taller than Link and they have a yellow light on top of them. There is one with a man standing next to it and it will trigger the start of a Side Quest. Further along you’ll find a second one on the left, and if you look up, there is a series of platforms that allow you to scale the mountain. Let’s begin our climb up to the tower.


The platforms are fairly straight forward so just follow along the linear path. You’ll eventually stop going up and you’ll have to run on flat planks. Further along you’ll find a ladder, so climb on up. Continue along the series of platforms, climbing ladders as they appear and you’ll eventually make it up to the Plateau. You can now see the tower in the distance and it’s not that far from your current location.


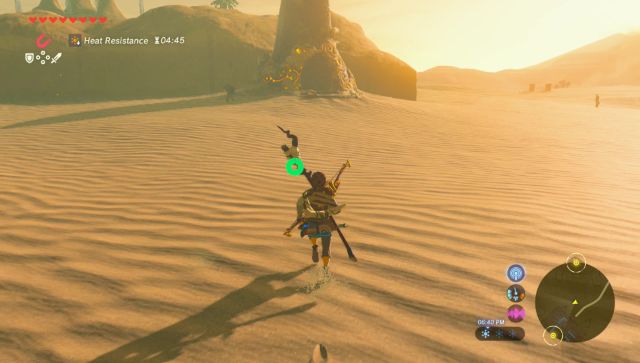
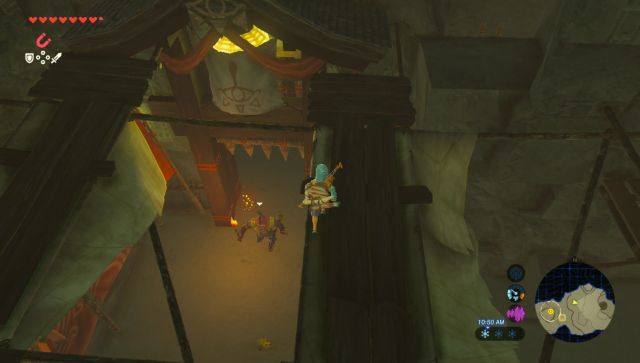
At this point there is a curvy road that somewhat leads up to the tower. However, none of the cliffs are particularly high in this area and you can just freeball your way to the tower. Along the way, if you run past some large rocks, you might trigger a battle with a Stone Talus boss. I would recommend just avoiding him if possible by running away. Continue scaling the plateau and you’ll run into a series of Moblin strongholds. Just avoid them and you’ll finally make your way up to the Wasteland Tower.
The water that surrounds the tower is hazardous and if Link falls into it, he will take damage and won’t be able to progress. The trick to reaching this tower is to use your Cryonis ability. You can make a series of ice blocks and then jump across from one to the next as you make your way to the tower. However, even then once you reach the tower, this one does not have any safe platforms that are low enough for you to climb. If you have a couple of Stamina boosts, you should be able to make it no problem.


If you don’t have any stamina boosts, no worries. Notice the large rock tower, right next to the Sheikah Tower? You want to make a series of ice blocks right up to that tower. Then jump over to the rock tower and climb to its peak. At this point you can rest up so that your stamina regenerates. From here you can then leap over to the Sheikah Tower and climb your way up.


8.2 Gerudo Canyon Stable
Our next destination is over at the Gerudo Canyon Stable, located just northwest of the Wasteland Tower. The Stable is located on the main road, just before reaching the desert to the West. From the higher vantage point, it is very easy to just paraglide in that direction.
At this point you can talk to many of the people that are around this area and it will trigger multiple Side Quests. However, our main purpose here is to talk to Maypin. Maypin can be seen walking around with a horse with a punch of stuff on its back.
Maypin is selling Warm Darner and Cold Darner. These Dragonflies can be cooked to make an elixir that can resist the cold and resist the heat, respectively. Maypin is selling three of each at 10 rupees a pop, so I would suggest buying at least 1 of each, if not more. You can then use the nearby pot to cook in to create the elixir.


As you travel through the Gerudo Desert up ahead, it gets very hot during the day and very cold at night, so you will need these elixirs, otherwise you will lose health.
8.3 Kara Kara Bazaar
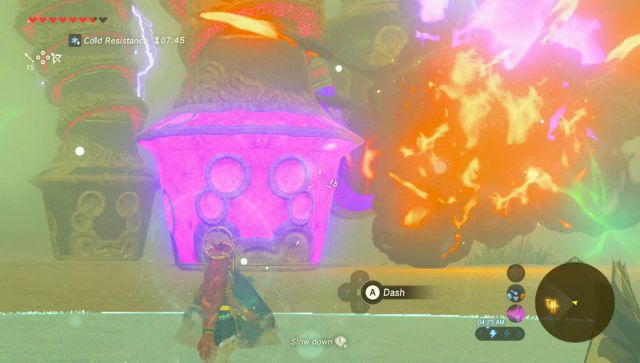
From the Gerudo Canyon Stable, follow the path westward to reach the Gerudo Desert Gateway. From there continue westward along the path and as you draw near the Kara Kara Bazaar, a scene will trigger showcasing the Divine Beast of this region.


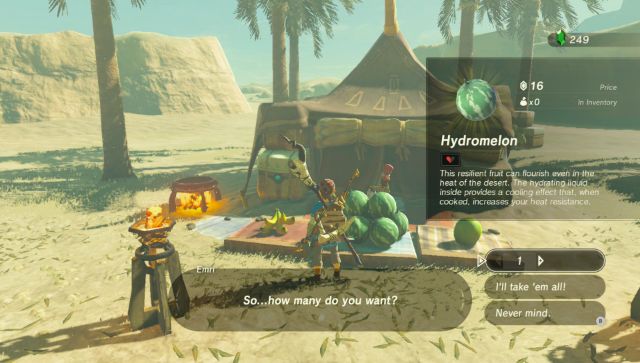
There are a number of vendors here at the Bazaar, most notably there is a Gerudo that sells Hydromelon. You can cook these melons and use them to restore health, as well as give you some heat resistance. Some of these melons can be found within the desert itself. You can also talk to Beedle here and he’ll give you an Ancient Arrow, which can be used against the massive Guardians. Looking around as you’d like and then travel westward onto Gerudo Town.
Travel westward and right near the entrance to Gerudo Town is the Daqo Chisay Shrine. I recommended activating this warp location as we will need to travel back to Gerudo Town shortly.
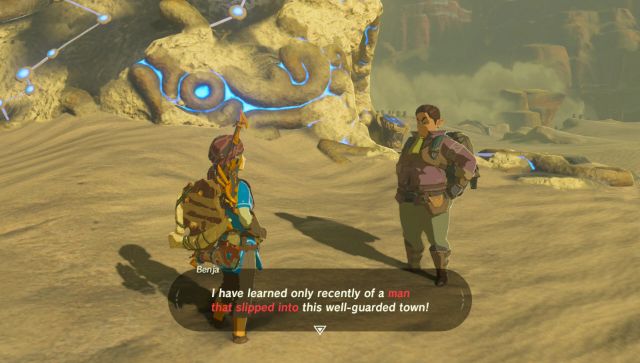
If you try to enter Gerudo Town, the guards will block your path as you are a voe, which is the Gerudo word for male. Only females are allowed into Gerudo Town. If you run north to right where the Shrine is, you will see a man by the name of Benja. He tells you a story of a man who was able to successfully sneak into Gerudo Town. He mentions that the man can be found somewhere between Gerudo Town and Kara Kara Bazaar.
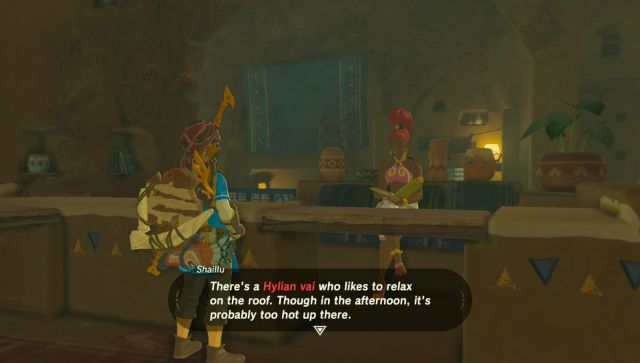
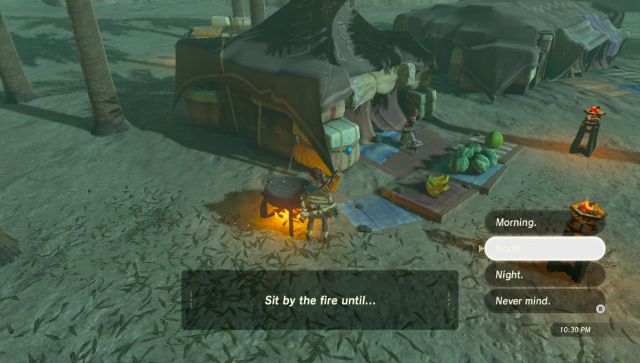
Make the trip back eastward to Kara Kara Bazaar. You can enter the large building and speak with some of the Gerudo here. You will find that a mysterious man can be seen on the roof during the daytime. In order to assure he’s there, walk over to the small fire and sit down. You can pass time until noon. Once it is noon, return to the large building and climb on up. Climb the large ladder to get to the rooftop and you’ll find the man.
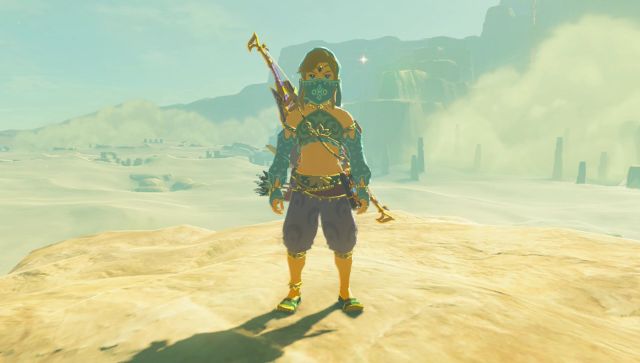
Run over and speak with Vilia, who you find is dressed as a Gerudo woman, but is actually a man. For 600 rupees, he will be willing to sell you an outfit to make it look like you are a woman as well. If you don’t have the rupees right now, I suggest dropping down and speaking with Beedle. You can sell him some of the items in your inventory to raise the funds. Climb back up and purchase the set for 600 rupees.


8.4 Gerudo Town
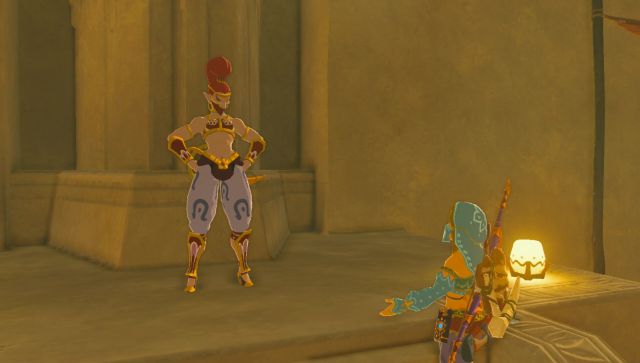
Warp back over to the shrine just outside of Gerudo Town. As long as you are wearing your new outfit, you will be able to walk right into Gerudo Town. You can run around town, talking to the many townsfolk if you’d like, but then head up the stairs. Here you will meet up with Riju, the Gerudo Chief.


After talking with Riju, she will task you with finding the stolen Thunder Helm. With the Thunder Helm, Link will be able to approach Naboris. They point you in the direction of the barracks to meet up with Captain Teake.
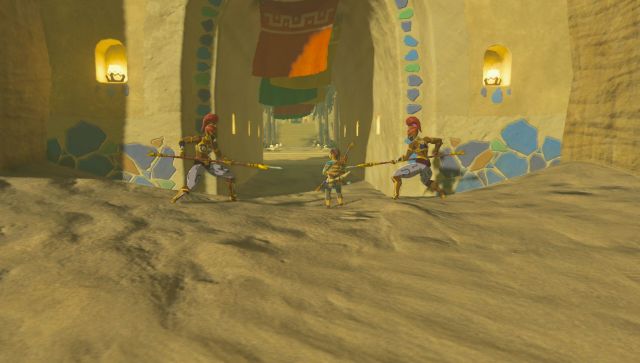
Walk to the adjacent room and you’ll see three three Gerudo guards. Walk up the steps and speak with Teake. She mentions that Karusa Valley is the location of the thieves that stole the helm. This new location will be marked on your map. You can then speak with the guards and they suggest taking a sand seal with you.

Return to the entrance of Gerudo Town, and right as you enter, take the first left. Here are a few Sand Seals and, if you jump over to the other side, you can talk to the Gerudo here to rent out a seal. It will cost 20 rupees to rent, and 50 rupees if you also need a shield. Go ahead and rent out the seal and then you’ll appear back outside on the desert. Keep an eye out on the time of day and temperature. At night time you will need to drink an elixir, otherwise you will take damage.
8.5 Karusa Valley
While riding the Sand Seal, travel northwest towards the Karusa Valley. The path is rather uneventful unless you purposely take a detour. As you get closer to the valley rocks will start to fall down from above, so be careful. The sand will end at some point, so you’ll have to get up and walk the rest of the way. The good news is once you get out of the sand, the temperature will return to normal, so you wont have to worry about any elixirs.


As you scale the area, you will encounter a number of Yiga warriors, the first of which is an archer. I personally found my Thunderblade to be more effective against these guys, so if you have an electric weapons, go for it. The Yiga Archer will disappear and reappear further away, trying to snipe you with its bow. You can either attack it with your bow, or try to run up whenever you see the red ball where he is going to warp to.

You will then encounter three more Yiga warriors, so defeat them as they come and then run ahead. You will come to a room that has a bunch of torches and curtains in all directions. You can use a torch and a flame to light the curtains on fire, allowing you to access what is behind them. Some of them have goodies, while other do not. The correct one that you need to burn down is the third from the right.
Climb the steps behind the curtain and you’ll arrive at the Yiga Clan Hideout. Imprisoned in the distance is a Gerudo by the name of Barta. Talk to her and she’ll give you the clue that these Yiga sure love their bananas. There are some loose bananas right next to the cell.


This next portion will require a lot of usage of stealth. You will see the Yiga patrolling the next area as he walks around the block. This first one you can simply crouch and walk around the block in a clockwise fashion. Just be sure that you aren’t in his line of sight.


The second will stand stationary right in front of the exit. He might partially see you as crawl forward, causing him to investigate. If not, just drop some bananas and he’ll go for them. Sneak around the side and run through the exit when he’s not looking.


Run straight ahead up the large ladder and then down the corridor to find all the bananas that you’d ever want in your life. Collect all the mighty bananas and open the treasure chest here to get some Topaz. Now run back and drop down the ladder. This next area has several Yiga guards and the first one to the right is one that we don’t really want to deal with at all. As you sneak in, the Yiga guard on the left will be patrolling around a pillar. Fortunately there is a block right here that you can use for cover.


Drop some bananas and the guard will come running over. Sneak around the block and then make your way over to the pillar that he was patrolling. Just around the pillar there is some Opal, Amber, Topaz, and even some Ruby. Sneak around the short wall where the Ruby is located and you’ll find another Yiga guard.


You’ll want to drop some bananas here to cause the Yiga guard to run on over. When it is clear, bolt for the ladder that is in the corner of the room. Sneak around on the rafters to find some bananas, as well as a Silver Rupee that is in the treasure chest.


The last guard in this room is just standing stationary in front of the exit. From the rafters, drop a banana down from a bit in front of him, causing him to run and get it. When he is distracted, drop off the rafters behind him and then quickly run into the next room.

In the next room you can open up the treasure chest for more bananas. There are also several treasure chests slightly buried beneath the ground. You can use your Magnesis ability to pull them up to the surface. You’ll find a Ruby and two Topaz. Keep using your Magnesis and you’ll discover there is a hidden wall. Pull the wall to its side and run onward to the next area.


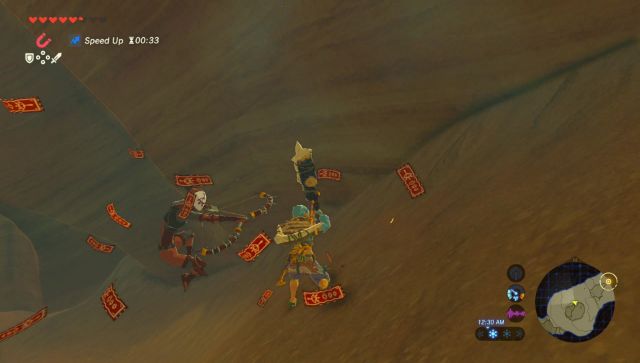
Here you will find Master Kohga, Leader of the Yiga Clan and it will trigger a boss battle. Fortunately this one is not that hard at all, and I actually find this battle easier than fighting even a regular Yiga Guard. During the first phase, Master Kohga will create a boulder and toss it towards you.
While he is holding the boulder over his head, he leaves himself vulnerable to an attack. You can’t get right up to him, but you can hit him with a projectile. Shoot him with an arrow, and if you don’t have any arrows, just toss a bomb and detonate it. Hitting him will cause him to drop the boulder on himself, leaving him stunned. Run over and deliver some sword slashes.


After several hits, Master Kohga will warp over to the center of the room, just above the pit. This time Kohga will summon two balls at once, but not much else has changed. You want to wait until one of the balls is directly above him and then hit him with an arrow or detonate a bomb. This will cause the ball to fall on him and he will be launched over to the surface where you can deliver more sword slashes.


The final phase of the battle will have Master Koha summon a large ball, controlling it with some sort of magnetic power. Fortunately it is no match for your own Magnesis ability. Use Magnesis and send the ball crashing right back towards Master Kohga. Repeat this until Kohga has been defeated.


That is about all there is to this battle. He will try to summon one last attack, but it will backfire, sending him into the pit below. A treasure chest will appear, so open it up to get the Thunder Helm.
8.6 Gerudo Desert
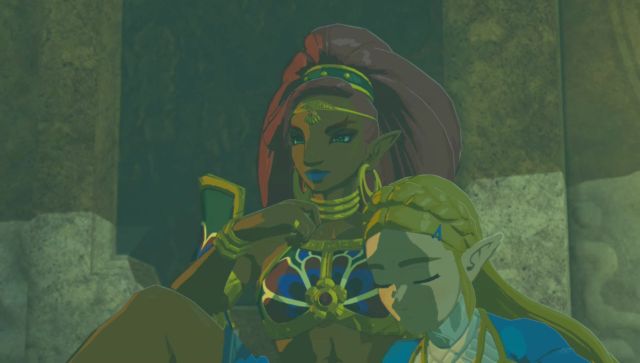
Once you acquire the Thunder Helm, warp back to the shrine by Gerudo Town and go and speak with Riju. She is no longer in her throne room, but she is now upstairs. Climb the steps and it will trigger a cutscene. When Riju puts on the Thunder Helm, it restores Link’s memory, and he remembers a time where he, Princess Zelda, and the Gerudo Champion Urbosa are atop the Divine Beast. After the scene, Riju will then ask you to meet her at the lookout post just south of town.

Before heading over, glance at the time of day. Again, if it is cold outside you will need a proper elixir. Make your way over to the lookout post and climb the ladder to reach Riju. She will gift you with some Bomb Arrows, as they will be needed to take on the Divine Beast. Riji will then appear with her Sand Seal and after a cut-scene, Riji and Link will begin their journey to the beast.


The first part of the battle is simply just getting to the Divine Beast Vah Naboris. While riding your sand seal, just follow Riji. Don’t bother trying to gain speed, as you’ll just jump ahead and it will disorient you. You want to try to stay within the protective circle as best as possible, as that will keep you immune to the Divine Beasts electric attack.


The actual battle with the beast is not that difficult at all. You’ll have to use your newly acquired bomb arrows and shoot the beasts legs. You will have to hit each leg twice. After a grand total of eight hits, the beast will drop the ground. A scene will play showing Link boarding the Divine Beast, just as it begins to get back up.