Link's Awakening Bosses
This is a list of bosses found in Link's Awakening.
Bosses
Moldorm
- Main article: Moldorm (Link's Awakening)
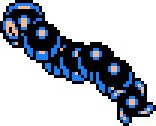
Molodrm is the boss of the first dungeon of Link's Awakening, Tail Cave. Much like the encounter in A Link to the Past, Molodorm moves around the arena, hurting Link if he comes into contact with him or knocking him into the gaps on the left and right. Four sword slashes to his tail defeats Molodorm.
Genie
- Main article: Genie
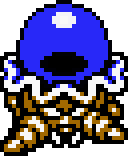
Genie is the boss of the second dungeon, Bottle Grotto. He starts the fight by hopping around in his bottle. He then rises out of his bottle and throws fireballs in Link's direction. Once he is done he returns to his bottle, at which point the bottle can be stunned with the sword and thrown with the Power Bracelet. Once this is done three times, his bottle breaks and he is open to a sword slash. After each hit, he splits into a double image of himself, spinning around the room and throwing a fireball when he becomes whole, at which point he can be hit again. Repeat until he is defeated.
Slime Eye
- Main article: Slime Eye
Slime Eye is the boss of the third dungeon, Key Cavern. When Link enters the room, Slime Eye taunts Link from an unseen location on the ceiling. Once Link rams the wall with the Pegasus Boots, Slime Eye falls to the ground and is open to attack. He can be separated with the sword, and then split in two with the Pegasus Boots once both Slime eyes are only held by a thread, leaving both Slime Eyes open to sword slashes. After each it, he will retreat to the ceiling and attempt to fall on Link, which can stun him unless he jumps in time with Roc's Feather. After enough slashes, Slime Eye will be defeated.
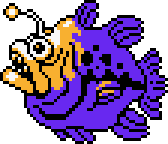
Angler Fish
- Main article: Angler Fish (Link's Awakening)
Angler Fish is the boss of the fourth dungeon, Angler's Tunnel. This fight takes place in a side-scrolling view rather than the usual top-down view. Angler Fish moves up and down, occasionally sending smaller fish at Link or ramming the left wall, causing rocks to fall. Enough sword slashes to the light hanging in front of his head and Angler Fish is defeated.
Slime Eel
- Main article: Slime Eel
Slime Eel is the boss of the fifth dungeon, Catfish's Maw. He begins the fight by breaking the middle of the floor with his tail and breaks four holes in the wall, one in each corner. He then proceeds to spin his tail around the room, which must be dodged or jumped over. He pokes his head out of a random hole, which can be grabbed using the Hookshot to pull him out and expose his heart, which can be slashed at for damage as he slowly recedes back into the hole. Slash his heart enough to defeat him.
Facade
- Main article: Facade
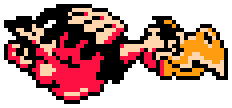
Facade is the boss of the sixth dungeon, Face Shrine. Throughout the fight, tiles and pots will fly at you, which must be avoided, and later holes will open up which Link can fall into unless he moves out of the way. Whenever the face appears, place or throw a bomb on it to damage him. Repeat until he is defeated.
Evil Eagle
- Main article: Evil Eagle
Evil Eagle is the boss of the seventh dungeon, Eagle's Tower. He is fought in a side-scrolling view on the top of a tower, which Link must avoid falling off. He flaps his wings to create wind and shoot feathers, which Link can block using the Mirror Shield. When he flies at or above Link, hit his beak using the Hookshot or sword until he is defeated.
Hot Head
- Main article: Hot Head
Hot Head is the boss of the eighth dungeon, Turtle Rock. Most of the room is filled with lava. He jumps out of the lava, creating four fireballs which travel in multiple diagonal directions when he lands. When he is out of the lava, a shot from the Magic Rod will remove the fire from his face, causing him to bounce around the room at which point he can be hit more times before falling back into the lava. Enough hits and the mask will break. Keep on hitting him until he is defeated.
Giant Gel
- Main article: Shadow Nightmares#Giant Gel
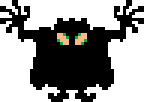
Giant Gel is the first of the Shadow Nightmares. Like the normal enemy Gel, it hops around the room, damaging Link if it comes in contact with him. The only way to damage it is with Magic Powder.
Agahnim's Shadow
- Main article: Shadow Nightmares#Agahnim's Shadow
The second shadow acts like Agahnim from A Link to the Past. It teleports to certain locations. It will then shoot one of two projectiles: a large fireball, or a smaller x-shaped projectile, which must be avoided as it can't be hit or deflected. In order to damage it, Link must deflect the large fireball back at it. Repeat enough times and it will transform.
Moldorm's Shadow
- Main article: Shadow Nightmares#Moldorm's Shadow
The third shadow resembles the Moldorm fight fought in Tail Cave at the beginning of the game, only without the gap to fall into. Much like the earlier fight, slash the tail enough times with your sword and it will transform.
Shadow of Ganon
- Main article: Shadow Nightmares#Shadow of Ganon
The fourth shadow is similar to the first part of the Ganon fight from A Link to the Past. It spins its Trident around, summoning Blazing Bats which it sends at Link before throwing the trident at him. Spin Attacks and Pegasus Boots are the most effective at damaging it.
Lanmola
- Main article: Shadow Nightmares#Lanmola
The second to last shadow is different from the Lanmolas fight in A Link to the Past and the Desert Lanmola fight earlier in the game in that it stays above-ground the entire time, moving rapidly along the ground in attempt to run into Link. While it is impervious to the sword, most of Link's items will defeat it in one hit.
DethI
- Main article: Shadow Nightmares#DethI
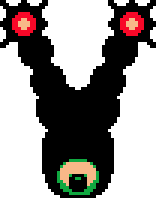
The final form of the Nightmare Shadow, Dethl swings its two arms in a circle, which must be jumped over. Once its eye opens, Link can fire an arrow into it using the Bow to damage it. Link must use 16 arrows to defeat it. Alternatively, Link can use the Boomerang, which will defeat it in only one hit and put an end to the Shadow Nightmares.
Hardhit Beetle (DX/Switch only)
- Main article: Hardhit Beetle
Hardhit Beetle is the boss of the Color Dungeon, exclusive to the later versions of the game. It starts out blue, then when Link hits it, it turns green, light green, yellow, orange, then finally red. Link must keep on hitting it, otherwise it will revert to its earlier colors until it turns blue again, starting the fight over. It will sometimes shoot stars and when it's red, it will summon Stalfos. Hit it enough times when it's red to defeat it.
Mini-Bosses
Rolling Bones
- Main article: Rolling Bones
Moblin Chief
- Main article: Moblin Chief
Hinox
- Main article: Hinox
Ball and Chain Soldier
- Main article: Ball and Chain Soldier
Dodongo Snakes
- Main article: Dodongo Snakes
Desert Lanmola
- Main article: Desert Lanmola
Cue Ball
- Main article: Cue Ball
Master Stalfos
- Main article: Master Stalfos
Gohma
- Main article: Gohma
Armos Knight
- Main article: Armos Knight (Link's Awakening)
Smasher
- Main article: Smasher (Link's Awakening)
Grim Creeper
- Main article: Grim Creeper
Turtle Rock
- Main article: Turtle Rock (Mini-Boss)
Blaino
- Main article: Blaino
Giant Buzz Blob (DX/Switch only)
- Main article: Giant Buzz Blob
Stone Hinox (DX/Switch only)
- Main article: Stone Hinox


