Agahnim
- This article is about the dark wizard and antagonist from A Link to the Past. For the second Shadow of the Shadow Nightmares, see Agahnim's Shadow. For the mini-boss of the Dancing Dragon Dungeon, see Agunima.

Gender | Male | |
Games | ||
Location | ||
The Dark Wizard, Agahnim, is the main antagonist in A Link to the Past.[1] Agahnim a priest who, by unknown circumstances, was possessed by Ganon the King of Thieves during the Era of Light and Dark. Ganon hoped that, by using Agahnim, he could break the seal that was put on him by the Seven Wise Men. Many have speculated that this is the very same seal from Ocarina of Time.
In the intro to A Link To the Past, it is revealed that, prior to the events that transpire in the game, Hyrule was suffering from many hardships due to mysterious causes. When there seemed to be no solution, Agahnim appeared as if from nowhere displaying great mastery of the arts of magic. Using these powers, Agahnim quelled the plagues, thus returning prosperity to the kingdom. Delighted, the king of Hyrule, thinking Agahnim to be a descendant of the Sages, invited him into the royal household. Once established, Aghanim began his vile plan. He eliminated the good King of Hyrule, brainwashed and took control of the royal guard, and set out to gather the descendants of the Seven Wise Men, offering them each as sacrifices in order to break the seal placed on the Dark World.
A Link to the Past (First Encounter)
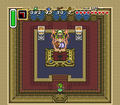
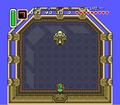
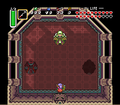
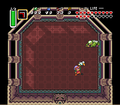
The first time Link encounters Agahnim is during A Link to the Past when, after retrieving the Master Sword, he is contacted telepathically by Princess Zelda's plea for help. After going to the Sanctuary and finding the dying sage, Link returns to Hyrule Castle, and ascends the tower, only to find Agahnim completing the sacrificial ritual. Overcome by anger Link battles Agahnim. Once Agahnim realizes he has lost, and that he is close to death, he uses the now open gate to draw Link into the Dark World, making his escape.

Hyrule Castle

Sprite of Agahnim
Too Late!
The Fight
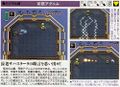
Japanese Info
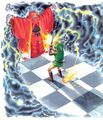
Link's Battle with Agahnim
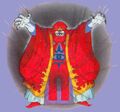
Art from the US Booklet

Art by Capcom for the Remake


A Link to the Past (Second Encounter)
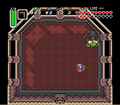
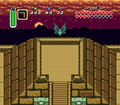
The second encounter also takes place in A Link to the Past. After Link gathers the Seven Maidens from the Dark World. The maidens, still in their Crystals, use their powers to break the protective barrier surrounding Ganon's Tower. Link enters the tower, and after completing the immensely difficult dungeon, finds himself at the door to the final chamber. Believing that the final battle with Ganon is near, Link enters at the ready. Much to his surprise however, Link finds Agahnim awaiting him. The two participate in a battle, similar in nature to the first, except for the fact that Agahnim produces two copies of himself, which add to the difficulty of the battle.
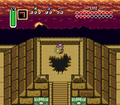
Even though Agahnim fought harder, Link had traveled across two worlds, gaining much strength and ability since their last encounter. Because of this, Link was able to finally strike the fatal blow, ending the life of the evil wizard, or so he thought. Agahnim was dead, but the soul that resided within him was merely expelled returning to its own body. The soul was none other than Ganon's. Using his Flute Link called upon the Duck and with it followed Ganon to his place of hiding in the Pyramid of Power, where one of the most epic final battles in Zelda history was bound to take place. After defeating Ganon with the Silver Arrows, Link claimed the Triforce, returning peace to the land at last.
Link's Awakening
- Main article: Shadow Nightmares
In Link's Awakening, during the final battle with the Shadow Nightmares, one of the forms is Agahnim's Shadow. It has many similar traits to that of its A Link to the Past variant. Link will need to deflect its energy balls back at Agahnim to deal damage.
Oracle of Seasons
- Main article: Agunima
In Oracle of Seasons, a character that is very similar to that of Agahnim appears as a miniboss in the Dancing Dragon Dungeon. Agunima shares many similar attributes with Agahnim, including its ability to clone itself, as well as shooting fireballs out towards Link.

Level 8
Ganon's Tower
Hitting Back
Splitting into Three
Ganon's Spirit
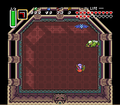
Turns into a Bat
Link calls the Duck
Pyramid of Power
Crashed Through, Link Arrives


Gallery

Sprite of Agahnim

Sprite of Agahnim

Sprite of Agahnim

Sprite of Agahnim
References
- ↑ The Legend of Zelda: Encyclopedia, pg. 162