- Chapter 1 – Spirit’s Grave
- Chapter 2 – Wing Dungeon
- Chapter 3 – Moonlit Grotto
- Chapter 4 – Skull Dungeon
- Chapter 5 – Crown Dungeon
- Chapter 6 – Mermaid’s Cave
- Chapter 7 – Jabu-Jabu’s Belly
- Chapter 8 – Ancient Tomb
- Chapter 9 – The Black Tower
- Chapter 10 – Room of Rites
6.1 Moblins at Rolling Ridge
Outside of the Crown Dungeon, a Goron will appear before Link. Having dug a new tunnel to this ridge, the Goron will encourage Link to try the new games at Rolling Ridge. Head right one screen and enter the opening on the right.


Walk along the path right one screen and then head up the staircase at the end. Push the top stone of the first pair “right” and the one below it “down” into the hole. On the next set, push the rightmost stone “down” and the one beside it “left” into the hole, then exit the cave.


Head right one and up one screen to find a cave. This leads you further along in the main quest, but there are a couple optional goodies for us to find here.
Some time later, Link can return to this cave and the Goron will have uncovered some treasure. He’ll have two treasure chest to choose from, but they both contain the same thing, the Red Luck Ring. When equipped, the Red Luck Ring cuts the damage done by spiked floors in half. This ring was previously obtainable as an uncommon ring in the Lynna Village Shooting Gallery.Optional: Goron Red Luck Ring


Soft Soil Location #10 - Rolling Ridge (Tier 1-3)


Enter the cave, then take the staircase inside down to the lower level. Step on the button on the left to connect a bridge across the gap, then head across the bridge and left one screen. Exit the cave at the bottom to the base of Rolling Ridge.


Head down two and right two screens. Avoid the lone shrub here as it hides a Mean Old Man’s hideout beneath who will steal 100 Rupees from Link if spoken to. Instead, continue up one screen and enter the cave on the right to the Goron Dance Hall.


Walk up one screen and speak with the blue Goron in the center who will ask Link if he would like to dance. Choose to dance with the group at the cost of 10 Rupees, to which a good performance grants Link the Brother Emblem. Link must complete the dance while messing up no more than two sequences. With this, other Gorons will recognize Link as one of their own. When choosing to dance again, Link is given the option to choose between three levels of difficulty: Gold, Silver, and Bronze. A perfect performance at the Gold level gets Link a Magical Ring, while missing one or two sequences changes the prize to a Gasha Seed.


Head back down one screen and speak with the Goron blocking the steps. Noticing Link’s Brother Emblem, the Goron will move out of the way but also request that Link bring him some food later.
With the Goron out of the way, we have accses to much of Rolling Ridge. Additionally, in the Past we have access to much of the mountain. There are plenty of optional goodies for us to collect. None of this is required, so skip ahead to section 6.2 to continue onward with the main quest.
Hook to the diamond stone across the gap on the left and head up the staircase to the upper level. Over on the right, head up the next staircase to the Big Bang Game location. Head up the next staircase on the right in this room, then jump off the ledge to the right and open the chest to obtain a Gasha Seed. Jump off this ledge to the right, then head down and up the steps on the left to exit the cave. Head left one screen and enter the cave here. Walk down the staircase and navigate through to the left side as before, then exit into the Rolling Ridge Base. Return to the Rolling Ridge Base in the present, just outside of the Goron Dance Hall. Walk left one screen and slash the bush on the far left to uncover an inactive time portal. Play the Tune of Echoes and enter the active portal to the past.Optional: Bombs and a Gasha Seed


Optional: Old Man: 200 Rupees


Optional: Gasha Seed


Optional: Huge Rupee: 100 Rupees


Walk up and grab Piece of Heart #9! Step back into the time portal to be transported back to the past.Optional: Piece of Heart #9


6.2 Games at Rolling Ridge
Back outside of the Goron Dance Hall, walk to the left a screen and if haven’t already, slash the push to uncover a warp portal. Play the Tune of Echoes and step into the portal to return to the Past. From there walk right a screen and enter the cave.


Talk to the Goron blocking the staircase and after showing him the Brother Emblem, he will move to the side. Slash the bushes on the left to get some Pegasus Seeds, then use them, alongside the Roc’s Feather to leap across the gap. Continue across a series of gaps and then climb the staircase. Exit the cave.


Optional: Extra 100 Rupees


Walk down a screen and defeat the enemies found here. Use the Switch Hook to move the vine seedling onto the bare spot under the crease in the mountain on the right. Play the Tune of Currents to return to the present, where the sapling will have grown up the wall.


Soft Soil Location #11 - Rolling Ridge (Tier 1-3)


The sapling has grown into a full vine, so go ahead and climb up a screen. Head right one screen and enter the Target Carts Game. Speak with the Goron on the left to play at the cost of 10 Rupees. During the game, Link will ride along a track with only the Seed Shooter at his disposal, attempting to hit as many big rupees as possible. In order to win at least 20 Rupees back, Link must not miss any more than three targets. Getting a perfect score will earn Link a Rock Brisket! Link can play as many times as he wishes, with the game getting more difficult after the first time and a Huge Rupee replacing the top prize to be won. Link can also win a Boomerang! Link can also win a Gasha Seed and smaller rupee values as alternative prizes.


Exit the Target Carts Game when finished and lift the top boulder of the two on the right to uncover an inactive time portal. Play the Tune of Echoes to activate it, then step in to be sent to the past.


In this time period, the Target Carts Game is replaced by a Target Practice Game just like the one in Lynna Village. Enter the game room and speak with the Goron at the counter to play. Getting a score above 100 wins Link the Lava Juice! Choose to play the game again and score 400 points or higher to obtain the Boomerang!


Leave Target Practice when finished and jump down one screen through the break in the lower ledge. Swipe the Mystery Seeds down from the tree, stocking up on them and securing a warp point back to this location via Gale Seeds. Inside the cave above is a Fairy Fountain if needed. When done, jump down one screen from the seed tree. Now use the Tune of Currents to return to the present.


Enter the Goron Dance Hall and speak with the hungry Goron next to the staircase. Give him the Rock Brisket in exchange for a Goron Vase then leave the Dance Hall and use the time portal created to return to the past.


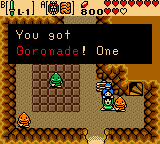
Walk inside the Dance Hall in this time period and speak with the Goron by the staircase on the right. Trade him the Goron Vase for some Goronade!


Use a Gale Seed to warp to the eastern side of Rolling Ridge, then play the Tune of Currents to warp Link to the present.


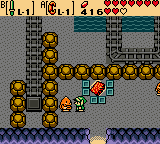
Head left one screen, then follow the path on the left side of the screen up one. Enter the cave here and climb the staircase on the right to the Big Bang Game. Walk up one screen and speak with the game owner who is admittedly too thirsty to even operate his game. Give him the Goronade and then choose to play his game.


The Big Bang Game consists of an open room with floors moving in all different directions while bombs are thrown on-screen before quickly detonating. If Link is hit by even a single explosion, he will lose and have to start over. As the game progresses, more and more bombs will be thrown on-screen to the point where it can become very frustrating. However, using a Pegasus Seed combined with the Roc’s Feather, Link can pick his speed up to help get away from the crowds of bombs thrown his way. Once Link has won the game, he will be given the Old Mermaid Key!


Go down one screen and descend the staircase on the left, then exit the cave back to the peak of Rolling Ridge. Head down one screen, then climb the vines growing up the wall back up one screen onto the ledge. Continue right one screen and play the Tune of Echoes to activate the time portal, then use it to travel back in time.


Head left one screen and jump off the ledge down one. Walk back up one screen along the path on the left side of the trees and enter the cave. Speak with the Goron here who claims to be a friend of the Graceful Goron and will notice Link’s Mermaid Key. In exchange for the Lava Juice, this Goron will give Link the Letter of Introduction to be given to the Graceful Goron.


Exit the cave and use a Gale Seed to warp to the eastern peaks of Rolling Ridge. Jump off the ledge down one screen and enter the Goron Dance Hall. Walk up one screen and speak with the first generation Graceful Goron to give him the Letter of Introduction. Promising to deliver on his “brothers” request, the Graceful Goron will give Link his Mermaid Key if he can perform a dance session successfully.


Once the key is obtained, the dance can be performed again at the three levels of difficulty: Platinum, Gold, and Silver. A perfect performance at the Platinum level will earn Link a Magical Ring.
Head down one screen and exit the Dance Hall when finished. Swim across the river and head left one screen, then swim into the waterfall to discover a hidden cave. Walk up and insert the Mermaid Key into the door to open the way to the sixth dungeon…


6.3 Level 6: Mermaid's Cave
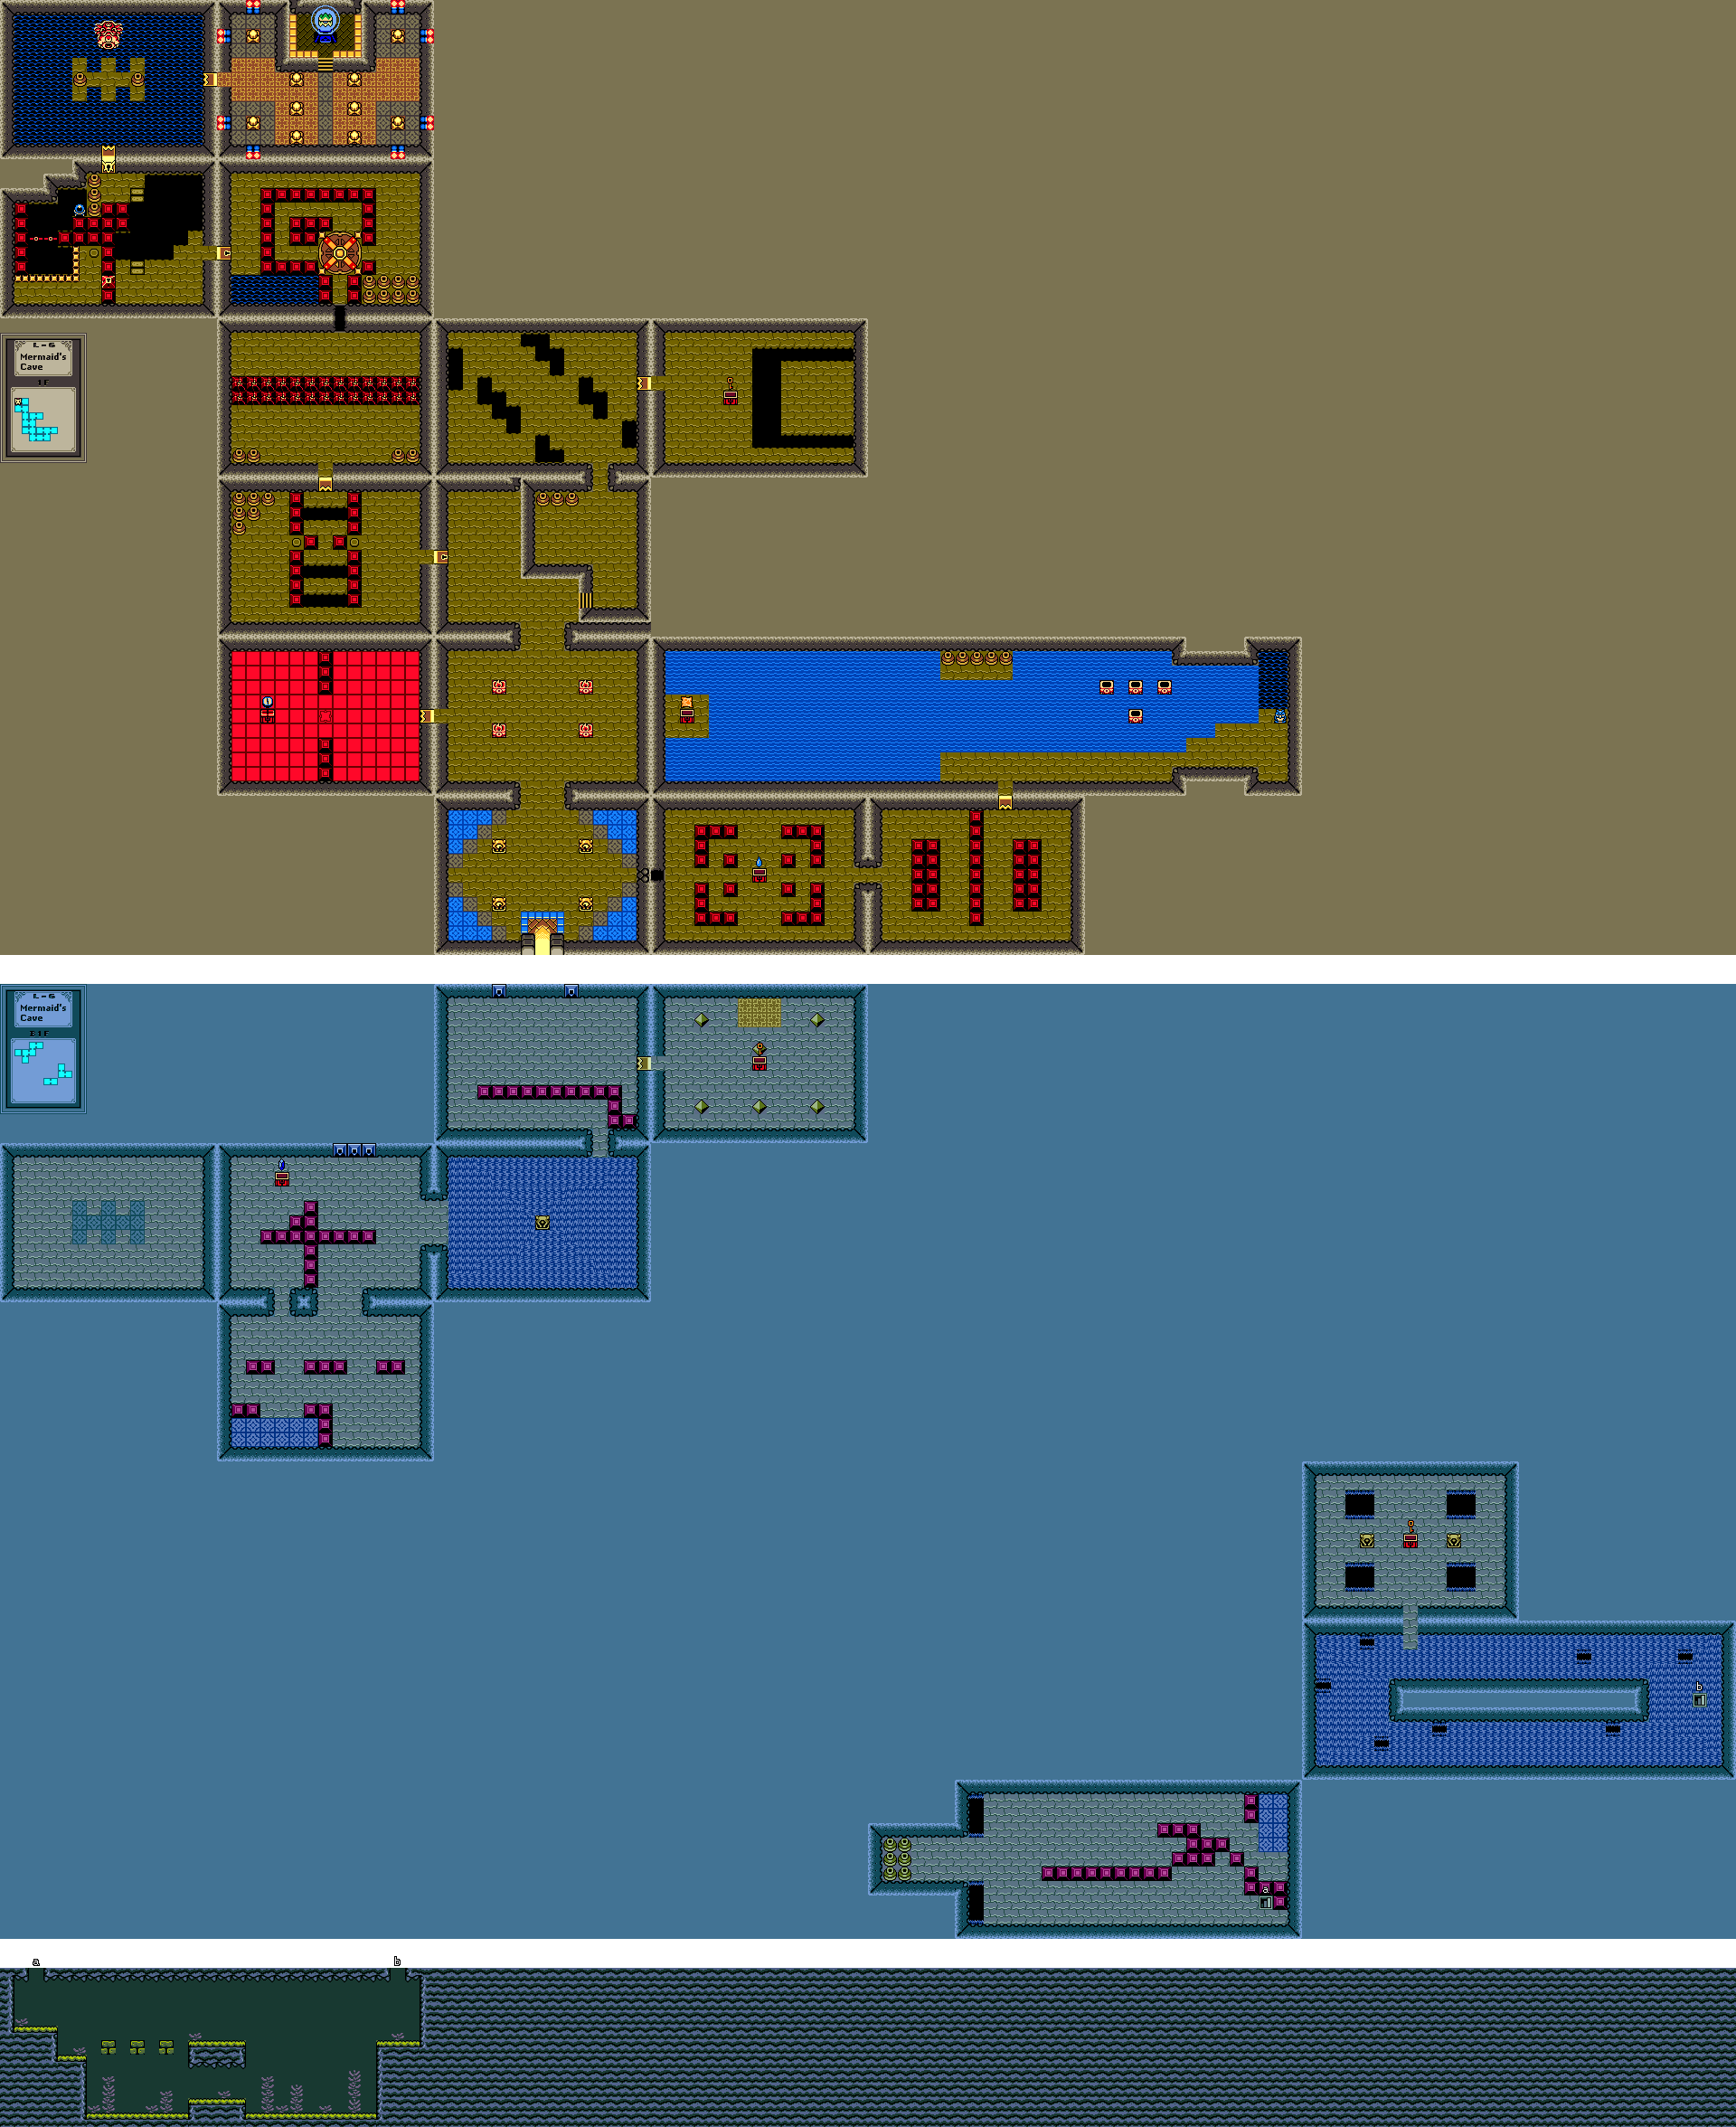
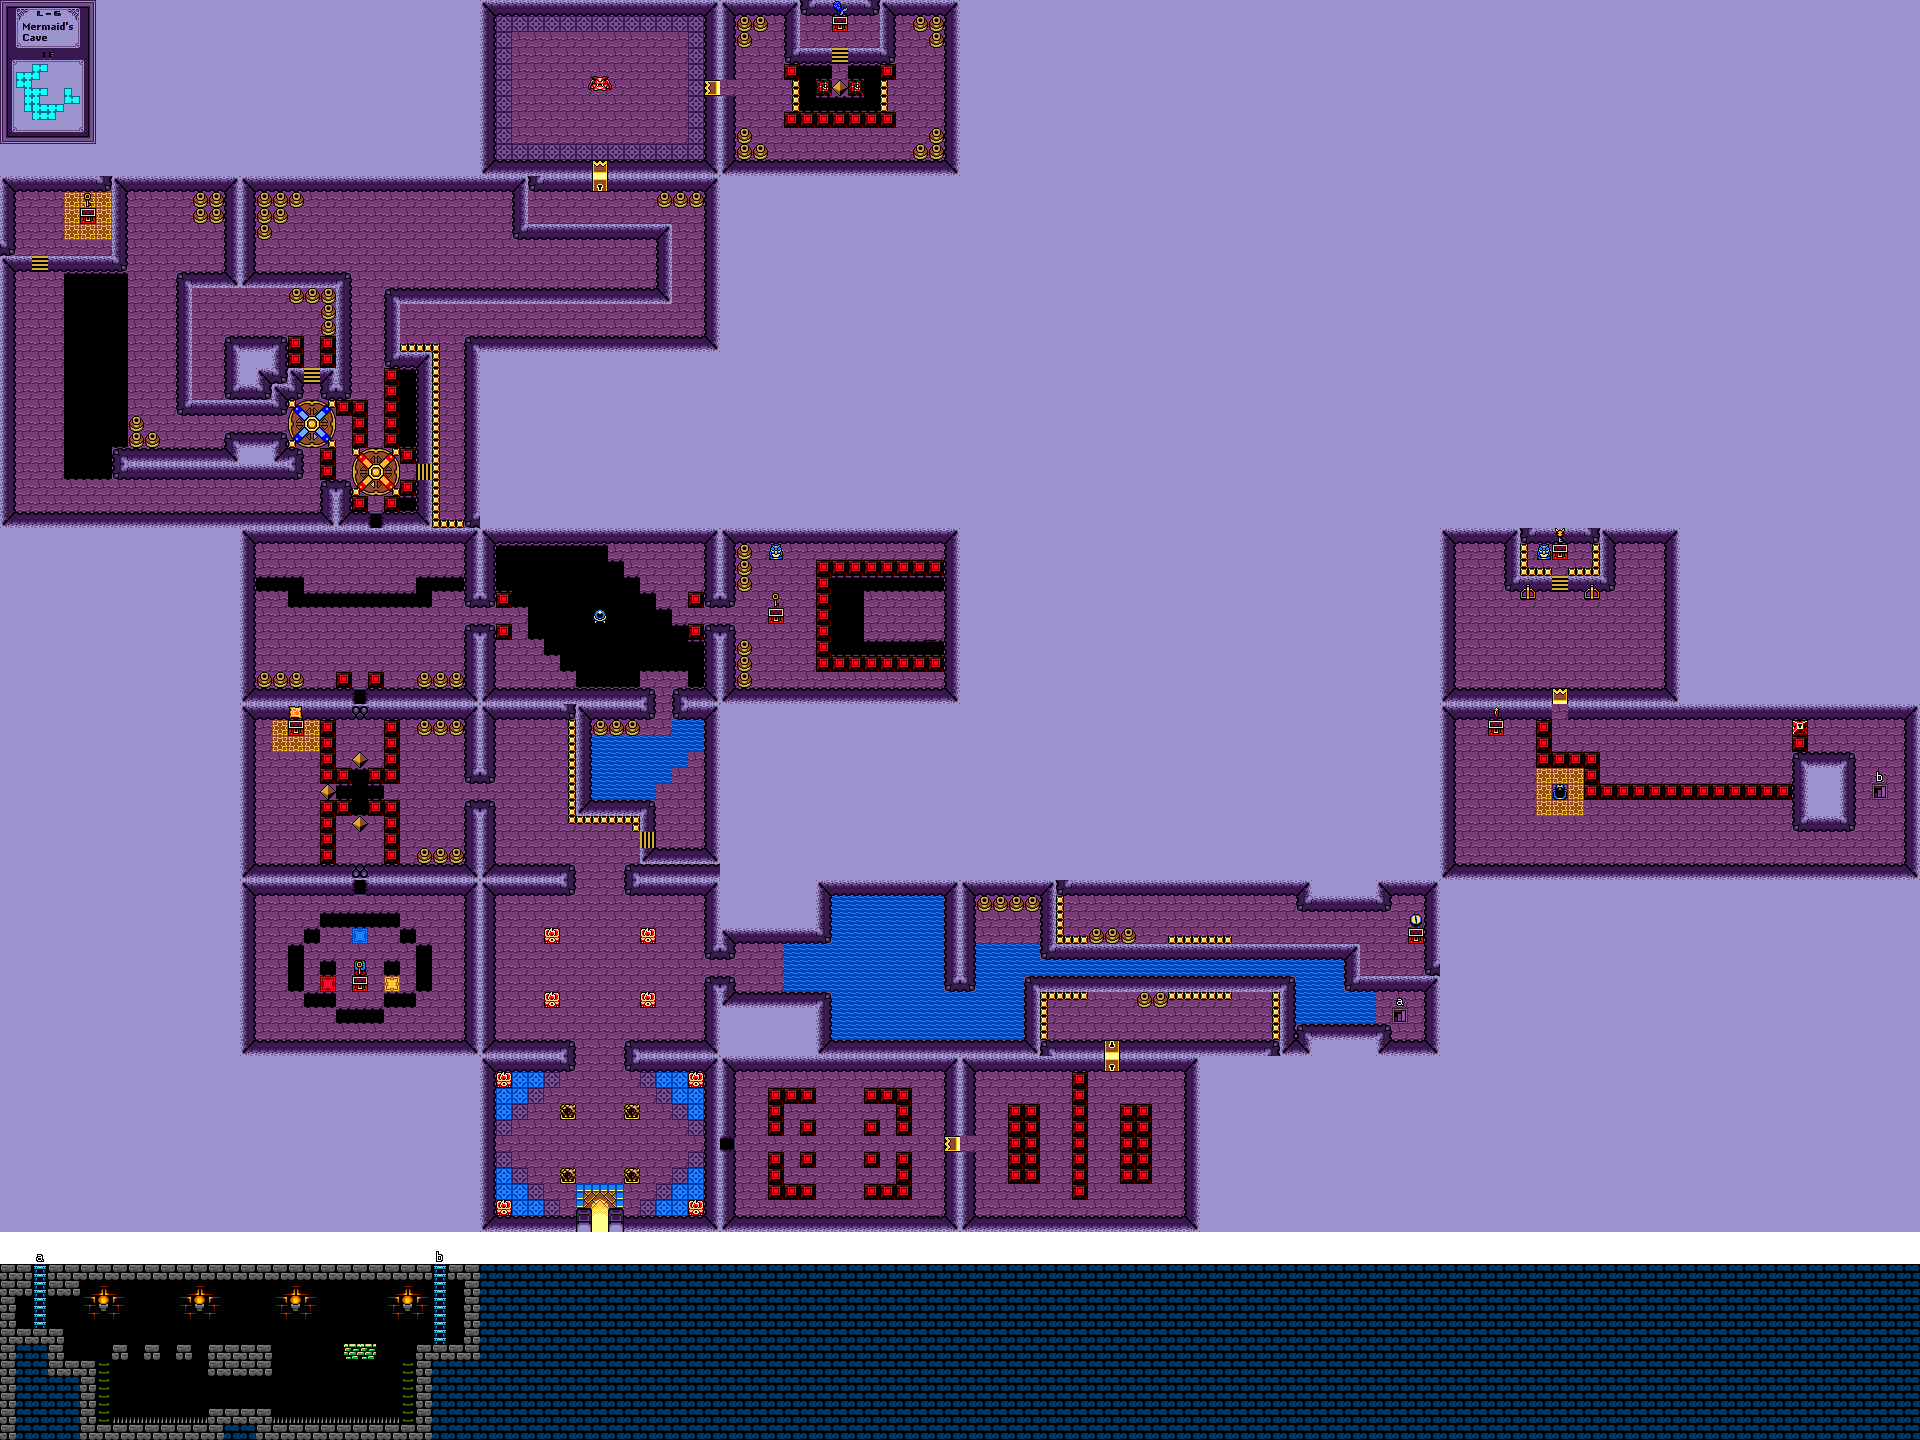
From the start of the dungeon, use a bomb to blow up the wall on the right side and head through the door. One Red and two Green Wizzrobes occupy this room. Defeat them to have a chest appear on the yellow tile in the center. Open the chest to obtain a Gasha Seed, then continue right another screen.


Use the Seed Shooter, equipped with Ember Seeds, on the Candleheads in this room to light them up, causing them to run about the room before exploding. When all are destroyed, head through the newly opened doorway up one room.


Walk right one screen where four unlit torches rest in the waters above. These must be lit in order: Leftmost torch first, middle torch in the back row second, front torch third, and rightmost torch last. The middle torch in the back row will require Link to stand directly in front of the middle two torches and shoot an Ember Seed against the wall on the right. When all torches are lit, the rightmost wall will open, revealing a passage through the middle towards some very deep water on the right. Because Link cannot enter water this deep, head back left one screen.


Optional: Dungeon Map (Past)


Head down one screen and left two screens to get back the dungeon’s entrance.
Optional: Compass (Past)


From the entrance of the dungeon head up two screens, then take the steps on the right and continue up another screen. Defeat the three Candleheads and two Keese in this room to unlock the doorway on the right, then head through it right one screen.


Defeat the two Shrouded Stalfos across the gap by hitting them with some seeds from the Seed Shooter and a chest will appear in the center of the room. Open the chest to obtain a Small Key, then head back left one and down one screen.


Go through the locked door on the left side of the room. Defeat the Blue Wizzrobe in this room to get him out of Link’s way, then create a block on top of the button on the right using the Cane of Somaria. Head over to the upper-left corner of the room and trash every vase except the middle one. Push it down twice and right three times onto the button to unlock the doorway above, then head up one screen.


Go ahead and defeat the three Floormasters and Blue Wizzrobe in this room as they will become annoying, then bomb through the cracked blocks in the center to reach the top of the room. Poke Link’s sword against the center of the northern wall. Just to the right of the middle section, a hollow sound will reveal a hidden passage. Bomb this location to uncover the passage but do not go through it yet as Link requires a new item to progress further. Instead, head back down and right one screen each.


Head down three screens to exit the Mermaid’s Cave, then swim across to the other side of the waterfall. Step onto land and play the Tune of Currents to be sent back to the present.


Head into the cave above, where the Mermaid’s Cave is mysteriously still locked. Walk up and use the Old Mermaid’s Key to unlock the door, then re-enter the dungeon from this time period.


Optional: Dungeon Map (Present)


From the entrance, head up two screens to reach a room with some Wizzrobes. Walk down the steps on the right and swim across the water above, then head up one screen. Shoot the blue switch in the middle of the room and head towards the top-right along the newly arranged floor. Hit the switch again, changing it back blue and altering the floor again, then head right one screen. Drop a Scent Seed from the Satchel to have the Ropes on blocked-off side of the room rush towards it and fall into the pits. Open the chest that appears to obtain a Small Key, then head back left one screen.


Shoot the blue switch again to connect a path through the center, then head to the lower-left section of the room. Shoot the switch again to turn it back blue and change the floors, then head left one screen.


Toss a bomb in the middle of the two red blocks on the southern wall to open a passage, then head down one screen. Use the Switch Hook to get across the gap towards the bottom of the room, then bomb the weak wall here to reveal another passage and head through it.


Jump across the gap and head over to the puzzle block. Push block down one and left two onto the Red tile, clearing it in the process. Next, push the block right two and up, left, down, and right once each, then up, left, and down once each and right three times, clearing the Yellow tile. Finally, push the block left two, up one, left one, up one, right one, up one onto the Blue tile to have a chest appear in the center of the room. Open chest to obtain a Small Key, then head back up one screen.


Switch hook across the gap again and continue up one screen. Jump across the gap above and head through the passage up one screen. Note: If you didn’t blast the wall on this screen in the past, this passageway would not be open.
Step into each rotating platform so that Link reaches the steps at the top of the room, then head up them and up one screen. Make a circle back to the last rotating platform by heading left, down, and right one screen each, then step onto the platform again. Make another circle back to this same platform and this time when Link steps on it, it will turn him towards the lower path. Follow this path left one screen.


Walk along the path towards the left side of the room, then head up one screen. Walk up the steps above to reach a chest containing a Small Key. Grab the key, then jump off the ledge on the right and head down and right one screen each. Step onto the rotating platform to have it turn Link towards the northern steps again, then head up one screen.


Jump off the ledge and head back down one screen through the path in the middle. Walk all the way down to the rightmost rotating platform and step into it, turning Link towards the middle of the room. Take the leftmost rotating platform next again towards the northern steps, then head up one screen, jump off the ledge, and back down one screen through the middle path the same as before. Walk into the rightmost rotating platform which will now face Link towards the eastern steps. Walk up them and head up one and right one screen along the ledge.


Follow the path along the ledge until Link reaches a locked door on the northern wall. Head through to the location of the dungeon’s mini-boss “Vire“.
Claiming to be Veran’s loyal henchman, Vire will attempt to stop Link by flying about the room and shooting a variety of orbs. For the first few runs, Vire will charge towards Link after each sequence of blue orb is shot. About this time, Vire will “get serious”, making his charges towards Link less frequent than before. Keep waiting on Vire to come close to Link and continue slashing him when he does until he splits into two smaller versions of himself. Alternatively, a strategy here is to use bombs and toss them not at vire, but the direction he is moving towards. Good timing will deal damage to the boss. The mini-vires will hover shortly before charging towards Link, so slash them when they do and Vire will be beaten.


After Vire flies off, head right one screen through the newly unlocked doorway. Toss a bomb over the yellow gate towards the cracked block, timing it perfectly so that it explodes on the block instead of falls down the hole, then use the Switch Hook to change places with the diamond stone in the center. There are bombs under the pots in this room if you need more of them. Walk up the steps above and open the chest to obtain the Mermaid Suit! With this, Link can now swim faster and in the deepest of waters, even those in the ocean! The controls will also change for swimming with this suit, as tapping the direction desired to swim towards on the D-Pad will replace the A Button.


Jump off the ledge with the chest and head back left one room, then step into the portal to warp to the dungeon’s entrance.
Have the Roc’s Feather ready as two Giant Blade Traps will come at Link throughout the passage in this next room. At the end of the passage, head through the locked doorway on the northern wall, up one screen. Switch hook to the vases on the northern ledge across the water, then head right one screen along this ledge to 1F-F6. Open the chest at the end of the path to obtain the Compass (present).Optional: Compass (Present)


If you acquired the Compass, jump off the ledge below the chest and head down the staircase to a dungeon area below. If you didn’t get the Compass, from the dungeon entrance simply head up a screen and right three screens, swimming across the water. Head down the steps at the end of this path. Jump across the ledges and head right one screen, then jump onto the moving green platform to ride to a blue ladder on the right side. Head up the ladder to resurface.


Walk left one screen along the path at the bottom of the room. All the way at the end of this path, open the chest to obtain 10 Rupees, and then head back right one screen. Head up to the top of the room and unlock the block with a small key, then head left one screen along this northern path.


At the end of the path, take the passage up one screen. Two levers stick out of the ledge above, each either causing Ropes to fall throughout the room or making a chest appear on the blue tile beside the owl statue. Which lever is correct will always be random, so pull one until the chest appears and open it to obtain the Boss Key!


Head back down one and right one screen, then take the staircase back down to the dungeon area. Navigate left one screen until reaching a ledge too high to jump on. Use the Cane of Somaria to create a block here, allowing Link to reach the blue ladder and take it back up.


Enter the water and swim left two screens, then get out of the water at the end of the path and continue left another screen. Head down two screens, exiting the dungeon.
Magical Ring: Toss Ring


Play the Tune of Echoes to activate the time portal in the lower-left, then step into it to travel to the past.

Swim into the waterfall and re-enter the Mermaid’s Cave. Head right two screens and defeat all the Candleheads to unlock the northern doorway, then head through it up one screen. Walk right one screen, where Link can now dive into the deep waters on the far right side of the room. Do so to dive into the basement level.


Swim left one screen, then take the lower path beneath the purple blocks back right one screen. Swim down the staircase at the end of the path to an underwater dungeon area. Swim right one screen, then up and out, where many flowing floors will attempt to send Link into a bottomless pit.


Swim left one screen along either path and then up one screen. It’s important to remember that Link can only use the weapon equipped to the ‘A’ button while underwater. Defeat both Ropes in this room to obtain a Small Key, then head back down one and right one screen and back down the staircase to the underwater dungeon area. Swim left one screen, then up and out of the dungeon area. Head left one screen along the lower path, then back right one screen along the upper path and resurface in the section of blue tile.


Swim left one screen and head down one screen. Continue left two screens to the dungeon’s entrance, then head up two and left one screen. As before, place a block on the right switch with the Cane of Somaria and push the middle vase on the left onto the opposite switch to unlock the doorway.


Blast through the cracked blocks to reach the top half of the room and head through the passage up one screen. Step onto the rotating platform, then walk around the path and through the platform twice more until it turns Link towards the right side of the room. Head over to the deep waters on the left side and dive down to the basement level.


Head up one screen through the leftmost passage and swim up to a chest containing 30 Rupees. Swim right passed the arrows that shoot, or avoid them by heading back down one screen and up one through the rightmost opening, then head right one screen.


Swim through the flowing waters towards the upper-right section of the room to a passage and take it up one screen to B1F-A3. Head left, then swim along the upper side of the purple blocks back towards the right side of the room as arrows shoot down towards Link. Use the Switch Hook to attack the two Ropes in this room, unlocking the doorway on the right, then take it right one screen.


There are six yellow tiles at the top of this room, one for each of the diamond stones scattered about. Place each diamond stone on a section of yellow tile using the Switch Hook until all are filled, causing a chest to appear in the center of the room. Open the chest to obtain a Small Key, then head left, down, left, and down again one screen each. Swim to the blue tiles in the lower-left corner of the room and resurface to the first floor.


Head left one screen through the locked door. Unlock the block on the left, then step on and off of the button above it. Place a block using the Cane of Somaria onto the button so that the red bars on the left are turned towards the blue switch. Equip the Seed Shooter and stand so that Link can aim at the second-to-last vertical red block on the left. Shoot a seed and it should bounce off the red block, pass through the red bars, and hit the blue switch, connecting the bridge to the top half of the room. Walk along it and head up one screen through the locked boss’ door.


Swim to the middle platform in the room. Octogon will swim around this middle platform and often turn its face towards Link to shoot a rock at him. When Octogon does this, retaliate with a seed from the Seed Shooter to damage the boss. With some practice, Octogon can be hit while facing away from Link by shooting a seed so that it ricochets off the wall behind the boss and hits him in the face.


Periodically, Octogon will submerge its head underwater, to which Link may dive under and shoot at him from below to damage him. While underwater, however, Octogon will come after Link wherever he is and shoot out bubbles to try and capture him for an attack. If Link runs out of seeds, the vases on the central platform will respawn each time he dives underwater and comes back up and be filled with Scent Seeds. After shooting Octogon enough times, the boss will be defeated.


A Heart Container will appear on the central platform once Octogon has perished. Grab it and head right one screen to the altar room of the sixth Essence of Time. Walk up the steps to claim the Lonely Peak!


After clearing the dungeon, the Maku Tree will inform Link that Queen Ambi has left her palace, giving him the chance to possibly save Nayru from Veran’s grasp…
