Goron City is further beyond the Lanayru region. Thus, if you haven’t already, I recommend first tackling the Zora’s Domain portion before venturing further north.
- Chapter 1 – Great Plateau
- Chapter 2 – Dueling Peaks
- Chapter 3 – Hateno Village
- Chapter 4 – Zora’s Domain
- Chapter 5 – Vah Ruta Dungeon
- Chapter 6 – Goron City
- 6.1 – Foothill Stable
- 6.2 – Eldin Tower
- 6.3 – Southern Mine
- 6.4 – Goron City
- 6.5 – Abandoned North Mine
- 6.6 – Death Mountain
- Chapter 7 – Vah Rudania Dungeon
- Chapter 8 – Gerudo Town
- Chapter 9 – Vah Naboris Dungeon
- Chapter 10 – Rito Village
- Chapter 11 – Vah Medoh Dungeon
- Chapter 12 – Captured Memories
- Chapter 13 – The Master Sword
- Chapter 14 – Hyrule Castle
- Chapter 15 – The Champions’ Ballad
6.1 Foothill Stable
Our next journey takes us to the northeast part of the map where we will meet the Goron race. The first step is to warp on over to the Lanayru Tower. If you have not yet activated this tower, I recommend doing so now. The easiest way to reach the tower is to leave Kakariko Village to the north and Paraglide across the water. You’ll see the tower in the distance and the pathway can be rough.
From the Lanayru Tower, we want head northward. If you glance at your map, you’ll see that there is a road that leads northward. As soon as you reach the point where the map is no longer charted, you’ll come to a fork in the road. You can read the sign but we want to take the left path toward the Maw of Death Mountain.
Follow the pathway and you’ll eventually come to the Foothill Stable. You’ll see a woman sweeping the ground here or sitting by the fire, depending on time of day. Her name is Gaile and she asks if you are heading to Goron City. She will sell you some Fireproof Elixir. I recommend buying the three of them for 150 rupees as the road ahead can be treacherous.


Also, there is Shrine located just southeast of the Stable, the Mo’a Keet Shrine. At the very least, I recommend going to the shrine to create a warp point, as this makes for a easy place to warp to if you need to purchase more Fireproof Elixirs.
6.2 Eldin Tower
The path to the next Sheikah Tower is very treacherous. From the Foothill Stable, there is a road that leads basically right up to the Eldin Tower. However, there are two massive Guardians that block your pathway at two separate locations of the road. You can free ball this area completely, avoiding the main road all together and just making your way directly to the tower through some strategic climbing.
The main road continues just west of the Foothill Stable, heading northward. Run ahead to reach the Maw of Death Mountain. Along the way you might run into some Gorons or other travelers that you can trade with. You will run into some Red ChuChus. I recommend using bombs from a distance to destroy them, as their flame burst will cause damage.
Run ahead and the main turns to the right where you will find the first Guardian. This guardian patrols back and forth underneath the massive rock archway. If you have very powerful weapons and armor, you can run on in and defeat the guardian. Otherwise, I think the best method to getting by is stealth. You can sneak by the south end of the rock. Keep in mind that this guardian will just patrol back and forth, stopping at two set locations. Wait until he’s on the other side of the rock, and then run by.


I did find that there is a safe spot behind one of the rocks right at the ledge in case the guardian does see you. Even when it looks like you are in the clear, keep sneaking away, as the Guardian does have quite extensive eye sight. This part really can be both difficult and frustrating, but with enough patience, you should be able to get by. The alternative is to ditch the road completely and just make your own path to the Eldin Tower.
After the first guardian the pathway becomes a bit straightforward and you will encounter some Fire Keese along the way. You will eventually come to a sign that reads Death Mountain Marker #2. At this point the road somewhat breaks up a bit. You’ll have to climb up to continue along the path. Unfortunately, once you climb up, you will soon come across another massive guardian.


On the left side there is a very large rock that extends to a higher elevation. I recommend climbing up to the top of this rock. If you stand at the top of this large rock, the guardian will be able to see you but won’t be able to hit you. So if you have enough powerful arrows you can defeat the guardian from here. You can also toss bombs down to harm the guardian, but that method will take a very long time.
From the large rock you can sneak down the backside, out of sight from the guardian. You can then carefully make your way across, staying low and out of sight of the guardian. The guardian can still spot you, so be careful and just keep at it if you do get caught. I’m not sure if this is the best method, but it does work. You will eventually need to climb back up and fortunately, there are plenty of spots to do so.


Once you finally arrive climb up the Eldin Tower to download the map and activate the warp zone.


6.3 Southern Mine
From the Eldin Tower, leap off to the north to get back onto the road that is marked on your map. As soon as you start drawing near though, the air around is will start to burn and you will take damage over time. It is at this point where you should used one of the Fireproof Elixirs that we purchased at the Foothill Stable. You should also un-equip any wooden based shields or weapons, as they will burn.
Follow the path and you’ll encounter some Red Octoroks. These guys will suck in some of the burning air and launch a fireball out towards you. As soon as you get too close to them, they will hide underground so you cannot harm them with a sword. Pull out your bombs and when the Octorok is sucking in some air, toss a bomb and it will explode in its mouth.


Further ahead you’ll see small patches of lava, as well as one much larger patch in the middle of the road. If you walk near it, this will trigger a battle with the giant Igneo Talus. I recommend staying clear of that large molten boulder. As long as you don’t walk by it, Igneo Talus will not awaken. Further along the path you will see a wall with molten rocks found throughout. Carefully navigate the wall to climb up to the top.

You will reach the Southern Mine and this area is littered with a punch of tiny Fireproof Lizards that are on the ground. If you run towards them, they will run off and disappear. You need to sneak up to them and grab them to get the lizard. There are a bunch of them in this area, but we will need to collect 10 of them.
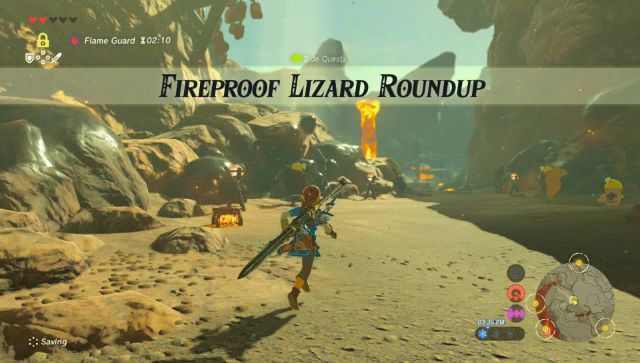
Run ahead in the Southern Mine and one of the first characters you will see on the left is Kima. He just came from the Goron Mines but he wants to bring home a souvenir. He asks you to bring him 10 Fireproof Lizards. In exchange for the lizards, he will give you some heat-resistant armor. We will need this armor in order to progress to deeper parts of Death Mountain where the temperature is much hotter. This begins the Fireproof Lizards Roundup Side Quest.
Don’t venture out of the Southern Mine as there are plenty of Fireproof Lizards in this immediate area. Don’t just run up to them as they will run off if you get too close. You need to be a bit more sneaky. In particular there are often times groups of 2 or 3 of these lizards on each side of the path, right where you spoke with Kima. Steadily make your way around the Mine, collecting 10 Fireproof Lizards.


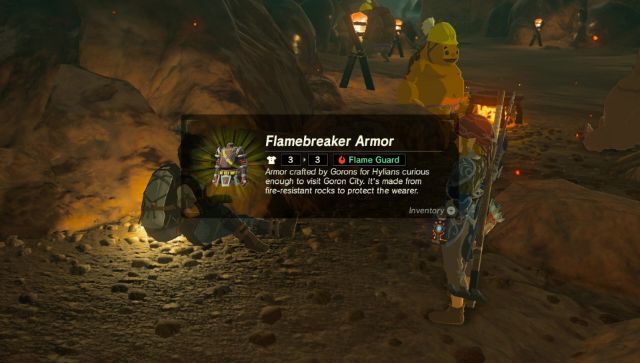
After acquiring 10 Fireproof Lizards return to Kima and trade them in. In exchange for the lizards he will give you the Flamebreaker Armor. This armor will give you enough heat resistance to tolerate a visit to Goron City.
6.4 Goron City
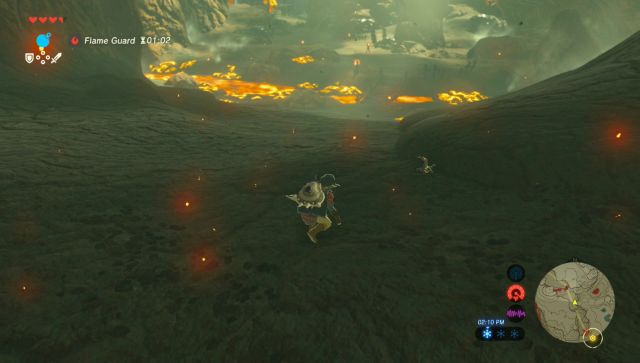
The pathway from the Southern Mine is very straight forward. As you draw near, you’ll see a massive eruption, causing flaming boulders to drop from the sky. Do your best to avoid the boulders and continue up towards Goron City. Before entering the city, you will see a cut-scene of the Divine Beast tormenting Death Mountain, causing the eruptions to happen.


Once you arrive at Goron City, you can look around as you please, but then make your way to the target on the map to speak with Bludo, the Goron Boss. He mentions that the beast Rudania has been running wild lately, causing the eruptions. Bludo is having back pain so is unable to drive off the beast. He had sent Yunobo to the Abandoned North Mine to get some painkillers, but he has yet to return. This will advance the Main Quest objective, the Divine Beast Vah Rudania.


Follow the curvy pathway north out of the Goron Mines. You’ll come across the Shae Mo’sah Shrine. Be sure to examine the shrine to at least open up the warp portal here. Then continue northward to them Abandoned North Mine.
6.5 Abandoned North Mine
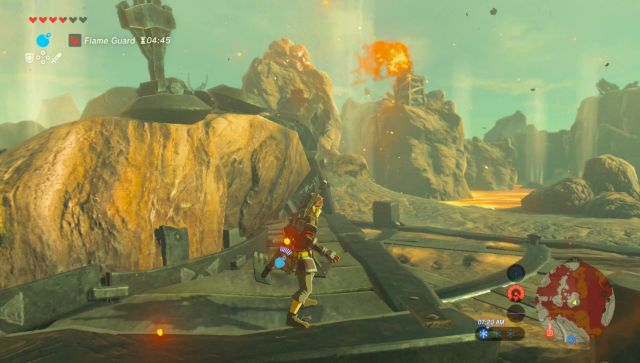
Speak to the Goron here and then walk over towards the large cannon. If you place a spherical bomb into the hole and then explode it, it will launch a fire boulder out in the direction that it is facing. There is also a nearby lever next to the cannon and if you hit it, it will turn the cannon. Turn the cannon and launch the boulder out at the Lizalfos that are in the distance.
Before progressing any further, you’ll find that this portion of the mountain is even hotter than the previous. Just having the Flamebreaker Armor is not enough to keep you from losing health. You should have the armor as well as a couple of Fireproof Elixirs.
Run down to where you just defeated the Lizalfos and turn the cannon found here. Place a bomb and launch it at the next batch of Lizalfos. Then make your way over and grab one of their bows that they left behind.


There are two Lizalfos Archers that will shoot fire arrows towards you and a third one in the distance at the next platform. A single hit will do considerable damage and could kill you. There are some wind geysers coming out from the ground. Jump towards them and use your Paraglider and it will send you upward. Instead of attacking the Lizalfos head on, stay to the right and glide over to the next geyser. Further along you’ll find another cannon. Use this cannon to defeat the two Lizalfos, and then turn the cannon and use it to defeat a third one.


Use the geyser to glide over to where the lone Lizalfos was. There are more Lizalfos in the distance, but you can ignore them for now. Run on over to another geyser that is in the distance and it will send you to a higher platform with a cannon. Hit the lever so that the cannon is aiming at the large skull and then shoot out a ball to destroy it. You can also destroy some of the Lizalfos by shooting the cannon while it is in the midst of turning. Then use the Paraglider and a geyser to get over to where the skull was. Open the treasure chest here to get some Ice Arrows.


At this point you can climb up to the target that is highlighted on your map. Yunobo can be heard inside of the structure here, but the entrance is blocked off by boulders. These boulders are too strong for ordinary bombs and we’ll need something with a bit more fire power. If you look right across the lava there is a cannon on a nearby high platform. In order to reach it, climb up to the top of the structure where Yunobo is trapped in. While you are here, you can lift up the rock to get a Korok Seed. From here, use the Paraglider to make your way over the large cannon.


This cannon is another case where you will need to launch the bomb while the cannon is turning. Doing so will explode the boulders that are blocking the entrance to the cave. Navigate around this area to get back to where Yunobo is.

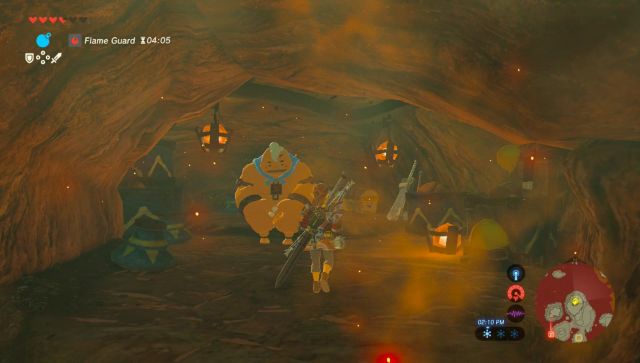
Talk to Yunobo and he’ll then run off back to Goron City. Before leaving, there are some goodies for us to find here in this cave. Open the treasure chests to get some rupees and some loot. Also, be sure to smash the pots for even more rupees.
While we are here, there is a Korok Seed we can collect, located at the island in the middle of the lava to the northwest. Climb to the top of this structure and paraglide over. Lift the rock to find the Korok. There is more to do in this area if you’d like, but to continue on with the main quest, quick warp back to the Shrine that is near Goron City. If you didn’t activate that shrine, you’ll have to journey back the long way.
6.6 Death Mountain
Make your way back to Goron City and speak with Bludo. He will thank you for finding Yunobo and will reward you with some Fireproof Elixir. He will also tell you about Daruk, the Goron Champion of past. This will trigger Link to remember another one of his memories. Afterward he mentions how he and Yunobo cause the Divine Beast Rudania to retract back to the mountain. However, since his back is still hurting, he tasks Link to go in his stead.


A new location is charted on your map and it’s a bit further along on the mountain. Make your way back to the Abandoned North Mine area and this time continue scaling the mountain. You’ll encounter a number of familiar enemies along your path and you’ll eventually come to Goron Hot Springs, right on the other side of the Stolock Bridge. You can sit in the water for a few moments and it will restore your health.
Keep following the path and you’ll eventually find Yunobo being tormented by two large Moblins. Try to pull one of the Moblins away so that you can fight them one at a time. These are two enemies that you will have to defeat so be patient.


Once defeated speak with Yunobo and give him the news that you are here instead of Bludo. He talks about the process used to defeat the beast. The first objective is to knock down the Bridge of Eldin. Yonobo will curl into a ball within the cannon. Turn the cannon and then use a spherical bomb to launch Yunobo at the bridge, knocking it down.

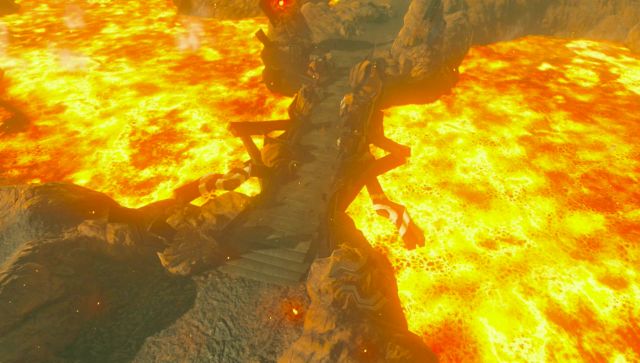
The trail leading to Death Mountain begins right beyond the Bridge of Eldin. It is very hot, so you will need to drink one of your Fireproof Elixirs. You have three of them in total, lasting 18 minutes and 30 seconds. If you follow the guide below, you should have no trouble making it in that time. However, if you ever run out of time, you can load a save file from this point forward.


The Divine Beast Vah Rudania will send out Sentries that serve as a surveillance system. If they spot either Link or Yunobo, the beast will trigger a massive eruption of the volcano will cause almost certain death. Link and Yunobo devise a plan where Link will lead the way, whistling when he wants Yunobo to follow.
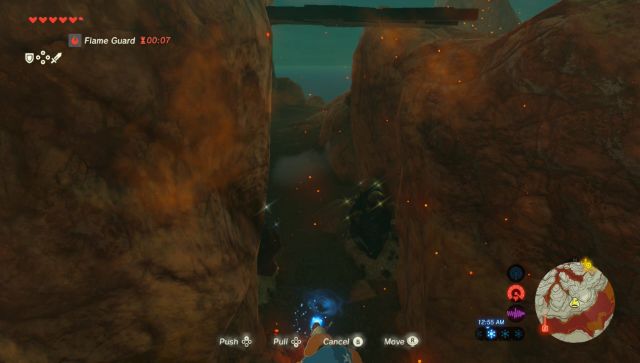
The first sentry ahead is fairly easy to avoid. It patrols back and forth, but part of its patrol area is blocked off by a rock. Wait until it is moving away from you and then run and stop underneath the boulder. Wait until it turns around and goes back and then progress.


The second sentry is locked in place and it covers the entire area we have to pass, so we’ll have to get rid of this one. There are a few ways to do so. You can actually just shoot it down with arrows, but that is not recommended. Climb the wall to get to a higher ground. There are two massive boulders here, use Stasis to get them out of the way. I believe if you hit it light enough with a weak weapon, you can get the rock to fall on the sentry. Alternatively, you can just use a remote bomb, launch it towards the sentry and detonate it when it is close enough. Defeat the sentry and drop down. You’ll have to use Stasis on the rocks below to allow Yunobo to progress.


Run ahead and Yunobo will jump into the cannon. Hit the lever to turn it and then use a bomb to launch Yunobo at the Divine Beast.
The next area has two Sentries. Whistle to cause Yunobo to stop and then climb the large wall to the left. There are a few ways to defeat these sentries. The best way is to use Magnesis to grab the large plate and smash the Sentries. Alternatively, you can toss bombs and detonate them when they are close.


Run ahead and you’ll see a Sentry over a very narrow passage. Use Magnesis to lift one of the nearby bridge piece and place it directly beneath the Sentry, blocking its vision. Run up and you’ll find a cannon but it is being defended by a large Moblin. Battle the Moblin and then once again launch Yunobo up at the Divine Beast.


Run ahead and you’ll encounter two more sentries. One of them is stationary while the other revolves around it. Wait until the revolving sentry moves and then quickly run behind it. Just stay against the wall and you’ll be able to squeeze through the narrow passage without alarming the sentries.


In the next area whistle to leave Yunobo behind. These sentries are a bit too much for Link to just run by them. However, if you look ahead there is a geyser. When there is an opening, run over to the geyser. Use the paraglider to sore up into the air and then land on the higher ledge. Jump over to where the large metal blocks are located. Use Magnesis to grab these blocks and then smash the three sentries. Drop down and continue up the cliff.


This final area has two large Moblins, but the battlefield is rather narrow and it can be quite difficult to maneuver. My suggestion would be to climb the cliff again and once again use Magnesis on one of the metal blocks. Carry the block over to where the Moblins are and from a safe distance on the ledge, use the metal block to repeatedly smash the Moblins until they have been defeated.


Turn your aim towards the Divine Beast one last time and launch Yunobo at it. This will trigger a cut-scene that ends with Link leaping onto the massive beast.
