- Chapter 1 – Great Plateau
- Chapter 2 – Dueling Peaks
- Chapter 3 – Hateno Village
- Chapter 4 – Zora’s Domain
- Chapter 5 – Vah Ruta Dungeon
- Chapter 6 – Goron City
- Chapter 7 – Vah Rudania Dungeon
- 7.1 – Dungeon Map
- 7.2 – 1st Terminal
- 7.3 – 2nd Terminal
- 7.4 – 3rd Terminal
- 7.5 – 4th Terminal
- 7.6 – 5th Terminal
- 7.7 – Fireblight Ganon
- Chapter 8 – Gerudo Town
- Chapter 9 – Vah Naboris Dungeon
- Chapter 10 – Rito Village
- Chapter 11 – Vah Medoh Dungeon
- Chapter 12 – Captured Memories
- Chapter 13 – The Master Sword
- Chapter 14 – Hyrule Castle
- Chapter 15 – The Champions’ Ballad
7.1 Dungeon Map
Once you arrive, you will see that it is scorching hot. While you are in the indoor portions of this dungeon, just having the armor is enough, but the outdoor sections will require more heat resistance. Before even stepping foot through the door you can turn around and run to the edge of the Divine Beast where you will find a treasure chest containing an Ancient Screw. Now make your way down the steps.
Once you enter the door will shut behind you and the area is completely dark. There are a few glowing eyes scattered about this dark room and you should take them out with an arrow. If you are out of arrows you can just toss items at them. One of the initial eyes leaves a treasure chest that has a Torch. This particular torch has a Durability Upgrade where the flame will stay lit unless you put it away.
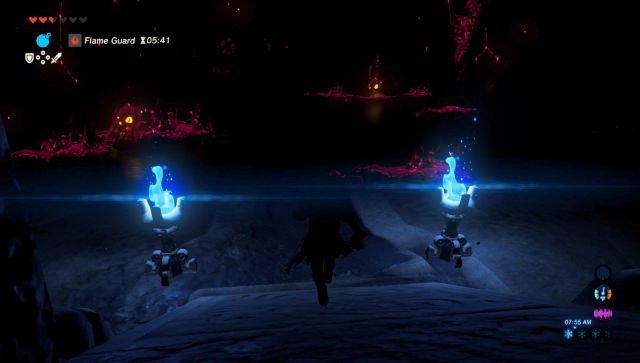

Run back to the entrance and light the torch with a blue flame. This will allow you to see better, but will also allow you to light another torch in this area, opening a nearby door.
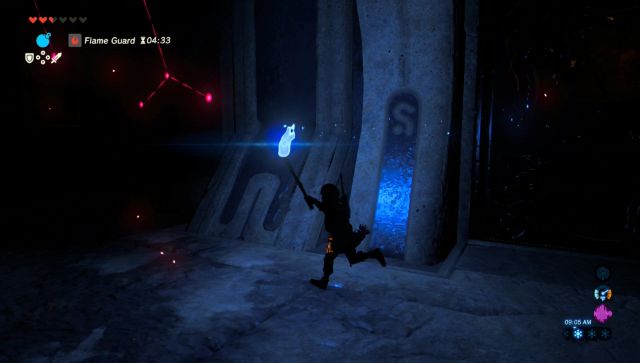

On the other side of the gate you will find a mini-guardian as well as more corruption eyes scattered about. Defeat the guardian and you can also wander around this area, defeating all of the corruption eyes. Many of them will drop treasure chests for you. One of the spots of malice hides an unlit torch. Return back to the previous area and light your torch again. Walk around and light the unlit torch to raise the bars. Run ahead and place the Sheikah Slate in the pedestal to get the Dungeon Map.


What is different about this dungeon is that when looking at the dungeon map in your inventory, you have the ability to full rotate the dungeon 90 degrees. Many puzzles you solve in this dungeon will require you to do so. Before doing anything else, it’s probably a good idea to run around the previous two rooms, defeating any of the glowing eyes that you might have missed.
7.2 1st Terminal
The 1st Terminal is right here in the main room. Right after you get the dungeon map, walk past the gate and if you look up and to the right a bit, you will see the terminal is turned sideways. Go into your map and flip the dungeon 90 degrees. Run to the other end of the room and then use your paraglider so that you land accurately by the terminal. Place the Sheikah Slate on the terminal to activate it.


7.3 2nd Terminal
With the dungeon rotated 90 degrees, there is now a massive staircase leading to a higher floor. Run up the staircase to get outside. You will need to use a Fireproof Elixir once you step outside. Right when you reach the top of the staircase, rotate the dungeon so that it is back to normal. As it is rotating you can run along the side of the structure as that will soon be the ground floor. Run ahead and you’ll see an unlit torch. We’ll get to this in just a bit.


For now, look to the left of the unlit torch and you’ll see some malice up ahead. Shoot the glowing eye to eradicate it and then climb up a bit. You can’t keep climbing here, but what you want to do is just carefully fall off the small ledge to the left, being weary not to fall all the way down to the floor below. Now rotate the dungeon 90 degrees and you’ll be able to walk right where that malice was just located.


Walk along the perimeter here and you’ll see a treasure chest on the outskirts. Jump over and open it to get an Ancient Core. From right where you got the treasure chest, rotate the dungeon once again so that it is right side up. You’ll see some more nearby malice and an eye that hanging a bit higher up. Shoot the malice and the pedestal will be revealed. Walk on over and put the Sheikah Slate in place to activate the 2nd terminal.


7.4 3rd Terminal
The third terminal involves that unlit torch we saw, just after climbing the long staircase. We want to light that torch on fire, using the blue flames from the first floor of the dungeon. Make your way to the first floor and assure the dungeon is right-side up. Use the Torch that you go from the treasure chest in this dungeon, as it has a longer burn duration, so you can complete this puzzle in one shot.
Light the torch using one of the torches on the first floor and then rotate the dungeon. You want to make your way over to that large staircase and climb it to get back outside. Once outside, rotate the dungeon again, and walk along the ledge as it is rotating. Run over and light the unlit torch, causing the nearby gate to open up. This will cause a ball to roll down this enclosed gate.


Follow the ball as it will roll to the top of that large staircase. Rotate the dungeon so it is on its side again, and this will cause the ball to roll down the staircase. At the bottom of the staircase, there is a metal box and it is preventing the ball from rolling further down. Use your Magnesis ability to left the box and the ball will roll down further below. The ball will rest right in the perfect spot, causing a nearby gate to open. Run over and place the Sheikah Slate in the pedestal to activate the 3rd terminal.


7.5 4th Terminal
The 4th Terminal is right nearby on the main floor. Directly across the room from where the ball landed you will see two massive metal doors. However, the doors cannot be opened as a large piece of wood is blocking the doors. Shoot a Fire Arrow at the vines above and it will burn the vines as well as the wooden plank. If you do not have fire arrows, a regular arrow will do. What you will need to is hold out the arrow next to the blue flame and the flame will transfer to the arrow. The blue arrow can burn down the vines as well.


You can now use Magnesis to open the door and you’ll find the 4th Terminal just beyond. If you look at the ceiling there are more vines in this room and you can burn them; causing a treasure chest to drop down.
7.6 5th Terminal
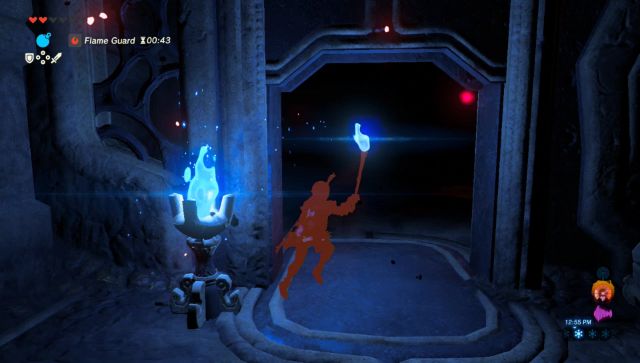
The final terminal can be a bit tricky and it is located right near the entrance. From the start of the dungeon as you go down the ramp, there are the two torches. Just beside one of the torches there is a door that is closed, but there is a hole right in the middle of the door. If you peak through, you can see that there is a torch on the other side. Pull out an arrow and light it up using the nearby blue torch. Then aim through the hole and shoot the torch, causing the door to open.


There is a wall of flames in this room, preventing us from crossing. In the adjacent area, look up at the ceiling and you’ll see some more vines. Shoot a fire arrow at the vines to burn them down and a large metal cube will drop to the ground.


Use your Magnesis ability to pull the block and place it over the flames. Put it all the way to the right to assure it is fully blocking all three of the flames on the right side. Turn the dungeon sideways and you’ll be able to sneak by. Turn the dungeon once again and then activate the 5th terminal.


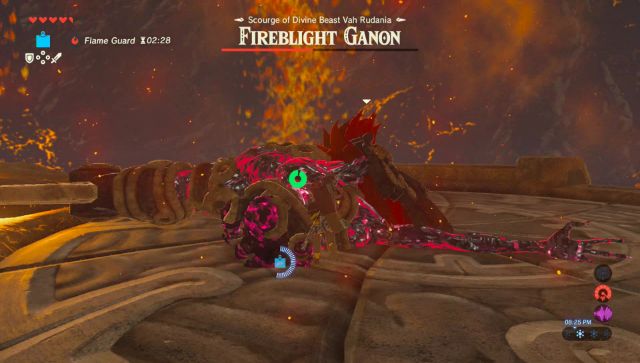
7.7 Fireblight Ganon
With all terminals now activated, it’s now time to activate the main control, which is located on top of the dungeon. Climb the large staircase and then make your way to the main control. Before taking on the dungeon boss, it’s probably a good idea to have full health, as well as some food so that you are ready to heal if necessary. Activate the main control to take on the Scourge of Divine Beast Vah Rudania, Fireblight Ganon.
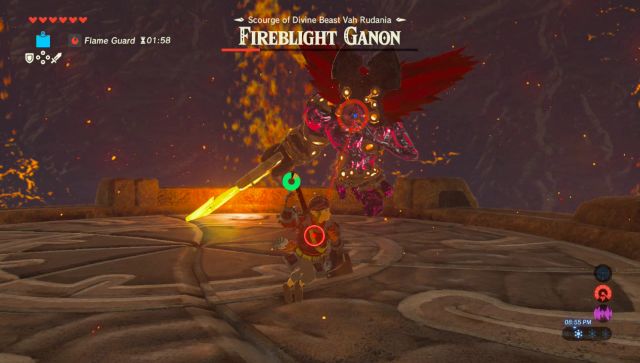
During the first phase of Fireblight Ganon, he will wield a massive sword and will try to attack you. His vertical slashes can be dodged by jump sideways, where as his horizontal slash can be dodged by jump over them. Alternatively, you can avoid everything be keeping your distance. However, I think the best way to defeat him is to strategically dodge one of his attacks, allowing you to do a Flurry Strike and hit him multiple times with whatever is your most powerful weapon.


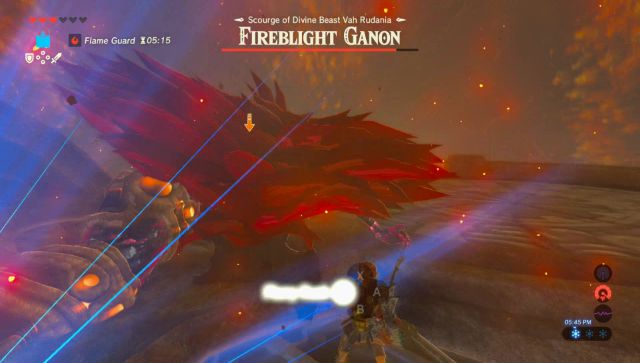

During this phase, Fireblight Ganon will occasionally do consecutive horizontal slashes, so be careful. He will also occasionally throw out a bunch of small fireballs in your direction and I would suggest quickly running away or blocking them if you have a proper shield. After half of his health is gone, it will transition to the second phase of the battle.
This second phase of Fireblight Ganon is actually somewhat easier. He will now float higher above and you will no longer be able to hit him with your sword. Fireblight Ganon will shoot fireballs out at you and you can either hide behind a pillar, or more effectively, just shoot them with an arrow to disintegrate them.


The key to defeating Fireblight Ganon is to use bombs. When he is charging up his fireball attack, he is sucking all the first from the air. Toss a bomb in his direction and he’ll suck it up, much like an Octorok. Detonate the bomb and Fireblight Ganon will come crashing down. Run on over and deliver some sword slashes.


Fireblight Ganon’s final attacks will come in the form of a laser attack, much like a Guardian. I would suggest running behind a pillar to avoid taking damage. While he’s flying around the room, you can now use any projectile, including arrows as well as just launch items at him. If you run out of items, you can still use bombs to deal damage. Just keep at it until Fireblight Ganon has been defeated.
