- Chapter 1 – First Three Days
- Chapter 2 – Southern Swamp
- Chapter 3 – Woodfall Temple
- Chapter 4 – Collection
- Chapter 5 – Snowhead
- Chapter 6 – Snowhead Temple
- Chapter 7 – Spring, Romani Ranch, Ikana Graveyard
- Chapter 8 – Great Bay & Zora Cape
- Chapter 9 – Great Bay Temple
- Chapter 10 – Ikana Canyon
- Chapter 11 – Well & Ikana Castle
- Chapter 12 – Stone Tower Temple
- Chapter 13 – The Moon
9.1 Small Key
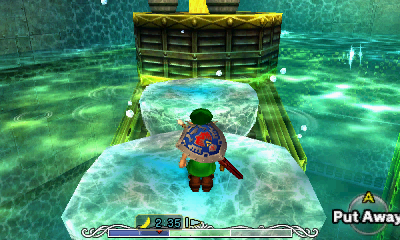
As you enter, Link will wave at the giant turtle and you’ll regain control. If you want to leave at any point during the dungeon, simply Hookshot onto his back again. You may want at least one bottle of Green Potion (Magic Hags’ Potion Shop in Southern Swamp or Trading Post in Clock Town) as well as a Fairy or two (next to any Owl Statue or inside the crates in this room).
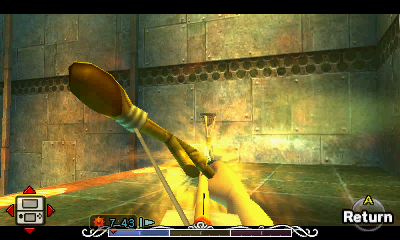

In this first area, you can smash the crates nearby for arrows, magic, Bombs and a Fairy. You’ll notice there are four unlit torches on the upper ledge. Light a Deku Stick on the lower torches and use it to light all of the unlit ones (or just shoot them all with Fire Arrows). Once all of them are aflame, a large chest will appear containing the first Stray Fairy. That’s all there is to do here, so enter the door.
Stray Fairy #1 – Light all of the unlit torches.
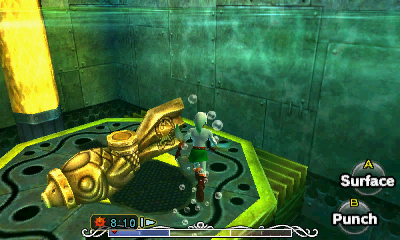
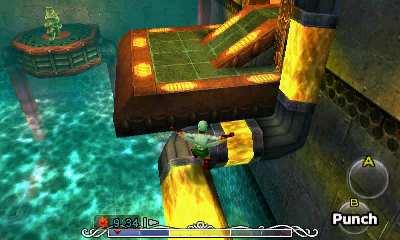
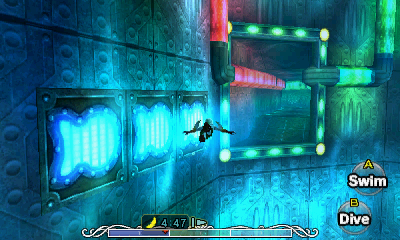
As you enter, Tatl will point out the big waterwheel. Craziness. First, slap on the Zora Mask and swim to the other side of the room. There is a yellow platform under the water in the far corner with a switch on it. Sink down with B and push/pull it, causing it to disappear. This will allow the water to continue flowing through this particular YELLOW pipe and create a “water platform” of sorts that you will need to use in just a moment. Turn around and head back towards the door you entered from.
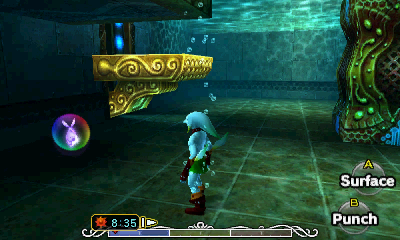
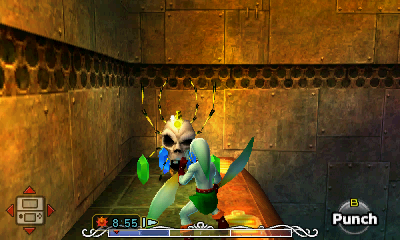
Just underneath the platform, swim through (or hit with your blades) the bubble and snag your second Stray Fairy. There are two platforms that are going up and down. Get on the one to the west of the door which takes you up to a platform with rupees and a Big Skulltula, which you can defeat to get your third Stray Fairy. Jump down and take the opposite one up to get to a platform with two Big Skulltulas. Defeat them if you wish, then jump on the yellow water pump when it’s low, then jump to the higher platform across from you when it rises. Round the corner and go through the small hallway.
Stray Fairy #2 Trapped in a bubble under the platform.
Stray Fairy #3 Take the west-most rising platform up to a Big Skulltula and kill it.

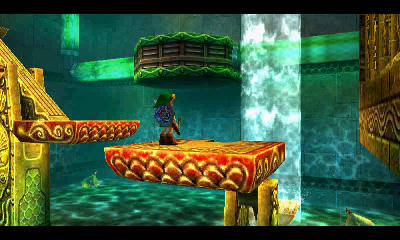
Man, this room is massive! As you’ll notice, you can only explore a few areas in here at the moment. You’ll need the water to go the opposite direction in order to access the others. For now, jump on the rotating platform and use it to get to the side platforms with the barrels. Roll into them to find your fourth Stray Fairy. Hop down to the lower platform next to the water, then look down. In the center of the spinning vortex of water on the ground there is a lone jar. Shoot it with an arrow to release the fifth Stray Fairy and wear the Great Fairy Mask to make it come to you. Alternatively, you can sink down and hit it with your Double Cutters, then try to swim into it, although this is the more difficult option.
Stray Fairy #4 Smash the barrels on the west side.
Stray Fairy #5 Stand on solid ground and shoot an arrow at the jar in the center of the spinning water at the bottom, then wear the Great Fairy Mask.


Put on the Zora Mask and jump in the water. Following the flow of the water, you’ll notice there are only two areas you can access at the moment. Swim through the upper YELLOW colored path.
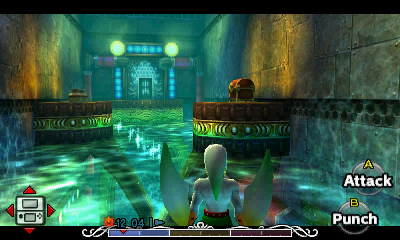
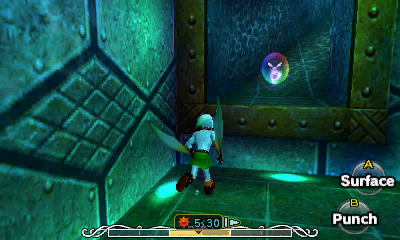
This room has several Skullfish that you can kill easily by pressing the R button (R + B when standing on the ground). Float up to the surface and climb onto the lowest ledge. Turn around and use the Hookshot to grapple onto the chest and open it to get the Dungeon Map. Just across from the Dungeon Map, there is a platform with two pots. Inside one of them is a Stray Fairy. Hit it with the Hookshot and then use the Great Fairy Mask to draw it in.
Stray Fairy #6 Inside of a pot on one of the platforms.


You’ll notice a door to the south, there is no way to get there at the moment. Instead, sink down to the bottom where you’ll see the next opening, which has some new enemies guarding it: Dexihands. They won’t actually hurt you, but they’ll prevent you from going through. Either charge up some Double Cutters or swim through them and hold R to kill them instantly. Swim through the GREEN path.
After rounding the corner, you’ll find yourself in a small hallway with another new enemy you may have seen once before: Bio Deku Babas. These things are much like regular Deku Babas, but they’ll break off their stem and walk around, jumping at you if you get close. Worse, they’re quite agile underwater. Nasty little things. Kill all of the ones hanging upside-down (stand under them and press R + B), then hop along the lily pads to reach the far platform. Kill the last one to make a large chest appear containing the seventh Stray Fairy. Enter the door.
Stray Fairy #7 Kill all of the Bio Deku Babas in this room.


The chest on the opposite side of the room is the next objective, however, you’re going to need to do a few things to make sure you can get there safely. Shoot an arrow at the Real Bombchu on the ledge, then use your Hookshot to get rid of those pesky Bio Deku Babas. Put on the Zora Mask (so you’re taller) and jump across the lily pads and to the platform. Pull yourself up and open the chest to get the Compass.


Sink down to the bottom of the water here and defeat the Bio Deku Babas that you sliced down earlier as well as the Dexihand. Break the jars to recover arrows and magic, then open the chest to get a Small Key. Float back up to the surface and climb out of the water. There are some Dexihands in the flowing water here next to the door. Shoot the jar between them with an arrow to find the eighth Stray Fairy. Either wear the Great Fairy Mask or hop in, allowing the Dexihands to shake you into it before they toss you out of the water. Once you have it, hop into the flowing water to be taken back to the main room.
Stray Fairy #8 In a jar between two Dexihands in the flowing water.


9.2 Ice Arrows
This time, swim through the lower RED path.
Ignore the Shell Blades and Skullfish. Float up to the surface, where you’ll encounter a new enemy called an Octorok. Ignore them for now as well. Find the RED pipe and climb on top of it out of the water. Shoot the Real Bombchu with an arrow (or your Double Cutters) and follow the pipe to the locked door. Enter.


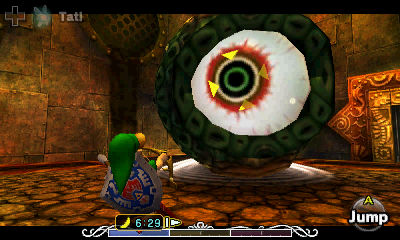
This room contains a Green Chu and a Yellow Chu, which drops arrows when defeated. Stock up on arrows and magic, then head through the door. Look up at the ceiling to initiate the mini-boss battle.
This creature is quite simply a giant eyeball that can only be damaged when it’s eyelid is open. It’s very similar to Arrghus from A Link To The Past and Deku Toad from Twilight Princess.


The main eye can be damaged with just about anything (when it’s open), however, this thing obviously doesn’t just float around. After several hits, it will drop all of the bubbles surrounding it and zoom around the room, ramming the walls repeatedly in an attempt to squash you. If there are a lot of bubbles still remaining, it can make this very difficult to complete without taking a lot of damage.
At the start of the battle, it surrounds itself with bubble. You can get them off by hitting them with just about anything, but Deku Nuts, Fire Arrows or Bombs work the best. They will then bounce around, at which point you can kill them with your sword. Utilizing the Quick Spin (rotate the Analog Stick in a full circle and press B) can make this much easier!


That being said, here are some recommended strategies for removing the bubbles:
- Put on the Blast Mask and hold a Bomb over your head. Toss it into the middle of the eye (so it lands directly below it) shortly before it explodes. This will make the maximum number of orbs come after you. Hold in your shield and press B to explode, not taking damage, but killing loads of them all at once. This is likely the easiest method.
- Use Fire Arrows or Deku Nuts to make a bunch fall off, then use Quick Spins (rotate the Analog Stick in a full circle and press B) repeatedly.
- Use the Hookshot to take off one at a time and slash it with your sword. Easy and safe, but slow.
- Wear the Zora Mask and remove several at a time with your Double Cutters, then either Quick Spin or use Double Cutters again to kill them.
Once there aren’t many pink bubbles floating around (or you run out of patience), hit the main eye with arrows or your Hookshot. Once it falls down, run away and kill the pink things if you wish, then Z target the eye. Get an arrow ready and fire whenever it’s facing your direction and the eye is exposed.


After you’ve defeated Wart, open the chest to find the Ice Arrows. The plot thickens! Exit this room as well as the next after stocking up on resources again.
9.3 Red Switches
With the first Mini-Boss defeated and Ice Arrows in hand, return to the room with the Red Pipes just outside the chamber where you fought Wart and head to one of the two platforms in the southern corners of the room. There is an Octorok at each of them, and as you stand on the platform itself, Tatl will wish to point out something interesting. Shoot the Octorok with an Ice Arrow to freeze it into a solid block temporarily, allowing you to climb up and reach the central platform. Do so and push/pull the giant RED switch to let the water flow through the pipes. Head back to the main room.


In the central chamber, swim back through the upper YELLOW colored opening, where you can see the RED pipe is now flowing into. This takes you to a familiar room. Float up to the surface and climb up on the platform on your left. Use your Hookshot to reach the chest (and open it if you haven’t already). Next, face towards the smaller platform on the opposite side with the two jars. Slap on the Deku Mask, hop over to it and if you haven’t already gotten it, you can snag the Stray Fairy.


Look at the RED pipes in this room. It enters the nearby door which you were unable to access earlier and comes out not flowing. You’re going to need to fix that! Now that you have the Ice Arrows, you can use them to shoot the water surface, creating temporary icy platforms. In the Nintendo 3DS version of the game, you can only shoot specific locations to create ice, which are noted by where the water is sparkling. In the Nintendo 64 version you can shoot any area with ice. You might want to jump to the Ice Platforms while wearing the Deku Mask so you can hop on the water. Shoot an Ice Arrow fairly close to the southern platform, put on the Deku Mask to hop over to it, then take off the Deku Mask, jump and climb atop the platform, then enter the door.
In this small room, you’ll see a new variation of an old enemy. This Blue ChuChu does not drop any goodies when defeated, however, it can be frozen with an Ice Arrow to form a temporary block. Lure it over to the upper platform and shoot it, then push/pull it if you need it any closer. Use it to get on top of the red platform, then hold R to defend, waiting for the Real Bombchu to bump against your Shield. Push/Pull this second RED switch to allow the water to continue flowing through the RED pipes. Smash the crates if you’d like and exit the door.


Hop in the water and swim through the GREEN path, following the RED pipes into the next area and out the door. This takes you to the room where you got the Compass earlier. You’ll notice, across the water is a hallway that you were unable to reach before. Put those Ice Arrows to use and make a path to it, using the Deku Mask to jump from platform to platform, then wearing the Zora Mask (for added height) to jump to the alcove if you’re worried about it. Inside, use a Fire Arrow on the ice chunk blocking the door, then slash the ice stalagmites to recover arrows and magic. When you’re ready, enter the door to confront the next mini-boss.


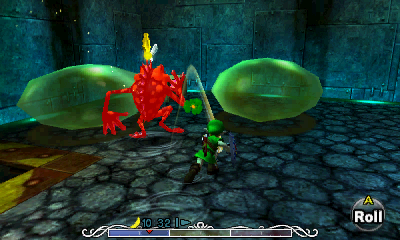
Him again? Yes, and he has new friends. These blobs called Mad Jellies are a unique “enemy” and are only found in this battle. They will hop towards you when you get near them, similar to ChuChus. They cannot be defeated, but you can defend against them with your Shield as well as toss them away by slashing your sword. Make good use of Quick Spins (rotate the Analog Stick and press B) to get rid of all the ones surrounding you easily.
The goal of this battle is to chase down Gekko, who runs around the room and tosses Mad Jellies at you. Just swerve to avoid them, or slash them with your sword like tennis to send them flying. Use the Bunny Hood to hasten the pursuit. Once you get close enough, smack him with your trusty blade.
Gekko will then jump up to the ceiling along with all of the Mad Jellies, which combine to form a giant gooey blob. When you regain control, you’ll see it’s shadow on the floor, which comes close to you and quivers (getting ready to fall). Quickly run away from it (using either the Bunny Hood or Goron Mask if you have troubles with this), otherwise it’ll stick to you and pull you in, allowing Gekko to deal loads of damage to you.
As you’ve probably already guessed, these globs are made of water, so the natural conclusion is to use Ice Arrows. Shooting it on the floor or in the middle of the elevation will have no effect, so wait for him to fully be on the ceiling. Shoot the blob with Ice Arrows so that it falls to the floor and shatters. If you have trouble doing this, simply wait for the blob to come down on purpose, then turn around and Z target Gekko. As he’s getting back on the ceiling, prepare an Ice Arrow and release once all of the jelly-ness is on the ceiling.

When you successfully freeze him, run over and stand just outside the shadow on the floor. Once it hits the ground, quickly run after Gekko, avoiding the Mad Jellies as you go. Slash him and repeat this process until he’s defeated.
After the punk dies, he’ll revert back into a normal frog. If you have the Don Gero Mask, put it on and speak with the frog to make it disappear. This will allow you to get a Piece of Heart after the dungeon. Enter the new door on the left which leads to a small blocked off area in the previous room. Open the large chest to find the Boss Key. To get out of this golden gate area, either use your Hookshot or climb over it. Put on the Zora Mask and use the flowing water to get back to the main room.


9.4 Going the Other Way (Green)
In the central room of the dungeon, float up to the surface and climb onto the platform. Climb up the ladder and work your way back towards the entrance (south). Once you’re back in the room just after the entrance with the giant waterwheel that Tatl pointed out initially, turn to the right and you’ll see the red pipes flow all the way back here and form another one of those water pump elevators.
Hookshot to the target directly above it, then wait for it to be raised and jump to the RED platform. Push/Pull it to allow water to flow into the waterwheel, causing it to stop moving entirely. Jump down into the water and swim over to the YELLOW platform, then Push/Pull that one to shut off the water flow from the YELLOW pipes. This will allow the waterwheel to move again, but in the opposite direction. Return to the main room.


So now water is flowing through both the YELLOW and RED pipes. If you glance around the room, the only one left that is not flowing is the GREEN pipes. Following the pointing arrows (on pipe itself) backwards, you’ll see they originate to the north of this very room. Hop on the rotating paddles and use them to get to the north side of the central room, where you’ll find a waterfall blocking a ladder. Shoot it with an Ice Arrow to freeze it, then climb up the ladder and enter the green door.


First of all, kill the enemies in this room. Lure the Blue Tektite over and slash it with your sword. Next, from the entrance to this room, shoot an Ice Arrow at the sparkling water. NOTE: In the Nintendo 64 version, the water is not indicated and you can create ice blocks anywhere. Also, in the Nintendo 64 version, it is easier to use the Deku Mask to hop over to the ice, and then the then the Zora Mask (for added height) to jump up to the higher ledge. Kill the second Blue Tektite with arrows if you haven’t already.
Now for the GREEN platform. From the YELLOW platform, use this same process, shooting two Ice Arrows to get over to the GREEN platform. Push/Pull the switch to make the water begin flowing through the GREEN pipes.

Hop back over to the Yellow Platform. Look up and you’ll see that this room has a grating above it, and there are holes that lead to an upper area. From the YELLOW platform, shoot an Ice Arrow to the far north. Now, shoot another Ice Arrow fairly close to the northern wall. Hop to it, turn around and now you should be far enough back that you can use the Hookshot on the target above. Do so to get to the upper area and open the large chest in the middle to find your ninth Stray Fairy. There are two red rupees you can get, but it’s best to just get the one to the far south, since the other requires a bit of swimming.
Stray Fairy #9 Above the grate in this room. Hookshot the target at the northwest corner to reach the upper area


Back in the central room, jump into the water, which is now flowing the opposite direction. There are only two paths you can take, middle and bottom. The GREEN pipes are now flowing into the middle path, so take that one. Stop swimming with it and sink down by pressing B before you get to the end, or else you might hit the Spike Mines.

Kill the Skullfish if they cause any problems, then head over to the platform in the northwest corner of the room. Wait for the rising platform to sink down into the water and hop onto it. When it raises up, jump across the turning gear and onto the next platform that’s going back and forth. At this point, you can turn off to the right where you’ll see a secret alcove. Use the Hookshot on either the torch or the chest and open it to find the tenth Stray Fairy.
Stray Fairy #10 Hookshot over to the torch at the southeast corner of the room.


Hop back into the water and get back up the same way, jumping on the platform, jumping across to the next one, then finally climbing onto the ledge. Circle around to be confronted with a puzzle. You’ll see water is flowing onto the waterwheel and making it spin. Shoot the water with an Ice Arrow to make the waterwheel stop spinning, giving you a new platform to walk on. This will allow you to access the next door, but before you head through it, there’s another Stray Fairy you can get. Face to the north and you’ll see an alcove with a large chest in it. To get there, walk on the now stationary platform and use it to climb onto the waterwheel itself. Climb up onto the very edge of it and use the Hookshot on the chest, which you can open to find the eleventh Stray Fairy.
Stray Fairy #11 After freezing the waterwheel, hookshot to the treasure chest higher up at the north end of the room


Hop down onto the platform directly below you and work your way to the door. NOTE: If you fall down at any point, you’re going to have to shoot the frozen waterfall with a Fire Arrow to make the platforms move again, allowing you to climb back up.
As soon as you enter, hop down. At the first see-saw you come to, hop into the water on the raised side and sink down with the Zora Mask. Swim (ram) into the barrel underwater to find the twelfth Stray Fairy.
Stray Fairy #12 Underneath the first see-saw. Swim into the barrel that is underwater.


Float back up and stand on the lower part of the middle see-saw in the room. Shoot a Fire Arrow at the frozen water above the opposite side, causing water to flow down on it and raise you up. Hop over to the next one and repeat this same process, which will raise you up to the highest point. Jump over to the GREEN platform and push/pull the switch and allow water to continue flowing through the GREEN pipes.


Before hopping down, there’s something else you can snag. If you look to the south end of the room, there’s an enclosed area that you can reach by climbing on top of the GREEN pipes. From atop the GREEN platform, slap on the Zora Mask and use the Double Cutters to kill the Real Bombchu. Run along the green pipe and climb up at the end (with the added height of the Zora Mask) and run off to the right. Hop down into the enclosed area and use the Hookshot on the chest, opening it to find the thirteenth Stray Fairy.
Stray Fairy #13 In an enclosed area. Climb on top of the Green Pipe to reach it.


Drop down and kill the ChuChus to stock back up on goodies, then use the first see-saw that you haven’t used yet, shooting a Fire Arrow at the frozen water to make it lift you up to the final platform. Exit through the door, which takes you back to the Map Room. Put on the Zora Mask and swim back to the central chamber.
9.5 Temple Boss
There’s only one room left! With the GREEN pipes finally flowing into the bottom path, take it to find the room with the Boss Door. Before you go off to fight the boss, however, there are two things you can do. Swim over to the right side of this room where you’ll find the exit back into the central chamber.
In this path is the fourteenth Stray Fairy. Sink down and pop the bubble with your Double Cutters, then swim through it to get it. Reenter the bottom path to get back to this room, then float up to the surface. You’ll see directly under the central platform is the fifteenth Stray Fairy. In order to get it, go stand on top of the GREEN pipe right where it’s coming out of the water. From here, you can turn right and shoot the bubble with an arrow. Wear the Great Fairy’s Mask to reel it in.
Stray Fairy #14 In a bubble at the exit of this room.
Stray Fairy #15 Under the GREEN platform. Shoot it with an arrow and wear the Great Fairy Mask.


Gather any goodies you may need for the battle from the jars under the water. Follow the GREEN pipe the rest of the way and push/pull the GREEN switch to allow the water to flow through the final bit of piping. Wait for the water pump just ahead to be low and jump onto it, using it to reach the Boss Door.
NOTE: This battle is drastically different depending on whether you are playing the Nintendo 64 or the Nintendo 3DS version of the game. Both strategies are listed below.
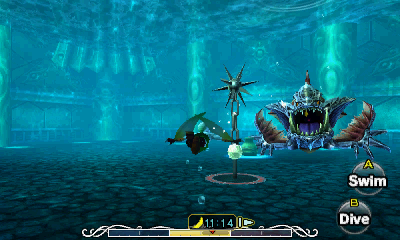
This battle involves running back and forth between the central platform and swimming around with the Zora Mask. Anytime you are in the water, Gyorg will charge at you and chew you up, dealing massive damage. That being said, you want to stay out of the water as much as possible.
While on the platform, Gyorg will back up and rush towards it. If you’re near the edge, it’ll ram into it, trying to knock you over the side so it can nom your face. If you’re more towards the center, it’ll jump over and try to push you off with its fins. Either way, swerve to avoid these attacks and quickly face towards it when it gets back in the water.
There are extra jars on the platform that have arrows, a clue that you need to Z target Gyorg (follow the bubbles to find its location) and shoot it to stun it. Alternatively, you can charge up the Double Cutters with the Zora Mask, but they take longer and don’t have the same range. One word of advice: if Gyorg is already backed up (getting ready to charge), get back and wait a moment before trying to shoot it, since otherwise you could miss and essentially knock yourself into the water. Once you’ve hit it, it’ll go limp under the water for several moments. Quickly put on the Zora Mask and swim down there.
You can press B to sink down and slash it with your fins, but you do extra damage by using the Electrical Barrier (R) instead. Because of this, it is best to put on the Zora Mask, jump into the water and hold A immediately so you begin swimming. Swim next to Gyorg while holding R, damaging it, and immediately begin swimming back to the platform. If you’re a really good swimmer, you can try doing a dolphin jump out of the water and onto the platform, but if you miss and hit the platform, it’ll take you even longer to climb up. Get out of the water as soon as possible!
Alternatively, you can stay under the water charging up the Double Cutters or ramming into the side of Gyorg while using the Electric Barrier to hopefully stun it this way. This is very dangerous, since, once Gyorg begins charging to take a bite out of you, it’s invulnerable. This strategy is extremely dangerous and is not recommended, but it sure is fun!
After a while, Gyorg will spit out a ton of smaller fish which act a lot like piranhas. They can be easily defeated by swimming through them with the Electric Barrier. Stun Gyorg with an arrow, kill the small fish, then run back to the platform – they drop Recovery Hearts, so utilize them if you’re running low on life. Repeat the same steps to steadily deal damage to Gyorg and eventually defeat it. There are additional arrows in the jars on the platform and magic in the jars underwater in each corner of the room, should you need to restock.
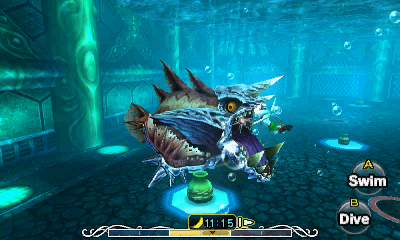
During the first phase of the battle, Gyorg will swim around the perimeter of the platform, occasionally poking his head out. When it is near the surface, or when it jumps partially out of the water, use your Bow and shoot an arrow out at Gyorg. Repeat this process a number of times, and after several hits, Gyorg will be stunned, revealing a massive eyeball as its weak spot. Nail it with a few more arrows, or throw on the Zora’s Mask and damage it with your Electric Barrier.


Occasionally Gyorg will leap and land on top of the platform. When he does this, quickly roll out of the way to avoid his attack. Just keep attacking him with your arrows and replenish them using the nearby pots if needed. After several hits to its massive eye, Gyorg will collapse the platform, sending you underwater.
This phase can be a bit tricky, and you’ll notice there are a number of Spike Mines around the water. He will also begin releasing smaller fish which will surround and attack you. These can be easily killed with an Electric Barrier, and they often drop Recovery Hearts. The secret here is to trick Gyorg into swallowing one of the spikes. It is a bit random as to where he will settle, and there might not be an active spike in the area.
After Gyorg has found a place to sit for a moment, swim over to him. He will begin sucking in the water around him, pulling you and the chained Spike Mines towards his mouth. Either hit a nearby Spike Mine with your fins or use the Electric Barrier to dislodge it from the ground. If it is close enough to Gyorg, he will swallow the Spike Mine, stunning him in the process. Be careful though, as you don’t want to get too close to Gyorg. He could swallow you, dealing quite a bit of damage.

When Gyorg is stunned, its massive eyeball will appear. Swim nearby and use the Electric Barrier to do some harm. If you run out of magic, there are plenty of magic jars around the room. Repeat this same process until Gyorg has been defeated.

Be sure to snag yourself the Heart Container followed by Gyorg’s Remains. You’ll then witness another short scene with the next guardian. “Help our friend.” They must mean the final Giant, right?


- Chapter 1 – First Three Days
- Chapter 2 – Southern Swamp
- Chapter 3 – Woodfall Temple
- Chapter 4 – Collection
- Chapter 5 – Snowhead
- Chapter 6 – Snowhead Temple
- Chapter 7 – Spring, Romani Ranch, Ikana Graveyard
- Chapter 8 – Great Bay & Zora Cape
- Chapter 9 – Great Bay Temple
- Chapter 10 – Ikana Canyon
- Chapter 11 – Well & Ikana Castle
- Chapter 12 – Stone Tower Temple
- Chapter 13 – The Moon
