Spirit Tracks Bosses
This is a list of bosses found in Spirit Tracks.
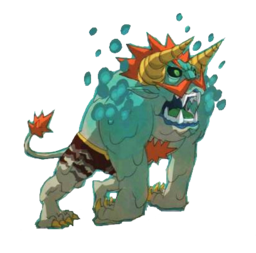
Stagnox
- Main article: Stagnox
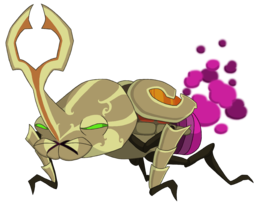
Stagnox is the boss of the first dungeon in Spirit Tracks, the Forest Temple. Link must use the Whirlwind in order to blow away the poison gas on the beast's backside, from where he can then deal damage with the sword. Afterwards, Stagnox will begin throwing out Blastworms. Link can hit them with a sword slash, which will begin a timer that increases in pace before they blow up. Link can then time a Whirlwind shot so the worms blow up in Stagnox's face, which will cause Stagnox's backside to be vulnerable with sword hits once again. After repeating this process a few more times Stagnox will be defeated.
Fraaz
- Main article: Fraaz
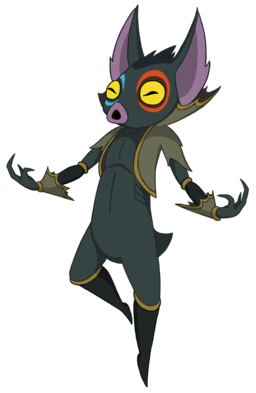
Fraaz is the boss of the second dungeon in Spirit Tracks, the Snow Temple. During the first phase Fraaz will alternate between ice and fire forms. Link will need to use the Boomerang to target the opposing element and then Fraaz as well. This will stun Fraaz, at which point Link can attack him with the sword. During the second phase, Link must use the fire torch to target the fire creature, and the ice torch to target the ice creature. The two creatures will then combine into Fraaz once again. Fraaz will then destroy the torches, and Link will need to wait until Fraaz shoots out a specific element. Fraaz will then switch elements, at which point Link can target the element and send it towards Fraaz. Fraaz will be stunned once again, where Link can deal more damage. This entire process will need to be repeated again, at which point Fraaz will be defeated.
Phytops
- Main article: Phytops
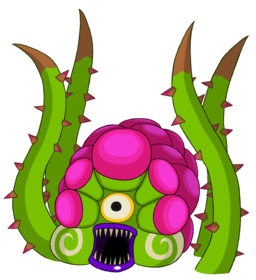
Phytops is the boss of third dungeon in Spirit Tracks, the Ocean Temple. Link must use the Whip in order to grab a spike out of one of Phytops' tentacles. He can then aim the tentacle at the purple gunk covering Phytops' eye, which will uncover some of the eye. After repeating this process a second time, the entire eye will be uncovered. Link can then take a third spike and hit the eye directly, which will momentarily stun Phytops. At this point, Link can run over and slash at Phytops' eye with the sword, dealing some damage. After repeating this process a second time, Phytops will increase the battle's intensity by attacking with four tentacles at once. Though the number of tentacles has doubled, Link will need to use the same attack process as before in order to defeat Phytops.
Cragma
- Main article: Cragma
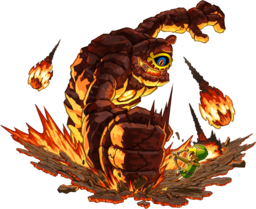
Cragma is the boss of the fourth dungeon in Spirit Tracks, the Fire Temple. Link must use the Bow in order to shoot the glowing spots on Cragma's body. This begins with the large spot on its stomach. After doing so, Cragma will pound its fists and cause a large boulder to drop down. Link must allow Cragma's fist attacks to smash this boulder, which will leave behind a small platform. Link can then grab the platform and run over to the right side of the room. The platform can be tossed onto a nearby rocky area, which will allow Link to jump onto the cart. This will begin a ride around the boss arena, where Link will circle around Cragma. When the time is right, Link will need to shoot an arrow into the glowing spot on Cragma's body. After shooting enough spots, Link will be able to shoot Cragma's eye which, after doing so, Cragma will fall to ground and reveal the weak spot on its head. Once the ride ends, Link can run over and slash at Cragma's head to deal damage. After completing this entire process a few more times, Cragma will be defeated.
Byrne
- Main article: Byrne (Boss)
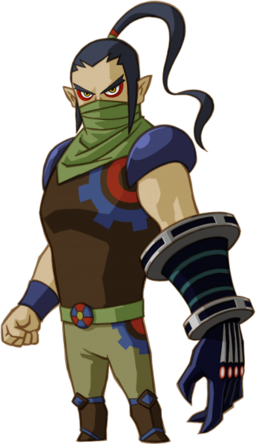
Byrne is the boss of the Tower of Spirits, during Link's fifth trip through the dungeon. When the battle begins, Byrne will jump along the pillars and occasionally shoot weak beams towards Link. After dodging a few of these, Byrne will attempt to hit Link with his massive gauntlet arm. If Link dodges out of the way the gauntlet arm will get stuck in the ground. Zelda can then run over to the gauntlet and pull on it, which will cause Byrne to fall to the ground. Link can get a few slashes in before needing to repeat the process. After a few times, Byrne will stay on ground level. At this point, Link can go up and attack Byrne directly. After Byrne is a bit shaken up, he will now perform large purple charged attack towards Link. When he is charging up, Link can go hide behind the phantom. When Byrne charges in, the phantom will grab him and hold him steady. Link can then run on over and deliver some sword slashes while he is stuck, repeating the process until Byrne is defeated.
Skeldritch
- Main article: Skeldritch
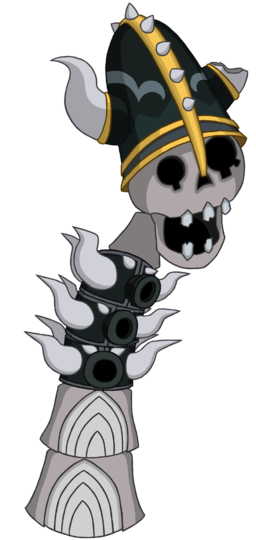
Skeldritch is the boss of the fifth dungeon in Spirit Tracks, the Sand Temple. When the battle begins, Skeldritch will shoot boulders out of the lower part of its body. Link will need to stop a boulder with the Sand Wand and then maneuver it onto one of the catapults surrounding the platform. Upon hitting the switch, the boulder will fly across the room and hit Skeldritch, removing a part of its body. This causes Skeldritch's weak spot to change as well; the first time it's on Skeldritch's right side, then behind, and then behind and to the left. Link will need to place boulders on the catapults and then run around the room so the catapult is in line with Skeldritch's unarmored weak spot. The Bow, Boomerang, or even timed Bombs to blow up the switches and launch the catapult.
After removing the last of Skeldritch's lower body parts, only the head will remain. The final phase of the battle can be quite hectic. Link can use the sand wand to create a massive wall of sand surrounding Skeldritch. Skeldritch will begin eating away at the sand, so the sand protection won't last long. Link must very quickly run to the backside of Skeldritch and slash away at purple spot at the back of its head. In order to accomplish this, Link must be elevated on top of sand in order to reach the jewel on Skeldritch's head. After repeating this process a few times, Skeldritch will finally be defeated.
Demon Train
- Main article: Demon Train
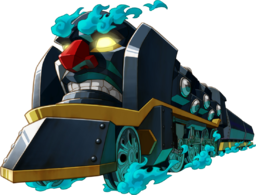
The Demon Train is a boss found within the Dark Realm. During the first part of the boss fight, the Demon Train drops explosive barrels out of the sides of its last car to hit the Spirit Train. Link must blast these barrels with the cannon before they drop out in order to cause damage to the Demon Train. Once Link damages the Demon Train enough, the last car falls off from the rest of the train. In the second phase of the fight, Link must destroy the Demon Train's second car. On this car, the Demon Train has four laser cannons that fire at the Spirit Train. Link must shoot each cannon twice to damage the second part of the Demon Train and break it off from the engine. Link must also make sure to avoid the Train when it switches tracks; dropping the Spirit Train's speed and switching its own track when necessary.
The final phase of the fight consists of Link facing off with the engine of the Demon Train. The engine (the very front part of the train) has multiple rotating lasers that all fire simultaneously. Link has to shoot each crystal that is producing the lasers. After this is done, he can proceed to speed up and shoot at the Demon Train's face at the front of the engine. After repeating the process, the Demon Train will be defeated and Link moves on to his fight with Chancellor Cole.
Possessed Zelda and Chancellor Cole
The goal is to march the Phantom all the way to Puppet Zelda at the north end of the train. As Link and the Phantom walk towards Puppet Zelda though, Chancellor Cole will set off various traps to stop them. During one of the traps Cole will summon magical rats that surround the phantom. Link must slash all the rats before they can reach the phantom. If they do, Cole will then be able to control the phantom with some magical strings. If this does occur, Link can pull out the boomerang and trace a path so that it will cut the strings.
The best solution is to keep Link behind the phantom to protect him from the lasers that Puppet Zelda shoots out. Keep slashing away at the magical rats that Cole sends out towards them. Once Link and the Phantom have finally reached Puppet Zelda, trace a path so that the Phantom picks up Puppet Zelda. Link can then walk to the very edge of the train and pull out the Bow. At this point, all Link needs is to shoot a Light Arrow into Puppet Zelda to finish off this portion of the ending fight.
Malladus, the Demon King
- Main article: Malladus
The first phase of the battle involves protecting Princess Zelda from the numerous fireballs Malladus shoot out. The first few will be direct shots that are easy to deflect, but then he'll start shooting fireballs that trail off to the side and come around from the right or left to hit Zelda. Link will need to move around and hit the fireballs before they hit Zelda. At one point Malladus will shoot four fireballs at once, for which Link will need to stand as close to Zelda as possible, and use a spin attack to deflect all four fireballs. Once Princess Zelda has full charged up her power, she says she needs to combine her sacred power with power of the Spirit Flute. Princess Zelda will then teach Link a very challenging song on the Spirit Flute.
Playing the song reveals a shining weak spot on the back of Malladus. Link now needs to distract Malladus so that its back is facing Princess Zelda, who possess the Bow of Light. Link can run around the area and slash at the legs of Malladus until there is a clear shot of the weak spot of Malladus. When the cursor on Malladus turns yellow, tap the arrow at the bottom of the screen to deliver a Light Arrow shot. After being shot with three arrows Malladus will fall to the ground. Link can then run over and slash at the gem that is on its forehead. After attacking it enough times part of Malladus' horn will fall off. Repeating the process for a second time will allow Link to cut off the second horn. Once Malladus is stunned for a third time, Link can run over and jab the sword into Malladus' forehead. Quickly rub the stylus on the bottom screen as Princess Zelda assists to defeat Malladus for good.


