- Chapter 1 – First Three Days
- Chapter 2 – Southern Swamp
- Chapter 3 – Woodfall Temple
- Chapter 4 – Collection
- Chapter 5 – Snowhead
- Chapter 6 – Snowhead Temple
- Chapter 7 – Spring, Romani Ranch, Ikana Graveyard
- Chapter 8 – Great Bay & Zora Cape
- Chapter 9 – Great Bay Temple
- Chapter 10 – Ikana Canyon
- Chapter 11 – Well & Ikana Castle
- Chapter 12 – Stone Tower Temple
- Chapter 13 – The Moon
5.1 Snowhead Mountain
Your next objective is the snow-covered mountain known as Snowhead to the north. In order to get there, however, you’re going to need Bombs. This guide covered purchasing the Big Bomb Bag back at the beginning of Chapter 2, but if you have not yet done so, you can either purchase the regular Bomb Bag from the Bomb Shop in West Clock Town for 40 rupees (which allows you to carry up to 20 Bombs), or you can rescue the Old Lady in North Clock Town at 12:00AM on the first night, then purchase the Big Bomb Bag for 90 rupees (which allows you to carry up to 30 Bombs). By doing this, you can skip straight to the upgraded Bomb Bag.
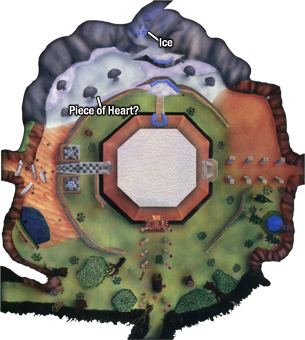
Slash some of the circles of bushes to gather up arrows and Bombs, since you will need both for this journey. Go down the ramp into the snowy area where you’ll encounter Dodongos (day) or Eeno (night). The fire-breathing lizards can be defeated by smacking their tail, but they have quite a bit of health and die much faster if you use Bombs or the Blast Mask. The snowmen are fairly easy; simply get close using your shield and slash them up. Be warned that the larger ones will split into several when defeated. If you haven’t done so already, you can collect a Piece of Heart here by defeating two Dodongos that appear in a hole nearby. This hole is under a mushroom off to the left.
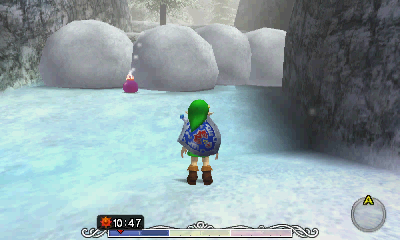
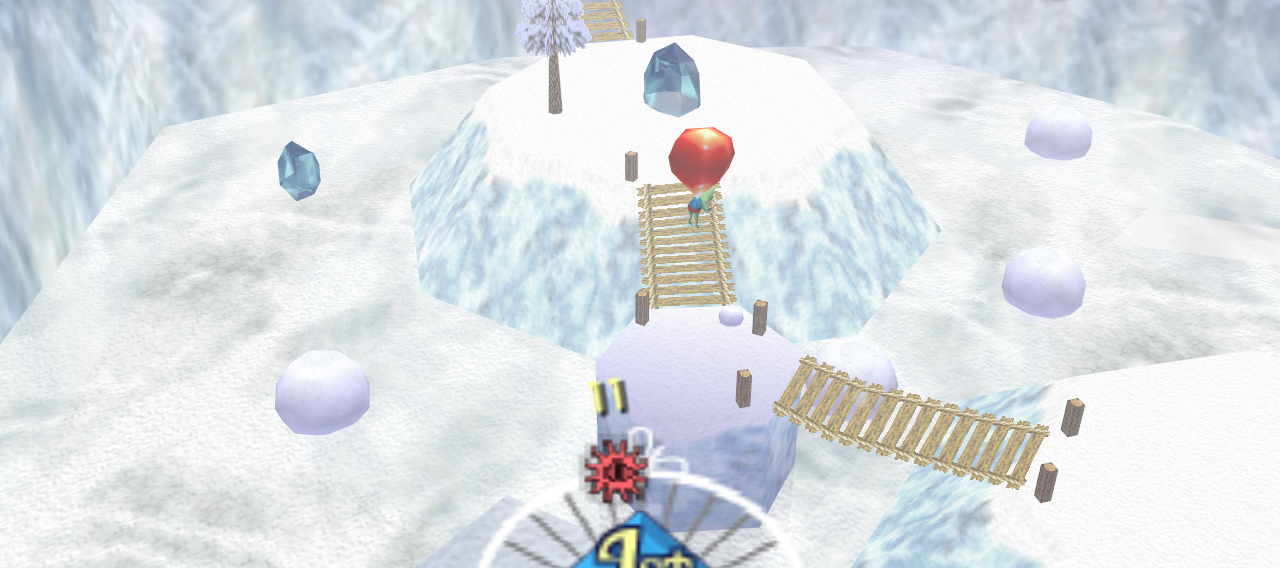
Climb the ramps to the north and you’ll come to some large chunks of ice. If you touch them, they will freeze you and deal quite a bit of damage before you break free. If you look above the ice, you’ll see an ice stalactite that is hanging directly over it. You can target it and speak with Tatl, who will point out that you could pierce right through it with two shots of some kind of weapon…Whip out your trusty Bow and prove her point.


Run forward and you’ll encounter a new enemy: a Blue Tektite. These things will hide under the snow and pounce once you get close, so be emotionally prepared to whip out your shield on a moment’s notice. Continue upward and eventually you’ll come to a wall of snowy boulders that block your path. If you stand near them, Tatl will tell you to blast through them. Use either Bombs or Blast Mask to do just that, then continue onward.

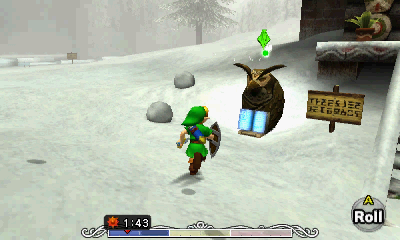
This isn’t much of a village. It’s just one building! You’ll see there’s a shivering Goron on top of a ledge, but you can’t do anything with him at the moment. Run forward once you regain control and cross the little bridge to find an Owl Statue. Slash it with your sword to wake it up, then turn around the other way, following the path behind the lone building.


This area is somewhat bowel shaped, and if you aren’t careful, you’ll fall down into the lower portions and have to take the ramp to get back up (at the beginning). Run forward, killing the Blue Tektite that gets in your way, then cross the first bridge. Here, you’ll encounter a new enemy called a White Wolfos. These pale and pasty hounds appear when you get close, and they’re excellent at guarding themselves. Wait until they attack to strike. If you can get their backside, it will do double damage! Continue across the bridges and shoot down Tingle who is floating around about half-way through the area. Purchase the Map of Snowhead from him for 20 rupees, then continue on the last stretch to enter the Goron Village.


5.2 Goron Mask

You can speak with the Gorons around town if you’d like, though most of them are indoors because everything’s frozen over right now. Go to the opposite side of the village where you’ll see a large floating island off in the distance. At the edge, you’ll see Kaepora Gaebora perched atop the nearby pillar. As soon as you get close, he’ll talk to you for a moment about courage and the like, then tell you to follow him. He then proceeds to drop feathers upon invisible, icy platforms. The feathers will disappear after a short time, so don’t take too long. If you mess up, you’ll have to leave the area and come back to make him do it again. Jump from one to the next, steadily working your way forward. Once you get to the end, enter the shrine.


Open the large chest ahead to receive the Lens of Truth. Set it to one of your C buttons and the fun begins. Blow up all of the giant boulders here with either Bombs or the Blast Mask and use your Lens of Truth to find two chests. One contains a purple rupee (50) while the other (which is guarded by an invisible Skulltula) contains a red rupee (20). Slash the bushes to get more Bombs and magic, then leave the shrine.
Back outside, use the Lens of Truth to see the icy platforms that were previously invisible. Jump back across them and you’ll see a floating Goron on the ledge. Now that you can see him, go ahead and speak with him. He’ll be surprised, but quickly ask you to follow him. At this point, you can simply stop using the Lens of Truth to conserve magic and follow his shadow. You can slash the snowballs along the way for more magic if you need any. Follow him through the village, and once he stops moving (at the exit), use the Lens again and stand next to him to make him go through. Follow him.
Back along the Road To Goron Village, use the Lens again to get the spirit moving. You can turn off the Lens again and follow its shadow. Watch out for the White Wolfos and Blue Tektite along the way, then use the Lens again once you get to the end to make it go on to the next area.


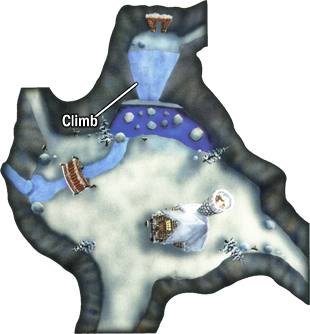
Finally back in the Mountain Village, use the Lens again to get it moving, then follow it over to the water. At this point, you’ll see it fly up to the top of the cliffside, which you’ll see, has a ton of ladders on it. To get across the water, you can either jump on the small iceberg that’s spinning around or simply wear the Deku Mask and hop to the other side. The latter is probably the easier option. Use the Lens to see the grippable points and start climbing. The correct path is shown in the image on the left: right, left, right. When you reach the top, slash the snowball here to get some magic, then use the Lens to make the spirit finally enter the Goron Graveyard.


Inside, use your Lens one last time to speak with the spirit. He introduces himself at long last as Darmani the Third, the proud Goron Hero. Apparently, he tried to get to the Snowhead Temple on his own to stop the unnatural cold that is coming from the mountain, freezing Snowhead and slowly killing his people. On the way there, he got blown off the mountain by the fierce blizzards and died. Yipes! Better not fall off yourself then, huh? His soul is overcome with grief and cannot pass on while his people suffer.
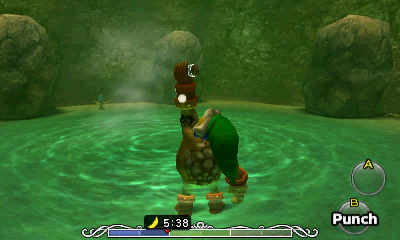
Well, he asked you to heal his sorrows, so play the Song of Healing and witness a sad cutscene of Darmani crying because he could not save his people. At the end, he will pass on his duty to you and grant you his powers. As expected, you will then receive the Goron Mask, which will allow you to change into the very form of Darmani! Everyone will think you are him. Put on the Goron Mask, then read the grave for more instructions on how to use it if you wish. There is also a summarized version off to the left that may be a little more handy.


5.3 Goron Lullaby

Just outside the Goron Graveyard are two Gorons. The one who isn’t frozen mentions that there’s a hot spring beneath Darmani’s grave. Go back inside and pull it back (from behind) as a Goron. This will allow this lower area to fill up with steaming Hot Spring Water. Snag some in a bottle, but it won’t stay hot for long! Either run out of the cave, take off the Goron Mask and jump into the water, OR, Soar to the Owl Statue in Mountain Village. Once you make it down, run in the direction of Goron Village. The Bunny Hood can be really useful here.
On the Road To Goron Village, go across the first two bridges, avoiding the White Wolfos. At the third island, just before the entrance to Goron Village itself, you’ll see some ice blocking a hole in the ground. Use the Hot Spring Water here to melt the ice and allow you to enter the hole from now on. There isn’t much to do with this now, but it’ll come in handy in a moment. Continue on into Goron Village.


As soon as you enter, you can go across the bridge and speak with the Goron here above the door. He’ll open up the door by pounding the ground (which you can now do yourself as a Goron by pressing A + B). Just outside of the shrine in the Nintendo 3DS version, you’ll find an owl feather where you will be able to save your progress. Either way, enter into the Goron Shrine.
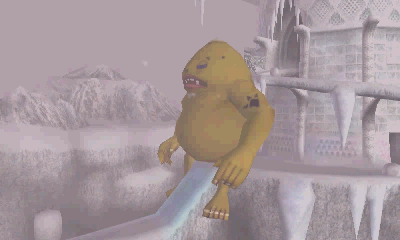
Inside it seems that the baby Goron is crying so hard that all of the fires in the shrine have been blown out. You can chat with the various Gorons inside who all basically tell you the same things: They thought Darmani was dead, the cold has made trade nearly impossible (so stuff in the shop at the bottom is expensive), the Goron Elder went to Snowhead in Darmani’s place and the Goron Elder’s Son is lonely and will not stop crying. Go to the top of the shrine and speak with the crying baby on the throne while wearing the Goron Mask. He’ll recognize you as Darmani and explain that he misses his daddy (the Goron Elder). That’s all you need to do here, so go ahead and leave the shrine.


According to the Gorons within the Goron Shrine, the Goron Elder started heading to Snowhead, but that was quite awhile ago. They don’t think he quite made it, so where could he be? There’s actually three places he can be, depending on which day it is.
The Goron Elder is found within a giant snowball (that can be broken up with the Blast Mask, Bombs or a good old Fire Punch while wearing the Goron Mask) and he steadily moves forward each day. If it’s the first day, he’ll be near the entrance to Goron Village, if it’s the second day, he’ll be near the ramp towards Mountain Village, and if it’s the third day, he’ll be right next to the Owl Statue in Mountain Village itself. Once you’ve determined his location, return either to the Goron Graveyard (where you got the Goron Mask) or the hole you unfroze on the third platform on the Road To Goron Village (whichever is closer).

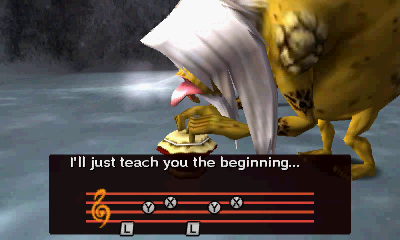
Grab some Hot Spring Water, return to the correct boulder, break it with a Fire Punch and thaw the Goron Elder. Wear the Goron Mask and speak with him twice to tell him of the situation with his son. NOTE: You have to have spoken to his son before this or it won’t work! Upon realizing that his son misses him, he will teach you the Lullaby Intro. The poor old guy can’t remember the rest.
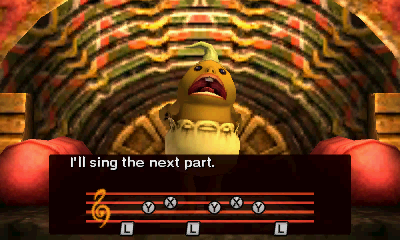
Run back to the Goron Shrine, stand in front of the baby Goron and play the Goron Lullaby while wearing the Goron Mask. The Goron Elder’s son will then teach you the last part of the song (which is ironically very simple), and after repeating it back to him, he AND the two nearby Gorons will fall asleep.
5.4 Goron Goodies
NOTE: This entire section consists of optional content. Now that you have the Goron Mask, there are a few goodies you can get, including a Bomb Bag upgrade, a new mask, and a Piece of Heart. None of this is required to progress through the main quest. To continue onward in the main quest, jump ahead to section 5.5.

Now that the kid is asleep, the torches in the throne room are lit. Slash the nearby jars to get a Deku Stick, put on the Bunny Hood if you have it, and run out of the room with a lit Deku Stick, lighting the torches on the ramp straight ahead. Turn to your right and light all the torches going down as quickly as you can! At the bottom, hop onto the platform, lighting the final two torches. Once all of the torches in the room are lit, it will cause the chandelier at the top to start spinning.


Go back to the top and put on the Goron Mask. Whenever you see these ramps (at the edge between the two torches), it means you can use a Goron Roll to launch up into the air. The red carpet here is slippery for some odd reason, but only near the doorway and into the throne room itself.
Stand on a slippery portion and hold A and forward on the Analog Stick to begin rolling. Because of the slippery surface, you should have more than enough room to charge up and launch forward. If you time it well, you can smash one of the five pots with the Goron faces on them that make up the chandelier. Four of them are empty, but just keep using the process of elimination until you find the Rock Sirloin. This hefty and apparently hardy meal of stone is just the ticket you need to get your next mask. Pick it up as a Goron and leave the shrine.
Now, if you happen to be full on rupees (200), head over to the nearby Business Scrub while wearing the Goron Mask to purchase something handy. If you don’t have that much, just follow along. You’ll have to carry the Rock Sirloin all the way back to Mountain Village. Just ignore all of the enemies you encounter. Alternatively, you could just set down the rock (why can’t you throw it at them? That would hurt!) and defeat them with your fantastic Fire Punches.


Once you make it back to the Mountain Village, head over to the ledge on the west side of the area where there’s a shivering Goron wearing an odd-looking green mask. He’ll inform you that he’s too famished and cold to make it down. Toss him the Rock Sirloin to give him the energy he needs to return home, blessing you with Don Gero’s Mask as you part ways. This is a cool little mask, but unfortunately, you won’t be able to use it until much later. That’s all that there is to do here, so use the Owl Statue if you haven’t already to create a spot you can soar to.
Soar back to Clock Town and gather (or withdraw) some rupees. Enter the Treasure Chest Shop in East Clock Town and pay the girl at the desk while wearing the Goron Mask. She’s a stickler for beauty and will charge you the largest amount, but the prize is a wonderful Piece of Heart if you win!
The checkerboard floor contains invisible walls that you can only see once you get close to them, rising up to stop your progress. Quickly try to memorize the maze (which changes each time you play) and get to the chest at the end!
Use either the Goron Mask to roll (although you’ll bounce off the blocks if you’re not careful), or the Bunny Hood, which makes this mini-game much easier!


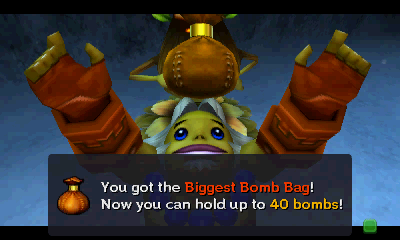
Once you have acquired that fantastic prize, gather (or withdraw) a total of 200 rupees and soar back to Mountain Village. Run all the way back to Goron Village and chat with the Business Scrub if you haven’t already. He mentions that he’s looking to do business with Gorons, and if you wear the Goron Mask when chatting with him, he’ll make you a special deal: an upgrade for your Bomb Bag for 200 rupees!
Hopefully you’ve already purchased the Big Bomb Bag back at the beginning of Chapter 2, which the Business Scrub will upgrade to the Biggest Bomb Bag. If you only have the regular Bomb Bag, he’ll only upgrade it to the Big Bomb Bag and you’ll have to return to get the Biggest one, unfortunately.

5.5 To the Temple

Play the Song of Soaring and return to the Owl Statue at the Mountain Village. From here follow the pathway at the northwest part of the area, which leads to the Road to Snowhead.
You’ll find a new variation of an old enemy here: Ice Keese. Perhaps one of the most hated foes in the entire Zelda series, these guys do quite a bit of damage and are annoying to avoid if you don’t see them coming. This is the first area in which you have to use the Goron Jumps extensively. Curl up and roll towards the first ramp. If you charge it up for long enough, the spikes will come out and you’ll be propelled forward over the gap. You can roll through these snowy boulders or you can stop rolling and use Fire Punches to break through the ones that get in your way. At the second ramp, charge up another roll if you aren’t zipping around already and launch yourself over to the last side. Break some snowy boulders here to get some magic and go north.
Here, you’ll immediately find an Owl Statue. Slash it with your sword to activate it. Now is a great time to save, as you’ll be heading to the dungeon from here.


Now that you have that Piece of Heart, the Bomb Bag upgrade as well as the Owl Statue on Snowhead, you should likely play the Song of Time to save. After that, play the Inverted Song of Time to slow down time and soar back to Snowhead. Slash or punch the nearby snowballs to stock up on ammunition and the like, placing the Fairy in your bottle if you wish.
As you walk forward, Tatl gives you a hint on what to do next. She mentions something about “seeing,” which is a clue to use the Lens of Truth. If you do, you’ll see a very large, invisible Goron by the name of Biggoron, who is blowing gusts of wind in this direction. As with all of the dungeons, you must use the area’s respective transformation mask and song to proceed. Put on the Goron Mask and play the Goron Lullaby. You’ll see a short scene of Biggoron dozing off and falling down into the abyss. Ouch!

With him out of the way, you can run forward, using Fire Punches to smash the giant snow boulders that roll your way. Once you get to the ramp, just use A to roll up it. At the top, you’ll see some White Wolfos, which you can simply ignore. If you’d like to kill them, you can actually hold A and press B to perform a Goron Pound, which, if you time it right, will hit them from behind and deal more damage.

Off to the left is a ramp leading clockwise up Snowhead. Follow it upwards, using Fire Punches to break through anything that gets in your way. If you’re really daring, you could also use Bombs (which are hard to time well) or the Blast Mask (use the Shield to not take damage). Alternatively, you can just wait until they pass (since they drop down at set points) and then proceed. At the very top, you’ll come to the entrance of the Snowhead Temple.


- Chapter 1 – First Three Days
- Chapter 2 – Southern Swamp
- Chapter 3 – Woodfall Temple
- Chapter 4 – Collection
- Chapter 5 – Snowhead
- Chapter 6 – Snowhead Temple
- Chapter 7 – Spring, Romani Ranch, Ikana Graveyard
- Chapter 8 – Great Bay & Zora Cape
- Chapter 9 – Great Bay Temple
- Chapter 10 – Ikana Canyon
- Chapter 11 – Well & Ikana Castle
- Chapter 12 – Stone Tower Temple
- Chapter 13 – The Moon
