- Chapter 1 – Deepwood Shrine
- Chapter 2 – Cave of Flames
- Chapter 3 – Fortress of Winds
- Chapter 4 – Temple of Droplets
- Chapter 5 – Palace of Winds
- Chapter 6 – Dark Hyrule Castle
4.1 The Flippers
With the Bow and Arrow and Mole Mitts, as well as newly accessible kinstone fusions, there is plenty for us to do in the overworld. However, we are first going to progress in the main quest and search for the next element. You can use the Ocarina of Wind to warp to any of the Wind Crest locations that you’ve uncovered. One of the Wind Crests that is automatically uncovered is the one in Lake Hylia and that is our next destination. Play the Ocarina of Wind and warp over to Lake Hylia.
Once you arrive use the tree stump to shrink down to Minish size and enter the building. The Minish inside will talk about how to enter the Temple of Droplets and mentions that the Elder Librari over at the town library once entered the Temple. Once you speak with this Minish here at Lake Hylia, it triggers the opening of the library in Hyrule Town. While you are still here, you can fuse red kinstones with this Minish, and this allows for an opening in the Western Wood. We’ll cover this a bit later. For now, resize and then use the Ocarina of Wind to warp over to Hyrule Town. If you haven’t activated the Wind Crest in Hyrule Town, you’ll have to travel by foot to get there.
The Library is located at the northwest part of Hyrule Town. The man that was blocking the entrance is now gone, so go ahead and enter the library. Walk up the stairs to get to the second floor of the library and then exit through the door to get back outside. Use the Cane of Pacci to flip over the jar and then shrink down to Minish size. Reenter the library through the small hole.

As a Minish, walk over to the man at the top-left part of the room and it will zoom in. Speak to the Minish found here and you’ll learn that some of the books have been checked out of the library. Since these certain books are missing, the Minish cannot climb up to Elder Librari. Exit the library and revert back to human size. Reenter the library and head back to the first floor.


On the first floor of the library, speak with the librarian on the left and she recognizes you as Smith’s grandson. You’ll find out that those particular books are long overdue. A Hyrulean Bestiary has been checked out by a girl with a cat. Exit the library and head to the blue-roofed house at the southeast corner of Hyrule Town. Enter the house to find the cat on the left and a note on the right. Ezlo will point out that the missing book can be seen on top of the bookshelf. You can read the note on the table to find that the girl is next door.


Exit the house and enter the purple-roofed house next door. Speak to the Julietta on the left and you’ll find that it is her book that is overdue. She tells you that you can go back and get it…but that doesn’t solve the problem. The key here is the fireplace found within this room. We’ll need to get some water in order to put out the fire. Exit the house and walk to the river at the west end of town. Swing an empty bottle and you’ll fill it up with some water. Return to the house and pour the water onto the fireplace to put out the fire. Shrink down using the pot and then walk into the fireplace.


Back outside, walk across the wooden plank and enter the blue-roofed building. Be careful of the cat as it will try to scratch you. Walk to the top-left part of the room and climb the steps. Walk over to the book and push it down so that it falls off of the bookshelf. Go back up the fireplace and return to the previous house. Resize and then finally return to the house with the book to get the book titled, ‘A Hyrulean Bestiary‘.


With the first book in hand, return to the library and give it to the librarian. Speak with the librarian after returning the book and she tells you that the second overdue book is titled ‘Legend of the Picori’. This was checked out by an absentminded scholar.
This second book can be found at the southwest portion of Hyrule Town. In order to actually reach this area, you must have already spoken to the dog as a Minish. If you haven’t, you’ll have to enter Mama’s Café and shrink down to Minish size. Cross the river using the thin wooden plank and then speak with the dog, to get him to start moving. Resize and head over to the purple-roofed building at the southwest portion of Hyrule Town. Try to enter it and the man will mention the book before inviting you inside.
Once you are inside, speak with Dr. Left and he’ll mention that he hasn’t seen the missing book for several days. He is sure that it is somewhere in the house though. Exit the house and then use an empty bottle to scoop up some water from the river. Re-enter Dr. Left’s house and pour the water onto the fireplace. Exit the house and enter the carpenter’s house located just to the south. Shrink down in size by using use the pot and then exit the building through the small hole to the north.


You can reenter Dr. Left’s house and then walk into the small hole at the north end of the room. The Minish found here gives you a clue on what you need to do. “Cross the bridge that spans the rapid flow…Through the land of the fearsome beast…Until you reach the misty falls…The treasure sleeps on the other side of the secret entrance there…” Exit the room and then head up through the fireplace.


Back outside walk across the plank and then enter the large yellow roofed building through the small hole. You can speak with the Minish here, but then exit the house through the small hole at the north. Walk across the bridge on the right and you’ll see a small maze with some cats. Run right through, trying to avoid the cats in the process. Climb down the small vine seen here and then enter the small cave to the right of the fountain.


Inside of this cave, defeat the sluggula and then go right a screen. Use the Cane of Pacci on the hole to reach the higher ledge and then head up a screen. Defeat the four blue mulldozers in this room and then open the large treasure chest to get the Power Bracelets! These items will allow you to lift and push larger objects.

With the power bracelets in hand, let’s backtrack all the way to Dr. Left’s house at the southwest part of Hyrule Town. There are two large cabinets at the north end of the room. Stand in between them and push the cabinet to the left. Then push the second cabinet to the left. Now you should be able to climb the steps at the top-left portion of the room and head up through the small hole.


Walk to the right side of the room and you’ll find a Minish standing on top of a green book. You will need to add extra weight in order to knock the book down from the rafters. Walk to the bottom-left part of the screen and clear the dust using the gust jar. Make a vertical duplicate of Link and then walk back over to the green book. Stand on the left of the book and that extra weight will cause the book to fall from the rafters down to the ground below.

Exit Dr. Left’s house, revert back to human size, and then return to the building. Walk over and pickup the second book, “Legend of the Picori“. Run back over to the library and return the second book to the librarian. Speak to the librarian to find that the last book that is missing is “A History of Masks”. This book was checked out by Mayor Hagen.


Mayor Hagen’s house is located just east of the bell found near the center of Hyrule Town. Enter the yellow-roofed building and speak with Mayor Hagen, but unfortunately he doesn’t seem to know too much about the missing book. There are four masks along the north wall that you can knock down by ramming into the wall using the Pegasus Boots. Then use the Cane of Pacci to flip over the pot and shrink down to Minish size. Climb the small steps at the top-right portion of the room and head through the hole to find some Minish. The Minish will tell you that the mayor took off for the cabin by the lake and had the book in hand. The Minish will mark the Mayor’s Cabin on your map. Afterwards return to the large pot and resize before leaving the building.

Leave the town to the east to get to Lon Lon Ranch. Walk to the southeast part of the map and head east to reach Lake Hylia. Continue along the path and head south to get back to the Minish Woods. Walk down a bit and you’ll find a sign along with a cave nearby. Use the Mole Mitts to dig inside of this cave.

Inside of this cave use the mole mitts to find a treasure chest containing a Blue Kinstone. Dig your way to the northeast corner of the area, watching out for the Like Like enemies along the way. You will see a mysterious wall at the northeast corner of the room. Fuse blue kinstones with the wall and this will cause a second Goron to appear in the Goron Cave, helping to break the boulder that is in the way. This is part of a long sidequest that we will complete later on in the game. Afterwards dig your way over to the ladder and resurface in Lake Hylia.


On the right side of the map you can enter Mayor Hagen’s Cabin, but we cannot quite do much just yet. You can see the book on top of the shelf, but there is no way to get to it just yet. There is a note on the table that gives you a hint as to what you need to do. Exit the cabin and just north of the cabin there is a shiny tree that you can ram into with the Pegasus Boots. Use the tree stump that appears to shrink down to Minish size. Walk south and into the small path that leads to the back of the cabin. Use the gust jar to get across the water and enter the cabin.


Back inside of the house, ride across the lilypad to get across the water. Walk to the top-left part of the room and push the shelf to the right. Climb the small staircase and then push the book so that it falls to the ground. Afterwards exit the house and watch out for the pestos this time when you cross the water. Return to the tree stump and resize. Renter the cabin and collect the third book, “A History of Masks“.


Make your way all the way back to the library in Hyrule Town and return the third book to the librarian. Sturgeon will come downstairs and put all the books back on the shelf. Go upstairs and then exit the library. Use the stone to shrink down in size and reenter the library. Walk over to the northwest part of the room and speak to the Minish in yellow to get 50 rupees. Climb the books and then enter the door inside of a book to reach the Elder Librari. After mentioning that you’d like to visit the Temple of Droplets, the Elder Librari will open a secret panel in the ground, sending Link all the way down to a water area.


Push the blocks at the bottom-left to free yourself and then head down a screen. Defeat the sluggula and then use the gust jar to grab the mushroom and sling across the water. Walk left a screen and then head up through the door. There is a new enemy here known as a Scissors Beetle. Once these enemies toss their pincers towards you, you can slash away with your sword. You can use your boomerang to stun them or just try to hit them at their side or at their back. After they have been defeated open the large treasure chest that appears to get the Flippers!


With the newly acquired flippers, jump into the water and swim down several screens to get back outside. Resurface on the land and climb the small steps to get back to the top of the library. Resize using the stone and then head through the library to get back outside to the main part of Hyrule Town.


At this point there are tons of side quests we can do. If you’d like to progress in the main quest, you can go straight to the Temple of Droplets. Just head to Lake Hylia and make your way over to where the element is on your map. Jump over the crack in the ice and shrink down to enter the temple. The Temple of Droplets will be covered in section 4.3, so skip ahead if you’d like to continue on the main quest. Section 4.2 consists completely of optional quests.
4.2 Overworld Extras
You should have saved up quite a bit of rupees and if you have at least 600 right now, there are some goodies for you to pick-up at the Hyrule Town shop. First off, if you haven’t purchased it earlier, you can get the big bomb bag at the shop for 600 rupees. This will now allow you to carry the obnoxious amount of 50 bombs at a time. Also for sale at the price of 600 rupees is the Quiver. This will allow you to carry up to 50 arrows at a time. Obviously you cannot buy both of these back to back, but we are about to collect a handful of rupees, so you’ll be returning here shortly.


If you are still looking for additional rupees, visiting Carlov at the southwest part of Hyrule Town is a good idea. You can trade in Mysterious Shells in order to get some more figurines. Since we completed the Fortress of Winds, there are a handful of additional figurines now available. I recommend only trading in one shell at a time at this point in the game, and just taking the 5 extra rupees for each duplicate figurine you get. There are still some more figurines that we cannot even get yet, so there is no use wasting all your mysterious shells just yet, but also, you don’t want to reach the maximum of 999 mysterious shells either.
Now that we have the flippers, we can finally complete the Cucco mini-game at the southeast part of Hyrule Town. Speak with Anju the cucco lady here and you’ll find that some of her Cuccos are loose around town. She will ask you to return a number of cuccos in a set amount of time. There are more cuccos in Hyrule Town than you actually need, so there are options as to which cuccos you need to bring. However, in order to win the final prize, you will need to have the Pegasus Boots and Flippers to move around town quickly.
Link will get a reward each time he gathers the cuccos before the time expires. Furthermore, Link will get 10 rupees for every white cucco he returns and 50 rupees for every golden cucco. You can actually collect more cuccos than are asked of you to get more rupees each round. You can see a chart of all the data below. It’s a fun mini-game but the later portions of it can be quite annoying. When using the Pegasus Boots, I’d highly recommend not having the sword equipped at the same time, as you might strike the cucco and scare it off. When tossing the cuccos from directly to the left of Anju, the cucco might find its way into the pen.


- 2 Cuccos in 25 Seconds – 10 Mysterious Shells
- 3 Cuccos in 25 Seconds – 10 Mysterious Shells
- 4 Cuccos in 30 Seconds – 20 Mysterious Shells
- 5 Cuccos in 45 Seconds – 20 Mysterious Shells
- 5 Cuccos in 50 Seconds – 30 Mysterious Shells
- 5 Cuccos in 45 Seconds – 30 Mysterious Shells
- 6 Cuccos in 50 Seconds – Red Kinstone
- 7 Cuccos in 60 Seconds – Red Kinstone
- 2 Cuccos in 55 Seconds – Red Kinstone
- 3 Cuccos in 55 Seconds – Piece of Heart #21


After completing the cucco-game, you should have well over the 600-rupee mark, so go ahead and re-enter the shop and purchase the Quiver Upgrade. If you don’t have the rupees, you can still play the cucco game and it will just repeat the three cuccos in 55 seconds map over and over. Our next destination is right near the center of town, just south of the Mayor’s house and north of the bakery. There is a sign saying ‘under construction’, along with a strange wall. Use the Mole Mitts to dig into the wall and enter the cave.


Use the mole mitts to dig your way through this cave. There are three gold treasure chests found here, all containing red kinstones. Open all three treasure chests and then head down the staircase at the end of the tunnel. Open another treasure chest here to 100 rupees. On the right side, push the boulder to the right so that it falls into the hole in the ground. This will lead to a later quest in the game, but it is a good idea to get it out of the way now. Afterwards head back through the previous cave and resurface back in Hyrule Town.
One of the girls in town is named Candy and you’ll be able to fuse blue kinstones with her. She might be outside of the treasure game shop that is now open, which is the yellow-roofed building just to the east of the center of town. Alternatively, you might find her in the inn at the east part of town. Fuse blue kinstones with her and this will cause a small piece of land to appear in the Trilby Highlands, allowing you to access a cave nearby. We will be checking this cave out in a bit.

At the east end of Hyrule Town, enter the large yellow-roofed building from the entrance on the second floor. Inside you will find three women, Din, Nayru, and Farore. Fuse red kinstones with Farore on the right side and this will cause Gorman to appear in Hyrule Town. He walks by that empty house at the bottom-right portion of town and decides that he can rent out his house for some extra case.

Run over and speak with Gorman and mention that you know somebody who wants to rent the place. Return to the inn and you can speak with any of the three girls and whichever one you choose, that girl will move into Gorman’s house. It doesn’t matter which one you choose, although whichever one you do pick, you’ll be able to get a temporary bottled item from them. Later on in the quest, you’ll be able to get more permanent items from them through kinstone fusions.
After renting out the first house to one of the Girls, Gorman can then be found at the west end of Hyrule Town, where he plans to build a house right where there is a tiny Minish sized house. Just to the north of Gorman near the Post Office, you will find Bremor, one of the carpenters. Fuse red kinstones with him and the head carpenter will suddenly feel motivated. The carpenter feels he can build a good-sized house in a matter of minutes.


This triggers the beginning of a new house being built at the west portion of Hyrule Town. Enter a random building and then exit to find that part of the new house has already been built. Once again enter and then exit a building and you’ll find that the house is now complete! Speak with Gorman and he is once again looking to rent out the house. Run over to one of the two remaining girls over at the inn, and offer the house to them.

Located near the center of town, just south of the boots store, you will find a green-roofed building with a monster on top. Enter the building and you’ll be able to play Simon’s Simulations. Link will fall sleep in the bed and will dream of fighting monsters. Pay the 10 rupees to play and you’ll be taken to a generic looking room filled with enemies. Defeat the keatons, leevers, and beetles that appear and then open the treasure chest to get Piece of Heart #22. You can play the game multiple times to get rupee and kinstone rewards, but it is much harder the second time around.

Earlier this chapter when we got the Power Bracelet, we saw a Piece of Heart that we couldn’t quite reach. Now that we have the flippers, we will be able to get this goody. Go to the Carpenters house at the southwest part of town and shrink down in size. Exit through the whole to the north and then enter the building ahead. Exit through the fireplace and then head through the yellow-roofed building once again. Follow the same path, avoiding the cats, and enter the small hole near the fountain. Inside the cave, just swim across the water to the left and pickup Piece of Heart #23.


You should have plenty of green kinstones in your kinstone bag at this point, so now is a great time to complete Tingle’s sidequest for the Magical Boomerang. Go to South Hyrule Field and just east of your house, you will find a man dressed in green on the higher ledge. Use the Cane of Pacci to reach this higher ledge and fuse green kinstones with Tingle. This will cause one of the four trees in North Hyrule Field to reveal a secret entrance. It’s important to just talk to Tingle normally, as this will trigger his three brothers to appear in other parts of Hyrule. There are four trees in total here and there are four members of the Tingle Family.


Play your Ocarina of Wind and warp over to Lake Hylia. Jump off the ledge and cross the bridge to the north. Walk to the right and you will find David Jr. Walk on over to him and fuse green kinstones with him, causing a second tree in North Hyrule Field to reveal a secret entrance. Note, there are other goodies for us to get here in Lake Hylia, but we will be getting them a bit later.


The next Tingle brother can be found just to the west in Lon Lon Ranch. At the northwest portion of the cow pasture, there is a cave found here. Enter it and duplicate Link to be able to push the block. Climb the ladder here and fuse green kinstones with Ankle, causing a third tree in North Hyrule Field to reveal a secret entrance.


The final Tingle brother can be found in the Trilby Highland. Exit Hyrule Town to the west and at the northwest portion of this screen, you will find a small cave that you need to use the Mole Mitts to dig into. Dig through the dirt on the inside and you’ll find two treasure chests containing Blue Kinstones.


Also within this cave, there is another mysterious wall that we can fuse blue kinstones with. Fuse kinstones with the wall just to the right of the ladder and this will cause another Goron to appear in the Goron cave. This is part of a long Goron sidequest to get a couple of goodies and we will be finding a few more of these mysterious walls later on in this chapter. Afterwards, climb the ladder to exit the cave.
Knuckle will be found here so go ahead and fuse green kinstones with him, causing the fourth tree in North Hyrule Field to reveal a secret entrance. There is an optional small Minish home in this area and you can use the tree stump to reach it. However, it just contains an ordinary Minish that you can fuse a random kinstone with.


If you fused kinstones with Candy in Hyrule Town as stated earlier in this section, you will be able to access the cave just southeast of where Knuckle is. Jump into the water and then climb onto the land that is in front of the cave. Use the mole mitts to dig into the cave and inside you will find a treasure chest containing a Red Kinstone. If you dig deeper through this cave, you can climb down a ladder to find a fairy fountain.
Now that all four trees in North Hyrule Field have been opened up, let’s head on over. Each entrance has a treasure and a switch. Three of the treasure chests contain Red Kinstones and the fourth one contains 200 mysterious shells. After you step on all four switches in the four secret entrances, a ladder will appear in the center of this large room. Walk back outside and in between these four trees, climb down the ladder that has appeared. Open the large treasure chest to get the Magical Boomerang! This boomerang works much like the magical boomerang did in Oracle of Seasons. When you toss the boomerang, you can hold down the button and using the directional pad to cause the boomerang to turn as you’d like. It’s a nice item to have, but it is completely optional and doesn’t have too many practical uses over the standard boomerang.


With the Mole Mitts and Flippers, there are tons of goodies and lingering pieces of heart in the overworld that we can now get. Use the Ocarina of Wind to fly on over to Mount Crenel. We want to make our way back over to Grayblade’s Dojo. Climb up the walls along the east end of Mount Crenel and then enter the cave. Fuse red kinstones with Grayblade and this will cause a secret to open up within the waterfall at Castor Wilds. We will be checking out this goody in just a bit.


Afterwards, we want to make our way over to the Crenel Wall at the northwest part of the mountain. Climb the wall to reach the far northwest part of the overworld map. Climb down the ladder to the left and use the mole mitts to dig into the cave.


Dig your way through much of the cave and you will find Piece of Heart #24 at the top-left portion of the cave. Additionally, if you dig your way all the way to the top-right portion of the cave, there is a mysterious wall that we can fuse kinstones with. Do this and another Goron will join the group in the Goron cave at Lon Lon Ranch.

Play the Ocarina of Wind and warp on over to the Minish Woods. Use the tree stump to shrink down to Minish size and enter Minish Village. Enter the main part of Minish Village and make your way to the blue house at the west part of the town. There is a Minish in this house and you can fuse Green Kinstones with him. Doing so will cause a lilypad to appear in Castor Wilds. Leave the house and then re-enter, allowing you to fuse Kinstones with this Minish a second time. Repeat this a third time, and after fusing Kinstones three times with this particular Minish, three different lilypads will now appear in Castor Wilds.

Exit Minish Village and make your way back to the Tree Stump. Walk across the bridge to the left and then head up to find three small caves. The cave on the left leads to a red kinstone and Piece of Heart #25. The cave in the middle contains a Blue Kinstone and the cave on the right also contains a Blue Kinstone.


Exit the Minish Woods at the southwest corner of the area to get back to the Eastern Hills. Use the mushroom to launch yourself across the gap and then shrink down in size using the tree stump. Enter the Minish sized house here and fuse blue kinstones with the Forest Minish. This will cause a beanstalk to appear just to the north here in the Eastern Hills. Make your way over to the beanstalk and climb it to find tons of goodies. Run over and grab Piece of Heart #26. Open up the two treasure chests to get 200 rupees and 200 mysterious shells.


Make your way to the north area of the Eastern Hills, near Eenie and Meanie’s garden. Within the garden itself, there is one of those strange walls, so use the mole mitts to dig inside. There are two red rupees in this area, but be careful as a rupee like can be found underneath one of them. At the top-right portion of this cave, fuse blue kinstones with the mysterious wall and this will cause another goron to appear within the Goron Cave in Lon Lon Ranch. There is only one more goron to find, but unfortunately we cannot do that until much later in the quest.


Play your Ocarina of Wind and warp on over to Castor Wilds. Near the center of the area, you will find another one of those dirt walls that you can use your Mole Mitts to dig into. Inside here you will find two treasure chests, one containing 50 mysterious shells and the other containing a Red Kinstone.


The better prize in Castor Wilds is at the northeast corner of the area. Run across the swamp and swim across the small pond of water to find a cave. Push the block at the top-right corner to the left, and then push the block third from the top to the left. Push the middle block up and then pickup Piece of Heart #27.


Since we fused kinstones with Grayblade on Mount Crenel, there is now a secret passage within the waterfall. Swim inside the passage and you will find Scarblade’s Dojo. Scarblade will teach you how to more quickly unleash your Spin Attack. There isn’t much to this and it is just as it sounds. You can now charge the Great Spin Attack, but honestly, I think it makes very little difference.
Use the Pegasus Boots to dash over to the Tree Stump located at the northwest corner of the area. Shrink down to Minish Size and then use the Lilypad just north of the Tree Stump to reach a hole in the ground. Drop down and open the treasure chest to get a Blue Kinstone.


Return to the Tree Stump and this time ride the Lilypad down across the swamp and drop down another hole. Open this treasure chest to get a Red Kinstone and then climb back up the ladder. Walk through the small hole and at the southeast corner of this land area, you’ll find another lilypad. Ride it to another hole that contains Red Kinstone.


Ride the lilypad back to the west part of Castor Wilds. There is small hole that Minish Link can walk through on the right side of this area. Walk through and this will give Link access to much of Castor Wilds as a Minish. Make your way to the southeast corner of Castor Wilds and jump into the water. Swim into the small Minish size hole found here.


Inside the cave, open the treasure chest on the left to get a Red Kinstone. Then walk up the second path from the right and head up a screen. Defeat the two Scissor Beetles found here and then push the blocks on the left side to get through. Then defeat some Blue Mulldozers and push the middle blocks to reach Piece of Heart #28. Exit the cave and return to the Tree Stump so you can revert back to normal size.


Next, run to the southwest corner of Castor Wilds and then head south to the Wind Ruins. Make your way through this first area and shrink down at the tree stump. Drop down the hole just to the north and fuse red kinstones with the Minish found in this room. This will cause a beanstalk to appear just to the east here in the Wind Ruins.


Exit the cave and make your way passed the next few screens until you reach the beanstalk. Climb up the beanstalk and open the treasure chest to get a Quiver upgrade! If you got the previous upgrade, you will now be able to hold the obnoxious number of 70 arrows! Trust me, you’ll never need to use that many.


Use the Ocarina of Wind and warp over to South Hyrule Field. Since we have completed the Tingle quest, we’ll now be able to fuse kinstones with Tingle once again. This time it is a red kinstone and it will cause a Golden Tektite to appear on Mount Crenel. You can defeat this golden enemy at any point if you’d like and your reward will be 200 rupees.


Run over to the southwest corner of South Hyrule Field and dash into the lone tree to reveal a tree stump. Shrink down in size and then enter the small building to the north. You can fuse red kinstones with the Minish found here and this will cause Syrup in the Minish Woods to develop a more powerful potion.


As a Minish at the southwest portion of the South Hyrule Field, jump off the ledge to the right and land in the water. Swim northward and then eastward and you will find a small minish size hole. Enter it and collect Piece of Heart #29 that is waiting for you. Swim back through the water, climb the vines on the right side of the bridge, and resize using the tree stump.


Our next destination is over at the Western Woods. Walk to the far south area of the woods and you will find a tree stump. Shrink down in size and then fuse blue kinstones with the Minish that is in the small building just to the north. A giant beanstalk will appear just to the west, so revert to regular size and then climb up it. This beanstalk contains a red kinstone and a total of 320 rupees.


At the very beginning of this chapter we fused red kinstones with a Minish in Lake Hylia. If you didn’t, you can use the Ocarina of Wind to warp over to Lake Hylia, shrink down in size, and enter the Minish-sized building. Fusing red kinstones with this Minish causes a tree on the pathway towards Castor Wilds to open up. Enter this tree in the Western Woods and you will find Piece of Heart #30!


Make your way over to North Hyrule Field and then head to the northeast corner of the area. If you haven’t already, blowup the boulders using some bombs and then head east to enter the Veil Falls. If you came to this area earlier, you probably noticed the Piece of Heart just to the right. Now that we have the flippers you can jump into the water and collect Piece of Heart #31.


There are some other goodies for us here in the Veil Falls, but they are at the east end of the area. Return to Lon Lon Ranch and use Cane of Pacci on the hole at the northwest part of the area to reach the higher ledge. Walk up a screen to get back to the Veil Falls and swim on over to the northeast portion of this area. Watch out for the rupee likes as you collect tons of rupees found here. Use the mole mitts to dig into the cave. The electric blue chuchu can be quite damaging here, but just use the boomerang to stun him, and then defeat him with your sword. Dig your way through the cave to find two treasure chests, one containing 50 rupees and the other containing 50 mysterious shells.


With the flippers in hand there are several pieces of heart to collect in the Lake Hylia region. Use the Ocarina to fly on over to the Wind Crest Lake Hylia. Run over to the north end of the area where we previously were at Stockwell’s Vacation House. It is the red roofed building found here and there is a small pond just to the left. Jump into the pond and dive underwater to find Piece of Heart #32!


We can now access much of the lake since we have the flippers. There is a piece of heart right when you get into the water on the right, but we cannot quite get it yet. Swim to the bottom-right portion of the Lake to get back to Mayor Hagen’s Lakeside Cabin. Swim just to the west of the cabin and you will find Piece of Heart #33 waiting for you on a ledge.
Return to Mayor Hagen’s Lakeside Cabin at the southeast part of Lake Hylia and use the nearby tree stump to shrink down in size. Just southwest of the cabin, you will find a small hole, so head on through to find yourself back at the Minish Woods. Walk around the area and then enter the small cave at the north-east part of the Minish Woods.


Very carefully make your way across the ice and defeat the sluggulas that fall from the ceiling. It is a rather simplistic cave, with there being only two rooms. Open the treasure chest at the end of the cave to get a Red Kinstone. Afterwards exit the cave and resize all the way back at the tree stump by Mayor Hagen’s Lakeside Cabin.
Swim directly to the west of the tree stump and you’ll find an area where you can resurface and climb some steps. At the northwest part of this area there is a small boulder you can push, making it easier to navigate through the Lake Hylia region. Afterwards we want to enter the nearby tree to find another dojo.


Immediately pickup Piece of Heart #34 that is waiting for you right here. The master swordsman found here is known as Waveblade. In order for him to teach you this hidden skill, you must first have acquired at least 10 full heart containers. Meaning, you need to have gotten at least 16 pieces of heart, otherwise you’ll have to return here later. Waveblade will teach you the Peril Beam. This attack allows Link to shoot a sword beam when he swipes his sword, but the Peril Beam can only be used if Link is down to his final heart. Overall it is a good attack, but hopefully one you don’t really need to use.


It’s finally time to enter the Temple of Droplets. The Temple is located almost right in the center of Lake Hylia, just to the east of the Wind Crest. There is an ice structure with a hole in the center of it. Jump onto the structure and shrink down in size to enter the Temple of Droplets.


4.3 Temple of Droplets
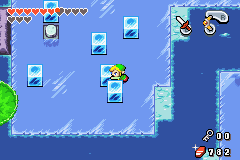
Once you arrive at the Temple of Droplets, climb down the stairs and you’ll find that the ground is solid ice. In general this entire dungeon is filled with ice, so you’ll have to be careful. Push the ice blocks on either side of the room and then head up through the door.


Watch out for the flying pots and continue to the right a screen. Defeat the red mulldozers and head down the staircase. Push the lever to the left and this will open up the ceiling, allowing sunlight to shine through. Climb back up the stairs and fall down the hole in the center of the room. Push the ice block down and to the right so that it slides beneath the sun. The block of ice will melt, so go ahead and pickup the small key. Push the block out of the way and head back up the staircase.


Walk to the left a screen and use the small key on the locked door. Defeat the blue mulldozers and then fall down the hole. There are three ice blocks on the far right portion of the room. First, push the top ice block to the left. Then push the bottom ice block to the left, down, and then to the left again. Finally push the ice block with the key left, up, left, down, left, up, and right. This will cause the ice block to melt, so run over and pickup the Big Key. Push the lever to close the ceiling and then head back up the stairs.


With the ceiling closed, you can walk across the gap. Walk to the right a screen and then down a screen to get back to the starting room of the dungeon. Use the big key on the big door at the south end of the room.


Right when you walk southward a bit, you will find the element that you are looking for, but unfortunately it is buried within the ice. Walk to the southwest part of the room and head left through the door. Walk down a screen and collect the rupees that are in the doorway. Continue downward and open the treasure chest to get the Dungeon Map. Afterwards, head back up a screen.


Wait until the Spiked Roller is at the top part of the water and then jump in. Dive underneath the water and swim upward, to avoid the spikes. Swim to the left a screen and dive into the waterfall to collect some rupees. Climb the steps here and head right a screen.


Defeat the flying pestos and head down a screen. Use the gust jar to grab onto the mushroom and fling yourself across to the right side of the room. Step on the switch to cause the barriers in the water to disappear. Swim into the water and jump down the waterfall.
Swim across the water and dive under the spiked roller that is in your path. Step on the switch on the left side of the room to cause some more barriers to fall. There is a stone block here that you can read and it gives you a hint that there is a secret in the bottom of the pot. Swim to the right a screen and you’ll see a pot-like structure in the middle of the water. Swim to the center of it and dive underneath to find a small key! After collecting the key, backtrack left a screen.


Swim back across the spikes and climb the wall on the left side of the room to get back up to the higher floor. Push the block out of the way and head up a screen. Use the small key you got on the locked door to the left. Walk down a screen and step on the switch here to lower the barrier. Jump into the water and stand on top of the lilypad.


Use the gust jar while on the lilypad and head up a screen, right a screen, and down a screen. While on the lilypad, use the gust jar to send it falling down the larger waterfall. You need to get the lilypad beyond the rolling spike in this area. Use the gust jar to move the lilypad downward, but when the spike comes near, jump into the water so that you aren’t harmed. Slowly move the lilypad downward, while diving underneath the water to avoid the spikes. Continue on the lilypad and head right a screen.
Continue along the lilypad to the right side of the screen and step on the floor switch to cause the barriers to fall. Jump back on the lilypad and ride it eastward. Here you will find another madderpillar, the same mini-boss from the Deepwood Shrine. The difference is this time the battle is on ice. Defeat the enemy the same way you did before by slashing at its nose and then its tail. After defeating madderpillar, head up through the door that opens. Open the treasure chest here to get the Compass!


After getting the compass, head back down a screen, jump on the lilypad, and continue to the left a screen. This time take the water pathway northward. Ride the lilypad northward and step on the switch that is on the ice. This will lower the barrier, allowing you move further along within this room. Continue moving along the rather linear waterway until you reach another barrier on the left side of the room.

There are a series of blocks just to the right of the barrier. Before even dealing with them, I suggest defeating the pestos and mulldozers before dealing with the blocks. Also, there is a treasure chest just to the north that contains 50 rupees. There are six ice blocks in this area, and we want to push one of them so it stops on the floor switch. It’s actually rather simple as we only need to push one block. Walk over to the block that is at the top portion of the six-block arrangement. Push the top-most block down, to the right, down, left, and then up so that it lands on the floor switch. Jump back on the lilypad and ride it to the northeast corner of the room. Get off the lilypad and head through the door.
This room becomes dark immediately when you enter it. You want to carefully make your way to the top-part of the room and head through the doorway found here. The room will light back up and there are a few sluggula found here. Defeat them and then head up the staircase to get to the floor above.


Here you will tackle three scissor beetles. You want to defeat them just as you did before, and I’d recommend using the boomerang to stun them, making it a bit easier. After defeating them a blue warp tile will appear, allowing for quicker access to the dungeon entrance.
After defeating the mini-boss, head down a screen and left a screen. There is a larger lever found right here, but it is too big for you to push alone. Use the tiles below to duplicate Link and then push the lever. Sun will come through the ceiling, melting the small nearby ice block. Jump off the ledge and then head right through the door at the southeast part of the room.


Walk up a screen and open the treasure chest here to get a Blue Kinstone piece. Continue right a screen and carefully make your way across the ice. Defeat the pestos and then open the treasure chest on the left to get another Blue Kinstone. On the right side of the room, carefully make your way between the gap of the Green Blade Traps. There are some pots on the pathway to the right, once of which has a Green Kinstone underneath. Afterwards, make your way to the south portion of the room and head left.


Walk up a screen and then head down the staircase to get the floor below. Go down the adjacent staircase to get to the lowest floor of the dungeon. Push the lever and then climb back up the staircase. Walk across to the south end of the room and push this lever, causing sun to shine down. Once again return to the bottom floor and pull the lever back, this time allowing sun to reach the treasure chest. Open it up to get a small key. Climb back up two sets of stairs and then head down a screen. Use the small key on the locked door and head through to take on another dungeon mini-boss.


The barrier will close behind you and all you’ll find in this room is a lever against the south wall. Push it and a massive Blue ChuChu will fall from the ceiling. The boss battle is identical to the green chuchu battle from the Deepwood Shrine. The only difference is this is a blue chuchu, which has an electric charge to it. Just use the gust jar to suck in the base of the chuchu, and it will eventually fall over. Slash away with your sword until the chuchu gets back up. Repeat this same process until the chuchu has been defeated.


Once the blu chuchu is done away with, open the treasure to get the Flame Lantern. This item can be used to light up dark rooms or also to melt some blocks of ice. Walk back up a screen and use the flame lantern on the blocks of ice to the left. Melt them and then head down the staircase.


Melt the nearby treasure chest and open it to get 100 rupees. Melt the blocks and then head right a screen. This room is dark and also has three more scissor beetles. You can temporarily light the torches in this room using the flame lantern if you’d like, but you’ll need to defeat the three enemies. Get rid of them however way you’d like and then head right through the door that opens.
Walk to the southeast corner of this dark room and light the torch with the flame lantern. This will cause a nearby block to disappear. Walk around this maze like area to reach a treasure chest containing a Red Kinstone. There is a second torch that needs to be lit near the center of the room and this will cause another block to disappear. At the west end of this room, you will find a crumbling wall. Use a bomb to blow it up and then head left a screen.


Defeat all the mulldozers that are found here and grab the small key that falls from the ceiling. Return to the previous room and make your way to the northeast corner of the room. Open the treasure chest to find a Red Kinstone. Nearby, light another torch, causing a block to disappear. Make your way through the rest of the maze and open a treasure chest to get another Red Kinstone. Light the final torch and then use the small key on the locked door.


Quickly rush through this room, trying to avoid the enemy Winder that is in here. If you touch this enemy, you will be set on fire for a period of time and won’t be able to progress. Walk to the left a screen and avoid the enemy pestos. Carefully walk across the ice and head up a screen.


Walk up through the passage and you’ll find some rupees here. Turn to the left through this blind hallway and you’ll appear at the northeast part of the room. Go through the door to the west to find a room with several blocks. You will have to repeatedly make duplicates of Link to push the blocks out of the way. First things first, push the large block at the top portion of the room to the left. Then push the block on the right side of the room downward. Use the tiles on the left side and push the left block down just one square. Now make a vertical duplicate of Link and push the top-block out of the way. With the path clear, head up a screen.


Once you enter this room, push the nearby ice block to the left. On the left side of the room, push the other ice block down and to the left, so it slides on the bottom of the three switches. There are two other switches here, and you’ll need to use the duplicated tiles on the right side of the room to step on these. I find it easiest to first step on the top-most tile, and duplicate Link with the one second from the bottom. Now carefully make your way through the blocks and step on the switches at the left end of the room. It likely will take you a few tries, but after successfully doing it, head down through the door that opens.
In this room there are five blocks and the one at the top-right is out of position. Just push it up a square and head left through the door that opens. Melt the ice block in this room and then use the tiles to vertically duplicate Link. Push the large block in the center of the room to the right to clear the path. Climb the steps and head left a screen.


There are nine torches in this room and you have to light all of them with the flame lantern to open the door. However, you have to do it quickly or else the torches will go out. It’s best to go in straight lines, doing a full row or column at a time. Once all nine torches have been lit, head left through the door that opens.


Dive underneath the rolling spikes and make your way southward in this room. Defeat or avoid the scissor beetles and then head right a screen. Step on the floor switch in the corner of the room, causing a red warp tile to appear. Defeat the enemies if you’d like and break the pots in the room. If it isn’t obvious enough, the massive arrow on the ground points to the wall to the north. Bomb the wall and head up a screen.


This room has two madderpillars, but luckily there is no ice to deal with. Keep the flame lantern equipped so that you can see where you are going. Defeat the madderpillars using familiar methods and then head right a screen. Continue northward to the adjacent room. Run across the ice and head up the staircase.
Once you arrive back on this floor head down a screen and right a screen to get back to the large room that holds the element. Once again duplicate Link and pull the lever, causing even more sunlight to shine through, this time melting the large ice block in the process. This will also melt the giant octorok that is nearby and the enemy will suck in the element. The octorok then backs down to the room below.


If you’d like, you can head south to face off with the dungeon boss, the giant octorok. However, there are two remaining treasure chests for us to collect in the dungeon. The easiest way to get to them is by heading north to the dungeon entrance, and then stepping into the blue warp portal. Walk down the stairs at the north end of the room and then head down a screen.


Use the lantern to light up this dark room and head left a screen to get back to this large room. The lilypad should be right here still. Use the lilypad and make your way over to the west end of the room. Ride the lilypad westward and you’ll find a frozen treasure chest. Melt it and open it to get a Red Kinstone. In the previous large room, there is another frozen treasure chests on the large ice platform. Melt it and open it up to get 100 Mysterious Shells. Now return to the room with the blue warp tile and get back to the dungeon entrance. Walk south two rooms to reach the boss room with the Giant Octorok.
The first phase of the battle with the big octorok has the giant creature shooting boulders out of its mouth. These boulders can harm Link by hitting him directly, or if they hit the wall, they’ll break into small pieces that stay on the ground and can hurt Link. What you want to do is just stand right in front of the octorok’s mouth and when it shoots a boulder, slash at it with your sword, sending the boulder back at the boss. Deflect three boulders back at the octorok to complete this phase.


The octorok will now freeze itself, freeze the ground, and the flower on its back will dry out. During this phase the big octorok will breathe out ice towards Link, trying to freeze him. Quickly keep running around the octorok to avoid the attack. You need to use the Flame Lantern to burn the dried up flower on the Octorok’s back. This will cause the octorok to run into the wall and blocks will fall from the ceiling.


The octorok and the floor below will thaw, and this triggers the next phase of the battle. This is quite similar to the initial phase, except the big octorok won’t just shoot boulders from his house. Instead, the octorok will also try to suck you into its mouth and then spit you back out, doing some damage in the process. You once again need to deflect three boulders back at the octorok, and successfully doing so will once again freeze the ground and the octorok itself. This phase of the battle is identical to the previous one and you’ll need to light the dried up flower on fire. This is a tad bit more difficult as the octorok will spin around a bit faster, but it shouldn’t give you too much of a problem.


After the octorok has thawed a second time, this will trigger the final phase of the battle. It’s identical to the previous thawed phase, except the big octorok will occasional create a smokescreen. If it does so, you’ll have to use your flame lantern in order to see. Other than that, the battle is identical, so just run around and when you have the opportunity, deflect three boulders at the big octorok to defeat him.


After defeating the big octorok, the Water Element will float down into your hands. Grab the full Heart Container that is left for you and then step into the green portal to warp back to the entrance of the Temple of Droplets. Step into the sunlight above to get back outside to Lake Hylia.
