- Chapter 1 – Inside The Great Deku Tree
- Chapter 2 – Princess of Destiny
- Chapter 3 – The Mighty Collection
- Chapter 4 – Dodongo’s Cavern
- Chapter 5 – Inside Jabu-Jabu’s Belly
- Chapter 6 – Timely Appearance
- Chapter 7 – Forest Temple
- Chapter 8 – Fire Temple
- Chapter 9 – Ice Cavern
- Chapter 10 – Water Temple
- Chapter 11 – Bottom of the Well
- Chapter 12 – Shadow Temple
- Chapter 13 – Spirit Temple
- Chapter 14 – Ganon’s Castle
9.1 Zora's Domain Revisited
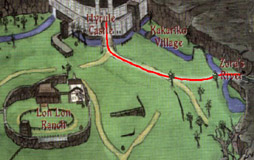
Our next destination is Zora’s River. If you’re nowhere near there, just play the Prelude of Light to take you back to the Temple of Time. From there, go out to Hyrule Field (and call Epona if you wish). Zora’s River is in the east portion of Hyrule Field, where the water starts.
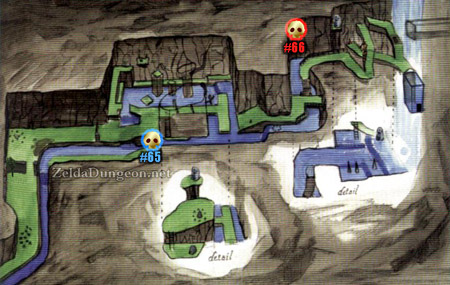
As you round the corner, you’ll stumble across the spot where the Bean Salesman used to sit, chomping away. If you planted a Magic Bean in the soft soil as a child, a Magic Bean Plant should be awaiting you. It’s path takes you most of the way to Zora’s Domain. Before you head in that direction, there are two Skulltulas that we can now collect here in Zora’s River.
The first one is kind of tricky. It’s up high on the south wall in the middle of the entire area, meaning you’ll have to get on top of that giant platform in order to reach it. There are two ways to get up there, either ride the Magic Bean Plant and jump off on the platform as soon as you can, or follow the path until the area narrows significantly (getting very close to Zora’s Domain) then turn right and follow the skinny water that leads back towards the entrance to this area. At that point, you’ll see a ladder nearby on a ledge.
In Zora’s River, located high up on the southern wall. Ride the Magic Bean up to the large plateau in the center of the River. If never planted the Magic Bean, you can still reach it from the east, by swimming down the narrow stream and climbing a ladder. The Skulltula is on that southern wall. At nighttime, use the Hookshot to snag the token.Optional: Gold Skulltula #65

Make your way towards Zora’s Domain and we’ll snag one more Skulltula token.
In Zora’s River, once you cross the small river, heading towards Zora’s Domain, if you look up high at the wall, you’ll find a Gold Skulltula. It is just out of reach from when you are standing on the ground. Jump onto the fence and your Hookshot will be able to reach it. Snag the token.Optional: Gold Skulltula #66


Nifty. Go up to the grating in front of the waterfall and play Zelda’s Lullaby to part the red seas. Jump in Moses!

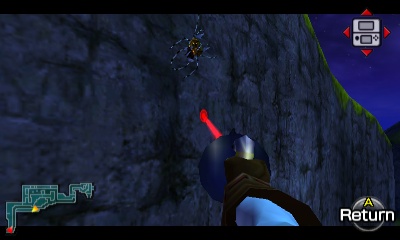
Eep! This place is all frozen and the Zoras are all gone. There isn’t anything quest wise to be done here, but before we go right on through, there’s yet another Gold Skulltula that we can snag. Make sure it’s nighttime and look up at the top of the waterfall. You should see a Gold Skulltula right next to it. If not, play the Sun’s Song. Go up through King Zora’s chamber and turn left. At the top of the waterfall you can go right out to the edge, turn left and use your Hookshot to get the token. Nifty.
Found inside of Zora’s Domain, there is a Skulltula near the top of the frozen waterfall. Go through King Zora’s Chamber and walk right up to the edge. Turn to the left and defeat the Skulltula. This Skulltula will only appear at nighttime.Optional: Gold Skulltula #67

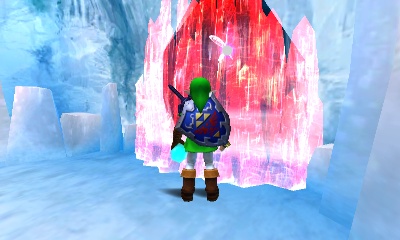
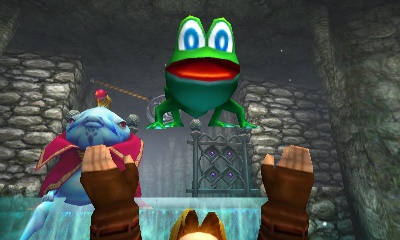
Anyway, go back to King Zora. Poor guy has a red, transparent shield-like thing around him. This is Red Ice, though, it doesn’t look very ice-like in my opinion… Either way, he’s stuck for now, so just go on through to Zora’s Fountain.
Once you get outside, you’ll quickly notice that it’s frozen out here too, and Lord Jabu-Jabu is gone! Who knows what happened to him… it’s kinda lonely out here at night, so you can play the Sun’s Song to make it more lively. Not that it matters of course.
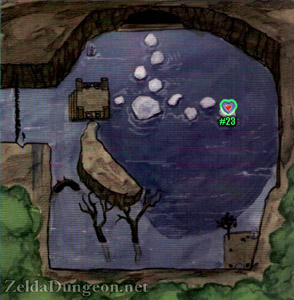
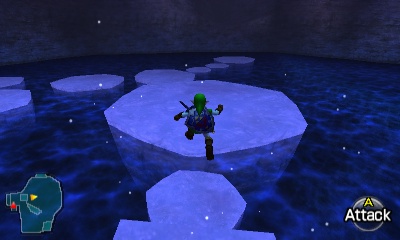
Step out onto the alter of Jabu Jabu and jump off onto the floating icebergs below. Jump across them to get to the opposite side. Should you fall into the water at any point, you can climb back onto most of the non-spinning platforms. Watch out for the Octoroks that litter the area. Don’t bother killing them, their shots are easily avoided, you just have to keep moving. You’ll undoubtedly notice the Heart Piece sitting out all by its lonesome off to the right. Wait for the small platforms to spin your way and jump on. It’s a little bit tricky since you have to account for the slippery ice.
In Zora’s Fountain, jump across the ice platforms that lead to the Ice Cavern. One of the ice platforms in the distance has a heart piece and you’ll easily be able to jump to it.Heart Piece #28

After you’ve snagged the Heart Piece, turn around and go the opposite way. As you can guess, we’re heading for the cavern in the wall across the way. It was there in the past as well, but we couldn’t reach it back then.
Anyway, you’ll come to three platforms in a row that are spinning. Just keep jumping across them like you normally would. It’s only when you go slow that their spinning affects you for the most part. The final platform just holds still. Get a running start and you should easily be able to grab the ledge and pull yourself up.

9.2 Ice Cavern
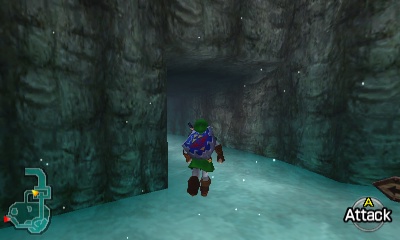
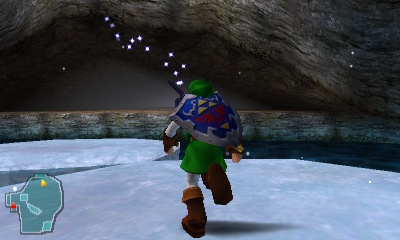
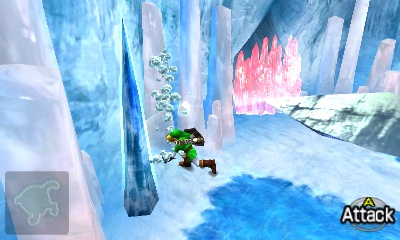
First Hallway – This mini-dungeon has many stalagmites which you can just slash with your sword if they block your path, also there are the more deadly stalactites which fall from the ceiling as soon as you pass under them. To avoid the latter, simply keep moving when you hear them making “icy noises.” They’re pretty easy to pick out too because they’re a lighter color.
Go down this hallway slashing the stalagmites that get in your way. You’ll pass by a chunk of Red Ice that serves no purpose; ignore it.
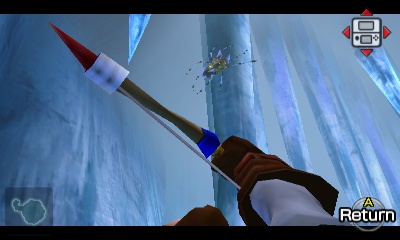
Freezard Cavern – At the end of the twisting hallway, you’ll come to a large room with some new enemies called Freezards. These chilly things will freeze you if you’re not careful. The best method is to target them from afar, wait until they’ve all attacked simultaneously, then Hookshot to the nearest one (which hurts it a little) and kill it. You can usually kill two in a row before having to retreat. Alternatively you can circle around them, causing them to attack in a previous location, giving you the chance to get them from behind.
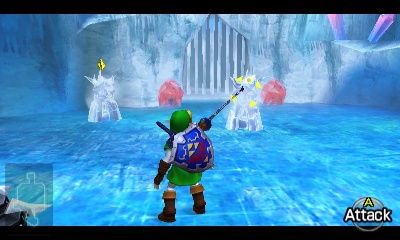
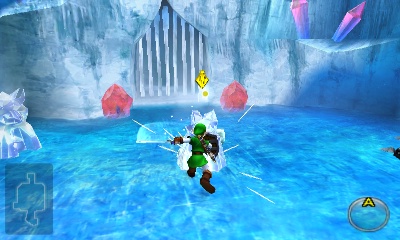
This whole process can be kind of frustrating due to the Blade Trap circling the room. Be careful though, as there’s one invisible one that will appear, attack and disappear. Just keep an eye out for it and it shouldn’t catch you off guard.
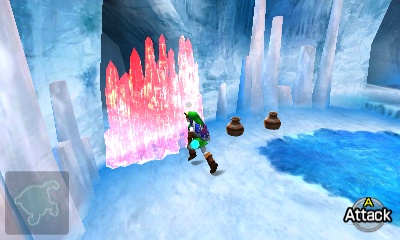
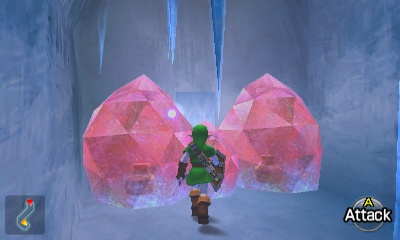
The best way to defeat them all is to just stand in the middle and use Din’s Fire… Once all four have been defeated, the icy bars blocking the next hallway will lift. Go on through the passage with the two Red Ice things next to it.
Hallway 2 – In the next hallway, watch out for the stalactite on the ceiling right before the stalagmites. It’s just waiting for you to try getting through. The jars here have recovery hearts in them, by the way.
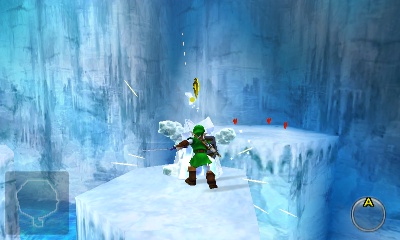
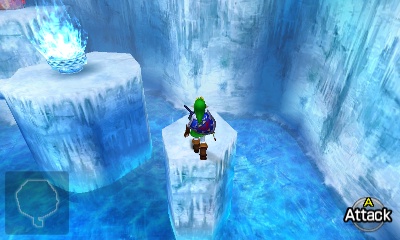
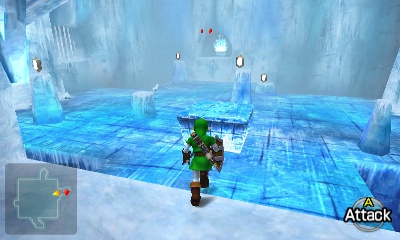
Spinning Blade Room – This will lead to giant room with a spinning ice blade of death! Well, of course you’d expect to find one of those in here! The goal is to collect the five Silver Rupees to open the next door. That, as well, is totally logical, no? First, I’ll explain the room a little…

The spinning blade can be avoided by running counter-clockwise with it, or you can duck by simply holding down the R button. Alternatively, you can roll, but that’s much trickier. Also, be warned there’s another new enemy of sorts in here: floating Jars! Just use your shield to defend if one comes at you.
So, with that being said, there are five Silver Rupees you need to get in this room. There’s a Skulltula right above the first one as well.
- 1 – Follow the left wall as soon as you enter, you’ll find a Silver Rupee behind some stalagmites.
- 2-4 – In the center surrounding the spinning blade. Use R without Z targeting to duck.
- 5 – The last one is in mid-air, above the spinning blade. Climb on top of the nearby ledges and jump to it.


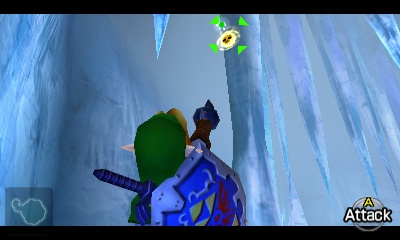
In the Ice Cavern, make your way to the first spinning blade room with the Silver Rupees. The skulltula is located high up on the wall, just above one of the silver rupees. Use the Hookshot to snag the token.Optional: Gold Skulltula #68


 After you’ve gotten them all, the bars on the ledge above will move away, allowing you to venture further into the cavern.
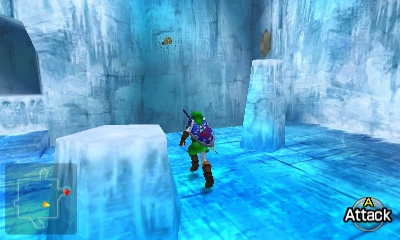
Map Room – As you enter this room, you’ll quickly notice a variation on an old enemy: Ice Keese. These things are annoying, because if they do hit you, you’re stuck for a long time. It’s a deadly combination with all the Freezards around as well. Before you get started in this room, I suggest you wander around the room, killing the lone Freezard that appears on the ground as well as any Ice Keese that try to come after you. This will make the room much easier.
To start off with, we obviously have to climb onto that platform near the entrance and kill that Freezard at the other end. To make it easy, you can even target him from below, and Hookshot up to him as soon as he stops blowing. Snag the nearby Recovery Hearts if you need them, then jump along the tiny platforms going left.

Navi will make a scene about this strange fire. Now, here’s the tricky thing of this dungeon: This “Blue Fire” will melt the “Red Ice.” Corny and obnoxious, but you’ll have to empty all if not most of your bottles and fill it up with Blue Fire. If you’ve been following the walkthrough thus far, you should have all four bottles. You only actually need one, but the more you have available, the better.


Kill the Freezard that’s been staring at you nearby and round the corner to find a large chest surrounded in Red Ice. Use the Blue Fire on it to melt the ice and open it to find the Dungeon Map. Nifty. Go snag some more Blue Fire and make your way back to the room with the spinning Ice Blade.

Spinning Blade Room – Once we get back to this main room, you’ll see that there are two paths we can take on either side that are blocked by Red Ice. Go left first, melting the ice with some Blue Fire.

Compass Cavern – The short hallway will lead into a small cavern with several Keese against the walls. Watch out for the Stalactites on the ceiling; not only are there several of them, but they’ll reappear shortly after falling from the ceiling. Run forward and slash through to the Blue Fire. Kill the Keese that’s atop it and refill your bottles if you need to.


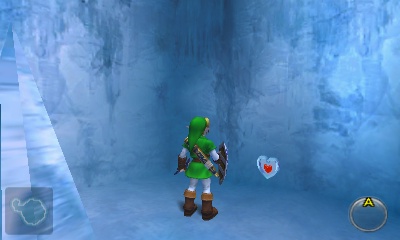
Next, go get the goodies on either side. On the right side is the Compass inside a frozen chest. On the other is a Heart Piece frozen in Red Ice and a Skulltula up high on a pillar. Be sure to get them all, then refill your bottles and head back to the main room.
In the Ice Cavern in the room with the Compass, a piece of heart can be found within a red block of ice. Use Blue Fire to melt it and snag the heart piece.Heart Piece #29

In the Ice Cavern in the room with the Compass, the Gold Skulltula is hidden up on a higher pillar. Use the Hookshot to grab the skulltula token.Optional: Gold Skulltula #69
 Spinning Blade Room – This time, go melt the Red Ice in front of the exit on the opposite side of the room (west).

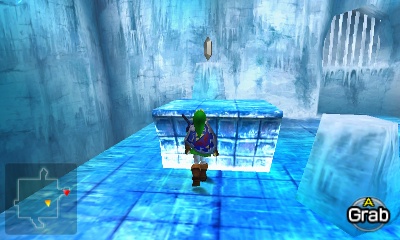
Ice Block Cavern – After going through the “S” shaped hallway, you’ll emerge in a blue room that’s covered in odd, square checkered ice. As one would guess, it’s slippery. First of all, I suggest going around the room, killing all the Ice Keese. Next, go snag the Gold Skulltula patiently awaiting you on the wall. If you don’t see it… well… I feel sorry for you…
In the large block pushing room of the Ice Cavern, the Gold Skulltula is found waiting on one of the higher walls.Optional: Gold Skulltula #70

The goal in this room is obviously to get all the Silver Rupees. To do so, you’ll have to push the Ice Block around the room and climb on top of it. If for whatever reason you mess up, just push it into a pit and it’ll reappear at its starting location.


Now, there’s some more Blue Fire on the opposite side of the room. If you don’t have any, push the block that direction and snag some, then push the block over the edge. You can get up to those red Rupees hanging in mid air by playing the Song of Time if you like. They’re rather pointless in my opinion…
So, with Blue Fire in hand, our first task is to push the block towards the room, once it hits, push it right, towards the north wall. There’s a single alcove here with a Silver Rupee inside some Red Ice. Snag it and push the block into the abyss.
Now for the seemingly tricky part. From the starting position (standing next to the block from where it begins). Push it left, climb on top and then onto the small pillar to get the second Silver Rupee. From then on, just keep pushing it right, collecting the Silver Rupees as you go. Jump up and grab some Blue Fire in passing. We’ll need at least two bottles of it.
Right in front of the Blue Fire, there are a few floating red rupees. If you play the Song of Time when Navi flies over, some time blocks will appear, allowing you to collect the rupees and reach the Blue Fire.


Once you finally have all of the Silver Rupees, push the block right one last time so it’s in front of the newly opened hallway. Climb atop the block and into the hallway.
Work your way through the final hallway, watching carefully for the two Freezards in here. Once you get to the end, use one of the bottles of Blue Fire on the wall of Red Ice. Go through the door.

White Wolfos Room – In this small, disco-like room, take a step forward and you’ll quickly be confronted by a White Wolfos. It fights just like all the regular Wolfos, and it’s the only one in the game. It should be quite an easy battle for you. As soon as it’s defeated, open the large chest that appears to find the, ta-da, Iron Boots! Well that’s nifty.


Sheik will then appear and recite more poetry. She explains that the Zoras were trapped under the ice and that she managed to free only the Zora princess (Ruto), who went to the Water Temple. After that, she’ll teach you the Serenade of Water, a song that teleports you to Lake Hylia.
After she leaves, try testing out those new Iron Boots. Press Start and go to the Equipment screen, then press A on them to equip them (annoying isn’t it?) then step into the water. While underwater, you can open the door. On the other side, you’ll see a timer appear. Yes, you can only be underwater for a certain amount of time. Funny how that works…


Freezard Cavern – Climb out of the water, equip the Kokiri Boots and jump down. Now, if you have at least one bottle full of Blue Fire, make your way to the exit of the Ice Cavern.
9.3 Zora Tunic
Before progressing, you want to be sure you have at least one bottle of Blue Fire. If you don’t have one, return to the Ice Cavern and snag a bottle as it will come in handy.
Jump down into the water and right away as there is a goody for us to collect here at Zora’s Fountain. If you put on your Iron Boots, you can sink to the very bottom of the water, finding a heart piece on the ground floor.
Located at the very bottom of Zora’s Fountain. Use the Iron Boots to reach the ground floor and collect the heart piece.Heart Piece #30


Return to Zora’s Domain and use the Blue Fire that we have to unfreeze King Zora. Then stand on the platform below and speak with him to get the Zora Tunic for free. Awesome! This tunic will allow you to breath underwater indefinitely. Alternatively, you can melt the Red Ice blocking the Zora Shop down below, where you can purchase the Zora Tunic for 300 Rupees. That’s quite costly, but can be useful should you lose your current one to a Like Like.


9.4 Biggoron Sword Trading Sequence
A quick word about the Giant’s Knife… There are two giant Gorons in the game. Medigoron is in Goron City on the second level, behind several walls you have to use bombs to get through. He’ll sell you a “knife” as an adult which is a giant two-handed sword that breaks after only a few swings. You can continually buy them, but they break every time… You can get a good one that doesn’t break from Biggoron at the top of Death Mountain through the following trading sequence…


We could have done this side quest much earlier, but I wanted to do everything in order of the temples. In order to complete this side quest, you will need the following:
- Epona
- Freed King Zora from the Red Ice (beaten Ice Cavern)
- Highly recommended that you have the Magic Bean planted in front of the entrance to Dodongo’s Cavern

If you don’t have Epona yet, please refer to Chapter 7 of the walkthrough or check out the Biggoron Sword Quest section. Anyway, once you have all of those things, you can tackle this side quest. It’s totally optional, but the reward is pretty sweet.
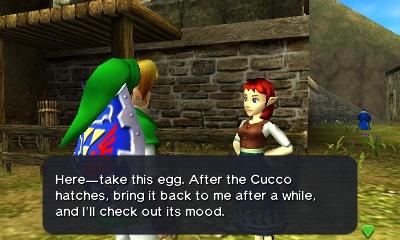
Pocket Cucco – Go speak with the Cucco Lady in Kakariko Village who will tell you she’s breeding a new type of Cucco. She’ll give you an egg to test run it because you look like a good Cucco raiser, no don’t you?

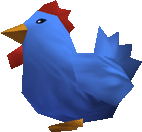
Cojiro – To hatch the egg, you simply have to wait until dawn. Play the Sun’s Song twice or wait around in Hyrule Field. After that, return to Kakariko Village and enter the house right below the stairs (across from the Skulltula House and Shooting Gallery).
Inside, you’ll find Talon asleep on the bed again. Use the chicken to wake him up and he’ll go back to Lon Lon Ranch if you’ve already gotten Epona from there. Return to the Cucco Lady and she’ll give you Cojiro.


Odd Mushroom – That chicken used to belong to her lost brother, whom you may have seen in the past in Kakariko Village at night (the freaky pale guy). Go to the Lost Woods and take the first left and you’ll find him. Whip out Cojiro on him and he’ll ask for your help, giving you the Odd Mushroom.


Odd Potion – Now you have a time limit of three minutes. During these time-limit sequences, you are not allowed to use a warp song, otherwise you will fail your quest. Leave the woods to reach Hyrule Field. This is made slightly faster if you planted the nearby magic bean. Jump on Epona and ride to Kakariko Village.
From there, run to the last building on the right when you’re heading to Death Mountain, this is the Potion Shop. It is only open during the daytime, so play the Sun’s Song if it is nighttime. Inside, run through the back door on the left and you’ll appear outside. Jump down and go up the ramp to find a little door, which is the secret shop owned by the old hag, who gives you the Odd Potion.


Poacher’s Saw – Take the Odd Potion back to the Lost Woods to find a Kokiri girl who tells you that the Cucco Lady’s brother has turned into a Stalfos. Well that’s lovely. She’ll then demand you give her back the Odd Potion because it belongs in the forest and give you the Poacher’s Saw that the guy left.


Broken Biggoron’s Sword – Head to Gerudo Valley and cross the bridge. If you haven’t fixed it yet, you can get across with a running start with Epona or using the Longshot. Speak with the fat guy here and he’ll trade you for the Broken Goron’s Sword.


Prescription – Take the broken sword to the very top of Death Mountain, just outside of the Death Mountain Crater, where you will find Biggoron. Since this is not a timed quest, you can quickly warp to the Death Mountain Crater if you have already learned the Bolera of Fire. Unfortunately, Biggoron got some volcano dust in his eyes and can’t see. He’ll take the broken sword and give you the Prescription.


Eyeball Frog – Go all the way to Zora’s Domain and speak with the now unfrozen King Zora. He doesn’t actually have the eye drops, just the ingredients. He’ll trade you for the Eyeball Frog.


World’s Finest Eye Drops – Another timed one with only three minutes to go, so quickly run out of Zora’s Domain and jump into the stream. Just stay left and swim as fast as you can back to Hyrule Field. From there, jump on Epona and gallop to Lake Hylia to the southwest, jumping across the fences.
Once there run in to the Lakeside Laboratory and give it to the freaky old scientist. He’ll be ecstatic at first, thinking he can eat it, but will eventually turn it into the World’s Finest Eye Drops.


Claim Check – Now we have the hard part. Although you have four minutes, it’s loads harder than the last two timed trades. Run out of the building, jump on Epona and run back to Kakariko Village. Run straight through and up the mountain. Hopefully, you have the Magic Bean planted right in front of Dodongo’s Cavern, which will save a lot of time. From there, run across the valley that used to drop the flaming rocks from the mountain.
Whip out your Fairy Bow and kill the Skullwalltulas up above and start climbing up. You should be able to make it with just a few seconds remaining. He’ll give you the Claim Check, apparently it takes a couple days…


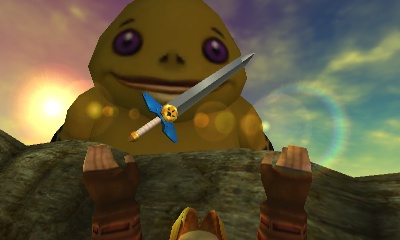
Biggoron’s Sword – You’ll need to pass several days, so just play the Sun’s Song several times and then speak with him to get, finally, the Biggoron Sword! Whew!
This two handed sword does twice the damage of the Master Sword, but you can’t use your shield at the same time. If you hack first, ask questions later, this is the weapon for you!

- Chapter 1 – Inside The Great Deku Tree
- Chapter 2 – Princess of Destiny
- Chapter 3 – The Mighty Collection
- Chapter 4 – Dodongo’s Cavern
- Chapter 5 – Inside Jabu-Jabu’s Belly
- Chapter 6 – Timely Appearance
- Chapter 7 – Forest Temple
- Chapter 8 – Fire Temple
- Chapter 9 – Ice Cavern
- Chapter 10 – Water Temple
- Chapter 11 – Bottom of the Well
- Chapter 12 – Shadow Temple
- Chapter 13 – Spirit Temple
- Chapter 14 – Ganon’s Castle
