This is a very puzzle heavy dungeon, but it also has a very difficult boss. I highly suggest coming into this dungeon prepared. You should have at least a few heart container upgrades, some food to eat, and have acquired some armor upgrades, as well as powerful weapons, as they will be needed for the dungeon boss.
- Chapter 1 – Great Plateau
- Chapter 2 – Dueling Peaks
- Chapter 3 – Hateno Village
- Chapter 4 – Zora’s Domain
- Chapter 5 – Vah Ruta Dungeon
- 5.1 – Dungeon Map
- 5.2 – First Terminal
- 5.3 – Second Terminal
- 5.4 – Third Terminal
- 5.5 – Fourth Terminal
- 5.5 – Fifth Terminal
- 5.5 – Waterblight Ganon
- Chapter 6 – Goron City
- Chapter 7 – Vah Rudania Dungeon
- Chapter 8 – Gerudo Town
- Chapter 9 – Vah Naboris Dungeon
- Chapter 10 – Rito Village
- Chapter 11 – Vah Medoh Dungeon
- Chapter 12 – Captured Memories
- Chapter 13 – The Master Sword
- Chapter 14 – Hyrule Castle
- Chapter 15 – The Champions’ Ballad
5.1 Dungeon Map
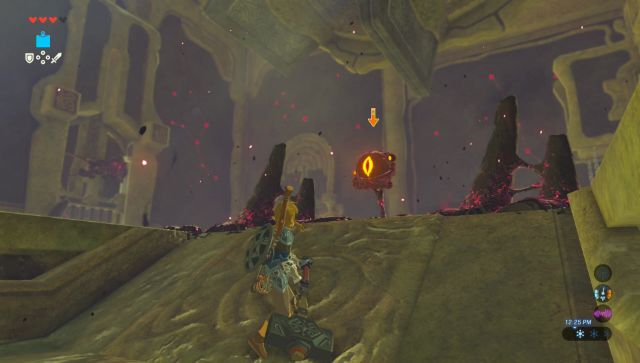
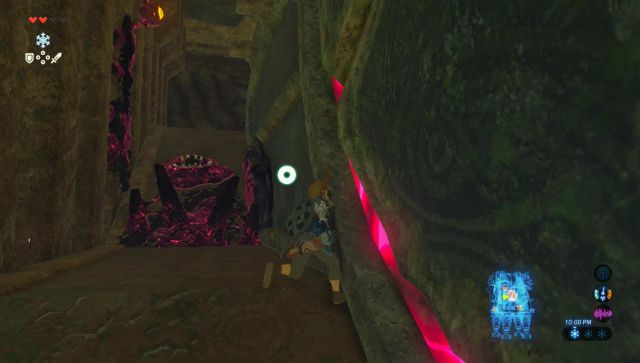
Once you begin the dungeon run ahead and you’ll see some dark sludge known as Malice on the ground along with a Glowing Eye. This malice is found all throughout the dungeon and whenever there is an eye nearby, you must defeat it to clear the sludge. You can use a bomb, sword, or an arrow to accomplish this task. Defeat the Glowing Eye that is ahead so he doesn’t get in your way.
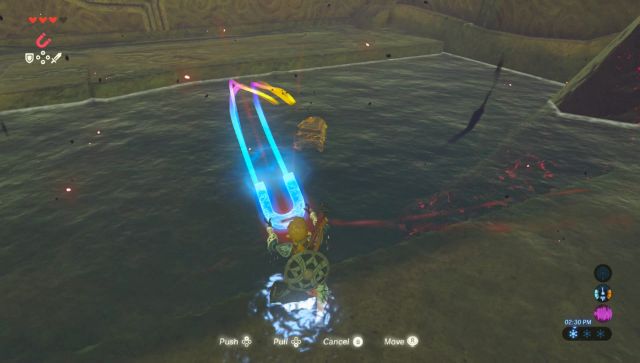
Our first objective is to get the dungeon map and it is located behind the shut gate here. First off, look into the water below and you’ll see a treasure chest. Use Magnesis to pull it out and get an Ancient Spring.
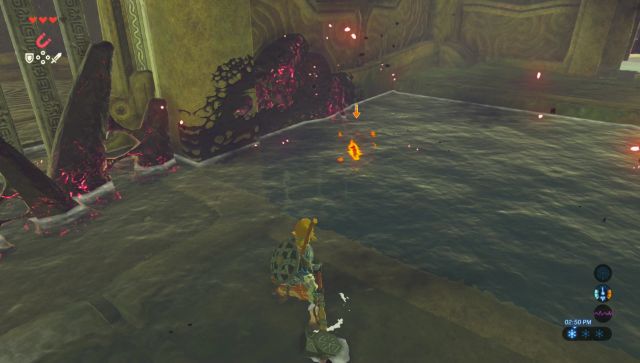

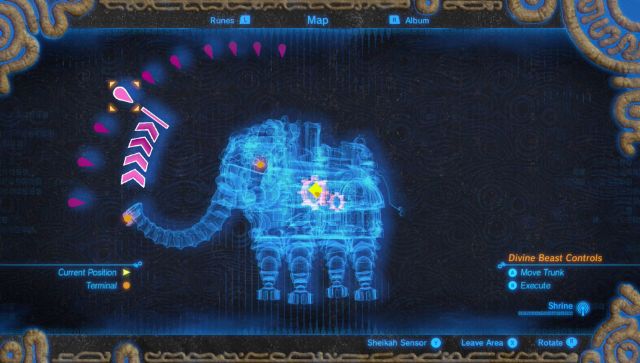
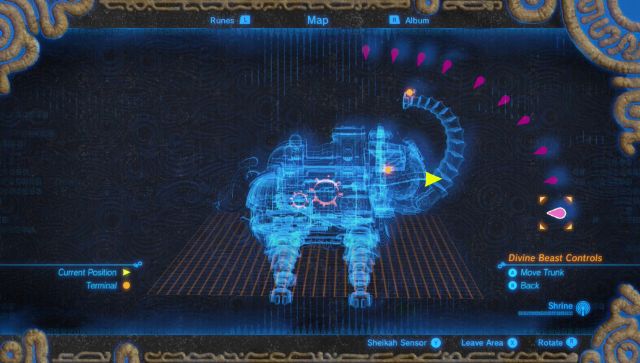
On the other side of the water, if you look just beneath the water along the wall you will see another Glowing Eye. Use a bow to defeat the eye to clear the corruption from the door. The door is still shut, but you can use Cryonis to create an ice block to lift the gate. Run forward and place the Sheikah Slate into the pedestal to get the Dungeon Map. This is a 3-dimensional dungeon map, and the five terminals that we will have to activate are all labeled accordingly. It is very easy to miss this, but right after getting the map, a text box pops up, indicating that you can manipulate certain aspects of the Divine Beast from the map screen. This means that at any point you can remotely control the very dungeon itself, changing the height that the trunk is raised to. This will be used multiple times throughout the dungeon.
5.2 First Terminal
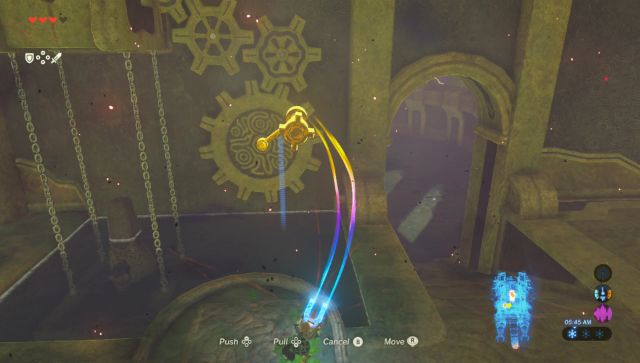
The first Terminal can be activated right here in this first room of the dungeon. Coming out of the dungeon map room, if you look at the left wall, you’ll see a series of gears on the wall. There is a lever that is sticking out. Stand in front of it and then use Magnesis to control it. Spin it around and it will raise the nearby platform, revealing a Sheikah Slate pedestal. Run on over and place the slate in the pedestal to activate the first terminal.

5.3 Second Terminal
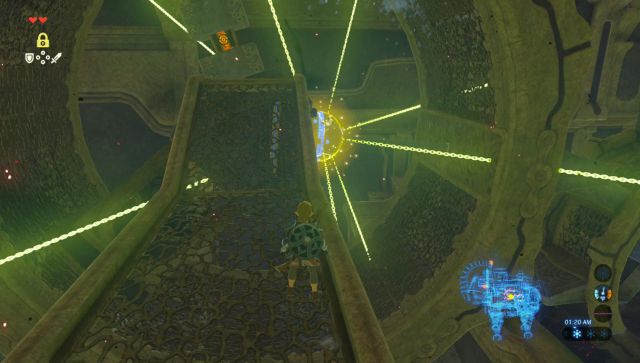
Walk to the outside part of the dungeon (opposite from the entrance) and then climb the long ramp to get to the second level. Once you arrive you’ll see a massive gear and some water spouting out, causing the gear to move. Before doing anything with the puzzle, there is a nearby treasure chest for us to grab. Walk forward to the water and use Cryonis to create an ice block so that it is near the higher ledge on the left. Climb the ice block, jump to the ledge, and then run over to the treasure chest to get a silver rupee.

Now turn your attention to the water that is shooting out. You want to use Cryonis directly on top of the source of the water in order to block the water that is shooting out. However, you want to time it for when the terminal that is inside the massive gear is nearly at the bottom, so that you can run over and activate it. Do just that to active the second terminal.

5.4 Third Terminal
On the second level of the dungeon, you’ll see a large ball and it looks like some sort of Stasis puzzle. It actually is, but we need to get higher up to complete it. Get to the other side of the water and head back to the outside portion of the dungeon. As you scale this area, there is more corruption blocking your pathway. If you look higher up, you will see the Glowing Eye that is associated with this corruption. Use an arrow or a bomb to blast it away and then progress up to the third floor.
We need to rotate the entire structure in order to solve this puzzle. It’s a bit cryptic and if you missed the one line of text, you might be really confused on what to do. If you look at the dungeon map in the inventory screen, you’ll see that you can actually manipulate the elephant’s trunk. Since it is shooting water out of its trunk, depending on how it is arranged, the water will cause some of the gears in this room to rotate, or in some cases, change the direction of rotation. Note that in addition, the buttons to actually perform the action can be a bit confusing. Pay very close attention to the on-screen instructions, and move the trunk to the fourth setting from the top.
This will cause the large gear to start moving. When the large sphere is at the top of the gear, it will move down, hitting the switch and causing the gate to open up. What you want to do is wait until the ball is on the right side, just before it’s about to fall to the outer ledge. Use Stasis on the ball and it will freeze it in time. The gear will continue to rotate, but the ball will still be pushing the switch, causing the gate to stay open.

You should be able to jump into the open gate and then place the Sheikah Skate into the pedestal to activate the third terminal. If you make it in time, the gate will stay open even after Stasis wears off.
There is also a treasure chest in this area and the same idea can be used to get it. It is being squeezed together by two platforms. As the gear is rotating, just before both platforms and the treasure chest are about shift to the inside, use Stasis on the outer platform. The bottom platform and the treasure chest will drop, so quickly run over and open the treasure chest before the top platform falls.
5.5 Fourth Terminal
Drop back down to the second level and stand right between the two gears. Manipulate the map and choose the option that is third from the top. This will cause the trunk to spill water over the large gear, and it will allow you to jump on top of it. Jump onto the large moving gear and allow it to carry you over up to the higher area of the dungeon that we have to be in. There is an enemy guardian here, so be sure to to defeat so it doesn’t bother you. There is also a nearby floor switch and pressing it causes a waterfall to appear. You can now use this waterfall to quickly swim up to this higher ledge if you fall down.
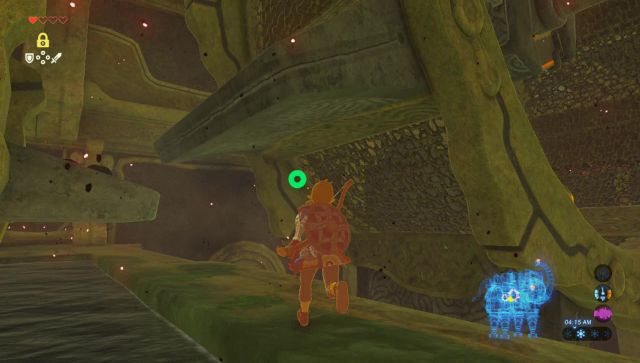


Run towards the trunk of the elephant and then manipulate the map so the trunk is horizontal. Run over and you’ll find a Glowing Eye that is blocking your path. Shoot it with an arrow and then open the treasure chest that is nearby to get an Ancient Shaft.

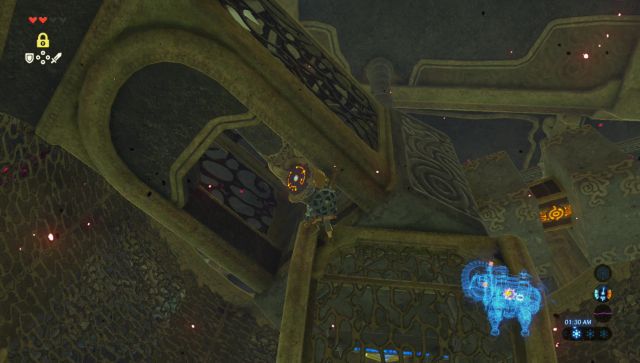
This next part is a tad bit tricky. What you want to do is basically climb up to the ledge that is just above the treasure chest. Then, adjust the map so that the elephant’s trunk is completely vertical. As the trunk is changing direction, Link will move higher and higher, but the platform becomes less stable as it is no longer flat. At the last moment, leap off the ledge and then use your Paraglider to fly over and land on top of the elephant.


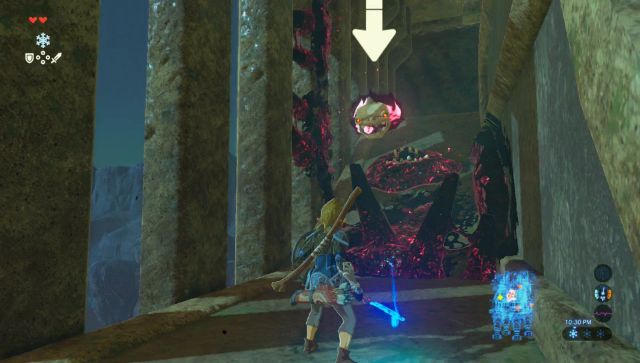
Here you will find a small square hole that you can drop down into. You’ll appear back inside the elephant, but still at a higher lever than we previously were at. If you look at the wall, you will see a gear, but it is covered in malice. There is a Glowing Eye on one of the sides, so go ahead and shoot it with an arrow or destroy it with a bomb. Then use Magnesis to turn the lever, causing the flames from the floor below to subside. Drop down and activate the fourth terminal.


5.6 Fifth Terminal
The final terminal is located at the tip of the trunk of the elephant. You want to do almost the exact same thing that we did for the previous terminal. Extend the trunk, walk over to the treasure chest, turn the trunk vertical, and then use the Paraglider to get on top of the elephant. Also, there is a treasure chest at the very top of the level. On one side there is some corruption, and if you defeat the eye, the treasure chest on the other side can be reached to get some ]Ice Arrows.


While you are on top of the level. Extend the trunk once again so that it is horizontal. Then leap off the top of the elephant and use the Paraglider to fly over to the very edge of the trunk. As you draw near, it’s a good idea to change it so that instead of it being at its lowest point, choose the second or third lowest option, so that the platform is flatter.


The terminal is actually on the side and you still can’t quite reach it. Drop down to the side, as there is a part of the platform that sticks out, preventing you from falling over. One last time, change the formation of the elephant and choose the option third from the top. This will cause the platform to be flat enough, allowing you to place the Sheikah Slate into the pedestal and activating the fifth terminal.


5.7 Waterblight Ganon
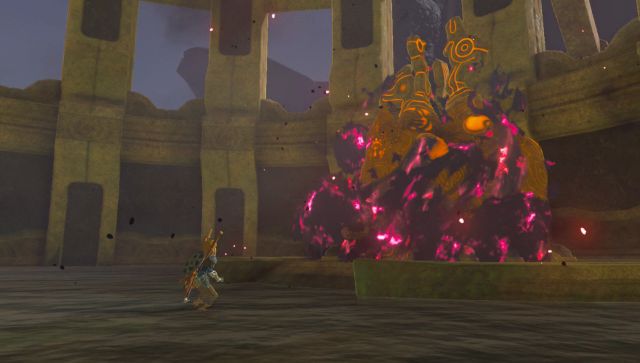
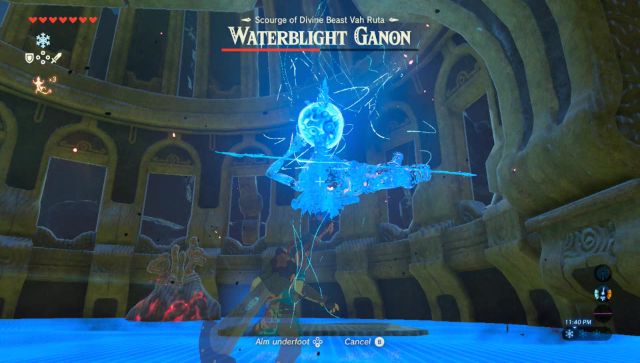
You can now start the Main Control Unit, located right near the entrance of the dungeon. On the lowest floor, climb down the steps and go and activate the Main Control Unit. This will trigger the start of the boss battle with the Scourge of Divine Beast Vah Ruta: Waterblight Ganon. Before entering the battle, I highly recommend to have a ton of arrows, otherwise this can be quite a challenging fight.
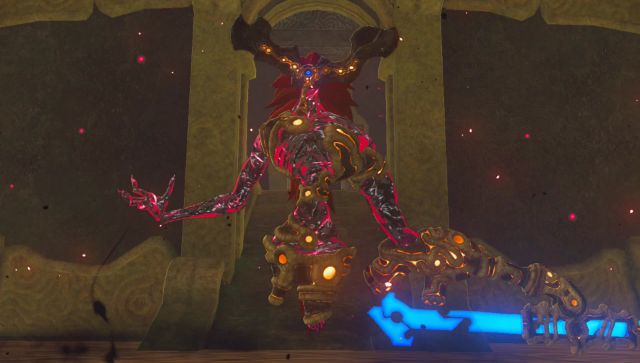
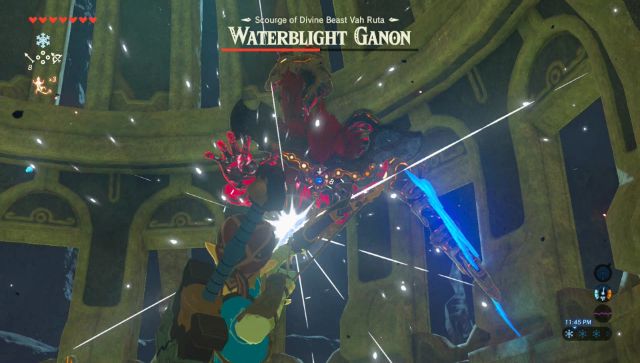
During the first phase of the battle, Waterblight Ganon will wield a massive spear and will attack you with it. The most risk-reward method of battling him is to wait for him to attack and then try to time a Perfect Dodge it by hopping away at the last second, followed by a Flurry Rush where you can deliver a number of attacks in a short period of time. The much safer route is to keep your distance and use projectiles such as arrows, or even just tossing your weapons out at Waterblight Ganon.
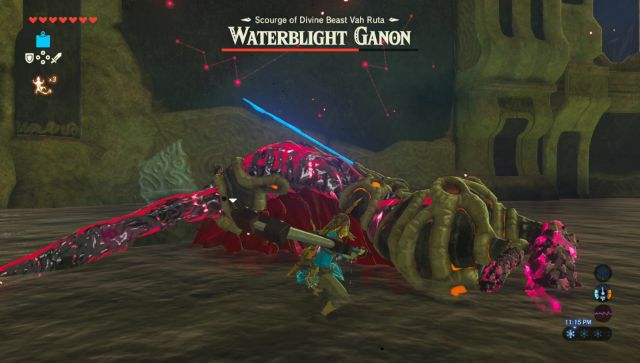

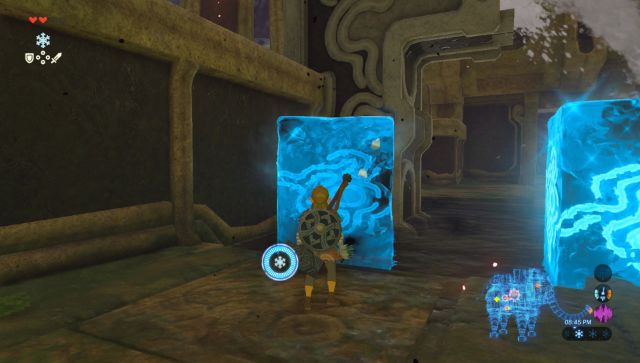
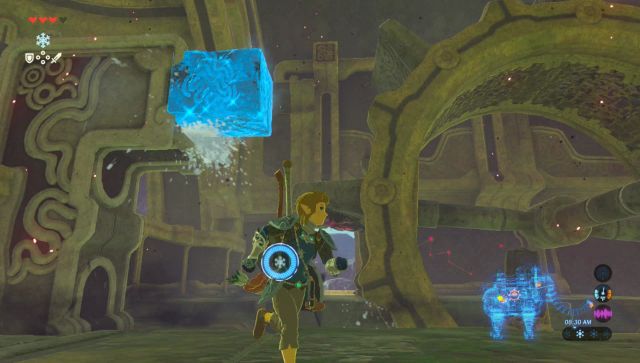
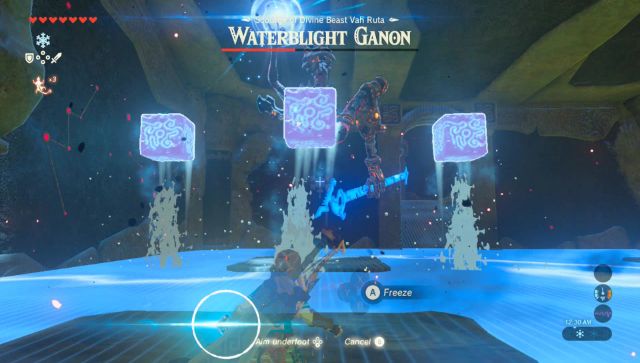
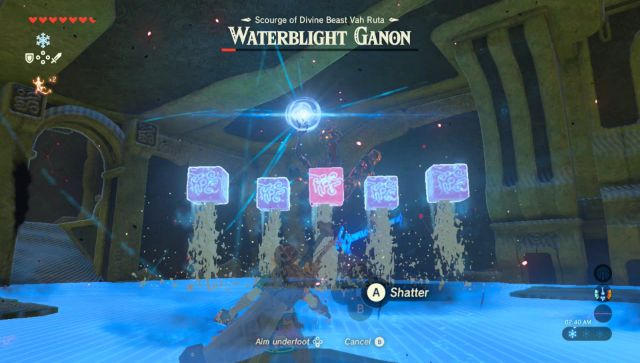
After Waterblight Ganon has lost half his health, this will trigger the second phase of the battle. The room will flood with water and only four platforms remain. Waterblight Ganon will create a block of ice and shoot it towards you. The block can be disintegrated by using the Cryonis ability, so be sure to keep that handy, or frozen with Stasis. As the battle progresses, Waterblight Ganon will begin to shoot three ice blocks out at a time, and then five ice blocks. These can be quite damaging, so be sure to have Cryonis readily available.
After you get rid of the ice blocks, there is an opening where you can shoot Waterblight Ganon with an arrow. After successfully hitting him, Waterblight Ganon will move to a different platform. It is best to just stay put, unless he moves to the platform close enough to where you are standing. Arrows with an elemental effect, such as Ice or Electric, will often stun him long enough for you to get over and wail on him. Just repeat this process over and over until his health comes down. Occasionally Waterblight Ganon will use his spear to attack, at which point, just do your best to avoid it. If you can time a Perfect Dodge, this is another opportunity to get in a load of damage.


If you do run out of arrows, then Perfect Dodges are about your only method of dealing damage. You can also freeze one of his ice blocks with Stasis, and then hit it back at him. You can damage him with bombs, but it is hard to get close to him. You can use Cryonis to create ice blocks, but Waterblight Ganon’s ice attacks will cause the ice blocks to break. Keep hitting him until he has finally been defeated.
