- Chapter 1 – Zelda’s Rescue
- Chapter 2 – Eastern Palace
- Chapter 3 – Desert Palace
- Chapter 4 – Tower of Hera
- Chapter 5 – Hyrule Castle Tower
- Chapter 6 – Dark Palace
- Chapter 7 – Swamp Palace
- Chapter 8 – Skull Woods
- Chapter 9 – Gargoyle’s Domain
- Chapter 10 – Ice Palace
- Chapter 11 – Misery Mire
- Chapter 12 – Turtle Rock
- Chapter 13 – Ganon’s Tower
3.1 Pegasus Shoes and the Book of Mudora
Now that Link has the Pendent of Courage, the first stop is to visit Sahasrahla right here within the Eastern Palace Compound. Sahasrahla can be found in the small hut just west of the Eastern Palace entrance. Speak with Sahasrahla and he will give Link the Pegasus Shoes. These shoes give Link the ability to dash.

There is a cracked wall within the hut where Sahasrahla resides. For these particular types of cracked walls, Link can either blow them up with a Bomb or dash into them with his Pegasus Shoes. Get the Rupees and Bombs that are found inside and then exit the hut.
Sahasrahla has marked the locations of the two remaining Pendants on your map. The Pendant of Power is located within the Desert Palace at the southwest corner of the overworld, however, Link will first need to acquire the Book of Mudora to enter the Palace.
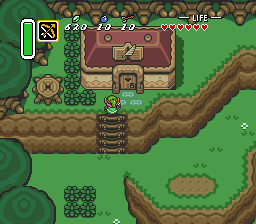
The Book of Mudora can be found within the southern portion of Kakariko Village. Enter the House of Books found here and you’ll see the green book on top of the shelf. Link can use the Pegasus Shoes to dash into the bookshelf, causing the book to fall to the ground where Link can pick it up.
At this point, Link can journey directly to the Desert Palace to take on the next dungeon, however there are several optional goodies to collect in the overworld; the first of which is all the way back by the Sanctuary. Immediately to the west of the Sanctuary there is a higher ledge with a pile of rocks. These rocks can be broken by dashing into them with the Pegasus Shoes. Do so to reveal a secret staircase. Head inside to find Piece of Heart #5.

The next destination is at the south end of the overworld. Make your way over to Link’s House and from there head south to enter the Great Swamp. At the southern end of the Great Swamp, Link will find a building known as the Swamp Ruins. These ruins become very important later on in the quest, but for now, they are only useful to obtain a Piece of Heart.


Inside of the Swamp Ruins, Link can push the blocks out of the way to reach a treasure chest containing some Bombs. If Link re-enters the Ruins, the blocks reset, allowing him to progress to the next room. At the top of the room, pull the right lever, causing the storm door to the right to open, allowing the water to flow. Exit the Ruins and you’ll find Piece of Heart #6 outside. In addition to this, there is also a pair of Fish. Strangely, Link can pick up one of these Fish and bring it all the way to the Bottle Merchant in Kakariko Village. The Merchant will reward Link by giving him some Rupees, Bombs, Arrows, and a large Magic Jar. Additionally, Link can toss the fish into any deep water and get a Red Rupee out of it.


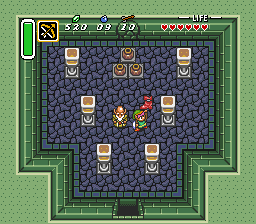
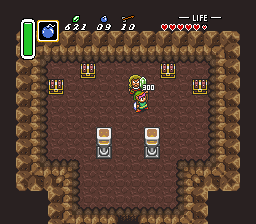
From the Swamp Ruins, travel east two screens to reach Lake Hylia. Right when you enter this screen, walk to the north and you’ll find a crack in the wall. Place a Bomb and enter the cave. Defeat the four Mini-Moldorm that are found here. You can walk to the left and right sides of the screen by carefully walking along the southern wall. Speak to the Thief and he’ll give you 300 Rupees! Furthermore, you can open the treasure chests to get 40 more, as well as some Bombs and Arrows.

Back outside, continue heading eastward around Lake Hylia. When you reach the southeast corner, turn northward and continue to follow the pathway until you reach a cave. Walk inside and then place a Bomb against the cracked wall. You can collect the fairies here, but the real secret is in the middle of the room. Using the Pegasus Shoes, dash into the fairy statue and it will release a Bee. Catch it using the Bug-Catching Net. This isn’t an ordinary Bee, but rather, it is a Good Bee. Link can unleash it to defeat enemies on screen and then the Bee will return to Link. Exit the cave.


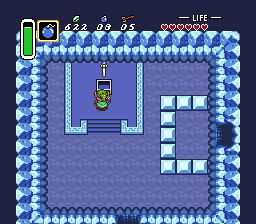
Just to the left of the cave there is a cracked wall. Place a Bomb and then head inside. Continue up a screen and open the treasure chest to get the Ice Rod! This item isn’t required until very late in the game, but it has several uses earlier on.

There is only one more goodie to collect before entering the Desert Palace. Luckily, it is right next to the dungeon. Travel back to the Great Swamp and make your way to the southwest corner of the overworld, entering the Desert of Mystery.
At the top-right corner of the desert, there is a cave that Link can enter. In the second room, there is a crack along the southern wall. Place a Bomb against the wall and then go ahead and enter it to find Piece of Heart #7. That’s all the major optional things you can do for now, so it’s time to take on the Desert Palace.

3.2 Desert Palace
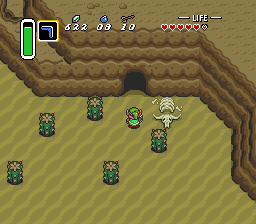
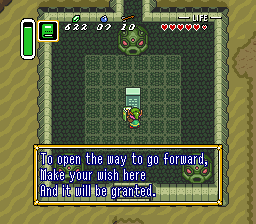
Once you have acquired the Book of Mudora from the south portion of Kakariko Village, head to the Desert of Mystery at the southwest corner of the Overworld. Just in front of the entrance to the Desert Temple, there are three statues, one of which blocks Link’s path. Walk up to the stone block in the center of this area and read the block using the Book of Mudora. Link will sing a song, causing the three statues to move, opening an entrance to the Desert Temple.

The Desert Palace has a number of completely optional rooms. This guide will just cover the quickest route through the dungeon. In the first room there are a series of Leevers as well as a Beamos that will shoot out a laser beam towards Link. Make your way towards the Beamos and then take the pathway to the left. Clear the pots and head up.


A Red Devalant blocks your path. Deliver two sword slashes or one hit from an arrow to defeat this enemy. Continue left a screen and then head up through the open door. A small key can be found at the top-left part of the screen. Much like when you acquired the Book of Mudora, simply dash into the torch and the small key will drop. Collect it and then exit the room.

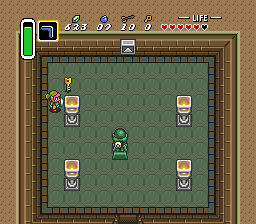
Dash to the right two screens and then head down another screen. Use the small key on the locked door here and head on through. Defeat the three Popo and the door will open above. You can collect the Compass from the treasure chest if you’d like.


There are Wall Turrets on the sides of the room that will shoot balls out towards Link. Avoid the balls and collect the Big Key from the treasure chest in this room. Afterward, head back down a screen and left a screen to get to the main chamber. Go up a screen, left two screens, and this time continue left one more screen.


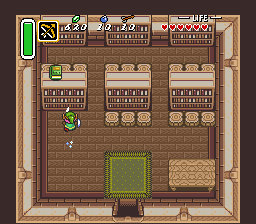
This room has a series of pots along with a Beamos statue right in the center. There are a lot of goodies to collect, but be careful of the Beamos’ laser. Under the pot at the top-left corner, there is a floor switch that will open the door. In the next room open the large treasure chest to get the Power Glove. This will allow Link to lift larger rocks. Go back down a screen and right a screen.


Continue down a screen and left a screen, avoiding the enemies along the way. Exit the first half of the dungeon to the south to get back outside. While outside walk southward along the left side of the ledge and you’ll be able to get Piece of Heart #8. Now run to the north end of the Desert. There is another entrance that is blocked off by some rocks. You can now lift these rocks, so do so and enter the second half of the dungeon.


There is a trio of blocks at the top-right corner in this room. Avoid the Beamos statue and push the bottom block downward to open the door. There are a bunch of Flying Tiles that will come up from the ground and shoot towards Link. Link can avoid these by hiding inside the entrance to the door, causing the tiles to crash against the wall. Alternatively, Link can just grab the key that is underneath the pot at the bottom-left part of the room and quickly go through the locked door.
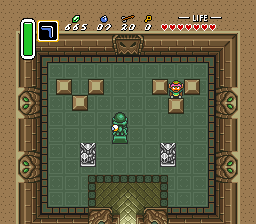

There is another room filled with a Beamos and a series of Popo. Defeat the Popo and then head right through the door that opens. This large room has several more Popo and some Beamos. Half way through the room there is a series of pots for Link to lift. The second pot from the right holds a small key. Grab it and then head through the door ahead.

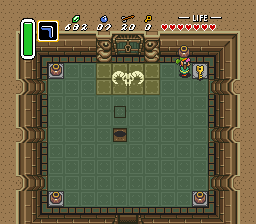
There is another Flying Tile room. This time they key is underneath the pot in the top-right corner. Defeat the Red Eyegore that is in the next room and then pull out the Lamp. Light the four torches, causing the wall to move, revealing the entrance to the dungeon boss. Once you are ready, head up a screen to take on the Lanmolas.


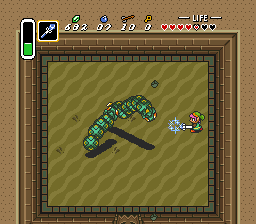
The Lanmolas will start off underground and you’ll see the ground shaking before they come up. Once a Lanmola pops up from underground, it will shoot four rocks out, each moving diagonally in different directions.
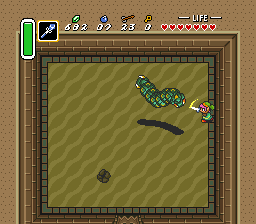

While a Lanmola is out of the ground, it is vulnerable at its head. Link can use his sword to slash the enemy before it burrows back underground. While a bit more difficult, a well timed Arrow will also work well. The most effective way to defeat these enemies though is to use the Ice Rod. However, much like the Arrow, it requires great accuracy and timing.
When there is only one Lanmola left, its behavior will slightly change. After it comes up from underground, it will now shoot eight rocks towards Link. These will come out diagonally, horizontally, and vertically. Avoid the rocks and finish off the Lanmola in the same fashion as the other two.
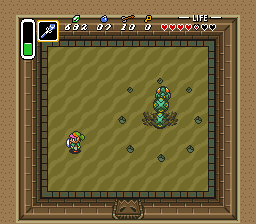
After the final Lanmola has been defeated, collect the full Heart Container to increase your health to eight heart containers. Grab the Pendant of Power and you’ll soon be transported outside of the dungeon.


- Chapter 1 – Zelda’s Rescue
- Chapter 2 – Eastern Palace
- Chapter 3 – Desert Palace
- Chapter 4 – Tower of Hera
- Chapter 5 – Hyrule Castle Tower
- Chapter 6 – Dark Palace
- Chapter 7 – Swamp Palace
- Chapter 8 – Skull Woods
- Chapter 9 – Gargoyle’s Domain
- Chapter 10 – Ice Palace
- Chapter 11 – Misery Mire
- Chapter 12 – Turtle Rock
- Chapter 13 – Ganon’s Tower
