- Chapter 1 – First Three Days
- Chapter 2 – Southern Swamp
- Chapter 3 – Woodfall Temple
- Chapter 4 – Collection
- Chapter 5 – Snowhead
- Chapter 6 – Snowhead Temple
- Chapter 7 – Spring, Romani Ranch, Ikana Graveyard
- Chapter 8 – Great Bay & Zora Cape
- Chapter 9 – Great Bay Temple
- Chapter 10 – Ikana Canyon
- Chapter 11 – Well & Ikana Castle
- Chapter 12 – Stone Tower Temple
- Chapter 13 – The Moon
4.1 Post Temple Collection #1
NOTE: This entire chapter consists of optional content. Before heading on to the mountains, there are a ton of new goodies to collect, however, none of these items are necessary. If you are simply concerned with the main quest, move on ahead to Chapter 5.

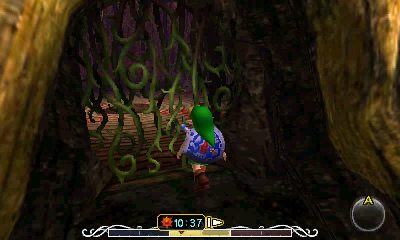
With Odolwa (the boss of the Woodfall Temple) defeated, the Swamp will return to normal, meaning that the poison is now gone and new vines have grown. Simply smashing! A new entrance to the temple has been revealed, and you will find yourself inside of it. Tatl will exclaim how awesome Link is as well as apologize for being a jerk earlier on in the game. So touching. The two of them will then hear a sound in the background, at which point you will regain control.
Slash the vines to reveal the Deku Princess! Oh jolly day! She’ll thank you for rescuing her and helping her friend, the monkey. After a moment though, she realizes that he’s in trouble and becomes frantic, begging you to find a means of transporting her. Anything will do! Well, this’ll sound downright silly. Take that bottle of yours and swipe it at her. You have a Bottled Princess!

Your goal is to bring the Princess back to the Deku Palace, but first, you’ll need to make a detour. In each of the dungeons in the game, there are fifteen Stray Fairies that can be collected for fantastic rewards. If you didn’t collect them all, check out the end of the last chapter to see their locations and hunt them down.
With all of them in hand, go to the south end of Woodfall. You can either jump in the water and swim around or teleport to the Owl Statue. Once there, use the Deku Flowers to reach the cave-like entrance in the far south wall. Inside, run forward and the Stray Fairies will reunite into the Great Fairy of Power, who will enhance an ability. NOTE: In the Nintendo 64 version, this will enhance your Spin Attack ability, where as in the Nintendo 3DS version, this will upgrade your magic meter, doubling its size.


Back outside the cave, if you look off to the right (east), you’ll see a large chest on one of the far platforms. There is a Piece of Heart here that was covered back in Chapter 2, but if you haven’t gotten it yet, use the Deku Flowers to reach it. At long last, exit Woodfall, jump down into the water, enter the Deku Palace and head to the throne room in the back.
When you arrive in the throne room, run up to the raised area and dump out the Princess in front of the Deku King. You’ll then get the pleasure of witnessing a humorous clip in which the Deku Princess jumps on her father in anger and frightens all of the other Deku in the room. She demands for the Monkey’s release and apologizes to him profusely. They are both grateful for what you’ve done for them and for Woodfall by cleansing the Temple.
As reward, there’s a little something the Deku have to give you that you’ll find in the Deku Shrine, to the right when you exit the palace. When you leave the throne room, as soon as you get past the guards, turn right (lower left side of the map) and hop across the lily pads. Also, you can press A before leaving each lily pad to spin across the water, making this process faster. At the end, enter the cave-like entrance to find the Deku Shrine the Princess spoke of.


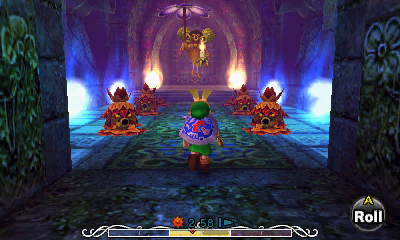
Because you saved the princess, the Deku are going to give you a special gift. Speak with the Deku Butler to begin a sort of race in which you must follow him through a long and twisted maze that is specifically designed to spite you. Whenever you’re ready, simply speak with the Deku Butler to begin. Here’s some insight/tips on how this works:


- The Deku Butler moves slowly if you are far away and moves quickly when you’re close.
- Follow the light of his candle; you’ll often see it on the floor in the direction he took.
- If you have the Bunny Hood, wear it, since it makes this much easier.
- Use the Deku Mask and spin with A when you need to cross water. This will allow you to get across quickly.
- Ignore the rupees. If you really need cash, there are much better places to acquire it.
As soon as you start, run forward and go left twice.


Climb up the steps in the next area, then put on the Deku Mask. Hop across the water, then go left and right. Hop across more water, then take another left.

Take off the Deku Mask and jump across the platforms. You can take the long way (green rupees), or take the shortcut (red rupees) while wearing the Bunny Hood. Next go right, then left.


Put on the Deku Mask. Hop across to the opposite side using the platforms. Turn right, repeat, turn left, repeat. Switching to the Bunny Hood now would be wise if you have it. Follow the path, then take either the left or right option.


In the Nintendo 64 version, this room has flaming walls between some of the pillars when you get close to them and they will burn Deku Link, so be sure you aren’t wearing the Deku Mask. In the Nintendo 3DS version, these are replaced by just solid bars. Hug the right wall, then once you come to the flames, simply run to the opposite side of the room and continue on to the exit.
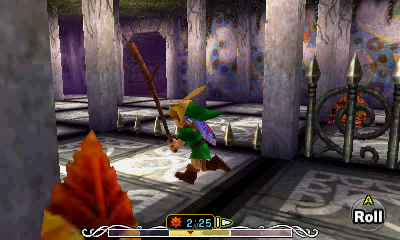

When climbing these stairs, make sure you run along the grooved “steps” and not the smooth parts, which will make you slide down and lose valuable time. Watch out for the rolling boulder and climb the next staircase. At the big open area, take a left, then take a right.


In the large open room, run forward and shoot the Crystal Switch with an arrow, temporarily removing the flames. Jump across the platforms, then continue on to the end. It doesn’t matter which way you choose at this point.


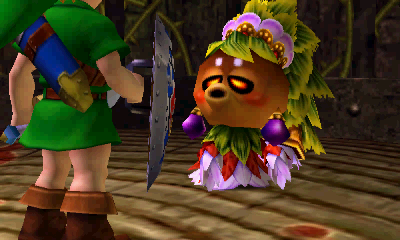
Once you make it to the finish line, you can run forward and speak with the Butler, who will reward you with the Mask of Scents. Yay! He’ll then apologize for going so fast. He explains that you greatly remind him of his son, who has been gone for a long while now, whom he used to race against. I wonder who his son is… Hmm… That’s all we had to do here, so step into the light to leave.

If you’d like another Piece of Heart, then soar to Southern Swamp. If you rescued Koume earlier, she’ll be waiting for you in the Swamp Tourist Information building. However, if you played the Song of Time (before you entered the Woodfall Temple) then you’ll have to rescue her again.
NOTE: If you return to the Magic Hags’ Potion Shop in the Nintendo 3DS version, Kotake will fly into the Woods of Mystery. When traveling through the Woods of Mystery, you will pass by Kotake. After seeing the hurt Koume, you can talk to Kotake who will give you a free Red Potion to give to Koume. In the Nintendo 64 version, Kotake never goes to the Woods of Mystery and instead, you’ll have to meet Koume, then return to the Potion Shop to fill up a free bottle of Red Potion, and then bring it back to Koume. Alternatively, you can just buy the Red Potion flat out to avoid the hassle of going back and forth.


Red – Day 1
Yellow – Day 2
Blue – Day 3

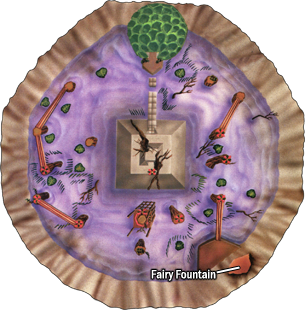
Anyway, enter the Woods of Mystery with your crimson elixir and either follow the monkey or use the provided map. Remember that the correct path changes depending on which day you enter the woods. At the end, give the Red Potion to Koume. Before you leave, in case you’re curious, you can put on the Mask of Scents to see Mushrooms (looks like a poof of smoke on the ground). Swipe at them with a bottle to collect them if you want, which you can then bring to Kotake and have her whip up some Blue Potion for free.
Enter the Tourist Information building again and speak with Koume who is now in the little alcove off to the side. Now that the poison is cleared up and you have the Bow, you have the option of playing a little game for Target Practice! It’s pretty easy and cheap, so don’t let it pass you by! The first time is free, but each time after that will cost you ten rupees.
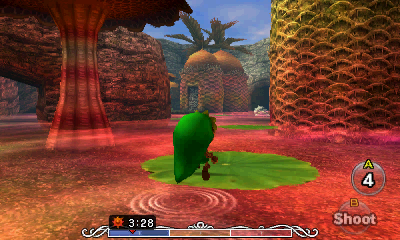
This game is pretty self-explanatory. You take the boat cruise as usual, but now you use the Hero’s Bow rather than the Pictograph Box. Koume flies around and holds a target below her broomstick. You want to avoid hitting Koume herself, since if you hit her ten times, you’ll have to start over. Each time you hit the target, it will reappear after a moment. You only need twenty points to win this mini-game, so after that, getting a higher score is just for fun.
Some tips that may help would be to press the B button rapidly (though that’s dangerous, as you may hit Koume) or to aim where you think the target will be next and release the B button once the target is in your line of sight.


While it may take you a few tries, this game becomes easy with practice. Once you’ve accomplished this miraculous feat, you’ll be rewarded with an Empty Bottle. NOTE: In the Nintendo 64 version of the game, you get a Piece of Heart as a reward instead. That’s all the stuff you need to do after the Woodfall Temple, so go ahead and soar back to Clock Town, put your remaining rupees in the bank and play the Song of Time.
4.2 Item Collection #2
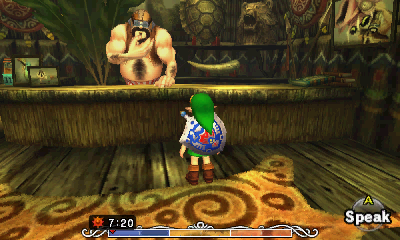


First on the agenda is the photo contest at the Swamp Tourist Center, which only occurs while the swamp is still covered in poison. There’s two pictures you can take that will grant you one Piece of Heart total:
- Deku King
- Tingle
Of those two options, Tingle is by FAR the easiest. You can find him either in North Clock Town or on the Road to Southern Swamp (area between Termina Field and Southern Swamp, just north of the Owl Statue actually). You may want to shoot him down to get a good picture of him (the game’s a bit picky and requires the entire body) then return to the Tourist Information building and enter. Speak with the big guy (who mentions something about his embarrassing son) and show him the picture. He’ll be a little flabbergasted and grant you a Piece of Heart in reward. You can take a picture of the Big Octo nearby and hand that in as well for 20 Rupees.
Next up is the Fearful Spider House, but you’ll need a few things before you enter. Be sure to grab the following:
- Arrows (slash bushes)
- Deku Sticks (slash the bush next to the Owl Statue)
- 2 Magic Beans (Business Scrub outside of the Tourist Information Center).
NOTE: If you have the Hookshot already, you will not need to purchase the Magic Beans, and likewise, won’t need to get Fresh Water while in the hut. However, if you are following along with the guide, we won’t be getting the Hookshot for quite some time.


Go outside, put on the Deku Mask and speak with the Business Scrub to purchase two Magic Beans (which you’ll use in a little bit). Be sure you have a Deku Stick (by slashing the bushes near the Owl Statue). With that, you’re finally ready to head to the second half of Southern Swamp (where it’s all poison). There are a few different ways to get there:

- Warp to Woodfall, fly and hop to the south end and drop down.
- Go clockwise through Southern Swamp, hopping with the Deku Mask along the lily pads, logs and flowers, shooting the Big Octo with an arrow.
- Give a bottle of Red Potion to Koume in the Woods of Mystery, then get a free boat ride from her.
- Take a picture of anything and hand it in, choosing the “boat ride” option, then disembark when you get to the Deku Palace.
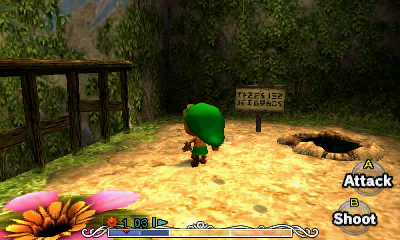
Out of those options, the boat ride is by far the easiest. However you get there, continue going clockwise through the southern part of Southern Swamp. You’ll find a large funny-looking building of sorts that you can reach by hopping along the lily pads. The entrance has a spider web blocking it, but you can burn that down by lighting a Deku Stick on the nearby torch.
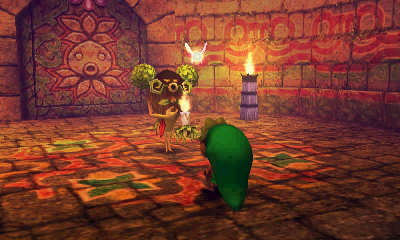
Inside, you’ll meet a guy who’s got a spider curse on him. He asks you to clear out all of the spiders in the depths of this building. After you kill each one, you need to touch the tokens they leave behind or they’ll just appear again. Once you’ve collected all 30 tokens, return to the entrance and the spider dude will give you a nifty prize. Sounds good, right? When you’re ready, enter the door.

Inside, you’ll meet a guy who’s got a spider curse on him (I HATE it when that happens!) who asks you to clear out all of the spiders in the depths of this building. After you kill each one, you need to touch the tokens they leave behind or they’ll just appear again. Once you’ve collected all 30 tokens, return to the entrance and the spider dude will give you a nifty prize. In each room, just listen for the sounds the spiders make and hunt them down until the room is quiet. Toss either of the rocks here to find bugs, which you can swipe up in your Bottle(s). Enter the door.


1. At the bottom of the ramp moving back and forth within the water.


2. Move up and down along the pillar at the northeast corner of the room.


3. Inside of a jar, just to the left of the ramp.


4. There is a soft soil patch on the wall at the east end of the room. Release bugs from your Bottle and they will crawl into the patch, causing a Skulltula to pop out.


5. There is a second soft soil patch on the wall at the west end of the room. Release bugs from your bottle and they will crawl into the patch, causing a Skulltula to pop out.


You will need one more Bottle of bugs in a later room. However, you will also need a Bottle of fresh water in the next room, so be sure to snag that before progressing. Once you’ve gotten the first five Skulltula tokens, head through the door on the left side of the room.
6. Roll into the crate that is third from the wall at the northwest part of the room.


7. Roll into a crate near the southwest part of the room to find a Skulltula.


8. At the northeast part of the room, use a Bomb or the Blast Mask to blow up the boulder. Then plant a Magic Bean and use fresh water to cause it to grow. Ride the plant to the western wall where you will find the Skulltula crawling around.


9. On top of the large tombstone in the center of the room. Climb up to the second floor and then jump over to the tombstone.


10. At the northeast corner of the room, hidden behind the lit torch.


You will need one more Bottle of bugs, so you can backtrack to the entrance to grab it. Once you are ready, head through the door to get back to the main chamber, now on the second floor.
11. Found on the pillar at the northwest corner of the room.


12. Found along the northern wall a bit higher up. Use an arrow or bubble to defeat the Skulltula. Then use the Deku Flower to grab the token.


13. Use the Deku Flower to get over to the east end of the room. At the southeast portion of the room, use a Bottle of bugs near the soft soil patch to cause a Skulltula to pop out.


Next, head through the door to the east, on the second floor of the central chamber.
14-15. Once you enter the room, look up and you’ll find five beehives. Two of them are holding Gold Skulltulas. Knock them down with your Bow or with a bubble and collect the tokens.


16-17. There are five large pots in this room. The one at the north end of the room and the the second from the south end both have Skulltulas inside of them. Roll into the pots to cause the Skulltulas to pop out.


18. There are a few small pots at the south end of the room. Slash at the front one to find the Skulltula.


19. At the north end of the room, slash at the wall to reveal a pathway where you will find a Skulltula right around the corner.


20. There is a Deku Scrub that is fast asleep. Play the Sonata of Awakening to cause it to wake up and run off. Use the Deku Flower to reach the higher ledge to the north where you will find a Gold Skulltula along the wall.


There is a rock here that has some bugs beneath. If you missed any of the previous soft soil Skulltulas, be sure to snag some bugs. However, no more bugs are needed for the remainder of the Skulltulas. Head through the door to get to the next room.
Slash the Crystal Switch here to form a ladder that you’ll use in just a bit. You will need some more fresh water in this room, so you can jump down and head through the door to the south to get back to the central chamber and fill up a Bottle.
21. In the center of the room you will find four beehives on the ceiling. The one closest to the north end of the room has a Skulltula, so shoot it down using an arrow.


22. A Skulltula can be found moving up and down the pillar at the northeast part of the room.


23. A Skulltula is located along the wall where the ladder had appeared. Shoot it down and then climb the ladder to snag the token.


24. There is a Skulltula higher up on the wall at the north end of the room. Plant a Magic Bean at the northwest part of the room and then pour some water to cause it to grow. Ride the plant to the Skulltula and swipe at it to collect the token. Use the plant again to get to the door at the north end of the room and head on through.


25. There are two beehives in the tree. The one to the northeast has a Gold Skulltula hidden inside, so shoot it down with an arrow or a bubble.


26-28. Roll into the large tree in the center of the room and three Gold Skulltulas will fall out. Run around the room to defeat them.


29-30. There are two more Skulltulas around the perimeter of the room, one of which will crawl around.


Once you have successfully gathered each token, return to the entrance and speak with the cursed man. Now that the curse has been lifted, he’ll be a Hylian again. He’ll thank you and give you the Mask that caused all this mess. This is actually an amazing one to have, as it will help you collect all of the rest of the masks found in the game!


Our next destination is over at the Post Office. If it’s already the third day, you’ll have to play the Song of Time and start a new three day cycle. NOTE: This event is available in the Nintendo 3DS version from 3pm until 6pm on the first or second day. However, in the Nintendo 64 version, this event is available from 3pm until 12am on both days as well.
Enter the Post Office in West Clock Town and speak with the Postman to play a little game.
Press A to begin, which starts a timer. The goal is to press A again once the timer reaches exactly 10 seconds. It can be a bit tricky and may take several tries. Try bobbing your head to the beat or tapping the controller with your finger (hitting A at 10 obviously).
For some reason, if you wear the Bunny Hood while playing this game, the timer will remain visible, rather than disappearing after the first few seconds. This makes it incredibly easy to stop it at the correct time.


When you have successfully completed this task, he’ll gift you with a Piece of Heart. You’re going to need at least 50 Rupees here soon, so you may just want to play this game again, since it’s fairly easy.
In Termina Field, there are several holes with four Gossip Stones inside. If you speak to them while wearing the Mask of Truth, they’ll say they all wish to be the same color. To do this, you put on one of the transformation masks and play the song for that area. The only set you have right now is the Deku Mask with the Sonata of Awakening, so that’s the one you’ll have to use (green). The other ones will be available later on in the game, but it doesn’t matter right now. In each of the four holes in Termina Field, play that song for the biggest stone to change its color. Once all four are the same color, you’ll be gifted with a Piece of Heart. Each of the four holes are found near the entrances of the four regions of Termina.


Next, you’ll need at least 50 rupees. Either go gather that much or pull it out of the bank, then head over to Milk Road. Play the Song of Double Time until it’s the final day (the worker will have broken the boulder by then). Proceed into Romani Ranch and go to the very back where there are two doors. Enter the one on the left which leads to Mamamu Yan’s Doggy Racetrack.
Pick up a Dog and bring it Mamamu Yan. Place a bet of anywhere from 10 to 50 rupees and watch the speedy little devils go at it!
This game is one of great chance, mostly not in your favor. There are tons of little doggies to choose from, but only a few are actually fast. Even if you pick a fast one, it may get caught behind some of the others and you’ll still lose your bet. To make the entire experience much easier on yourself, wear the Mask of Truth when picking your pooch to hear their thoughts. When you get one that says something like:
“There’s no way I’ll lose!”
“I feel unstoppable!”
“My paws feel lighter than air!”


…you’ve found your pup. Bet as much as you can for easy money. Your winnings are not guaranteed since the puppies will block each other, but you’ll at least break even if not come out ahead each time if you pick a faster breed.
Use the Mask of Truth, pick a fast puppy and bet large. If you manage to get 150 rupees or more in winnings, you’ll receive a Piece of Heart.
At this point, you should probably put your rupees in the bank and play the Song of Time. The last collectibles to grab come from several fairly difficult mini-games which each yield pretty sweet prizes if you’re successful. Go gather 200 rupees or pull that much out of the bank, then enter the Shooting Gallery in East Clock Town.


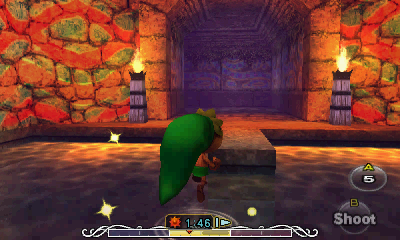
Shoot the red Octoroks for one point each. Avoid hitting the blue ones, as they reduce your remaining time. That’s really all there is to it. The pattern is different for each file, but it doesn’t change within the game. After a few tries, you should memorize the Octoroks’ locations. The only other trick is to work your way from left to right or vice versa so that you take them all out in a swooping motion rather than jerking back and forth.


Get a score of 40+ to receive a Quiver upgrade, increasing the total amount of arrows you can hold! Get a perfect score of 50 to be gifted with a Piece of Heart. There’s one more Shooting Gallery, which is quite a bit harder. Go to the area between Southern Swamp and Termina Field (where Tingle’s hanging out). On the east side of this area is a shop hiding in the wall called the Swamp Shooting Gallery. If you need extra cash, there’s a chunk of grass just outside the door containing 40 rupees, so collect those if you’d please. You can collect these rupees each time you re-enter this area, so it’s a great place to grind for money.


Shoot any enemies you see for points. Mad Scrubs (center) give very few points but they appear in consistently large numbers as long as you kill all of them each time. Deku Scrubs (trees on either side) will appear occasionally, giving additional points. Guays (crows) give medium points and often come in batches. They fly past a few times, so don’t worry if you miss them on their first pass. Occasionally Wolfos will run across the area, giving you a whopping 100 points each, so be sure to get those in particular!
It is best to focus on the Mad Scrubs in the middle. As long as you kill all of them, they’ll continually appear in groups of five. Missing one and allowing it to burrow will stunt your point buildup by quite a lot. Try to keep your Bow aimed towards the middle for the most part. Don’t go to the side for Guays or Deku Scrubs unless you’ve already gotten everything else in the middle taken care of.


Get a score of 2120+ (you earn extra points for time remaining) and you’ll be rewarded with another Quiver upgrade. There is one upgrade at each Shooting Gallery and the order in which you earn them does not matter. Once you have acquired both of them, you’ll be able to hold up to 50 arrows. However, you can play the game a second time after getting the Quiver. If you get a perfect score, with at least 6-seconds remaining, you’ll get 10-points per second. A score of 2180+ will get you a Piece of Heart!
These next two mini-games require you to beat them on each day for three days in a row in order to get the prize. Put your rupees in the bank, then play the Song of Time.
Now that your progress is saved (and it’s the first day), get some rupees and head over to North Clock Town. The fenced in area next to the Great Fairy Spring is your destination, and it can be reached by using the nearby Deku Flower.

This game uses floating platforms with Deku Flowers on them to form a mad race to collect rupees. If you run out of time or touch the floor, you’re out. It can be really disorienting at first, but you should get the hang of it quickly. Dive into the Deku Flowers with A and release to fly around. Try to fly to where you know a platform will be by the time you get there. Make good use of A to drop down onto the platforms before your “air time” runs out.
The first day the platforms go up and down. On the second day they move horizontally in circles. On the final day they do both.


Beat the record for each day and you’ll net yourself a Piece of Heart (plus you’ll never be allowed back in the Deku Playground). Put your rupees in the bank and play the Song of Time again.
Gather some more rupees (or pull some out of the bank) and head over to East Clock Town. There’s a shop in the center of the eastern wall (near the exit) which you likely haven’t visited yet.
Inside are Honey and Darling, who will allow you to play mini-games revolving around a rotating platform that goes up and down and steadily speeds up. You have a limited time to play and you’re out if you run out of time or fall off of the platform. The game changes by day, but here are some general tips to help you through each of them:
- Either try to focus on one target at a time or aim at whichever one you’re currently facing.
- Hit Honey and Darling! When you damage them, it makes a dialog box appear that says “Hey, that hurts!” When it does this, it pauses the timer temporarily. This is particularly useful for the Bombchu and Archery games.


In this mini-game, you can lay up to four Bombchus at a time, which will scurry up the walls and explode. Take out the higher ones first (while the platform moves slowly), by aiming a little before where you think it’ll go and laying down three Bombchus at a time. If you miss (or suspect you will miss) begin walking right and try again. After all four of the higher ones are taken care of, shift to the lower targets.
For this mini-game, work your way from right to left, focusing on only one or two baskets at a time. Try to aim for the higher baskets when the platform is high and the lower baskets when the platform is low.


Either line yourself up and release once it comes into your line of sight or mash the B button like crazy and focus on moving your stream in the right direction.
Beat each game, then play the Song of Double Time to move forward to the next day and repeat. Once you have gotten a perfect score for all of them, they will fork over a Piece of Heart. Whew! That’s all of the collectibles for now, so put your remaining rupees in the bank and play the Song of Time.
- Chapter 1 – First Three Days
- Chapter 2 – Southern Swamp
- Chapter 3 – Woodfall Temple
- Chapter 4 – Collection
- Chapter 5 – Snowhead
- Chapter 6 – Snowhead Temple
- Chapter 7 – Spring, Romani Ranch, Ikana Graveyard
- Chapter 8 – Great Bay & Zora Cape
- Chapter 9 – Great Bay Temple
- Chapter 10 – Ikana Canyon
- Chapter 11 – Well & Ikana Castle
- Chapter 12 – Stone Tower Temple
- Chapter 13 – The Moon
