- Chapter 1 – First Three Days
- Chapter 2 – Southern Swamp
- Chapter 3 – Woodfall Temple
- Chapter 4 – Collection
- Chapter 5 – Snowhead
- Chapter 6 – Snowhead Temple
- Chapter 7 – Spring, Romani Ranch, Ikana Graveyard
- Chapter 8 – Great Bay & Zora Cape
- Chapter 9 – Great Bay Temple
- Chapter 10 – Ikana Canyon
- Chapter 11 – Well & Ikana Castle
- Chapter 12 – Stone Tower Temple
- Chapter 13 – The Moon
10.1 Post-Temple Collection #3
NOTE: Nothing in section 10.1 is required. If you are strictly concerned with continuing along in the main quest, jump ahead to 10.2 – Ikana Canyon. Only the first half of section 10.2 is required to progress, as the majority of this chapter consists of optional content.
With the Great Bay Temple complete, the waters of Great Bay are now returning to a normal temperature, so fish will no longer boil to death and can safely migrate back. The murky water is slowly dissipating and Lulu’s voice has returned. In other words, as far as gameplay is concerned, nothing has changed.
One thing you can do is return Zora Hall. Now that Lulu’s voice is back, you can hang out with the band and speak with Lulu to start the rehearsal for their gig in Clock Town for the Carnival of Time. It’s totally optional, and you don’t get anything for it, but it’s cool to see. The song that’s played is the one that you (Mikau) and Japas made together, and is also the same song that is played in the credits of this game.
If you’ve collected all of the Stray Fairies in the Great Bay Temple, go to Zora Cape. Along the beach, near the entrance, there are some small platforms that lead out to the southern wall. Follow them until you get to the island with the trees. Hookshot from tree to tree, watching out for the Guays that hang out around here. Eventually you’ll get to a ledge with two boulders blocking a cave. Use some Bombs to blast them away and head inside to speak with the Great Fairy of Courage to receive an upgrade to your defenses! Enemies will do only half as much damage to you as they did before!


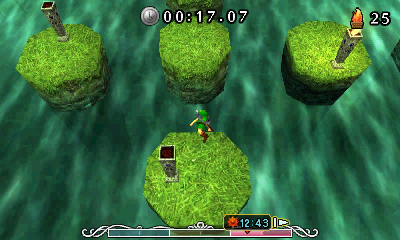
In the center of Great Bay Coast, there’s a little patch of land that extends out into the water. Go there to find a sign, a torch and an unmanned boat. Jump onto it and it’ll automatically start taking you to the islands in the distance with no driver. Spooky… Once you get to the islands in the northern portion of Great Bay, use the Hookshot to grapple onto one of the trees, then speak with the fisherman to play his “Jumping Game.” When you’re ready, jump to the center island to begin.


There are four islands with torches on them and one island in the center that you have to use to reach the others. Jump to the island that has the lit torch, but make sure you do so before the torch goes out! You have 2 minutes to get 20 points or else you’ll have to try again. Perhaps the weirdest part of this game is the odd camera angle. In some ways, it helps, but it’s different from regular gameplay so it can trip you up.
The fact that you have a time limit makes you feel like you have to rush to get the score in time. Don’t. Go slowly; you can easily get 25+ points if you take your time. Face towards the correct flame, Z target to center your camera and run straight forward, touch the flame, turn around, Z target, jump back to the center, repeat. Focus on your jumps and stay calm. You should be able to complete it without too much trouble.

Once you have completed this mini-game, the fisherman will sigh and regretfully fork up a Piece of Heart in reward.
This next Piece of Heart requires a bit of hunting as well as the Don Gero Mask, which was covered back in Chapter 5. There are five frogs across Termina that, when spoken to with the Don Gero Mask, will return to Mountain Village during the Spring (when Goht is defeated). If you can gather all of them together and wear the Don Gero Mask to conduct the choir, they’ll reward you with a Piece of Heart.
- The first one is already in the lake in Mountain Village in Spring (Snowhead Temple boss defeated).
- Waiting in the Laundry Pool of Clock Town.
- On a log in the eastern portion of Southern Swamp when you’re heading towards the Deku Palace in the non-poisonous water.
- Defeat Gekko in the Woodfall Temple.
- Defeat Gekko in the Great Bay Temple.


Also, as long as Goht’s defeated, head to the area just before Goron Village. Now that it’s spring, wear the Zora Mask and sink down into the water. There’s a chest right next to the ramp that leads out of water. Open it to find another Piece of Heart.
That’s everything you can do for now, so put your rupees in the bank and play the Song of Time.
10.2 Ikana Canyon
NOTE: You will need the Song of Storms to progress. If you’ve been following along in the walkthrough, the Song of Storms was covered back in Chapter 7, along with the Captain’s Hat and a few Pieces of Heart.
First of all, run around and gather at least 60 rupees, which you’ll need for the following tasks.
Your next destination is Ikana Canyon, but in order to get there, you’ll need one more mask for the road. Soar over to Milk Road and immediately take the path on your left (when facing the Owl Statue). This takes you to the Gorman Racetrack, where you can purchase Milk for 50 rupees. It’s completely not worth it, since you can get Milk for free by playing Epona’s Song for any cow.
Anyway, bring your horse and speak with either of them to be challenged to a little race for 10 rupees a try. It’s pretty easy, just make sure you use your carrots right before you get to jumps or mud holes. At the end, avoid the big mud holes entirely, because you can’t quite jump over them completely and they’ll slow you down.
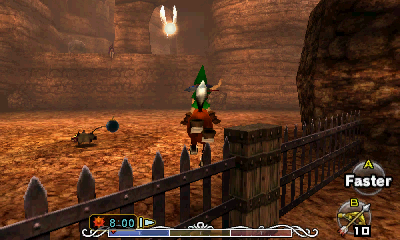
This particular mini-game is pretty self explanatory. Use carrots with A to speed up and try to avoid obstacles. There’s two methods for using carrots, either to use one at a time as soon as they recharge or to wipe them out completely and let them reappear all at once (they appear faster this way, but you’re also vulnerable for longer). It is best to use a combination of the two, being conservative with them at the beginning and using them all at the end.


Avoid hitting trees or walls, as they’ll obviously be a hindrance. The fences and mud patches can all be jumped over, just make sure you have built up speed with a carrot just before going over one. In this way, you can actually purposefully go for them to save time, rather than swerving around them like the Gorman Brothers. One note of caution, however: the final mud pits are quite a bit larger and you won’t be able to clear them completely by jumping over them, so they’ll still slow you down. For the final stretch, go over all the fences.
When you win, they’ll have no choice but to gift you with an odd mask. How’d they acquire this thing anyway? This is what you’ll need to proceed so head back to Termina Field and go back to Ikana (east exit).
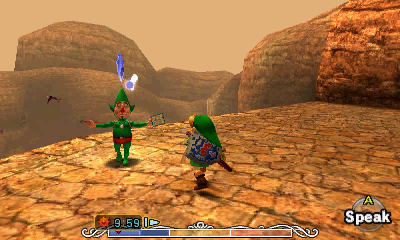
Ride Epona through this area, ignoring the Real Bombchus (since you’re invincible while riding your horse – go figure). Use your carrots to jump over the fences and dismount once you get to the wall. You’ll see there’s a creepy one-eyed man dangling his feet over the ledge. Run up to him and he’ll tell you that you need a certain mask that can be found near Romani Ranch (which you just got). Before moving onward, you’ll also need the Song of Storms, which is in the Graveyard.


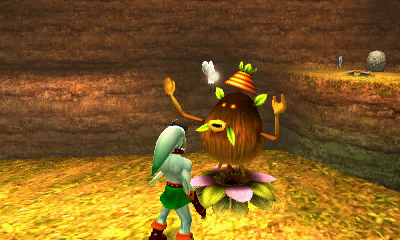
Otherwise, slap on the Garo Mask and chat with the one-eyed man again. After a little rambling and a giggle or two, he’ll make a small tree appear that you can Hookshot to. Do so and run along the path, avoiding the new enemies here called Nejiron. Just swerve to avoid them and continue on to the next area.
If it’s still the first day, you’ll see Sakon prancing around. If you talk to him, he’ll ask to see your sword for a moment (he’s a thief). Tatl won’t let you regardless, which is for the best. Run over to the water and you’ll see two Octoroks that are placed mischievously. Shoot them both with Ice Arrows and jump across the frozen blocks, then use the Hookshot to work your way up the cliff using the small trees on the ledges. At the top, slash the Owl Statue with your sword to wake it up.


Follow the left wall here, going up a ramp and then out to a ledge with a single tree. Look up and shoot Tingle’s balloon with an arrow. Purchase the Map of Stone Tower from him for 20 rupees. Next, head the opposite direction to the far north where there’s a small hut on the left. Go inside and you’ll find that creepy, one-eyed dude again. Cough up 30 rupees and he’ll allow you to play a little game.
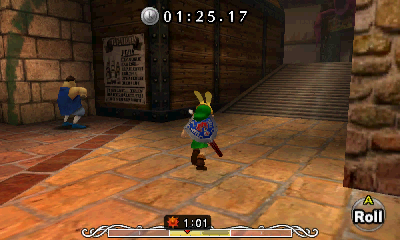
The object of the game is to kill the four Poe Sisters within three minutes. The first three fight the same way: They become invisible (and invulnerable), and charge at you. While they’re visible and not spinning, slash them with your sword or shoot them with an arrow.


Once you’ve defeated Amy, Beth and Joelle, the final Poe Sister will appear: Meg. She fights a bit differently in that she surrounds you along with three illusions of herself that slowly spin around you. You must guess the correct one and shoot it with an arrow, but if you guess incorrectly, she could wind up hitting you. The trick is that when they initially appear, the real one will spin around a second time. Watch for this, Z target her and shoot.
When you’ve successfully defeated them all, the one-eyed fellow will give you a Piece of Heart in compensation. Why, thank you very much! He’ll then disappear, having his own soul “healed” as well. At this point, you can run all around this area and wear the Garo Mask to make various Garos appear. These ninjas will give you interesting information and clues about the area when defeated. It doesn’t really matter much, but do so if you want the full game experience.


Now that you have this warp point, now would be a great time to go collect some goodies!
10.3 Item Collection #4
This next section is completely optional. If you’d like some extra Pieces of Heart, then follow along. Otherwise, skip to the next chapter. At long last, you can finally complete the entire Title Deed trading sequence. You might have gotten a few of these already, but at this point in the game, all of them are available.
The first order of business is to get a Moon’s Tear from the Astral Observatory. There are two ways to get there: you can use the Bomber’s Code to get past the Bomber in East Clock Town and go through the sewers or you could head out to Termina Field and go all the way to the Astral Observatory to the southeast. On the southern side is a Deku Flower that you can use to get inside the fence. Look through the telescope and zoom in on the top of the Clock Tower where Skull Kid is hanging out. Go back outside and pick up the Moon’s Tear.


Soar to Clock Town and approach the Yellow Deku Flower in South Clock Town. Speak with the Business Scrub once he makes an appearance and offer him the Moon’s Tear for the Land Title Deed. The Piece of Heart for this flower was obtained way back in Chapter 1!
Soar to Southern Swamp and climb up the ladder to the Tourist Information Building. Put on the Deku Mask and speak with the Business Scrub at the corner to purchase a Magic Bean for 10 rupees. Now take off the Deku Mask and speak with him to trade the Land Title Deed for the Swamp Title Deed. Use the flower to get on top of the building and snag the Piece of Heart.


Soar to Mountain Village and run all the way to Goron Village. In the southern part of the village is a Business Scrub in a Yellow Deku Flower. If you haven’t upgraded to the Biggest Bomb Bag yet (by speaking with him while wearing the Goron Mask), now would be an excellent time to do so. Speak with him while wearing the Deku Mask to trade the Swamp Title Deed for the Mountain Title Deed. Use the flower to get on top of the ledge behind it and collect a Piece of Heart.


Soar to Zora Cape and enter. Run along the right wall until you get to the last door where a Zora is fiddling with the keyhole. Put on the Zora Mask and speak with him to make the peeping tom incredibly nervous and run off. It’s fairly humorous, and you can follow him to rub his nose in it if you’d like. Anyway, enter Lulu’s room and check out her diary on the table if you wish. When you’re done playing around, put on the Goron Mask and speak with the Business Scrub here who’s selling Green Potion (and took up shop in a girl’s room…?) to trade the Mountain Title Deed for the Ocean Title Deed. Once he disappears, use the flower to reach the upper shelf with the Piece of Heart.


Soar to Ikana Canyon and jump into the river. Climb up onto the wooden dock and run to the far east side of the map along the cliff side. After going through the dark opening, you’ll come to a Business Scrub out near the ledge selling Blue Potion. Speak to him wearing the Zora Mask to trade the Ocean Title Deed for 200 Rupees (and the flower). After he leaves, use the flower to reach the opposite ledge and collect the Piece of Heart.

Soar back to Clock Town and return to the Astral Observatory. Either use the Bombers’ Password or enter using the Deku Flower in Termina Field. Once you get there, look through the telescope again, and this time, look at the leftmost wall of Clock Town. The Business Scrub you got the Land Title Deed from earlier is there. Look down and a bit to the right to see a tree. A little lower and to the left you’ll see a hole in the ground. Keep watching this hole and after flying around a few times, the Business Scrub will enter the hole in the ground.


Stop using the telescope and go back outside. If you bought that Magic Bean as directed earlier, you can plant it here and play the Song of Storms to make it grow, giving you a quick shortcut to get out of the fenced-in area. Otherwise, you can soar back to Clock Town and run back here. As long as you’re in the area, roll into the tree with the man in it (first day only) to get some extra rupees. Enter the hole.
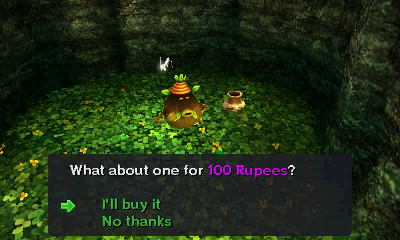
Inside, speak with the Business Scrub, who is upset that you found his secret stash. As a bribe of sorts to keep you quiet about it, he offers to sell you a Piece of Heart for 150 rupees. Refuse his initial offer and he’ll drop it down to 100 rupees. Buy it!!! If you refuse, he’ll become indignant and leave in search of another secret hideaway.

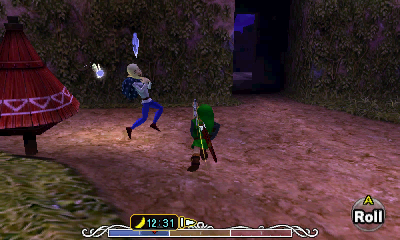
Next, you’re going to need the All-Night Mask, but first, you’ll need to save the Old Lady From The Bomb Shop in North Clock Town at 12:00AM on the first night. If you’ve passed that, you’ll have to play the Song of Time. Play the Song of Double Time to get to the first night, collect rupees while you’re waiting, then save her from Sakon.

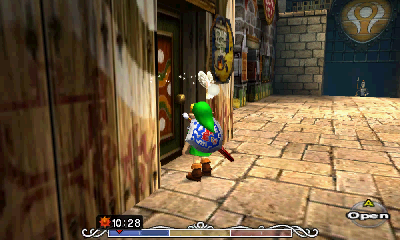
After that, play the Song of Double Time to get to the final night and continue collecting rupees. At 10:00PM, return to Clock Town and pull the remaining rupees out of the bank if you need to, bringing you up to 500. Enter the Curiosity Shop in West Clock Town (lowest door) and check out the bargain to purchase the All-Night Mask for 500 rupees. Play the Song of Time.


Head over to the Stock Pot Inn (which opens at 8), but if you don’t want to wait (or it’s night) you can use the nearby Deku Flower to get to the thatch overhang above and enter the door, even when they’re closed. Enter the only door downstairs to find the room where Anju’s Grandmother lives. This old woman in a wheelchair loves to tell stories, but she has a tendency to put her listeners to sleep. Slap on our new found mask and listen to each of her stories. If you answer correctly, she’ll give you “candy” as a reward. She actually gives two Pieces of Heart!

- Listen to the first story, do all the top answers.
- Listen to the second story, choose “I dunno.”


Next go to the Latte Milk Bar in East Clock Town (you’ll need the Romani Mask to enter) on the First or Second Nights at 10:00PM. Inside, go speak to Toto, the manager of the Zora band, the Indigo-Go’s. He’s a little nervous about what might happen with the moon, and is unsure if they’ll actually perform for the Carnival of Time or not, but in the meantime, he’d like to do a sound check. Speak with him while in each of your four forms to use the different instruments and he’ll make you play a bit of a song on the stage. You can also Z target him from atop the stage rather than walking down and around to save time.


When you play each part, Gorman, who is drinking alcoholic milk (right…) nearby will say that it sounds terrible. Once you have completed all the parts, they’ll all be played together (magically), and Gorman will recognize it at long last. Apparently it really tugs some heart strings, as he’ll burst into tears and grant you the Troupe Leader’s Mask, or the Circus Leader’s Mask, as it’s called in the Nintendo 64 version. While it is pretty worthless in the Nintendo 64 version of the game, it is helpful in getting another Empty Bottle in the 3DS Version. Plus, you’ll need it if you plan on getting the final mask of the game.


After acquiring the Troupe Leader’s Mask, there is an Empty Bottle that you can now get, but it is ONLY available in the Nintendo 3DS version of the game. ALSO: You CANNOT get the Empty Bottle on the same three-day cycle as the Troupe Leader’s Mask, so you’ll have to play the Song of Time and restart the cycle. It will need to be between 8am and 12pm on the Second Day to start this quest. If you are beyond this point in time, just play the Song of Time to revert back to the first day, then play the Song of Double Time to make it 8am on the second day.
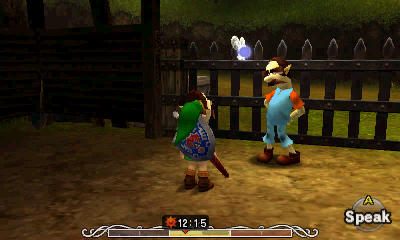
Enter the Stock Pot Inn, which opens at 8am. Go upstairs and enter the last door. You’ll find Gorman half asleep and he’ll mumble to you. Put on the Troupe Leader’s Mask and speak with him. He’ll explain that he needs a special type of Milk to calm his upset stomach. However, he asks that you bring it after noon, which shouldn’t be a problem.


Soar over to Milk Road and enter the Gorman Track. While wearing the Troupe Leader’s Mask, speak to one of the brothers. After hearing the dilemma that Gorman is in, they will whip up some Mysterious Milk. This special Milk will only last two minutes in real-time before it spoils, so you’ll have to get it to Gorman quickly. Furthermore, you aren’t allowed to warp. Just put on your Bunny Hood and run back to Clock Town. You should have plenty of time to make it back to Gorman at the Stock Pot Inn. After talking to him once again, give him the Mysterious Milk and he’ll jump right up, fully refreshed. He thanks and then asks you to toss away the Empty Bottle, or suggests that you can keep it if you’d like.


That’s all there is to do for now, it’s now time to head back to Ikana.
- Chapter 1 – First Three Days
- Chapter 2 – Southern Swamp
- Chapter 3 – Woodfall Temple
- Chapter 4 – Collection
- Chapter 5 – Snowhead
- Chapter 6 – Snowhead Temple
- Chapter 7 – Spring, Romani Ranch, Ikana Graveyard
- Chapter 8 – Great Bay & Zora Cape
- Chapter 9 – Great Bay Temple
- Chapter 10 – Ikana Canyon
- Chapter 11 – Well & Ikana Castle
- Chapter 12 – Stone Tower Temple
- Chapter 13 – The Moon
