- Chapter 1 – Skyloft
- Chapter 2 – Faron Woods
- Chapter 3 – Skyview Temple
- Chapter 4 – Eldin Volcano
- Chapter 5 – Earth Temple
- Chapter 6 – Lanayru Desert
- Chapter 7 – Lanayru Mining Facility
- Chapter 8 – Isle of Songs
- Chapter 9 – Lake Floria
- Chapter 10 – Ancient Cistern
- Chapter 11 – Lanayru Sand Sea
- Chapter 12 – Sandship
- Chapter 13 – Volcano Summit
- Chapter 14 – Fire Sanctuary
- Chapter 15 – Thunderhead
- Chapter 16 – Song of the Hero
- Chapter 17 – Sky Keep
- Chapter 18 – Final Showdown
9.1 Faron Woods: Silent Realm
If you haven’t already, fly over to the Faron Woods. If you land at the In the Woods bird statue, you’ll be able to get a piece of heart quickly. (If you don’t have the In the Woods bird statue unlocked yet, it is at the far southern point of the lower level of the woods, near two shortcut logs to the you may or may not have pushed off upper level ledges yet.) You’ll notice that the inhabitants of the Faron Woods have changed. You’ll see more keese, more quadro babas, and brand new Blue Bokoblin. These bokoblin are a bit more difficult to defeat as they have more health. You’ll also come across large moblins who take a number of hits to defeat. Your best bet is to avoid the moblins for now.
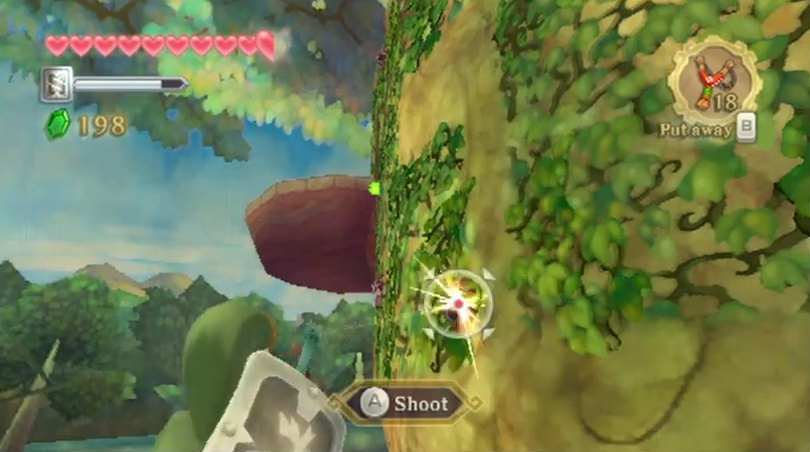
From the In the Woods bird statue, run down the pathway and you’ll find a boulder that is blocking a cave just ahead, past the intersection with quadro babas in it. We couldn’t do anything about this earlier, but now that we have the bomb bag, we can blow up this boulder. Do just that and you can collect Piece of Heart #11.


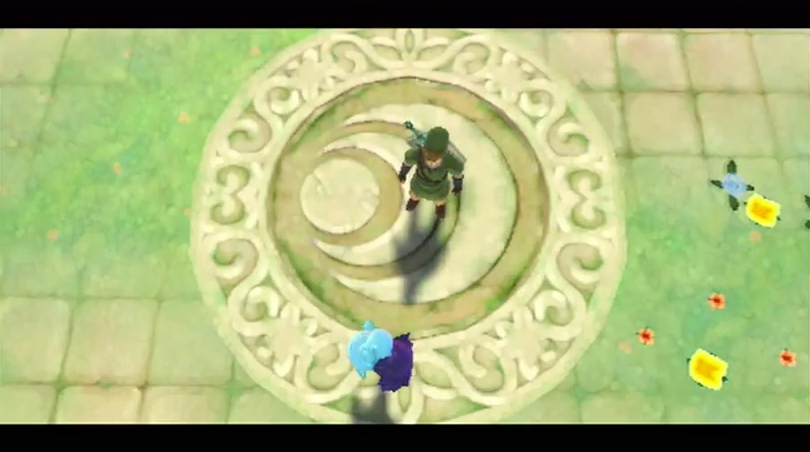
Make your way over to the northeast corner of the Faron Woods near the Viewing Platform bird statue (if you don’t have it on your map yet, it’s at the top of the structure). From here, use your dowsing mechanic to find the circular area just in front of the structure. Pull out your harp and strum to the pulsing. After playing Farore’s Courage, a strange mark will appear on the ground. Walk on over and thrust your sword into the ground to enter the Silent Realm.
You’ll now find yourself within Farore’s Silent Realm. Fi will give you the Spirit Vessel and you’ll have to fill with it the Tears of Farore. These are scattered throughout the Forest and you’ll have to collect 15 of them.


However, once you step out of the circle, the Guardians will awaken and will try to slash at you. If they hit you, you’ll have to start all over. Each time after you collect a Tear of Farore, the Guardians will be at rest for 90 seconds. In addition to Tears of Farore, there is also Light Fruit out in this location. These Light Fruits will illuminate the location of the remaining tears by shooting a beam of light into the air.
You’ll also see some Watchers with lanterns. If they illuminate your location with their lantern, the guardians will immediately awaken. The Silent Realm also has ponds of Waking Water. If you step into these ponds at any point in time, the Guardians will immediately awaken and will come for you. Try to avoid both of these whenever possible.
Finally, Dusk Relics are now available. These items are much like Amber Relics and used for crafting, so be sure to grab as many as you can. Possible spawn locations for these are shown in purple on the map below, and Tears of Farore are shown in green.
If this takes multiple attempts, do not be discouraged. Your in-game map will reflect every tear you’ve found on any of your previous attempts, and will also keep track of whether or not you have gotten it this attempt or not (by fading it grey if you have). Combine that with the Light Fruit and the map below, and you should be done in no time.

After collecting all of the Tears and returning back to the trial point, you will be rewarded with the Water Dragon’s Scale. This item allows you to swim underwater.
9.2 New Areas of Faron Woods
Right when you regain control of Link you’ll see Bucha, the giant Kikwi right behind you. He gives you a hint on what you need to do by telling you to explore new areas with the Water Dragon’s Scale. He’s basically saying explore the few areas of the Forest that have water.
Walk just south of where Bucha is standing and you’ll see a small pond of water. There is a quadra baba that hangs from the top of the wall, but if you dive into the water, it won’t bother you. Dive in and use the Wiimote to control Link while he is underwater. Swim into the nearby cavern to get Inside the Great Tree.
As you are swimming, you’ll see bubbles of air that appear and you can use these to fill up your oxygen level. If you’d like to do a spin attack/speed burst, simple shake the Wiimote and Nunchuk together (like doing a spin attack with your sword), but note that it takes up some of your air. Doing this while aiming up and out of the surface of the water will result in a dolphin-like jump. This jump can get you to higher ledges than you can simply climb out of the water onto, or get you over low obstacles.


Follow this rather linear pathway and Link will eventually reach a more open area. Swim on over and climb the nearby vines. You’ll find some Water Froak floating around, as well as a blue bokoblin. Pull out the gust bellows and you can blow the nearby swinging platform. Blow it away from you, but then allow it to come swinging back so that you can jump on it.
There is a blue bokoblin on the next swing, but you can completely avoid him. Just turn to your left and use the gust bellows to blow your swing in this other direction. Blow a second time to pick up a bit more momentum with your swing and then jump over to the platform on your left. You can use this area to scale the entire inside portion of the tree. There are several keese and a quadro baba near the top of the tree. The quadro baba in particular can be trouble but you can just gut it from its stem using the beetle. Open the treasure chest at the very top to get a rare gold rupee, worth 300 rupees!


You can drop all the way to the bottom or slowly descend. Your destination is the opening at the west end of the tree. Reach the ledge just above it and then drop down. Exit the tree to get back outside.
Begin scaling the tree by going counter clockwise. You’ll come to some vines, but before climbing them, use your slingshot to knock down the walltullas that are in your way. Climb the first set of vines and land at the higher platform. Use the slingshot to knock off the walltullas in the next area and then continue vine climbing. Enter the tree once again and you’ll find yourself matched with a moblin. You could use a couple bombs to defeat him, but the placement could be difficult given the narrow ledge you are on. Your best bet is to simply dash and jump over him, exiting the tree on the other side.
Interact with the bird statue to add it to your collection, and then continue scaling the tree. You’ll find yourself matched up against a blue bokoblin, as well as several red bokoblin. Defeat them and keep progressing up the tree, defeating some keese along the way. Climb the vines at the end to reach the very top of the tree. Link will automatically walk over and spot a sleeping Kikwi.

Use the slingshot to awaken this Kikwi. His name is Yerbal, but people just call him the Kikwi hermit. Yerbal will tell you that the flame you seek is Farore’s Flame, but it’s a secret to everybody. Yerbal tells you to seek out the Water Dragon and that she resides in Lake Floria. Yerbal tells you how to open the gate, but you’ll need to find the special symbol, and marks an ‘X’ on your map.
After you have spoken with the Kikwi at the top of the Great Tree, there are a couple of goodies for us to collect right here in the Faron Woods. In particular there are three Goddess Cubes that we can now reach. From the area with Yerbal, you can use first person camera and walk to the ledge to look down and spot them all (you won’t fall off while using this camera view). Getting all three will involve scaling the tree multiple times, so if that becomes frustrating, you can use any bird statue to get to the sky and then drop back down and return to the bird statue that’s on the path to Yerbal.
The first Goddess Cube can be found to the west, just below the first exit from inside the Great Tree when you’re scaling it. Look down below this exit and you’ll see Goddess Cube #13. Carefully jump down and deliver a Skyward Strike to activate it.


Goddess Cube #14 is found just southeast of the Great Tree. This time you’ll have to climb to the top portion of the Great Tree where the bird statue is and then carefully jump off, using your Sailcloth to break your fall. If you are having trouble getting this Cube, you can wait and get it more easily later on in the quest once you have a new item.


One last Goddess Cube is in this area and you once again need to climb to the top of the Great Tree with the bird statue. Near the very top area where you met the Kikwi, you’ll find an area of the Great Tree that sticks out towards the Viewing Platform. Just to the south of this area, hang off the ledge so that you can see down below.
Goddess Cube #15 can be found here and there is a tight rope leading to another platform. Cling to the ledge and position yourself until you are just above the platform and then drop down to the area below. Walk across the tightrope to get to Goddess Cube #15.
The locked door that we need to reach is located at the far south end of Faron Woods. The location is just south of where we met Bucha for the very first time. Make your way on over, defeating the keese, bokoblin, octoroks, and chuchu that get in your way. Once you reach the door, hold up your sword as if you were doing a Skyward Strike. Draw in the circle on the symbol and the door will open up.

Run forward and dive off the ledge to enter Lake Floria.
9.3 Lake Floria
Once you dive in the Lake, the flow of the river will take you down a small waterfall where you will meet the Parella. This the water race of Skyward Sword and they are found almost exclusively within Lake Floria. The first Parella that you see doesn’t really want to chat, so just keep following it.
The Parella that you are following will sneak by a hole in the wooden planks. Follow the Parella by shaking the nunchuck and performing a water attack, breaking through the wooden barriers. After seeing your ability, the Parella here suggests that maybe you can help the Water Dragon as she is wounded.
Continue following the Parella along the water corridor. Use the water dash attack to break another wooden barrier. The Parella will lead you to a more open area where there are several froaks. There are several boulders in this area and you’ll need to blow them up to get the goodies that are behind. To do this, target one of the nearby froaks and perform a water dash attack, exploding the froak into the boulder.


The large boulder in the middle of the area contains a silver rupee. The proper passage is the north, so blow up that boulder. Follow the Parella to the next area and you’ll reach a gate that is blocking your pathway. What you need to do is perform a water dash attack near the top of the water while you are swimming upwards. If done properly, Link will dash out of the water and over the barrier.
Continue following the Parella and you’ll have to perform another one of those water dash attacks. This time however, it will take you onto the surface above. If you turn around and walk along the land area here, you will come across Goddess Cube #16, so deliver a Skyward Strike. There is also a treasure chest near the bird statue that contains a rare Goddess Plume, so be sure to pick that up, and activate the bird statue so it gets added to your map.


Jump back in the water and continue following the Parella. You’ll have to make one more water dash jump to get over a barrier. Once you do so you’ll encounter a brand new enemy known as a Cranioc. They have these massive heads and they will try to charge at you. Just aim towards them and deliver a water dash attack to stun them and a second one to defeat them.
Follow the Parella to the door and she’ll open it, leading you to the Water Dragon. Jump onto the ledge and speak to the Water Dragon, who is sitting inside a bowl like container.

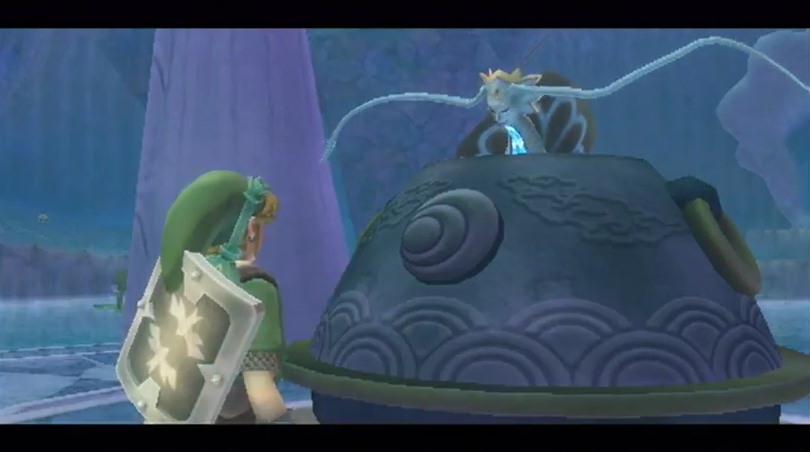
The Water Dragon goes on about how she was attacked by Ghirahim and how she needs Sacred Water. She asks you to bring her a container of fresh sacred water. Agree to do so and once completed, she will take you to the flame. You will need an empty bottle for this task. Fi will set the sacred water as an available dowsing target.
Jump in the water and if you use a dash water attack, you can leap up to the higher ground on the left. Follow this pathway to a treasure chest that contains a silver rupee! If you do the same on the other side of the area, you’ll find a treasure chest that contains a random treasure. Afterwards, exit the water area at the northwest corner of the map.
Be sure to use the bird statue to save your progress and record this point on your map. Now it is time to find where that Sacred Water is! You could go dowsing for it, but I’ll give you a clue, it’s over at the Skyview Temple. Walk to the pathway on the right to return to the Faron Woods. Knock down the log here, making for easier travel to the Floria Waterfall.
You could run on through the Faron Woods and Deep Woods to reach the entrance of the Skyview Temple. Alternatively, you can use the bird statue to leave and return to the sky, turn around to get back to the Faron area, and then drop down by the Skyview Temple entrance. If you do choose to head through the Deep Woods, be sure to pickup a couple Hornet Larvae treasures by knocking down the hornet nests.
There isn’t anything else to do, so run on over and enter the Skyview Temple.
9.4 Skyview Temple Revisited
The layout of the Skyview Temple hasn’t changed, but it is now infested with some new enemies. Luckily if you opened up the shortcuts the first time playing through the dungeon, this shouldn’t be too much work. Start by running down the corridor and defeating the quadro baba along the way.
Keep progressing down the path and one of our Mogma friends from the Eldin region will appear. Apparently he’s looking for some treasure. He gives you the same hint that Gorko gave you earlier, to play the harp when you see butterflies and a symbol will appear on the wall. You can raise your sword to the sky and draw a symbol on the wall to get some goodies. You can drawn an arrow, bombs, hearts, and you’ll get whatever you end up drawing. If you draw a Triforce symbol, three fairies will come out.


Right where the Mogma was, if you take a right there is a shortcut to get to one of the large rooms. You had to have opened it earlier, so if you haven’t, just progress through the dungeon to get back to this room.
There are a bunch of enemies in this room including the brand new Green Bokoblin Archer. As its name suggests this variation of bokoblin will shoot arrows out at you. Defeat it with a sword slash. You’ll also notice that the door at the end of this room has once again been locked, so we’ll have to go searching for a small key once again. Go through the door on the right side of the room.
Run forward and you’ll see the Mogma once again in this room. He mentions that he buried a key nearby. Jump in the water and you’ll be able to swim through the small hole on the left side. Swim through and then climb the vines on the other end. Dig up the soft soil spot to get the small key. Crawl through the hole, drop down, and return to the large room.


Run over to the north end of the room and use the small key on the locked door. Defeat the Staldra enemies in this room and then run through the door at the north end. If you didn’t unlock this shortcut during your first run through the dungeon, then you’ll have to go through the room to the east.
You’ll be back in the large room that has a tight rope in the center. There are two green bokoblin archers on the other side that are shooting arrows at you, so you cannot make it across the tight rope just yet. Take cover behind the pillar on the right side. What you want to do is pull out your beetle and send it across where the tight rope is. Grab on to the bomb flower that is nearby and drop it on top of the archers. You might need to maneuver your beetle left and right as the bokoblins will try to hit it with an arrow. Drop the bomb to defeat the archers and then run across the tight rope.
You’ll see the Mogma once again and he’ll have a few words with you. Afterwards, save your game at the bird statue if you’d like and collect some of the recovery hearts that are on the side. Once you are ready, enter the boss room once again to take on somewhat of a dungeon boss.

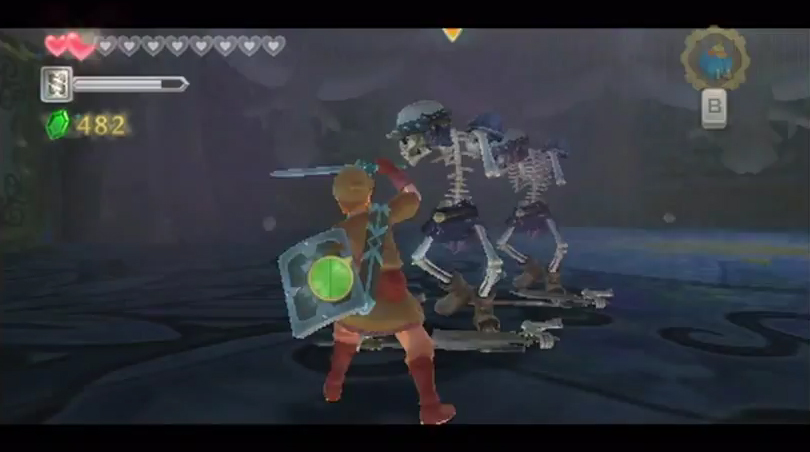
You’ll face off with a stalfos once again but this time there are three of them at one time! The method to attack them has changed a bit as we now have bombs in our arsenal. If a bomb explodes near a stalfos, its arms will temporarily fall to the ground, making it indefensible to sword slashes for a period of time. You can use that method if you’d like, otherwise just try to hit them with your sword like before. It’s a good idea to move in and out, not being too aggressive as one of the stalfos will hit you sooner or later. At any point during the battle you can slash away at the pots around the room to get some recovery hearts.
After the three stalfos have been defeated, exit the room to get back to the Skyview Spring. If you run to the end of the spring on the left side you will find a waterfall with fairies nearby. Swipe with your empty bottle into the waterfall and Link will pick up some Sacred Water! Fi will immediately chat with you and will warp you back over to the Deep Woods. At this point you can make the long journey on foot to get back to the Water Dragon. Alternatively you can use the bird statue to get back to the sky, and then drop down to the land below, selecting the Floria Waterfall statue.
Go back inside and speak with the Water Dragon. After pouring the sacred water, the water dragon will burst out of its small container, and is now in full health. The Water Dragon presents herself as Faron, the Water Dragon and guardian of these lands.


You will next appear at the Waterfall and the Water Dragon will stop the water, revealing the entrance to the next dungeon. Before entering the dungeon, there are some goodies for us to get in the Sky, so head over to the Bird Statue and return to the land above.
If you’d like to progress into the dungeon, water dash onto the higher ledge and enter the fourth dungeon of the game, the Ancient Cistern. Skip ahead to chapter 10!
9.5 More Goodies in the Sky
Back within the Sky there are four Goddess Chests that we have activated. You cannot activate Goddess Chest #16 just yet as we need another item for that one. However you can activate the three other ones as well as Goddess Chest #9 to get some notable goodies from them.


- Goddess Chest #9 can be found within the storage shed of Skyloft. Jump in the water near the waterfall and you’ll find a small cavern at the start of the river in Skyloft. Swim up on the other side to get a Silver Rupee in the regular chest and a Piece of Heart in the Goddess Chest!
- Goddess Chest #13 can be found at the southwest part of Skyloft just south of the Knight Academy and it contains a silver rupee. You can jump off the wooden platform to reach the small island.
- Goddess Chest #14 can be found just east of the Lanayru Region and it contains Piece of Heart #13. The chest is found on the higher ledge on the inside portion of the island.
- Goddess Chest #15 can be found at the northeast portion of Thunderhead and it contains a Rupee Medal. Defeat the Walltulas and climb the vines to reach the chest.


Now that we’ve gotten tons of Dusk Relics, some Evil Crystals, some more Hornet Larvae, and other smaller treasures, there are a number of upgrades that you can now get.
Big Bug Net
|
Fortified Shield
|
Goddess Shield
|
Tough Beetle
|
Note: You very likely will not be able to make all of these upgrades at this point in time… but you can. All of these treasures are now available to you and if you wanted to grind them out you can. For information on how to get each of the treasures in the game, check out our Skyward Sword Treasures Guide.
If you’ve been following along with the guide, you might have quite a few rupees in your wallet. During my playthrough when following the guide at this point I had just over 1000 rupees. Thus, it’s a good idea to purchase the Bug Medal. When you have the Bug Medal in your adventure pouch you can look at your map and spot where there are bugs in the area.
- Bug Medal – 1000 Rupees
- Piece of Heart – 1600 Rupees
- Adventure Pouch Slot – 1200 Rupees
You can make a stop at the Item Check if you need to trade in any items. I’d suggest picking up the Rupee Medal if that got sent to the Item Check automatically.
Afterwards, jump back on your Loftwing and fly towards the Faron Region. Land at the Lake Floria Waterfall and enter the next dungeon, the Ancient Cistern.
- Chapter 1 – Skyloft
- Chapter 2 – Faron Woods
- Chapter 3 – Skyview Temple
- Chapter 4 – Eldin Volcano
- Chapter 5 – Earth Temple
- Chapter 6 – Lanayru Desert
- Chapter 7 – Lanayru Mining Facility
- Chapter 8 – Isle of Songs
- Chapter 9 – Lake Floria
- Chapter 10 – Ancient Cistern
- Chapter 11 – Lanayru Sand Sea
- Chapter 12 – Sandship
- Chapter 13 – Volcano Summit
- Chapter 14 – Fire Sanctuary
- Chapter 15 – Thunderhead
- Chapter 16 – Song of the Hero
- Chapter 17 – Sky Keep
- Chapter 18 – Final Showdown
