This chapter covers the Nintendo Switch version of Link’s Awakening. If you are playing the Game Boy Color version, check out the Key Cavern Walkthrough.
- Chapter 1 – Tail Cave
- Chapter 2 – Bottle Grotto
- Chapter 3 – Key Cavern
- Chapter 4 – Angler’s Tunnel
- Chapter 5 – Catfish’s Maw
- Chapter 6 – Face Shrine
- Chapter 7 – Eagle’s Tower
- Chapter 8 – Turtle Rock
- Chapter 9 – The Awakening
3.1 Collection
With the Bottle Grotto now behind us, we have a few lasting minutes left with our friend BowWow. Unfortunately we are going to need to return him to his home shortly. If you’ve been following along with the walkthrough, you should have more than 200 rupees by now, or at least close to it. If not, there are a few places we can get some rupees, since we’ll need them to buy the Shovel from the Mabe Village shop. Purchasing the shovel and returning BowWow are the only required pieces in the section, but there is a lot to do.
From Bottle Grotto, travel to the west out of the swamp to reach an area with a Telephone booth. Use Roc’s feather to jump over the gap and head up a screen. Get rid of a few more enemies and enter the cave found on this screen. Using the Power Bracelet, lift up the skull that is in the way and open the treasure chest to get 50 rupees! That’s not it though, walk to the left a screen, jump over the gap, and you’ll find another treasure chest. Open this one to get 20 more rupees! Exit the cave on this side and then head down two screens to get back to the Mysterious Forest. Optional: Extra Rupees

From the northwest entrance of the Mysterious Forest, walk to the right and you’ll find a cave that is blocked off by some boulders. We can’t do anything with this just yet, but head down and you’ll find an area that has a stone at the top-right corner. Lift the stone and head down the stairs that appear. Walk up the steps and sprinkle some magic powder on the hole and a bat will pop out. This fellow is known as Li’l Devil and he previously made an appearance in the Legend of Zelda: A Link to the Past. It appears like he is casting a bad spell on you, but in reality, he is now allowing you to carry up to 40 units of magic powder! Exit the cave.Optional: Magic Powder Upgrade

During our first visit through the Mysterious Forest, we traveled through a cave near the center of the forest when we acquired the Mushroom. Return to this cave and on the third screen, there is a piece of heart. Now that we have the power bracelet, we can lift up the skull that is blocking the way. Do so and collect Piece of Heart #7! That’s all that we need to do in this cave, so let’s exit the way we came in.Optional: Piece of Heart #7

Near the west end of the Mysterious Forest there is a boulder that is blocking a path to a treasure chest. Lift it up and toss it to the side to reach the treasure chest that contains a Secret Seashell.Optional: Secret Seashell #3

When BowWow is following you around, there are tons of unique things you can do with your chain chomp companion. BowWow can eat that pesky monkey on Toronbo Shores; Bow-Wow will sniff up secrets beneath the ground; BowWow will even have a battle with Kiki the Monkey. Note: None of these are required and they are just fun little additions for you to discover.
After you’ve had your fun, return to Madam MeowMeow’s house, just to the left of Marin’s House. Enter the building on the left and speak to the woman. She’ll be delighted that you brought back her precious BowWow and in exchange…she will give you a kiss…Great!


Our next destination is at the Shop in Mabe Village. Enter it and you’ll find the Deluxe Shovel is for sale. You should have more than enough rupees so let’s buy the Deluxe Shovel. Additionally, if you haven’t picked up any bombs yet, let’s purchase 10 of them for 10 rupees. If you leave the shop and re-enter it now, you’ll see that the Bow is now for sale for an insane amount of 980 rupees! We aren’t going to purchase that one for awhile, but we’ll be back.
However, if you really want to get the bow right now…you can actually steal it from the shop! Pick it up, and stand just above the Shopkeeper. Then quickly move on a diagonal path, leaving the shop before he can see you. However, if you go back into the shop after you’ve stolen something, the shop-keeper will zap you with an electric shock, killing you instantly. Additionally, from this point forward, whatever your name was on your save file, it will be replaced by the word THIEF.
While you could have purchased it earlier, the town shop also has a piece of heart for sale for 200 rupees. If it’s a bit too expensive now, just make note of it and return here later.Optional: Piece of Heart #8
Enter the small doghouse on the right side of Madam MeowMeow’s house that holds the small chain chomp. Use your newly acquired shovel to dig up the bottom-right of the screen to find a Secret Seashell.Optional: Secret Seashell #4


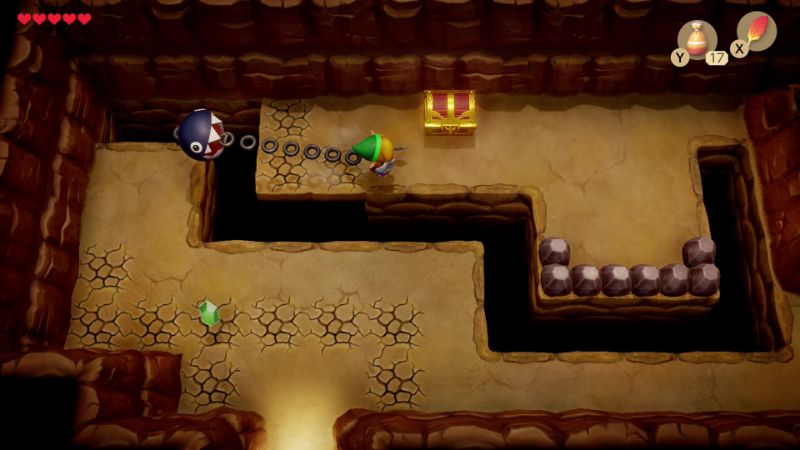
Our next destination is back at Tail Cave…Yes, actually within the dungeon. Let’s make our way all the way over to the Tail Cave and enter the dungeon. From the entrance go up a screen, left a screen, and up a screen. There is a wall on the left side where you can explode a bomb. Since you likely didn’t have any bombs the first time you came across Tail Cave, you couldn’t access this room. Now that we can, we’ll find a treasure chest containing Secret Seashell #5!Optional: Secret Seashell #5


Backtrack to the shop in Mabe Village and from there head east to reach the Ukuku Prairie. Enter the cave just to the north and you’ll find a treasure chest and a heart piece. First push the top-left block up one and then push the top-most block to the right. Lift the skull and toss it out of the way. There are two blocks on the right side, with one right above the other. Push the top one to the right and the bottom one down. Then lift the skull to reach the heart piece. Definitely open the treasure chest here to get some extra rupees as well.Optional: Piece of Heart #9


Make your way back to the Witch’s Hut located just east of the Mysterious Forest and north of the Ukuku Prairie. From here head left a screen, lift the stone, and then head down a screen. Beware of the zombies that come from underground in this area. There is a lone bush in the center of the screen. Cut it down and then use the shovel to collect Secret Seashell #6.Optional: Secret Seashell #6


Make your way back to the Witch’s Hut, lift the rocks and head up where you will find a Small House. Enter it and speak to the woman here known as Crazy Tracy. She tells you that she has a secret for you and if you speak to her again, she’ll try to sell you this secret for some rupees. Agree to give her the money and she’ll give you the Secret Medicine! This basically acts just like a fairy did in A Link to the Past. If you have the secret medicine, but lose all of your hearts, you will automatically use the medicine and it will revive you in the process. At any point if you return to Crazy Tracy’s house after using the medicine, she will sell you some more for 68 rupees. Optional: Secret Medicine


3.2 Chamber Dungeon
After completing Bottle Grotto the Chamber Dungeon becomes available to Link. This is a completely optional quest located at Dampé’s Shack, which can be found just east of Bottle Grotto and the Moblin Hideout. Inside the shack, Link can speak with Dampe and take part in a mini dungeon-maker. When Link first arrives, there are two quests available to him: Dungeon Arranging 101 and, after he completes that, Placing the Basics.

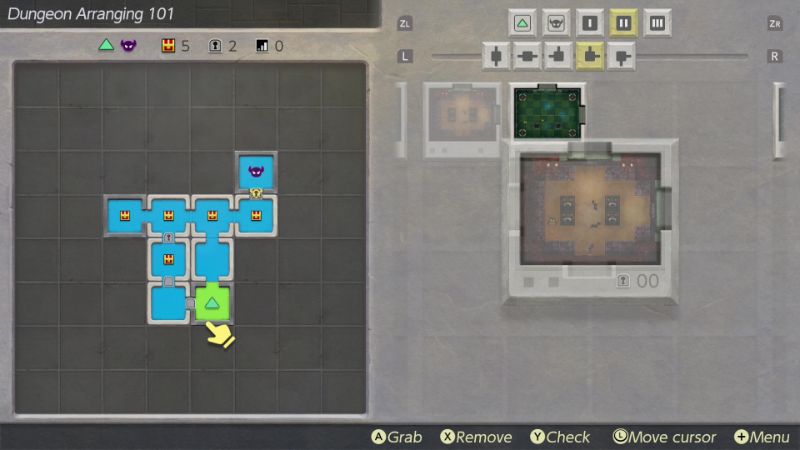

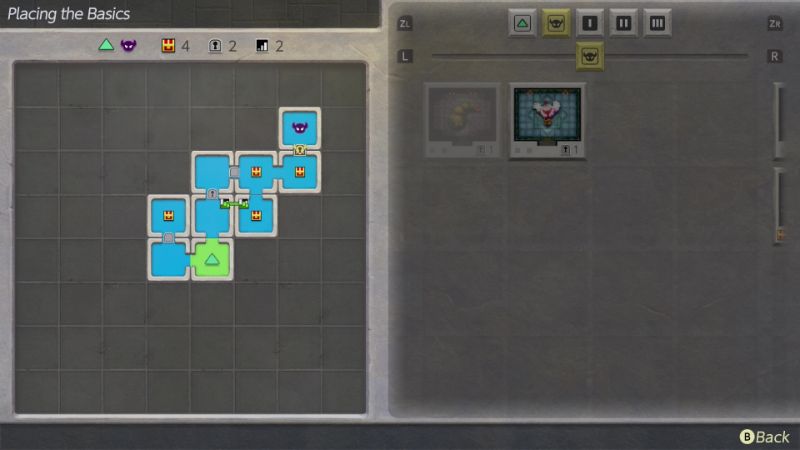
In this side quest, Link will need to take dungeon rooms from previously completed dungeons and arrange them in a dungeon map format. Each chamber dungeon that Link creates must have an entrance and a dungeon boss. Additionally, there needs to be at least one treasure chest, which will contain the Nightmare Key. There are a few other restrictions, such as requiring there to be enough treasure chests to account for locked doors.
After arranging a dungeon, Link then has the option to actually play the dungeon he has created. Doing so makes for an easy way to earn extra rupees as all the extra treasure chests will contain rupees.
After each time Link arranges a Chamber Dungeon and then adventures through it, he will be given a reward. Many times he will acquire a Chamber. This serves as an additional block that Link can place in the dungeon when arranging, along for more combinations and allowing Link to complete certain challenges.
Overall, the Chamber Dungeon is purely just a side quest, but as Link completes more dungeons, more challenges open up and Link can acquire heart pieces and secret seashells.
Additionally, just north of the Chamber Dungeon, lift the rock to create a warp portal. This will allow Link to quickly navigate across Koholint Island as he discovers more warps.

3.3 Kanalet Castle
We are now ready to explore the Ukuku Prarie, the area just east of Mabe Village. From the shop in Mabe Village, walk to the right and you’ll find a strange looking portal. This portal serves as a Warp Portal allowing you to quickly travel to various parts of Koholint Island. If you activated the portal by Dampe’s Shack, you can now quickly warp between these two locations.
From the warp portal, walk to the south and you’ll find the location of the third dungeon, Key Cavern. However, we don’t have the key to open the dungeon and it will be quite awhile before we can enter it. Instead just walk southward and you’ll eventually come across Richard’s Villa.
Inside there are a bunch of Frogs hopping around this house and the man found here goes by the name of Richard. Speak to him and he’ll talk about how he once lived in the Castle, but because his servants went berserk, he was forced to flee. He mentions the Ukuku Prairie Key and states that in order to get it, you have to recover the five golden leaves from the castle. He also mentions that you need a shovel, so if you haven’t purchased one in the Mabe Village shop yet, do so now.

From Richard’s house continue to walk to the east and north and you’ll eventually come across the entrance to Kanalet Castle. The front gate to Kanalet Castle is locked, so you’ll have to find another way in. Walk to the right two screens and you’ll find Kiki the monkey. If you’ve been following along with the Trading Sequence, we got the Bananas from Sale way back in Chapter 1. If you don’t have the Bananas or haven’t started the Trading Sequence at all, now is the point in time where you will need to do so. Check out the Link’s Awakening Trading Sequence guide for further help.
In short:
- Acquire the Yoshi Doll from the Trendy Game.
- Trade the Yoshi Doll to Mamasha at the north end of Mabe Village to get the Ribbon.
- Trade the Ribbon to the small chain chomp in the dog house of Madam MeowMeow’s house in Mabe Village to get the Dog Food.
- Trade the Dog Food to Sale, located in the lone house at Toronbo Shores, near where Link first acquired his sword. Sale will give Link the Bananas.
Speak with Kiki and give him the bananas. In exchange, he’ll summon his monkey friends who will create a bridge allowing you to cross. Once their construction is over with, a Stick will be given to you. This stick marks the 5th item in the Trading Sequence.
Give Kiki the bananas and he will call his friends to help build a bridge. After they leave, the Stick will be given to you.
Trading Sequence Item #5 - Stick


Cross the bridge and head up along the side of the Castle. Slash at the bush found here to reveal a hidden staircase that leads to a side-scrolling sequence. Inside, use Roc’s Feather to get rid of the goombas that are in your way and exit the cave. Once you resurface you will now be in the castle grounds of Kanalet Castle.


Walk left a screen and you’ll find a Darknut. Deliver a few sword slashes to defeat it and then head down. There is a sworded darknut on this screen and it will charge you once you have been spotted. Defeat it just like we defeated the sworded moblin before. You’ll also notice there is a Crow perched on top of the nearby tree. The crow will not move at all unless you pick up one of the nearby stones and toss it at the crow. It will then get off the tree and fly towards you. You need to quickly charge up a spin attack to hit the crow. Alternatively, you can pick up the second stone and toss it at the crow to defeat it. Once defeated, it will give you the first of the five Golden Leaves that we are trying to collect for Richard.


Make your way to the right side of the Castle and you’ll encounter a Mad Bomber. This guy will peak his head out from underground and toss a bomb at you. Once you see which hole he is going to pop out from, jump on over and deliver a sword slash while also avoiding the bombs that he throws. After four hits, Mad Bomber will be defeated and you’ll be rewarded with the second Golden Leaf! Make your way to the front gate and then enter Kanalet Castle.


In this first room, defeat the pair of darknuts and a zol. After defeating the enemies and the third Golden Leaf will come falling from the ceiling. There is also an Anti-Fairy floating around this room and it can be defeated by sprinkling some magic powder. These anti-fairies will always give off a fairy as a reward for defeating them.


Go up and right a screen, defeating the darknuts if you’d like. Step on the switch found here and you will hear a loud noise. This is the Kanalet Castle front gate opening up, making it easy to enter and exit the castle from now on. Walk left a screen and then up the steps to get to the second floor.
There are two mad bomber symbols on the wall in this room. You can place a bomb against each to blow open a hole and a sworded darknut will come out of both of them. Defeat the darknut on the left side of the room and you will be rewarded with the 4th Golden Leaf. Walk right a screen, down a screen, left a screen, and exit the Castle.
You’ll now be outside, but there isn’t much to do so just enter the other door found here. The door straight ahead will close and there are no switches to open it. Instead, you need to lift up one of the pots in the room and toss it at the door to open it up. Go inside to take on the Ball and Chain Trooper.
The ball and chain trooper will spin his ball and chain around before tossing it towards you. Once he misses, immediately rush in and deliver a sword slash. Just keep moving in and out, avoiding the ball and chain. After you’ve hit him 8 times he will be defeated, leaving behind the 5th and final Golden Leaf! With all five leaves now on hand, let’s backtrack through the entire Castle and get back outside the original entrance. Now that the gate to the castle is open, we have quick access in or out of the castle.

3.4 Secret Seashell Collection
While we have all five golden leaves, there are plenty of optional things we can do before returning to Richard’s Villa. If you’d like to skip these optional quests, jump ahead to the the next section titled “Finding Slime Key”. The first step is to visit the Seashell Mansion. From Kanalet Castle, head down and to the right to find a building here. Enter the building and walk to the right. Since we have at least 5 secret seashells, we will be rewarded with a Piece of Heart!
Collect at least 5 Secret Seashells and bring them to the Seashell Mansion to be awarded with a Piece of Heart.Optional: Piece of Heart #10


Just east of the Seashell Mansion, there are a bunch of bushes. Slash away at them and you’ll find a secret seashell. Additionally, there is a glowing soft spot on the ground that Link can dig up to create another warp portal, giving quick access to the Seashell Mansion.Optional: Secret Seashell #7

From the Seashell Mansion, head to the southwest and you’ll find an area with a a number of pig moblins. There is a lone stone in this area that can be lifted up to discover a Secret Seashell. Grab it and the head into the cave just to the west.Optional: Secret Seashell #8


Watch out for the Beetles that are hidden underneath the skull in this room. Defeat or avoid them and then go left a screen. Get rid of the enemies and then pull out your bombs. Toss a bomb against the wall at the far left of the screen and this will create a secret passage. Go through, jump over the gap, and head up the stairs. Walk to the left and push the block into the hole. Jump over and continue left and maneuver yourself through the blocks and head back to the right. Push the third block from the bottom to the right, and then push the adjacent block up to clear a path. Exit the cave. Walk up a screen and you’ll bump into two Winged Octoroks. These guys will jump whenever you try to swing at them with your sword. Use roc’s feather and your sword to defeat them, or slash them right when they land after their jump. You can talk to the owl statue that is here and it states, “AROUND HERE, SECRETS ARE NIGH”. Hmm…well, let’s pull out our shovel and dig just below and to the left of the owl statue to discover a Secret Seashell!Optional: Secret Seashell #9


Go down a screen and reenter the cave that we just came through. Backtrack through the cave and this time head down on the left side to exit the cave. Walk to the south to reach a telephone booth and then walk to the right right a screen. There is a lone bush in the area, so let’s slash it down to reveal a Secret Seashell.Optional: Secret Seashell #10

Leave Mabe Village to the east and follow the path heading towards Kanalet Castle. Along the way you’ll find Tarin and if Link gives him the Stick, he will knock down the Beehive that is in the tree. After being chased by bees, the Honeycomb will be left on the floor for Link to collect.
Trading Sequence Item #6 - Honeycomb

Just south of where Tarin is located and southwest of Kanalet Castle, there was a large skull that was in the pathway and it is indicated on the overworld map. Blast the skull with a Bomb and then dig the soft soil spot to get the seashell. Optional: Secret Seashell #11

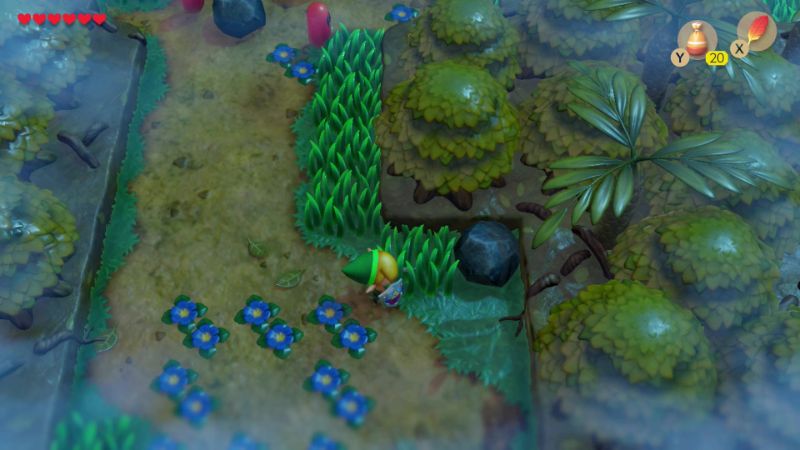
Right in the center of the Mysterious Forest, there is an area that has 8 small blue flowers. Dig up the soil spot right in the center to find the seashell.Optional: Secret Seashell #12

At the far northwest corner of the Mysterious Forest, use the shovel to dig up the soil along the west wall, near the trees to find the seashell.Optional: Secret Seashell #13

West of the Goponga Swamp there is a Telephone Booth. Just north of the booth there is some tall grass and a lone bush. Slash the bush and then dig it up to find the seashell that is hidden underground.Optional: Secret Seashell #14

Just east of the entrance to Bottle Grotto, there is a sign and a series of rocks. Lift the rock up that is on the right side to find the seashell.Optional: Secret Seashell #15

At the northeast part of the Tabahl Wasteland, just south of Dampe’s Shack, Link can use the Shovel to dig up the soil along the eastern edge. A seashell is hidden underground here.Optional: Secret Seashell #16

Located within the Tal Tal Heights region, directly east of Dampe’s Shack. Right next to the warp portal, there is a hole where Link can toss a bomb. The explosion will cause a seashell to jump out.Optional: Secret Seashell #17

Anytime after acquiring 15 Secret Seashells, return to the Seashell Mansion to claim your next reward, the Seashell Sensor. This item will cause Link to hear a chime every time he walks into an area where there is a hidden secret seashell.Optional: Seashell Sensor


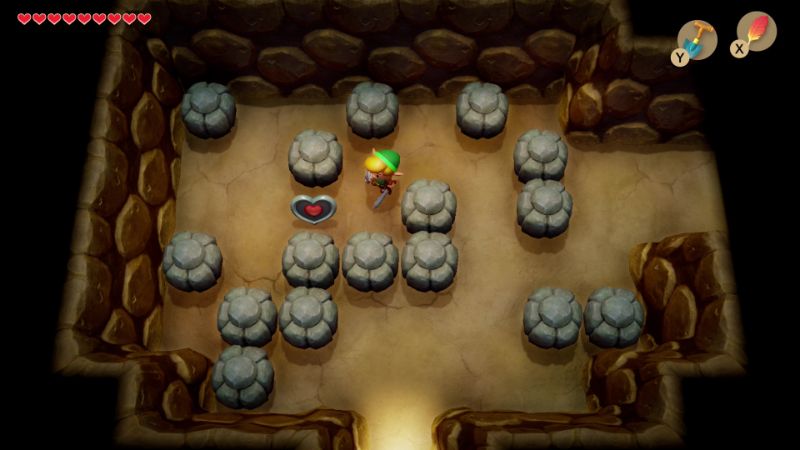
From Dampe’s Shack, travel directly northward towards the Tal Tal Mountain Range. Lift the rocks here and enter the first cave. Walk to the right and break the purple crystal. Push the block down and then head down the stairs. Immediately turn around and head back up the stairs. From here, there are three rocks in a straight line just below the staircase. Push the middle one down, and then the one on the left to the left. Break the purple crystal and grab the heart piece.Optional: Piece of Heart #11


On the Toronbo Shores, travel to the southeast edge of the beach and you’ll find a small log. Walk around the tree and dig up the sand at the far west edge against the wall to find the seashell.Optional: Secret Seashell #18

3.5 Finding the Slime Key
We are now ready to head back to meet up with Richard, so make your way back to Richard’s Villa. Enter the building and speak to Richard. He will allow you to pass so move the block and head down the stairs in his house.
Once you head down the stairs in Richard’s Villa, take the path on the left and push the block into the hole. Jump over the gap and open the treasure chest here to get a secret seashell.Optional: Secret Seashell #19

Take the path on the right and exit the cave to find yourself in the Pothole Field. There are a few paths that you can go through, slashing away at bushes to reveal the path. Slowly navigate by cutting down the bushes, being careful not to fall down into any of the holes that are unveiled. At the end of the path, cut the bush on this screen and listen to what the owl statue has to say. “IN SOIL SLEEPS SECRETS, BENEATH YOUR SOLES.” Well, let’s listen to this advice and pull out our shovel and start digging. Just below the owl statue, use your shovel and you’ll dig up the Slime Key! This key will allow us to open up the gate in Ukuku Prairie, allowing us to reach the next dungeon, Key Cavern.
At the northeast corner of the Pothole Field, there is a piece of heart that is just out of range. You can jump and slash away with your sword to cut down the bushes. While there are two rows of holes, if you jump right at the edge, Link is barely able to cross the gap and reach the heart piece. It’s best to jump right in between the two holes. This can be challenging and if you are having trouble, just skip it as you can return here once you get the item from the next dungeon, making it much easier to jump across.Optional: Piece of Heart #12

From the outside of Richard’s house, go up one screen, left a screen, and up a screen. Use the Slime Key that we just got on the lock and this will cause the gate to the dungeon to open up. However, we cannot reach the entrance from here. Go back down and around the Pothole Field. Once on the right side of the, use Roc’s Feather to jump over the water to reach the entrance of the dungeon.

Just north of the entrance to Key Cavern, climb the ladder and use the Shovel to dig up the empty spot right in the middle of the grass to reveal a seashell.Optional: Secret Seashell #20

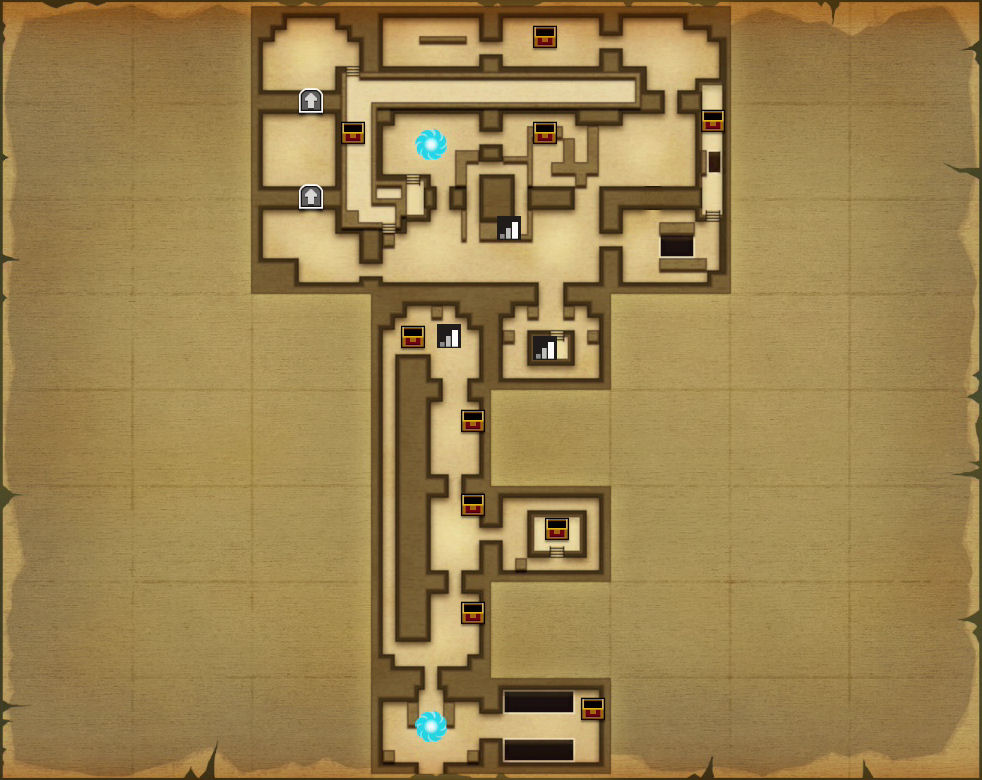
3.6 Key Cavern
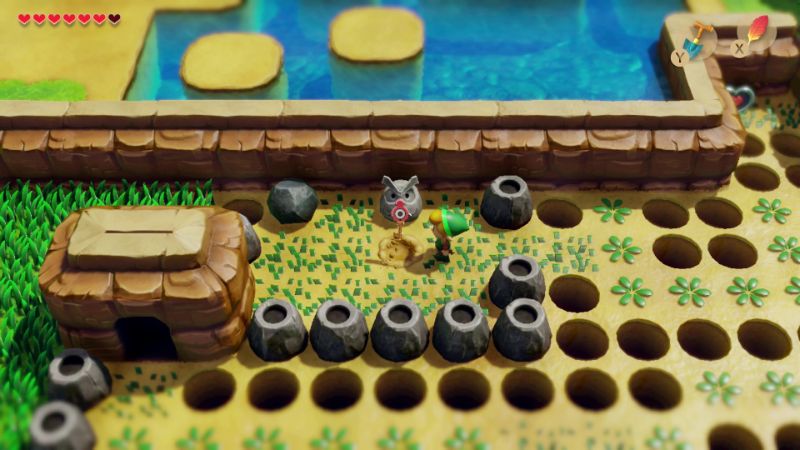
Key Cavern gets its name since there are many keys found throughout the dungeon. In fact, there is one too many keys as you can complete the dungeon, reaching every single room, but still have one remaining key. It’s a relatively easy dungeon, but can be troublesome if you miss a key. In the initial room, there are four bombs underneath the pots. You can lift these pots, leave, and then come back to continuously refill your bomb bag.
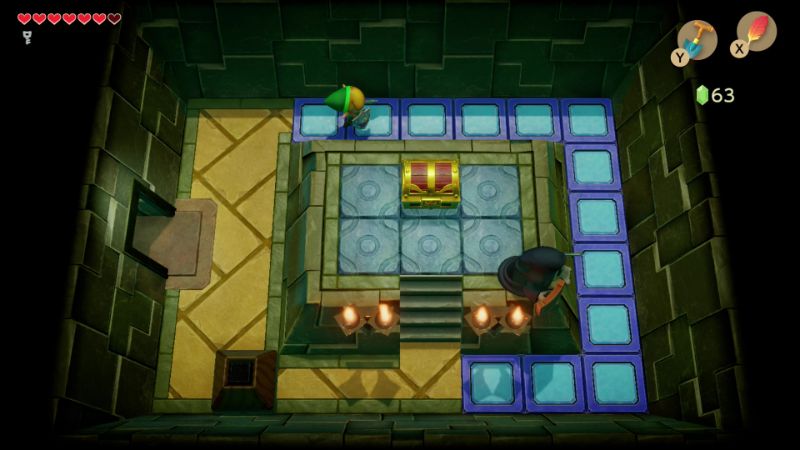
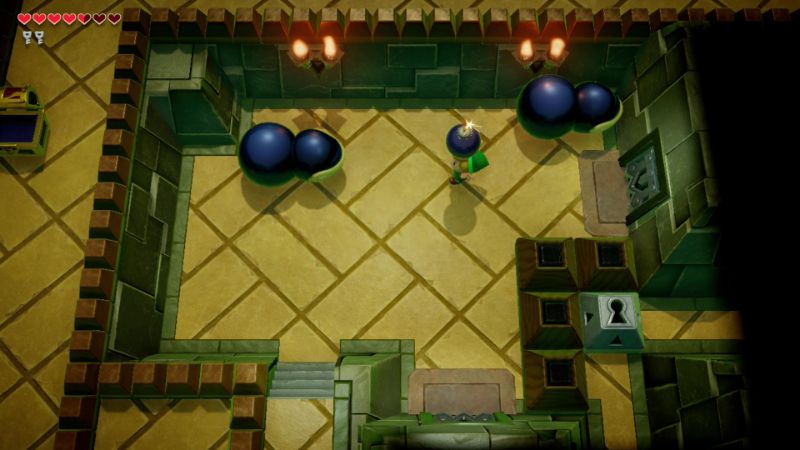
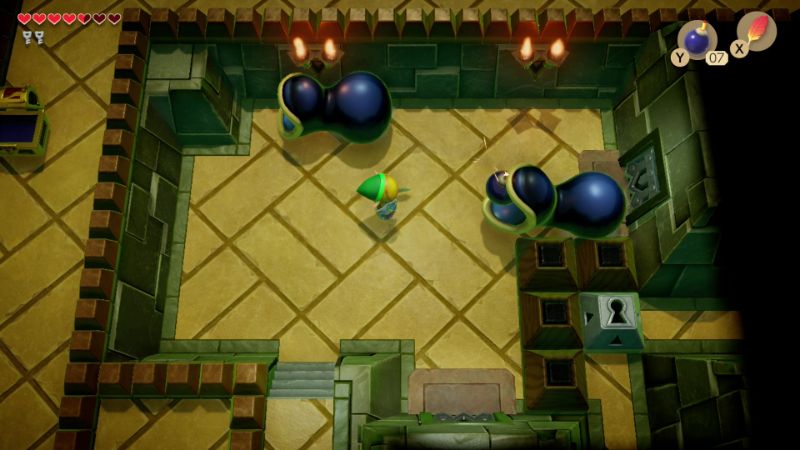
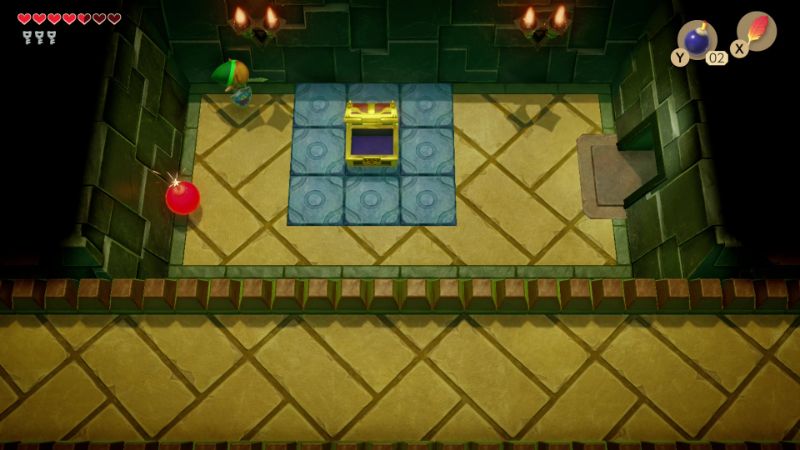
From the start of the dungeon the door at the top of the screen will shut close. Lift up one of the nearby pots and toss it at the door to open it up. Go through the door and you’ll find a shrouded stalfos, a gel, and a new enemy known as a Bombite. Once you strike a Red Bombite with your sword it will bounce wildly against the walls before exploding. A second sword slash at anytime will cause it to explode. Once all the enemies in the room have been defeated, open the treasure chest to get the first small key and then head up a screen along the right side of the room.


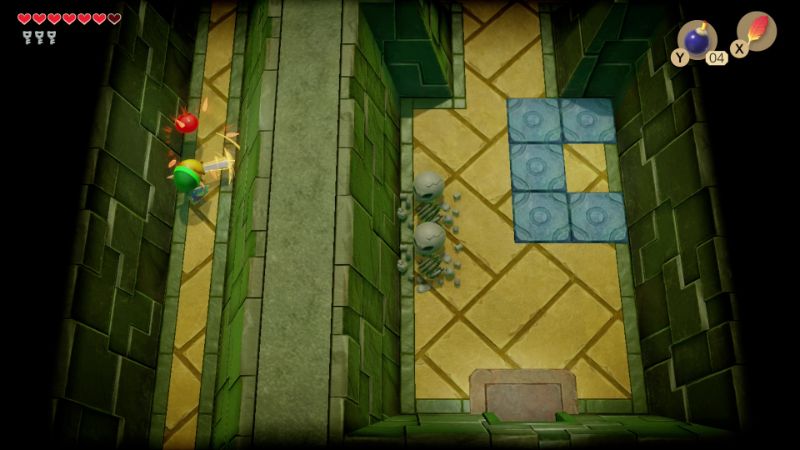
Defeat the four green Zol in this room and the doors will unlock. You could open up the treasure chest, but it is a fake one, as all you’ll find inside is another green Zol. The screen to the right holds the dungeon map, but we cannot get it just yet because of the position of the blocks, so instead, just head up a screen. Defeat or ignore the stalfos here and continue up another screen. Get rid of the Zol if you’d like, and then head down the stairs to reach the floor below.
Get rid of the four zols and gel that appear right near the staircase. This room has four locked doors but we only have one key. The ‘correct’ path is to head right a screen to progress further in the dungeon. However, there are various goodies in all three of the other locations and if we go there, we’ll get a key allowing us to use it on another door within this room. Start off by heading up through the locked door and defeat the stalfos. Collect the small key that falls down, hit the crystal switch to change the orientation of the blocks in the dungeon, and then head back down a screen.


Go back up the steps and since we changed the colored blocks, you can now access the treasure chest here. Open it up to get the dungeon’s Stone Beak! Additionally, we can now get the dungeon map in that room we passed up earlier, so head down two screens and right a screen. Maneuver around the room and open the treasure chest to get the Dungeon Map! Backtrack a few screens to get to the floor below that had the many locked doors.
Now that we have the stone beak, go back up a screen and we can talk to the owl statue here. Speak to it and it gives the advice of…“Far away…Do not fear, dash and fly!” We will be using this advice at a later point in the dungeon.
Go back down a screen and you still have three options. The room on the left side is almost completely useless as you’ll just fight some new enemies in the form of Pairodds. These bird-like creatures will disappear when you get near and reappear at another portion of the room. A good strategy to defeat them is to drop a bomb where they are going to warp to, and then run up to them to trigger them to warp over to where the bomb is. Once both pairodds as well the zols have been defeated, a small key will drop. The only purpose in going in this direction is that there is a floating heart which you can grab to restore some of your life. Afterwards head back right a screen.


With two remaining options, let’s head through the locked door at the bottom of the screen where you’ll find another flock of enemies. Once all of them have been defeated, another small key will drop. The only reason in going in this direction is that if you lift the pots in the center of the room, you’ll find some bombs, which we will need in just a bit. Go back up a screen and then head in the final direction by going right a screen.
Avoid the keese and the pairodd in this room and then head up the steps. There are five green zols hidden within this room. Walk around the room so that they reveal themselves. Once all five zols have been defeated, a small key will drop down, so grab it and then head up a screen.


Defeat the enemies and then lift the pot at the bottom-right of this room to find some more bombs. Walk to the left a screen and get rid of the zol and gels found here to open the door. Go left another screen and get rid of some more zols and pairodds to cause another small key to appear. Grab it and then head up through the one-way door.
Defeat the red zol and stalfos here to cause a treasure chest to appear on the higher ledge of the room. We’ll get to that in just a bit, but for now just go up through the one-way door. Get rid of the two red bombites and the shrouded stalfos in this room. You can lift the pots and jump to get the floating bombs, as we’ll need them in just a moment. Speak with the owl statue and it gives the advice of, “To defeat the black monster with the hard shell, feed him something explosive.” With that in the back of our mind, let’s climb the steps and head right a screen.
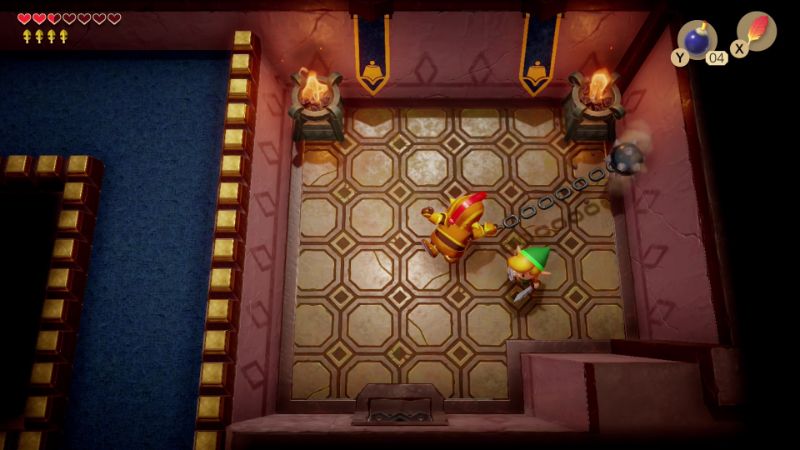
You can see a cracked wall in this room and if you continue to the right a screen, there is no crack on that side. Keep that in mind as we’ll need to blow-up the wall here to reach this treasure chest. Backtrack to the left and then head down a screen. Open the treasure chest that we discovered here earlier to get 50 rupees and then head down a screen. Continue right a screen, push the block, and once again get rid of the zol and gels found here. Once you are ready, head up a screen to take on the dungeon mini-boss, the Dodongo Snakes.
The Dodongo Snakes are the black monsters that the owl statue was speaking of, and the owl’s advice was to use something explosive. Pull out your bombs and chase the dodongo snakes around. You can walk up and just drop a bomb in the dodongo’s mouth. Alternatively, you can keep your distance and try to plant a bomb in front of the dodongo so that it will crawl over to it and gobble it up. They will only gobble up bombs when their mouths are open, so be sure to time it properly. Perhaps the easiest way is to drop a bomb, pick it up, and toss it in the direction of a dodongo, and if you time it nicely, the dodongo will gobble it up immediately.
If you are having trouble hitting the dodongos with the bombs here is a tip to conserve your explosives. If you drop or throw a bomb towards the dodongo but they don’t gobble it up, quickly run over to it and lift it up. Each time you lift up a bomb the detonation time is reset, which means you can have multiple chances at hitting the dodongo with a single bomb. Once each of the dodongo snakes have gobbled up three bombs, they will be defeated and a warp portal will appear in the center of the room. Collect the fairy that is left behind and then head right a screen.
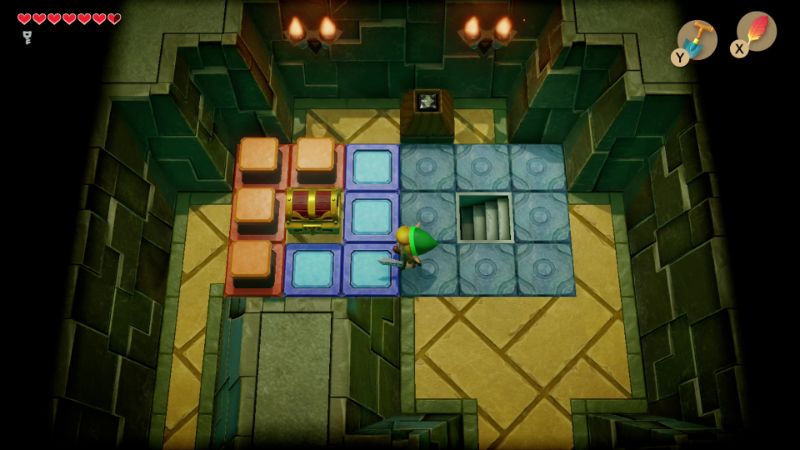
Push the bottom block to the left and then the adjacent block up to reach the treasure chest. Open it up to get the dungeon item, the Pegasus Boots. These boots will allow you to dash quickly. When used with the sword, your attack will do double the damage. Also, as an owl statue earlier in the dungeon pointed out, you can use the pegasus boots and roc’s feather to dash and jump a longer distance. Lastly, the pegasus boots will allow you to dash through certain types of blocks, including the black and green ones on this screen. Do just that and push the block to the right to clear a path. Walk down, left, and up a screen to get back to the room with the dodongo snakes.


Go through the warp portal to reach the dungeon entrance and then head right a screen. Use the pegasus boots to dash quickly across the screen and hit the vacuum found here. With the vacuum out of the way, open the treasure chest here to get yet another small key.
Go up a screen and this time take the left path as you go up another screen. Use the pegasus boots to dash through the blocks and head up one more screen. There is a lone gel on this side of the screen, so defeat it with your sword. We needed to defeat all the enemies on this screen in order for a treasure chest to appear, but we couldn’t reach this gel earlier. Now that we have, go back down two screens, and then back up two screens along the right side. Defeat the stalfos and a treasure chest will appear. Open it up to get a massive 300 rupees!
From the room where you fought the Dodongo Snakes, go down a screen, right, up, and right a screen. Defeat the enemies and then speak to the owl statue here. (NOTE: If playing the original, this statue won’t exist) It gives you a hint to poke against walls to see if it makes a mysterious sound. With that in mind, if you look at the floor layout of this room, you’ll see a giant arrow pointing against the wall. Place a bomb to create a whole leading to the room below.


You can bomb the wall on the left if you’d like to give yourself some more running space. Equip the pegasus boots and roc’s feather at the same time. Just like the owl statue had said earlier in the dungeon, we need to dash with pegasus boots and then fly with roc’s feather. Use the two items in combination to run and jump over the large gap in this room. On the right side, climb the steps and head up a screen. Jump over another gap here and then open the treasure chest to get the Nightmare Key! Jump off the ledge and walk up a screen.
The doors will shut and there are Green Bombites found in this room. Once you hit these bomb fellows, a timer will start and after three seconds the bombite will explode. Just wait until they are at one second and then slash them again with your sword to knock them away from you so you aren’t harmed from the explosion. Once all the enemies have been defeated head left through the door that opens up.
Defeat the enemies and open up the treasure chest here to get the Compass. It is actually quite useless at this stage in the dungeon since we’ve already gotten every single treasure chest. However, there is still one small key we need to get. If you recall, we were in this room earlier but on the higher ledge at the bottom part of the screen. There is a bomb-able wall along the left side of the screen but it isn’t marked on the wall. Charge your sword and then poke against the wall. When you hear a strange sound coming from the wall, you know you can place a bomb. Do just that and head left a screen.

You are greeted here by some red bombites, so get rid of them with a sword slash. Once all of the enemies are gone a small key will drop from the ceiling, so let’s go and grab it. With the key in hand, backtrack right two screens and go through the room with the green bombites once again. From here walk down a screen, left a screen, down a screen, and left once more to reach the area just south of the mini-boss room.
If you’ve been following along, you should have four small keys at the moment. Use the first one on the locked block here and then head up a screen. Follow along this path and use three more of your small keys until you’ve reached the staircase.


In this underground area, you’ll find Red Thwomp blocking your way. It won’t budge at all if you try to push it so instead, use the Pegasus Boots to dash into it, causing it to drop to the ground. Drop down along with it and head right a screen. You’ll have to use a combination of the Pegasus Boots and roc’s feather here to make it across this large gap. Dash-jump across and then get rid of the piranha plant blocking your way. Climb down the steps to resurface at another part of the level.
There are three pairodds found in this room, as well as a floating heart. Luckily now that we have the Pegasus Boots, these pesky fellows are easy to defeat. Just dash right at them and they won’t have time warp to another part of the room. Be sure to grab the recovery heart that is in the center of the room and then go left a screen.


There are five keese found in this room and you’ll also see that the ground has an assortment of moving platforms. Maneuver around the room defeating the keese and a small key will drop from the ceiling. This key is completely useless to us at this point in the level and its only purpose in being placed here has to do with that room with four locked doors that we saw earlier in the dungeon. Back in that room if you had gone through the locked door on the right prior to going any of the other directions, you would never be able to reach the other rooms. With this extra key you can now reach those…but those rooms were fairly useless anyway. Nevertheless, use the Nightmare Key and head up a screen to take on the dungeon boss, Slime Eyes.


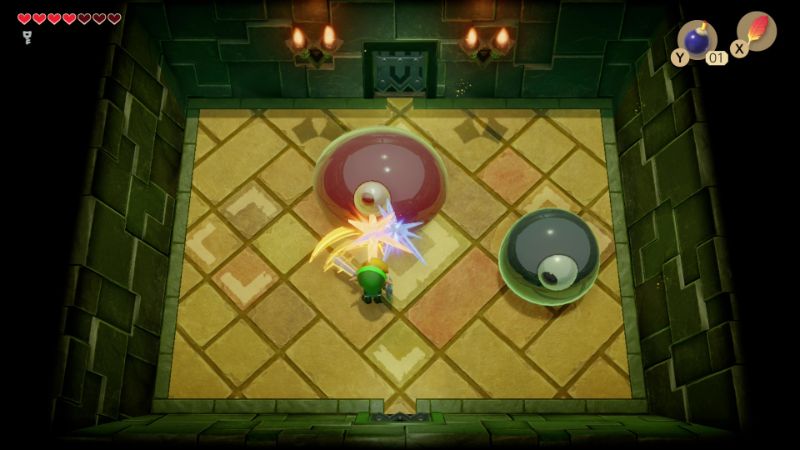
Once you enter the boss room, Slime Eyes will taunt you saying that you cannot find him. Green Zol will start falling from the ceiling and will just continuously fall if you wait around. Equip the Pegasus boots and dash against one of the walls causing Slime Eyes to fall to the surface.
Once Slime Eyes falls to the ground you’ll see its giant blob with a large central eye. You can slash at the eye and it will slowly start to separate into two smaller eyes. However, even if you just keep slashing away, you won’t be able to fully separate the eyes. Once they are almost separated, use the Pegasus boots to ram right through the middle, separating the blob into two smaller eyes.
The eyes will now hop around the room trying to harm Link. Equip roc’s feather along with your sword and slash at one of the eyes. Once you hit an eye it will jump back up to the ceiling and then try to land on top of you. Furthermore once it hits the ground you will be temporarily stunned. After you’ve hit one of the eyes, be sure to use roc’s feather to jump just before the eye pounds the ground. Repeat this same process until you’ve hit each of the eyes four times.


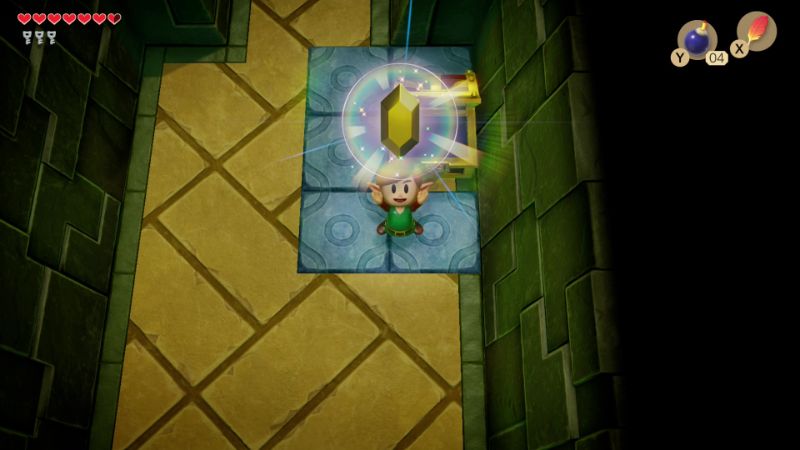
Once Slime Eyes has been defeated grab the full Heart Container, increasing your overall health to eight heart containers. Walk up a screen and collect the third of the eight Instruments of the Sirens…the Sea Lily’s Bell.
| “…WATERFALL… It is hidden in the waterfall…” |
