This chapter covers the normal mode of the HD version of Twilight Princess for the Nintendo Wii U. If you are playing on the Nintendo Wii, check out the Sacred Grove Round Two – Wii Version.
- Chapter 1 – Ordon Village
- Chapter 2 – The Twilight
- Chapter 3 – Faron Woods: Twilight
- Chapter 4 – Forest Temple
- Chapter 5 – Kakariko Village: Twilight
- Chapter 6 – Death Mountain
- Chapter 7 – Goron Mines
- Chapter 8 – Lanayru Province: Twilight
- Chapter 9 – Lake Hylia: Sidequests
- Chapter 10 – Lakebed Temple
- Chapter 11 – The Master Sword
- Chapter 12 – Gerudo Desert
- Chapter 13 – Arbiter’s Grounds
- Chapter 14 – Scaling Snowpeak
- Chapter 15 – Snowpeak Ruins
- Chapter 16 – Sacred Grove: Round Two
- Chapter 17 – Temple of Time
- Chapter 18 – In Search of the Sky
- Chapter 19 – City in the Sky
- Chapter 20 – Palace of Twilight
- Chapter 21 – Cave of Ordeals
- Chapter 22 – Hyrule Castle
16.1 A Pair of Heart Pieces
With the newly acquired ball and chain a few optional items are now available for collection. Start off by warping back to the Snowpeak Top warp point. Run to the east and enter the cave that we navigated through earlier. Jump down through most of the cave; defeating the ice keese as you pass them.
At the far east side of the cave use the ball and chain to break the two blocks of ice. One of these blocks has a Poe Soul waiting inside. Transform into Wolf Link and defeat it for the 49th Poe Soul.
Poe Soul #49: Break the ice in the cave leading to Snowpeak Top.


Transform back into human Link and light the two torches here with the lantern. Open the treasure chest that appears to get another orange rupee. Speak with Midna and now warp to the Castle Town warp point. Transform back into human Link and head over to the north portion of Hyrule Field.
Follow the rocky path and at the split take the path on the left that leads Link into a higher region. Continue on this path and it will eventually split again. The path to the north leads to Zora’s Domain; instead, take the path on the right. You will eventually see a boulder blocking an entrance along the left wall. Blow up the boulder here and enter the cavern.


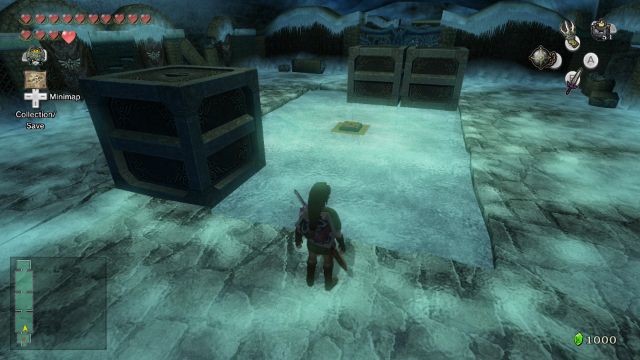
Break the ice that is straight ahead and walk forward. You will find a puzzle that is similar to the ones we just completed in the Snowpeak Ruins. Link will have to push the three blocks in a specific order to ensure one lands on the switch. These ones are a bit more complicated than in the dungeon, but as always the directions are listed below.
Start by pushing the block that is at the northwest corner to the east. Then push the block in the southeast corner to the west and then to the north. Now push the block that is in the northeast corner south, west, and then north. Finish the puzzle by pushing the northern most block to the east, south, west, and then north where it will land on the switch.
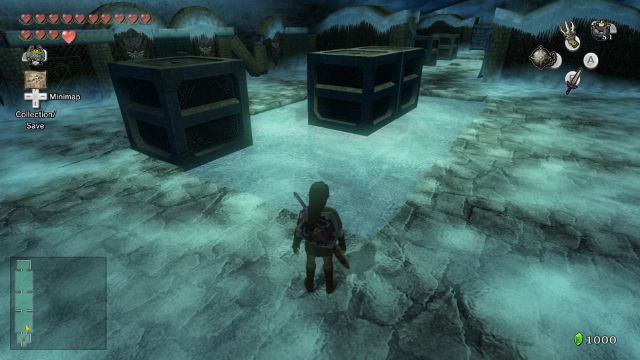
Walk into the now open room to the north and you will find three more blocks. This time, however, there are two switches on the floor. Start by pushing the southeast block to the west. Then push the northwest block to the east. Now push the southwest block north, east, and then south where it will cover one of the switches. This will cause one of the two gates in this area to open up.

Now push the southern block to the west, north, east, and then south. Then push the northeastern block to the south, east, north, and then west. The block will settle on the second switch and the gate to the north will open up.
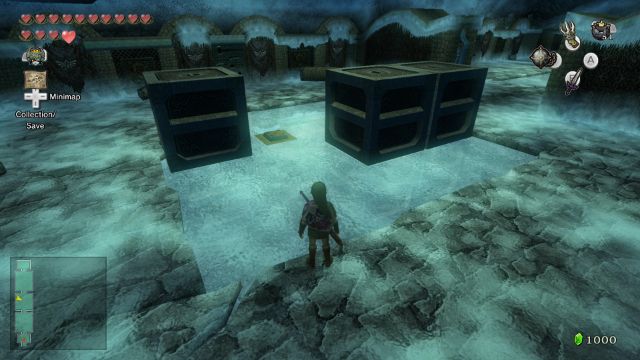
Continue north and you find the third and final puzzle. This puzzle has a large ice area but only one switch. Start by pushing the southwest block to the north. Then push the southeast block to the west, north, and then east. Now push the northwest block to the east. Then push the eastern block to the north. Now push the western block to the east, which will cause all three blocks to clog up in the northeast corner.


Push the northeastern block to the west, south, and then east. Now push the northeastern block north, west, south, east, and then north again. Then push the northern block to the west. Finally, push the southeast block to the west, north, and then to the east. Walk to the north and open the treasure chest to get Piece of Heart #33.


Leave the cavern and use Midna to warp to the Castle Town warp point again. Enter Castle Town and make your way to Telma’s Bar. As you entered Castle Town you should have received a letter from Yeta. She explains that she is feeling much better and that you should come visit sometime.


You can speak with Telma to learn that Rusl has made his way to the Faron Woods. Looking at the map, you will see his location is just outside the Forest Temple. Before heading there, leave the Bar and then use Midna to warp back up to the Snowpeak Top.
Transform back into human Link and walk towards the tree to the west where you’ll see Yeta and Yeto. Yeto says it is a nice day for sleds and asks if you will try. Agree to do so and a sled racing mini-game will begin.
The first race is a simple race to the mansion with Yeto. Just hold forward to speed up and the race should be no problem. About two-thirds down the path you’ll notice the path curves off to the right. If you take this shortcut, you’ll be able to get a quicker time; though it is not required for this race. Make sure to watch for Yeto as well; if you make contact with him he will knock you off your ice sled and you will lose a few seconds.


After beating Yeto move away from the two Yeti and warp back to the top of Snowpeak. Walk over to the tree and speak with Yeta. This will initiate another race; this time with Yeta, who is much faster. You must take the shortcut in order to beat her since she will take as well. It is rather difficult to beat her and may take several tries. After winning the race she will award you with Piece of Heart #34.
16.2 Return to the Sacred Grove
Talk to Midna and warp over to North Faron Woods. Once you arrive transform into human Link and then run north towards the Forest Temple. To the left you’ll find Rusl standing on a higher ledge. Speak with him and he’ll talk about the Sacred Grove once again. He then asks you to cross the gorge and find the ancient power that is hidden deep within the woods. Rusl then calls over his partner and tells you to use him to get over the gorge.


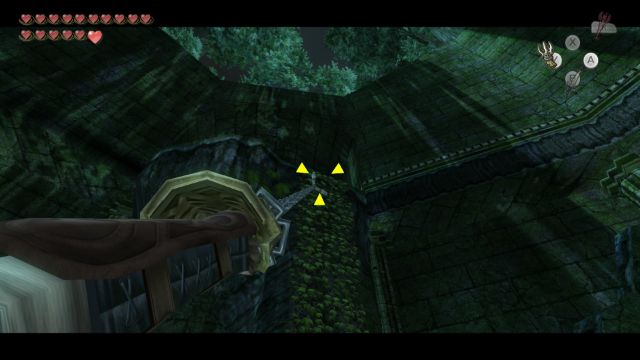
Grab the Golden Cucco and then use him to fly the same path that you went on before as wolf Link. First fly over the ledge and land on the alcove that is connected to the path to the Forest Temple. Continue flying towards the landing spot to the northwest, and then continue across the short gap onto the platform to the west.


The platforms here were spinning before due to strong winds; however they are no longer moving. Use the gale boomerang to spin the platform and then use the golden cucco to fly on over towards it. Drop the cucco momentarily and then use the boomerang to spin the platform once more.
Grab the cucco once again and carefully time your jump to the next platform so Link is not hit by the moving log. Jump over to the final piece of land to the south, where you can ditch the cucco. If you didn’t activate it the first time around, the Howling Stone will still be here if you’d like another shot.
Walk forward into the next area and Skull Kid will appear once again. He’ll blow his horn and create four puppets before running off, just like last time. This run through the Sacred Grove is similar to the last one, but is a bit harder as there are more paths and it is easy to get lost.

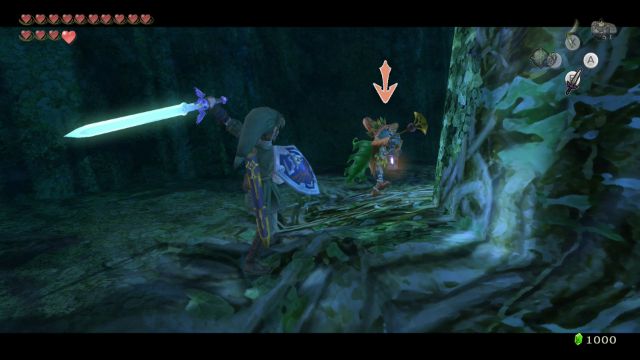
Follow him straight ahead and since it is now dark outside you will see his lantern glowing in the distance. Follow the path to the left to get to the next area. He will appear on the higher ledge to the left, just as he did before. Jump up and strike him with your sword to complete the first cycle.
Continue northward through the next hole and you’ll see the light of his lantern again. If you look up to the left you will also see the lantern of a Poe. Walk behind the waterfall and then transform into wolf link. Defeat the Poe and steal its soul for the 50th Poe Soul. Jump off the ledge and then go through the hole on the other side of the room where you see the skull kid’s lantern floating around.
Poe Soul #50: Found on a higher ledge while tracking down Skull Kid.


In this large central room head straight and you’ll see his lantern lighting up another path. There are two torches here, which can be lit to find a treasure chest containing a few bombs. Continue following the path where the light shows you to get to the next area. Skull Kid will be on a platform above the water here. Use the bow and arrow to shoot an arrow at him. He’ll run off again and create a new path to Link’s left; follow him.


Skull Kid will proceed to take you back through several areas that you have already been to. He’ll lead you back to the waterfall area at the beginning of the Sacred Grove. Walk through the path that forms between waterfalls and follow his light.
Eventually he will settle in the large middle room that has several openings. You’ll hear him playing his instrument nearby as well. Climb up the large tree stumps to the top part of the area. Look towards the middle and you’ll see him on top of the trees. Shoot him down with an arrow and he’ll run off to open a nearby path.


This battle arena is almost exactly the same as it was the first time around. Skull Kid will keep calling out puppets to attack you with. Defeat the puppets and then take out your Bow and Arrow. Shoot him before he summons more puppets. After a few hits Skull Kid will give up and let you head off to the next area. Follow him to get to the ruins area of the Sacred Grove.


16.3 Entering the Temple of Time
We are now in the same area where we originally got the Master Sword; except now we are on a higher southern ledge. Push down the block nearby and head to the middle of the ruins. Return to the area where you got the master sword and if it’s night time a Poe will be floating around. Defeat it and capture the 51st Poe soul.
Poe Soul #51: Found at nighttime in the area where the Master Sword was kept.


Transform back into human Link and then walk up to the pedestal that held the Master Sword. Press A when standing next in front of it and it will strike (If the option to Strike isn’t there, remember to equip the Master Sword if you haven’t). Doing so will cause a statue on the southern part of the ruins to disappear.


Make your way back in that direction and a wall of twilight will appear and 5 shadow beasts will drop from a warp portal. Defeat 3 of them and then finish 2 of them off at the same time. This can be a little difficult with all the keese flying around, but the charged attack should take of them quickly.
Walk back towards the south end of the ruins and climb up the block that you pushed down. Walk up to the door that is now accessible since the statue is no longer in your way. Open it up and Link will walk through the door and appear in the Temple of Time.


Walk down the stairs and take a u-turn to the right. Against the wall you will find the 24th and final golden bug, the Female Snail. Use the gale boomerang to capture it and then leave the Temple of Time through the same way you came in.
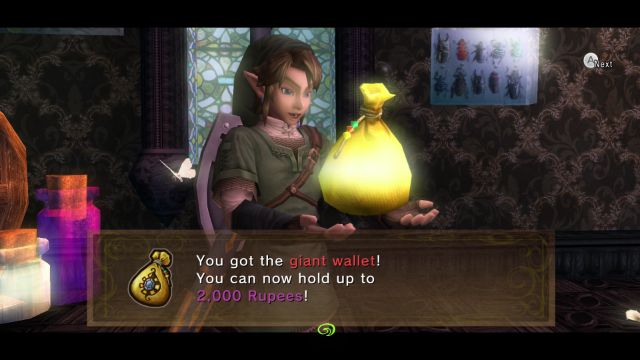
Talk to Midna and warp to Castle Town. Transform back into human Link and walk into town. Now that we have all the golden bugs, head on over to the south part of town and enter Agitha’s Castle. Speak with her and give her all the remaining golden bugs that you have. As a reward for your work, Agitha will reward you with the Giant Wallet. This will allow Link to hold up to 2000 rupees. Leave Castle Town and then use Midna to your newest warp point, the Sacred Grove.

Before progressing, we can grab another stamp at this point. From the Sacred Grove warp point, head to the west and back into the area where you first fought Skull Kid. Straight ahead past the ruins is a long set of vines. Clawshot to the top and you will be met with a spinner track. Take out the spinner and rotate around the arena. Open the chest at the end to get the Miiverse Stamp for the Hylian Letter X.

Climb up to the north side of the ruins area and once again enter into the Temple of Time. Walk down the stairs, past the guard statues, and to the pedestal. Strike your sword into the pedestal and a holographic staircase will appear, leading into a window. All of a sudden our friend Ooccoo will appear and run up the steps. Follow upwards and as you get close a passage will open up. Continue northward to enter the next temple, the Temple of Time.


- Chapter 1 – Ordon Village
- Chapter 2 – The Twilight
- Chapter 3 – Faron Woods: Twilight
- Chapter 4 – Forest Temple
- Chapter 5 – Kakariko Village: Twilight
- Chapter 6 – Death Mountain
- Chapter 7 – Goron Mines
- Chapter 8 – Lanayru Province: Twilight
- Chapter 9 – Lake Hylia: Sidequests
- Chapter 10 – Lakebed Temple
- Chapter 11 – The Master Sword
- Chapter 12 – Gerudo Desert
- Chapter 13 – Arbiter’s Grounds
- Chapter 14 – Scaling Snowpeak
- Chapter 15 – Snowpeak Ruins
- Chapter 16 – Sacred Grove: Round Two
- Chapter 17 – Temple of Time
- Chapter 18 – In Search of the Sky
- Chapter 19 – City in the Sky
- Chapter 20 – Palace of Twilight
- Chapter 21 – Cave of Ordeals
- Chapter 22 – Hyrule Castle
