- Chapter 1 – Great Plateau
- Chapter 2 – Dueling Peaks
- Chapter 3 – Hateno Village
- Chapter 4 – Zora’s Domain
- Chapter 5 – Vah Ruta Dungeon
- Chapter 6 – Goron City
- Chapter 7 – Vah Rudania Dungeon
- Chapter 8 – Gerudo Town
- Chapter 9 – Vah Naboris Dungeon
- Chapter 10 – Rito Village
- Chapter 11 – Vah Medoh Dungeon
- Chapter 12 – Captured Memories
- Chapter 13 – The Master Sword
- Chapter 14 – Hyrule Castle
- Chapter 15 – The Champions’ Ballad
- 15.1 – New Armor
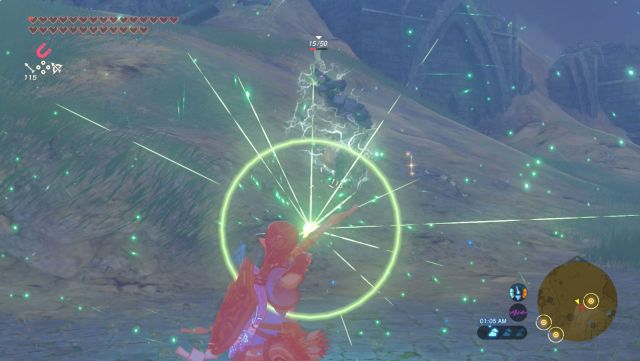
- 15.2 – Great Plateau
- 15.3 – Champion Revali
- 15.4 – Champion Mipha
- 15.5 – Champion Daruk
- 15.6 – Champion Urbosa
- 15.7 – Final Trial Divine Beast
15.1 New Armor
The Champions’ Ballad DLC included the addition of many new pieces of armor that are listed below. You can click each individual piece of armor to visit the corresponding wiki page, which gives a detailed description, as well as information about how to acquire it. You can also search for all the armor pieces using the Breath of the Wild Interactive Map.
- Royal Guard Boots
- Royal Guard Cap
- Royal Guard Uniform
- Phantom Ganon Armor
- Phantom Ganon Greaves
- Phantom Ganon Skull
- Island Lobster Shirt
- Ravio’s Hood
- Zant’s Helmet
- Ancient Saddle
- Ancient Bridle
15.2 The Great Plateau
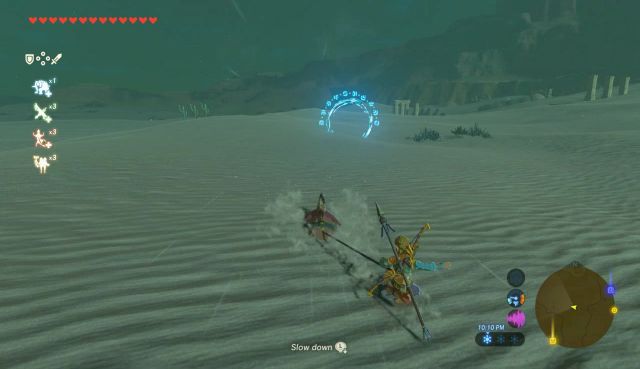
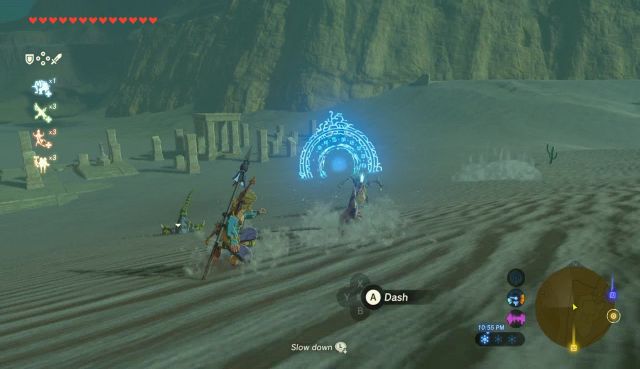
To begin the quest, return to where it all started: the Shrine of Resurrection. After arriving, put the Sheikah Slate into the pedestal slate to trigger a scene. Link will acquire the One-Hit Obliterator. As its name suggests, it will defeat any enemy with a single hit. The caveat is that it will reduce Link’s health to just a quarter heart, causing Link to die by just a single hit as well. Furthermore, Link can only attack with the One-Hit Obliterator twice in a short period of time before the weapon loses its power. At that point, Link will need to wait a few moments for it to recharge.
Yowaka Ita Shrine
To reveal the Yowaka Ita Shrine you must head to the pinpoint located north of the exit to the Shrine of Resurrection. Located nearby is a camp of bokoblins, ranging in strength from the weakest ones to the strongest in the game. All bokoblins must be defeated in order to reveal the shrine. This is easily done by walking around using stealth and by attacking enemies from a distance with arrows, particularly with shock arrows. This avoids a one hit kill to Link, and it also prevents the bokoblins from calling others nearby. There is one evasive bokoblin on top of the log, and another more powerful one on top of a large tree. This powerful bokoblin can be easily taken out with the One-Hit Obliterator. After defeating all bokoblins, the shrine will rise from the ground a few feet away.
Rohta Chigah Shrine
To reveal the Rohta Chigah Shrine you must head to the pinpoint located northeast of the exit to the Shrine of Resurrection. This area is filled with Lizalfos, many of which are powerful enemies. These enemies are likely best taken from a distance with arrows, as getting close to them will require a fight with many at once. Bomb Arrows work well in this situation to attack from a distance and do heavy amounts of damage. Remember, the One-Hit Obliterator only gives two hits before it needs to recharge. Watch out for the stand still Guardian located nearby as well. After defeating all of the lizalfos, the shrine will rise from the ground a few feet away.
Rohta Chigah Shrine Wiki Guide
Ruvo Korbah Shrine
The Ruvo Korbah Shrine can be reached by heading southeast from the exit to the Shrine of Resurrection. Nearby is a wide open area filled with Lizalfos, Moblins, and Bokoblins. Most of these enemies are not a significant threat – lizalfos can be attacked from a distance, the moblins are slow, and the bokoblins ride around on horses. The bokoblins can easily be killed from a distance with arrows, and any moblins or lizalfos that run up can be killed quickly with the One-Hit Obliterator. After all enemies have been defeated, the shrine will rise from the ground next to a wall nearby.


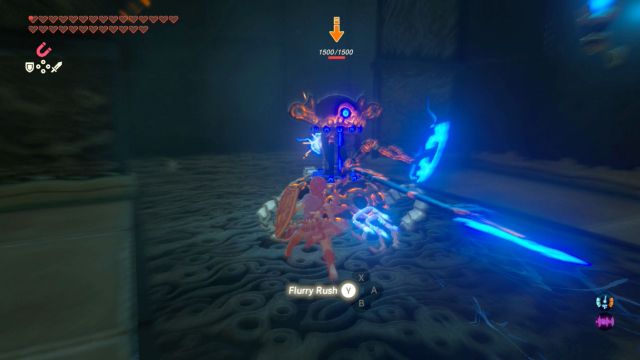
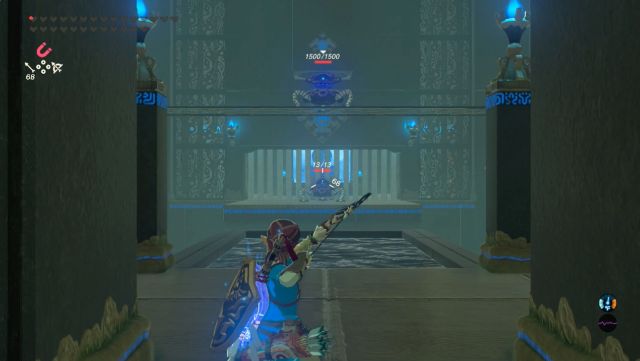
Upon entering the Etsu Korima Shrine, continue forward to begin a Major Test of Strength with a Guardian Scout II. This enemy can be a little difficult as it has significant shield protection. Flurry Rushes work well if performed, as they will cause an immediate kill with the One-Hit Obliterator. Otherwise, you can wait for a slight opening between the shields to use the same weapon, or constantly whittle down its health with arrows from a distance.

Once the guardian scout has been defeated, the gate at the far side will open. Open the chest for an item, but the Monk is nowhere to be found. Step on the switch at the top and it will lower the platform the scout appeared from. Use the paraglider to enter and reach the bottom of the area. You will need to start by taking the left pathway, as we cannot head straight since the door is locked. The pathway showcases a few more guardian scouts. The first one is the easiest, and you can move slightly towards the corner and then take it out with an arrow shot. Afterwards there is another guardian scout, who can be taken out with either the One-Hit Obliterator or more arrows.

Upon taking the path up the stairs you will find another guardian scout II, who is more difficult this time since the area for battle is much smaller. The tactics are the same as before; either use a flurry rush or sneak in a hit with the Obliterator once the shield protection disappears momentarily. Head down the nearby stairs and use the bow to take out two more easy guardian scouts; one on the floor, and another on the high platform nearby. Walk down the pathway that is to the left when coming down the stairs. Take the last pathway, and then make another left. Follow the path to reach a chest that contains a Giant Ancient Core. Walk back and this time take the ladder that is next to the stairs. Open the chest at the end to obtain the small key we needed. Jump down and open the door to enter the last area.
This area contains a few guardian scouts that vary in difficulty, with all of them attacking at once. I find the easiest way to confront this is to be aware of each guardian scout at all times and what it is doing. Start by taking out the easiest enemy with the bow first, which is the one in front of the gate on the other side of the room. Then take out both scouts to the left and right using bomb arrows, or another heavy duty arrow type. Water is on the floor in most places, so you can use cryonis to create barriers if necessary. You can also paraglide to one side and use the One-Hit Obliterator, then head to the other side later and do the same thing.


Float to one side of the room where a scout was if you have not already done so. Then quickly run up the stairs and use the nearby walls as protection. At this point you will need to take on the most difficult guardian scout on the bridge. You can perform an attack with the Obliterator immediately after it attacks with a weapon, as it is momentarily vulnerable to sword attacks. Flurry Rushes again work well to defeat the last scout on this narrow bridge. Once every enemy has been defeated, the gate will open allowing access to the monk. Enter and initiate the cutscene to obtain a Spirit Orb.
Etsu Korima Shrine
The Etsu Korima Shrine is located directly south of the exit to the Shrine of Resurrection, and can be reached by climbing the mountain on the opposite side of the river. While climbing the path up the mountain you will encounter various enemies, including Ice Keese, Moblins, Ice ChuChus, and an Ice Wizzrobe. Make your way up the path slowly, taking one enemy at a time. Use an arrow to shoot the Ice ChuChus from a distance, and make sure to be far enough away so Link is not hit by their ice explosion. Watch out for the gust of ice shot by the Ice Wizzrobe and the ice shot by the strongest Moblin as well. Once all enemies have been defeated, the shrine will rise from the ground nearby.


Upon entering the Etsu Korima Shrine, continue forward past the first set of lights and up the stairs. Here you will find a set of unmoving vertical lights, along with a set of horizontal lights. One of the horizontal lights moves up and down, making it slightly more difficult to avoid. The vertical lights are easy to dodge; just walk around them. Crouch down to avoid the first three horizontal lights and walk under them. Then, once the fourth light has gone low enough to be under the pathway or high enough to be taller than Link, quickly ran past its range.


Head into the next room where you will find a few moving pillars with spiked walls attached to them. This room is extremely easy to pass; walk to the left side to pass the first pillar, then continue to the left to pass the second pillar and find the exit nearby. The next room contains a few fire torches in a row, with many that continually switch on and off. The first one is easy; run past the two middle ones after they turn off. For the second set, the first and third turn off and on, and the second and fourth follow a similar pattern. Use either set to pass the area once they turn off. The last set is more difficult, switching on and off in a much more complicated pattern. Watch them for a little while if necessary, then run past. I find the second one the easiest to run through once it turns off.


Be cautious, as upon entering the next room three Guardian Scout I’s will immediately drop down. The first two can be taken out with the One-Hit Obliterator, and the third can be taken out with a few arrows. Hide behind a wall for a few seconds between the second and third guardian scout if necessary to avoid an attack. Begin walking up the long set of stairs further on, where the lights will turn on and Etsu Korima will appear. Initiate the scene with him to acquire a Spirit Orb.
15.3 Champion Revali
Visit Kass who is now marked on your map. He is located near the Cuho Mountain, which is north of Tabantha Tower and south of Rito Village. As Link approaches you will find a structure with three pillars. If you look closely, they are actually maps showcasing three locations within the Tabantha and Hebra regions. The locations represent three objects that you must complete in order to progress. You can visit both Teba and Kaneli in Rito Village to get some clues on what to do. If you’ve already talked to Teba after defeating Medoh, he has made his way to the Flight Range with his son.
Shoot the Flame Dragon’s Horn
Warp over to the Hebra Tower and then make your way southwest along the pathway. Just south of the Tabantha Hills towards the Tanagar Canyon there is a large area down below, but not quite all the way down into the Canyon. There is a campfire here along with a Rito named Mazli. If you talk to him you will find that the dragon Dinraal has been appearing at nighttime, and specifically that you must hit his horn while it is shining.

Walk over to the campfire and wait until nighttime. Now wait until after midnight and you will see Dinraal approaching from the north. At exactly 1am, Dinraal’s horn will begin to shine bright. Wait for him to get a little closer and then paraglide right up to the dragon. Take aim and shoot the horn. Successfully doing so will cause the Shira Gomar Shrine to appear, just southeast of the Tanagar Canyon.
Shira Gomar Shrine
Paraglide across the wind geysers to the platform ahead and then pull out a bomb. Drop it into the wind geyser and it will fly up. Detonate it to blowup the boulders nearby. Follow the path and you’ll see an instrument where you can drop a spherical bomb into. It’s a bit high up, so you’ll actually have to stand back and toss a spherical bomb in. The bomb will launch towards a group of boulders, so blow it up and then follow across using the wind geyser.


Up ahead jump down to the gear that is spinning in a circle. You need to launch a bomb towards the boulders up ahead, although the nearby wind geyser will lock a gate temporarily. Use Stasis on either the wind geyser, or on the gear when it is facing the gate, allowing you to buy some time for the gate to stay open or re-open, allowing you to blast the boulders. Follow the geysers up to the monk ahead.


Race down a peak rings adorn
Just south of the Hebra Peak you will find a large glowing blue circle. This is the beginning of a shield surfing mission. Leap onto your shield and slide through the circle. A series of blue circles will appear as you make your way down the mountain. At one point there is a a gap and you’ll have to jump, use your Paraglider, along with the nearby wind gust to get across. Successfully make it down to the final circle in time and it will cause the Kiah Toza Shrine to appear.
Kiah Toza Shrine
In this shrine you have to get the large orb into the hole down below. It’s a bit of a mouse trap where you have to use your abilities and the available objects to guide the ball in the proper direction. Just follow these steps.
- At the very top, move the two metal blocks that are on rails towards the corner, which will cause the orb to bounce off them
- Move the two metal blocks along the path so they are in a straight line, allowing the orb to role across.
- Down below, there is some water against a wall. Use Cryonis to create a path, extending the ramp in a staircase like pattern to guide the ball.
- Just above the water, step on the floor switch when the orb comes by, causing the moving ramp to change direction, allowing the orb to continue onward.
- Once the orb clears the moving platform, turn your attention just down the ramp and use Stasis on the teeter-totter, holding it in place and allowing the orb to roll across towards the ice blocks you created.
- Drop down below and step on the floor switch when the orb rolls over the nearby revamp, causing the catapult to shoot it across towards the hole.


Shoot four targets to win
Make your way to the Flight Range and you’ll see all the targets on the wall. Don’t play the actual Flight game, but just leap off the ledge. The key here is you need to shoot four targets without pulling out your Paraglider. I recommend using a Bow that gives you longer distance. Additionally, it’s a good idea to stock up on Stamina Potions, as you can fill up your stamina mid-flight.


Successfully shooting four targets will cause the Noe Ragee Shrine to appear at the bottom of the Flight Range.
Noe Ragee Shrine
Shoot the first target and ride the geyser up ahead. In this room there are a few hidden switches within the large structure ahead and you have to hit them all to activate all of the wind geysers.
Wait for the pillar to rotate until you see a set of six boulders. Hit them with a bomb arrow and then follow up with a regular arrow to hit the switch. A second switch his hidden behind a metal gate. Way down beneath there are four geysers and if you just ride those up inside the pillar, you should be to hit it with an arrow.


On one of the sides of the pillar, there is a small windmill. When it is directly near a wind geyser, it will open up the gate, allowing you to shoot the switch. The last one his behind a gate that has vertical bars. Fortunately, you can just aim right in between the bars and hit the switch with an arrow.


With all four geysers activated, ride them all the way to the top of the pillar. Note, there is a treasure chest at the top of this shrine, with a wind geyser located behind the pillar that it stands on. You can head over and open it to get a Shield of the Mind’s Eye. Then glide over and speak with the monk.
Windblight Ganon
(Coming Soon)
15.4 Champion Mipha
Visit Kass who is marked on your map, just southeast of the East Reservoir Lake.
Find What the Light’s Path Shows
One of the pictures leads you to an area just east of the Ulria Grotto, and west of the Knuckel Island. Right at the edge of the cliff you will find two Zoras: Muzu and Tottika. Muzu will give you some advice about following the morning sun. From this precise location, if you wait until morning, at 3am a ray of light from the sun will shine on the water below. Way out to sea to the east, the ray of light passes through a blue circle. The blue circle only appears early in the morning from the hours of 5am to 6am. You need to swim through the circle before it disappears.


Your best bet is to wait at the east end of Knuckel Island and create a camp fire. Sit until morning and it will be 5am. This should give you enough time to paraglide over and drop down into the blue circle. Successfully doing so will cause the Kee Dafunia Shrine to appear.
Kee Dafunia Shrine
Once you arrive, equip the torch that is leaning right next to the fire. Use the flame to light the torch on fire and then jump onto the nearby ice. Walk over to the large ice blocks ahead and allow the flame to melt the cubes, allowing you to pass.


Walk to the right and step on the floor switch, causing two large ice blocks to fall to the ground. Melt one of them so that it is roughly half the size as the other and then use the two blocks to create somewhat of a staircase that you can climb up. Light your torch and climb up, melting one of the blocks on the higher platform as well. Once again make a staircase of sorts and climb all the way up to the top.


Melt the large block all the way at the top until it is about half the size and then put the torch away. Lift the smaller ice block and carry it up ahead, tossing it into the water. Push it up against the back wall and then use Cryonis to create an ice block beneath it, raising it up. Now climb up on top of the Cryonis block and then on top of the smaller ice block. From there climb all the way up and then run over to the monk.


Conquer the Ancient Foes
Make your way northwest of Zora’s Domain to the Upland Zorana. The area on your map has a few trees and this area is littered with Guardians. As the objective suggests, you simply need to defeat all of the Skywatchers here. It will take some effort to beat these guys, so I suggest stocking up on some Ancient arrows, or at the very least, have some powerful bows with Bomb arrows. Perfect Guard blocks with your shield are also effective. Once you’ve defeated them all, the Sato Koda Shrine will appear.

Sato Koda Shrine
At the top-left of the shrine you will see an orange ball rolling down. You will need to use Cryonis to create some ice blocks, guiding the orange block into the hole at the bottom-right of the shrine. While there are a few ways to go about doing this, you can actually successfully guide the block using a single cryonis block.
If you place a block below the first gap and slightly to the left, the orange ball will drop down, hit the edge of the ice block, and bounce rightward, all the way down into the gate. It will then launch up and land in the circle at the end of the shrine, opening up the gate to the monk.

Just above where the ball end point is, there is a treasure chest that contains a Giant Ancient Core. You can use Cryonis on the back wall and climb up a series of ice blocks to get it.
Chase Rings of the Waterfall
Just east of Zora’s Domain, make your way towards Mikau Lake. Here you will find a glowing blue circle. Walk through it and another circle will appear towards the waterfall. Equip your Zora Armor and use the ability to swim up the waterfall to go through a series of blue circles. You’ll have to make your way up three waterfalls, ending at the top of Lulu Lake. Successfully doing it in time will cause the Mah Eliya Shrine to appear.


Mah Eliya Shrine
You will find two large metal crates that are attached to the wall on rails. Note that there is a waterfall behind them as well as water beneath them. First we need to raise the one on the left, so use Cryonis to create and ice block and then climb up. On the higher ledge to the left, you will find another block, so grab with Magnesis and toss it down below. Now using Cryonis and the three blocks, you need to create a staircase that is four levels high to reach the highest platform. Just follow these simple steps.
- Create an ice block on the ground, right in the middle, raising both of the large platforms at the same time.
- Grab the small block and place it underneath the large block that is on the right.
- Use Cryonis to create an ice block underneath the small block, raising up the large block to the third level.
- Use Cryonis to break the ice block that is in the middle, causing the large block on the left to drop.
- Now use Magnesis to grab the small block and carefully move it to the left, so that the majority of the block is on top of the large block on the left, but it is still holding up the large block on the right.
- Now use Cryonis to create an ice block, raising the large block on the left.


This will raise the blocks four levels high and you should be able to climb up to the top to complete the shrine.
Waterblight Ganon
(Coming Soon)
15.5 Champion Daruk
Stop a Titan of Molten Stone
Make your way over to Lake Darman, which is located at the north end of the Eldin region, northeast of Goron City. Just north of the lake is a Goron named Krane, who tells you of a huge monster in Lake Darman.
Once you arrive you will find that there is an Igneo Talus in the lava below. Since the Talus is actually in the lava, there is no safe ground around it. Fortunately there is a constant wind gust from the ground, allowing you to stay in the air for a while. I recommend shooting it with Ice Arrows from above if you have them so that you can land on top of the Talus and strike it with a strong weapon. Even if he is flaming, you can still land on top of him, but you won’t do as much damage. Once defeated, the Kamia Omuna Shrine will open up to the northwest.


Kamia Omuna Shrine
Run over and drop a spherical bomb into the opening. Hit the switch and when it is about to be lined up with the target, detonate the bomb to launch the orb at it. Once you hit it, a second target will appear, this one moving up and down. The process is the same and you just have to time it.


Just to the right of the target you will find a treasure chest in the distance. If you launch an orb at it it will break the wood that the treasure chest is standing on. Then you can run across the platform to get to it. Use Magnesis to grab the treasure chest and bring it towards you. Then open it up to get a Diamond.
Up ahead on the right you will find a motion puzzle. Turn the object so that the target is facing you. Then use the same device below to launch an orb at it. Once you hit it a second target will appear. This time you want to adjust the object with the motion control so that a clear pathway through the center of the objects highlights the target. Once again launch an orb at the target to hit it. Run up and and speak with the monk.


Follow Rings of Light Alone
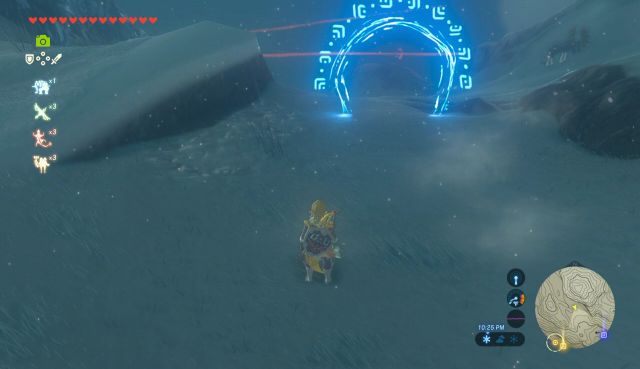
Climb up to the top of Death Mountain and you’ll find a blue circle has appeared on one of the pillars, just to the south. Go through the blue circle and another one will appear just to the east. Climb up and go through that that blue circle as well. There are now a series of circles that appear as you head down the mountain. Successfully go through all of them in the allocated time to get the Sharo Lun Shrine to appear.

Sharo Lun Shrine
Run ahead and grab onto the metal crate. It will carry you across the room and you need to avoid the flames. For the first two sets of flames, you just need to be on the side of the metal crate so that the crates blocks the flames. For the third grouping, just climb on top of it.


The next area has some spikes that you must avoid, along with some guardian scouts that appear. You can shoot them with arrows, or just strategically move around the block, as well as using your shield to block their attacks.
The last moving blocks will require the use of Cryonis. Grab onto the metal block and then climb on top of it. As you draw closer to the water, use Cryonis on the waterfall, and then glide over. There is a treasure chest that is constantly falling and you and break its fall by creating an ice block. Open it up to get a Great Flameblade.


Climb up to the top and then paraglide over the fire to get back on the metal crate. Again use Cryonis on the water up ahead and then jump over to the block. Use Cryonis to create a number of ice blocks so that they act as a staircase. Climb up to the top and then run over and speak with the monk.
Survive Lava’s Fiery Fate
Make your way over to the Darb Pond, located southeast of Goron City and south of Death Mountain. You will find that there is a white symbol in the lava below and you have to step on it to get the shrine to appear. However, as it is right above lava, gliding towards it will cause you to fall into the lava and it will not trigger the shrine to appear. You can talk to the trio of Gorons on the higher cliff for more information but they don’t provide any substantial hints.


On the west side of the Pond you will find two large metal blocks. You can use Magnesis to grab them and place them in the lava. They are just tall enough so that they hit the base of the pond, allowing Link to stand on top of them without falling into the lava. You need to use Magnesis to place one of the blocks on top of the white symbol in the lava. Then glide on top of it and it will trigger the Rinu Honika Shrine to appear.
Rinu Honika Shrine
Titled Block the Blaze, this shrine requires you to avoid and block the blaze of fire, using blocks. Run ahead and simply duck underneath the first set of flames. Continue onward and the next line of fire is directly in your way. If you look at the pillar to the left, there is a breakable boulder down below. Toss a bomb and explode the boulder, causing it to drop down and allowing you to pass.


The next pillar on the right has a magnetic block underneath it. Pull it out use Magnesis and the pillar will drop, allowing you to pass. Use that Metal block and place it in front of the next flame. Now stand to the side of the block, grab it with Magnesis, and walk along with it so that it blocks the flames.


In the next area there are flames coming down from the ceiling and there is a second metal block in the lava below. Stack the blocks on top of each other and then use Stasis on the higher block. Quickly use Magnesis to move the lower block and then run on through. Just around the corner there is a treasure chest that you can use the blocks to reach. It contains a Stone Smasher.

The last challenge requires you to use motion controls to turn the platform. The platform has three small pillars on each side and you can turn it so that it is blocking all lines of fire at the exact same time. Do so and then quickly run across to reach the Monk.

Fireblight Ganon
(Coming Soon)
15.6 Champion Urbosa
Make your way over to Kass, who can be found just southeast of the Divine Beast Vah Naboris.
Fight the Brute of the Sand
Make your way over to the southeast portion of the Gerudo Desert, east of the Misae Suma Shrine and southwest of the South Lomei Labyrinth. You will find a traveler here Traysi and in the sand below a giant Molduga. This will trigger a battle with the Molduking. The battle itself is not much different than that of a regular Molduga Battle.
Throughout the sand region, there are some pillars that stick out of the ground. I recommended climbing up on top of one to stay away from Molduga’s Reach. Then toss a bomb, causing Molduga to come swallow it up. Explode it while it’s inside to stun Molduga. Then jump down and deliver some swords strikes. Urbosa’s Fury is also very useful against Molduga. Repeat this process until the enemy has been defeated, causing the Keive Tala Shrine to appear.


Keive Tala Shrine
The shrine is titled Big or Small, as you will need to use either big or small electric boxes to continue the chain of electricity throughout the shrine. Just to the left when you enter there is an electric charge that has a ball and chain that sticks into the water. Grab one of the small boxes to the right with Magnesis and place it here, causing the electricity to pass through.


If you follow the electric path, it splits, with one going to a glowing orange orb. Grab one of the second small boxes with Magnesis and connect the power to orange orb, causing the platform to rise. Then place the small block on top of it to continue the electric current.


Up ahead you will find a massive ball and chain. Grab it with Magnesis and toss it over the bar that extends outward from the wall, causing the electric current to pass through. The last point of interest requires use of the large block. However, it isn’t quite tall enough. So first, use Cryonis to create and ice block and then toss the large block on top of the ice block, causing the electricity to go through the circuit, opening a path to the monk.
There is an optional treasure chest if you turn to the right. You can use motion controls to shoot the laser at the switches, activating or deactivating the platform. You have to line them up so the electric current passes through all four of them. This will cause the nearby gate to open and you can reach the treasure chest that contains a Radiant Shield.
Chase Rings Upon the Land
This objective requires you to get a Sand Seal. I recommend heading to Gerudo Town and speak with Frelly to rent out a sand seal. Once you are outside on the desert, right to the northwest of Gerudo Town. You will find a blue circle and once you move through it, another circle appears further ahead. Continue going through a series of circles until you make it to the end and the Takama Shiri Shrine appears.
Takama Shiri Shrine
The shrine is titled the Dual Purpose as there a series of metallic platforms that you will need to pass through areas, as well as continue the electric current. In the first room use Magnesis to move both platforms to the left and make your way towards the locked gate. Then turn around and pull the two blocks to the other side, causing electric current to flow through and open the door.

In the second room, disconnect the first metallic block so that it is no longer charged. You can do this by moving the second block, or by moving the block closest to the electricity. Jump onto the first block and make your way along the perimeter to the right. From here create a safe path using the blocks to reach the platform that has the electricity.
Push a block so that it is right up against the locked gate, and a second block right next to it, so you can easily walk over to it. Now use remaining two blocks to transfer electricity across to the other side, causing the gate to open. Make sure neither of the blocks are touching the blocks closest to the gate, otherwise you won’t be able to walk on them.

In this final room there is a treasure chest that you can get. Behind the blocks, if you look on the ground you’ll find a electric pathway. Move the blocks so that electricty flows to the ground, opening the gate. You can open the treasure chest to get a Royal Bow.
Some of the blocks have a grating that you can climb up. First, move the blocks away from the electricity and arrange them so you can climb up to the platform next to the locked gate. From here, you want to grab the block on the top row and move it all the way against where the locked gate is located as we will need this to climb on top. Now arrange the six remaining blocks so that you can transfer electricity to the circuit on the other end of the room. Be sure the top row block that you can climb up is not electrified. Climb on hope and head to the next room where you will find the monk.


Throw the Orb Underground
The third objective requires you to return to the Yiga Hideout. You can warp over to the Kuh Takkar Shrine and then make your way westward. You don’t have to come in through the entrance, in fact, it’s much quicker to just go straight to the arena.
Sneak back inside the Yiga Hideout and the guards are still patrolling the area, albeit in some slightly different spots. You need to head towards the entrance of the large room and then climb the tall ladder. The giant orb is located where the large collection of mighty bananas were previously found. After getting the orb, you want to carefully sneak through the hideout to get back to the Arena. Toss the orb into the large hole in the center of the arena and the Kihiro Moh Shrine will appear.

Kihiro Moh Shrine
The shrine, titled Inside the Box, requires you to get a count of the amount of specific colored balls within the box. Then, if you look at the side of the shrine, there are rows with a number of torches, and columns representing the particular colored orb. From left to right, the solution of the puzzle is.
Red – 1 Green – 2 Yellow – 2 Purple – 4


In the last room, there is a secret treasure chest that you can collect. Turn the large box so that the door is at the bottom. You can then use Magnesis to open the door, causing the balls to fall out. There are three orbs here that you can grab with Magnesis. Grab them and place them in the holes on the side, causing the nearby gate to open. Open the treasure to get a Thunderspear and then talk to the monk to exit the shrine.
Thunderblight Ganon
(Coming Soon)
15.7 Final Trial Divine Beast
After completing all four of the Champions’ Ballads, you will be summoned back to the Shrine of Resurrection. Return to the shrine and place the Sheikah Slate into the pedestal. This will cause the Shrine to lower down beneath the ground, bringing you to the entrance of an extra Divine Beast dungeon, the Final Trial.
As with all the prior divine beasts, the first step is to get the map, which fortunately can be found directly ahead. Run forward and place the slate in the pedestal to get the map of the dungeon. There is a large wheel in the center of the dungeon and using the dungeon map, you are able to change which direction the wheel is turning.
If you glance at the map, there are four sections that jut out from the center of the Divine Beast. Each of these four sections are themed based on one of the elements of the various champions, Fire, Water, Wind, and Electricity. They each have a terminal that you will need to unlock to progress within the dungeon.
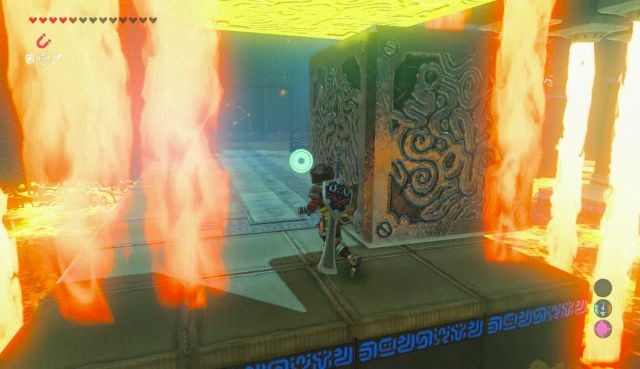
Fire Terminal
From the Shrine of Resurrection, it is the first hallway on the right and you can see some lava just on the outside. There is a large gear spinning in the lava here and you want to turn it so that you can jump on top of it, and it will take you upward.


In the room you will see a large spiked cylinder that is turning, but if you look closely, there is a clear path for you to walk on. Wait until the platform has turned until the pathway opens up. Then if it isn’t already doing so, immediately turn the gear on the map, so that the cylinder is turning to the right. This will allow your navigate along the safe ground without falling into the lava. At the end of the cylinder, you will see fire appearing in several columns. After a few moments the columns disappear one by one. When the path is clear, quickly jump across the gap.


If you step on the floor switch ahead, a gate against the wall will open, causing an orange orb to fall down. If you look against the back wall, there is a maze like structure where that orb can travel through. You have to line it up so that the entrance to this maze structure is facing the gate, right when you step on the switch. You can use the mechanism on your map to change the rotation of this structure. I find it easiest to get it in there when the gear is blue, or turning clockwise.
Once the orb is in the maze you will need to constantly tweak the direction of the map and let gravity take the ball through the maze. Once you get it through the maze it will fall out of the opening in the center, dropping straight to the floor where you can go and pick it up.


Pickup the orb and take it back to the columns of fire. Just to the right there is a gate that you can drop the ball into it and it will roll down and land in a hole, causing a nearby gate to open. Paraglide down and activate the terminal here, releasing one of the locks on the large door.
Water Terminal
You can use the gears that are near the lava on the first floor of the dungeon to get to the top of the room. Note, there is a treasure chest, just above where the Shrine of Resurrection is, but it is behind a rapidly moving gear. If you use Stasis at the right time, so that it freezes right where the a small hole, you can open up the treasure chest to get a Gerudo Shield. From higher up you can glide down to the higher platforms by the area further from the Shrine of Resurrection.
From the Shrine of Resurrection, the far pathway on the left side is where the Water Terminal is located. Glide over and climb the nearby ladder. If you look along the wall, there is a slowly moving gear that has blocks attached to them. Turn the dungeon so that this gear is moving counterclockwise. As the gear turns, the blocks drop down due to gravity. There is another gear just to the right and further up, but it is slightly out of reach.


What you want to do is use Stasis on one of the blocks when it is directly to the right. If this were a clock, it would be at the 3 o’clock position. This will prevent it from falling down, which will in turn cause it to move the nearby gear and raise the nearby platform. Use this opportunity to quickly run across the short bridge that forms and into the next room.
There is water on the ground here and right in the center there is an upside switch that needs to be pushed in. Use Cryonis in the center of the room to raise an ice block, causing the switch to be pressed in. This will connect the gear to rotating bar, causing the whole platform to rotate. Turn the dungeon so that it is rotating counterclockwise and head up through the opening to the next room.


Run forward and you’ll there is water all over this area and there is an object right above the platform that you are standing on. Use Stasis on this object and then hit it a number of times so that it turns clockwise. It will rotate and will cause water to drain from the ground below. This allows you to reach a treasure chest on the floor that contains a Zora Spear.


With the water lowered, you can make your way underneath the gate. Climb the steps and stand on the floor switch here to cause a large boulder to appear. Grab it with Magnesis and place it right on the otherside of the platform that is right up against. Then step off the floor switch to retract that platform and then step back on it. This will launch the ball to the other side of the room, hitting that water wheel and causing the water level to rise back up.


From here you can now use Cryonis on the water to reach the higher ledge and the second terminal. The nearby gate will open, allowing for quick access back to the main room.
Wind Terminal
The Wind Terminal entrance is located directly across from the Fire Terminal, which is just to the right of the large locked door. The first thing you need to do is get the gear moving, to allow yourself to enter the room. If you look at the back wall you will find a rectangular block that you can grab with Magnesis. Higher up on the outer wall, you will find a gear, right where that rectangular block will fit in. Grab it with Magnesis and stick it into the gear. This is a little more tedious than it should be, but stick with it until you get it.


Now grab the end from the moving gear closer to the center of the room and connect it with the rectangular block. With the two attached, the gears will be spinning, creating an opening that allows you to enter the next room.
Inside you will find a massive fan that is blowing air. First things first is turn the dungeon so that the wind is blowing towards the fan. Then use Stasis on the fan and glide by the fan blades. You can open the treasure chest here to get a Swallow Bow. Use Stasis on the fan again and run passed the blades.
Climb the steps and then climb up the ladder. Turn the dungeon and glide back towards the entrance, landing on the higher platform. Climb the ladder and turn the dungeon one more time. If you look towards the fan, you will find a moving platform. Carefully glide over and try to land on top of this moving platform. Once you have successfully done so, use Stasis on the large fan and then glide over to the terminal. Place the Sheikah Slate in the terminal to remove another one of the locks and then return to the main room.


Electric Terminal
From the Shrine of Resurrection, it is the first hallway on the left. The first thing we need to do is get the gear spinning. Before entering the room, look up and you’ll find a metal block that you can grab onto with Magnesis. Grab it and pull it towards the outer wall. There is a point where the piece will fit directly into a whole. Push it into the whole and the whole platform will start turning.


Ride the moving gear to reach the small staircase against the wall on the right. From here, grab the block that is on the ceiling with Magnesis and drop it down to the ground below. You need to place that block so that it fits snug into the hole in the center of the room. Now wait until the large block on the moveable gear comes by and grab it with Magnesis. Pull it all the way out and the two metal blocks will hit. This will cause the second set of gears to move around the room.


Furthermore, electricity is now flowing further into the room, causing the gate on the far all to open. Run to the end of the room and activate the terminal.
