- Chapter 1 – Great Plateau
- Chapter 2 – Dueling Peaks
- Chapter 3 – Hateno Village
- Chapter 4 – Zora’s Domain
- Chapter 5 – Vah Ruta Dungeon
- Chapter 6 – Goron City
- Chapter 7 – Vah Rudania Dungeon
- Chapter 8 – Gerudo Town
- Chapter 9 – Vah Naboris Dungeon
- Chapter 10 – Rito Village
- Chapter 11 – Vah Medoh Dungeon
- 11.1 – Dungeon Map
- 11.2 – 1st Terminal
- 11.3 – 2nd Terminal
- 11.4 – 3rd Terminal
- 11.5 – 4th Terminal
- 11.6 – 5th Terminal
- 11.7 – Windblight Ganon
- Chapter 12 – Captured Memories
- Chapter 13 – The Master Sword
- Chapter 14 – Hyrule Castle
- Chapter 15 – The Champions’ Ballad
11.1 Dungeon Map
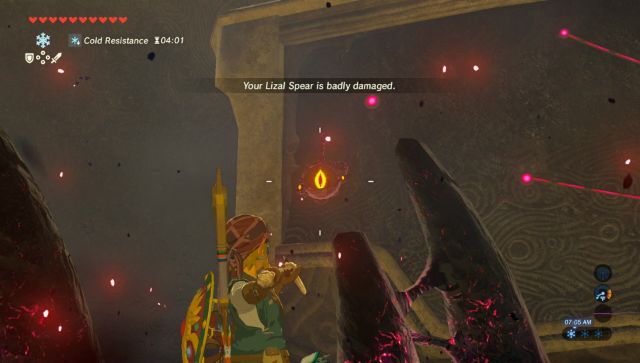
Once you start the dungeon, run ahead and you’ll see a glowing eye on the wall to the right. Shoot an arrow out to remove the malice. You want to make it across to the other side of the room. There are blocks in the center of the room and you can use Magnesis to push or pull some of them. Alternatively, you can use the wind geyser and paraglider over to the other side. Defeat the small guardian and activate the pedestal ahead.


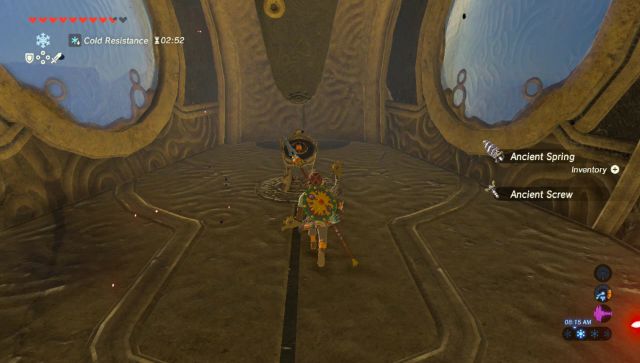
The Map in this dungeon will allow you to tilt the Divine Beast. This will cause platforms and items to drift accordingly.
11.2 1st Terminal
In the main room drop to the bottom floor and head through the passage on the left side. You will see an eye all the way in the distance; use your bow and snipe at the eye. On the map, change the tilt of the dungeon to the top and it will cause a cart to move over to you. Step into the cart and choose the bottom tilt of the dungeon and the cart will move back to the other side.


Climb up the staircase here and place the Sheikah Slate onto the pedestal to activate the first terminal.
11.3 2nd Terminal
Pass through the door and look up to find a glowing eye. You want to get rid of this guy so he doesn’t bother you. Tilt the dungeon downward and you’ll see a large battering ram move against the wall next to the door you came out of. If you follow the rails to where this battering ram leads, there is a large glowing switch that needs to be pushed in. However, there are two gates that are blocking the pathway.
Just above the rail you will notice two windmills that are also on rails. The only way to lift the gates is to cause the windmills to spin. There is also a nearby switch on the ground, and if you strike it with your sword, a window will open, causing wind to blow in the direction of the opening. The wind will blow and if it hits the windmills, they will spin, causing the gates to open.
The trick here is that we need to hit the large switch with the battering ram with full force in order to press it all the way down. We want to start with the tilt of dungeon down, and then change the tilt up, so the battering ram moves all the way across the rails. However, this will also cause the second windmill to move, which will close the gate. In order to keep that windmill in place, use your Magnesis ability to hold it in place, allowing the battering ram to hit the switch. Run inside and activate the terminal.
Note: This is not the only way to solve this particular puzzle. Later in the dungeon you will find a large spherical ball and you can bring it over to this switch, avoiding having to use the battering ram.
11.4 3rd Terminal
Return to the main room and if you fall down, use the wind geyser to get back up. Looking towards the main room from the wind geyser, glance to the left and look at the ceiling. There is a glowing eye here, so nail it with an arrow. Just beneath the platform where the glowing eye is located is a wall that you can climb up. Tilt the dungeon up so that the nearby platform moves all the way to this side of the room. Step onto the platform and then tilt the dungeon down. You can toggle the tilt so the platform stops right in front of the wall. Climb up and up the treasure chest to get an Ancient Core.

From here use the Paraglider to glide through to the next room. There is some malice on the wall to the left and you can shoot the eye above it to get rid of the malice. There terminal is located on this higher ledge and there are a couple ways to reach it. You can climb the staircase on either side of the room and then tilt the room so that the platform with the pedestal is lower than you. Use the paraglider to glide over and activate the 3rd terminal.

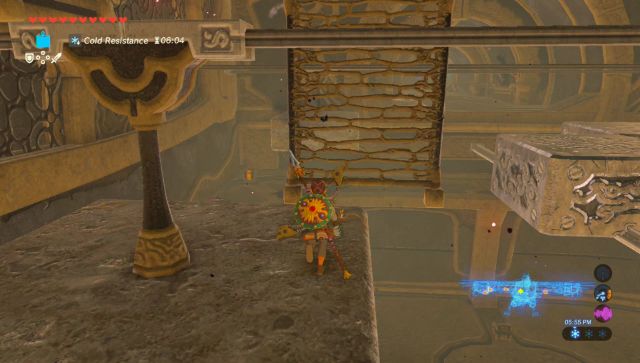
In this same room you can tilt the dungeon up and glide over to the treasure chest that is above the door to get a Knight’s Claymore.
11.5 4th Terminal
In the same room as the previous terminal, you’ll see a small spherical hole where you can drop a round ball. Drop a round ball into the hole and as long as the dungeon is tilted up, the ball will role into the hole towards the boulder ahead. Blast the bomb to destroy the boulder.


Toss a second bomb into the hole and let it roll all the way to the end. Hit the switch that is right next to where you dropped the bomb and it will cause wind to blow through a window, blowing the bomb to the other side of the room. Detonate the bomb and it will blast through a wall, revealing a large spherical ball.


Tilt the dungeon downward and the ball will roll out. Use Magnesis to grab the ball and pull it on the route where you initially dropped the spherical ball. Tilt the dungeon up again and the ball will roll right into the switch, opening the door. Run ahead and activate the 4th terminal.


11.6 5th Terminal
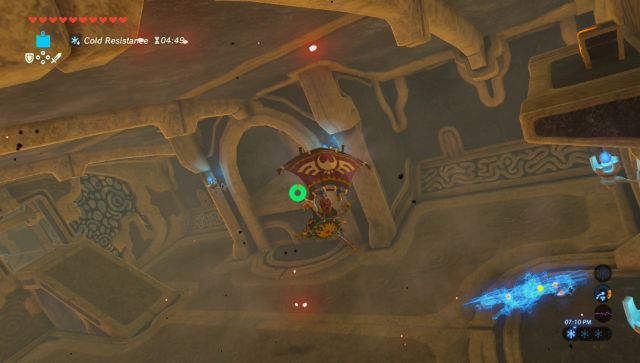
Run to the main room in the center of the dungeon. From the wind geyser, drop down to the bottom floor and then head through the door on the left side. If you look across the gap, you can see the final terminal in the distance. Turn to the right and you’ll see a slightly higher ledge that is a bit closer. Tilt the dungeon up and then paraglide over to the final terminal.


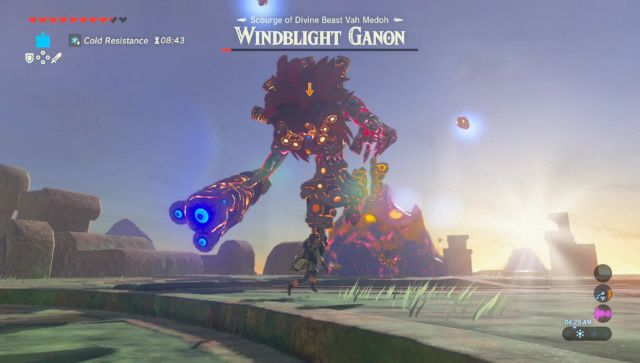
11.7 Windblight Ganon
Return to the start of the dungeon and ride the large wind geyser up to the top of the dungeon. Here you can access the main control panel to trigger the boss fight with the Scourge of Divine Beast Vah Medoh: Windblight Ganon.
For this battle, I recommend having a bunch of arrows, as they will come in handy for the second phase of this fight. Without arrows, the second part of the battle becomes a bit trickier. All in all this boss can be a bit challenging, but if you have some patience, you should be able to get by in a few tries.
During the first phase Windblight Ganon will appear at various parts of the arena and he will do one of two attacks. Either he’ll summon a small tornado, or he will shoot out four consecutive lasers from his arm cannon. During the tornado attack, there isn’t too much you can do, just run away and you’ll easily be able to dodge the attack.


When Windblight Ganon shoots his four lasers, he will stop for a moment and if he’s on the ground level, he is vulnerable. The lasers are quite easy to avoid as long as you stay on the move and don’t run directly into him. If Windblight Ganon is on the ground level, after he shoots his lasers, run up to him and deliver some attacks. If you are using a two-handed weapon, I recommend using faster, one-handed attacks to do multiple hits. After a few hits, you’ll want to run away as Windblight Ganon will attack. Just repeat this same exact process and use some patience.
After you hit Windblight Ganon enough times, he’ll drop to the ground and you can run over and deliver a series of attacks.


After half of his health is gone, Windblight Ganon will now begin to summon some satellites. When he performs his laser attack, the lasers will bounce off of the satellites and then come after you. It is a much more dangerous attack than before, but still nothing that you can’t just run away from. Windblight Ganon will still summon tornadoes and this time he’ll summon two at a time. Still, nothing you can’t just run away from.

While you can defeat the satellites with some arrows, they will eventually respawn. I would recommend just avoiding them, as they aren’t too much of a hassle as long as you stay on the move. Occasionally Windblight Ganon will spawn on the ground level and shoot arrows. You can run up to him and deliver sword slashes, just like before. However, that is a bit less frequent. A much safer strategy at this point is to simply use arrows. Whenever he is floating around, just deliver an arrow right at its eye for maximum damage. You can use the wind geysers and launch an aerial attack with your bow to get a better shot in.


When Windblight Ganon’s health is really low, he will resort to shooting a red laser at you, much like the Guardians. Don’t bother trying to block it, but instead, just hide behind a boulder. Keep at it until Windblight Ganon has been defeated.
