The Wind Waker Items
This is a list of items found in The Wind Waker.
Inventory/Equipment
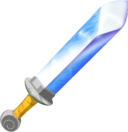
Hero's Sword
- Main article: Hero's Sword
The first sword Link acquires in the game. He receives it from Orca after getting the Telescope. This sword is very useful, acting as Link's sword for the first half of the game. It is not known what is done with it after Link receives the Master Sword.
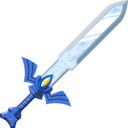
Master Sword
- Main article: Master Sword
The legendary Master Sword held by the Hero of Time himself. Link acquires this after completing the Tower of the Gods, therefore proving his worth. However, Link must complete additional tasks before it reaches its full power.
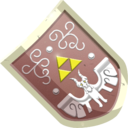
Hero's Shield
- Main article: Hero's Shield
The first shield Link gets. He receives it from Grandma after Tetra tells him to get one.
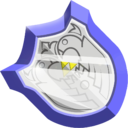
Mirror Shield
- Main article: Mirror Shield
The Mirror Shield is found in the Earth Temple. Its reflective surface allows Link to reflect light towards enemies to stun/defeat them, or into objects to solve puzzles. It is also used to deflect the Light Arrows at Ganon that Zelda shoots at Link to help stun Ganon in the last phase of the final battle.
Telescope
- Main article: Telescope
Link's first item in the game. Given to him by his sister Aryll, it is her most prized possession. Use the C-stick to zoom in and out, and the control stick to look around.
Sail
- Main article: Sail
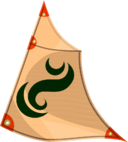
The key to traveling in Wind Waker, the sail can be bought from a merchant on Windfall Island named Zunari. He will never say it by name, but will merely call it "it" and "that" a lot. He will then offer it to you for 80 Rupees after his speech.
Wind Waker
- Main article: Wind Waker
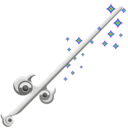
The Wind Waker is a conductor's baton that was used long ago to borrow the power of the gods. It is given to Link by the King of Red Lions the first time Link arrives at Dragon Roost Island. The Wind Waker is used to conduct a choir of disembodied voices in 3/4, 4/4, or 6/4 time by use of the C-stick and main analog stick.
Grappling Hook
- Main article: Grappling Hook
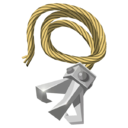
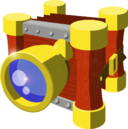
The Grappling Hook is the dungeon item for Dragon Roost Cavern, the first dungeon in the game. It is given to Link by Medli, which allows Link to progress further into the dungeon and swing across gaps. The hook is used by aiming it at hanging branches or hooks on the walls. The hook can also be used as a salvage arm while at sea to pick up treasure from the ocean floor, or can be used to steal spoils from enemies as opposed to having only a chance for them to appear when they are defeated.
Tingle Tuner
- Main article: Tingle Tuner
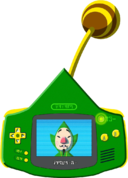
The Tingle Tuner is an item given to you by Tingle himself. When you rescue him from his jail cell on Windfall Island, he will give Link the Tingle Tuner as a sign of friendship, acknowledging him as a "true fairy". This item can be activated by connecting a Game Boy Advance to the Gamecube or Wii via a Link Cable. It will allow Link to partake in many different sidequests along his journey, such as finding hidden Tingle statues and finding bonus Rupees. It is not available in The Wind Waker HD, as it is replaced by the Tingle Bottle.
Tingle Bottle
- Main article: Tingle Bottle
The Tingle Bottle replaced the Tingle Tuner in The Wind Waker HD. It is given to Link by Tingle when he is released from jail. The Tingle Bottle is used to send messages and screenshots to other Wind Waker HD players via Miiverse.
Picto Box
- Main article: Pictograph Box
The Picto Box allows Link to take black & white pictographs and has the capacity to hold three at a time. In The Wind Waker HD, it has the capacity to hold twelve pictographs. The Picto Box is found at the end of a maze of tunnels located at the back of the jail cell that Tingle is being held in.
Deluxe Picto Box
- Main article: Pictograph_Box#The_Wind_Waker
The Deluxe Picto Box is an upgrade to the Picto Box that takes color pictographs instead of black & white ones. In The Wind Waker, Link must capture the Forest Firefly in a bottle and give it to Lenzo, who will then upgrade the Picto Box. In The Wind Waker HD, Lenzo gives the Deluxe Picto Box to Link after he has completed three tasks for him. Pictographs can be given to Carlov at the Nintendo Gallery and made into Figurines. Pictographs can also be posted to Miiverse using the Tingle Bottle.
Power Bracelets
- Main article: Power Bracelet
The Power Bracelets give Link the ability to lift the large headstone shaped stones and other heavy objects. Once Link acquires the Fire & Ice Arrows, he can go into the Fire Mountain to collect the Power Bracelets.
Iron Boots
- Main article: Iron Boots
The Iron Boots are found in a cave on Ice Ring Isle and are not accessible until Link receives the Fire Arrows and Ice Arrows from the Queen of Fairies on Mother and Child Isles after learning the Ballad of Gales and warping to them. The Iron Boots allow Link to not be affected by wind when equipped, therefore making them essential for the Wind Temple. They also allow Link to activate springboards first by wearing the boots and then taking them off. Larger statues may also be pulled over when the Iron Boots are paired with the Hookshot. One difference of these boots from other Zelda games is that when Link enters the water, the boots are automatically unequipped as opposed to making Link sink to the bottom of the body of water.
Magic Armor
- Main article: Magic Armor
The Magic Armor is an item given to you by Zunari as a reward after completing the Island Trading Sequence. This item creates a magical barrier around Link that protects him from damage. While active, the armor drains Link's magic meter. Once Link's magic is depleted, the Magic Armor stops working. The Magic Armor can also be used while sailing to protect from attacks during battles at sea. In The Wind Waker HD, the Magic Armor no longer uses magic. However, while it is activated, Link will lose Rupees whenever he would normally take damage.
Boomerang
- Main article: Boomerang
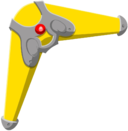
The boomerang is the dungeon item from the Forbidden Woods. It can used to hit up to 5 objects at a time in succession or to attack enemies, though it is a relatively weak weapon. It is obtained after defeating a Mothula.
Deku Leaf
- Main article: Deku Leaf
The Deku Leaf is received from the Great Deku Tree after he asks Link to go rescue Makar from the Forbidden Woods. Unfortunately, the leaf is at the top of the tree and Link must make a long and tedious trip up a line of Baba Buds to obtain it. The leaf allows Link to leap from a platform and float through the air to another one. With the leaf comes a magic meter that will deplete as Link flies. When the meter is depleted, Link is simply left with a useless oversized leaf. Another use for the leaf is to send gusts of air in any direction from the ground.
Hero's Bow
- Main article: Hero's Bow
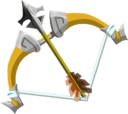
The Hero's Bow is the dungeon item found in the Tower of the Gods. Link acquires it after defeating a Darknut. The Hero's Bow has many used in The Wind Waker. It is required to learn the Ballad of Gales, as well as collecting the Power Bracelets and Iron Boots to progress through the rest of the game. Link will also need to use the Hero's Bow with the Light Arrows to defeat Phantom Ganon and Ganondorf at the end of his quest.
Fire & Ice Arrows
- Main article: Fire & Ice Arrows
The Fire & Ice Arrows are magic arrows that can "melt the coldest ice" or "freeze the hottest flames". Link acquires them by playing the Ballad of Gales and warping to Mother & Child Isles after rescuing Aryll from Forsaken Fortress. The Fire & Ice Arrows are required to enter Fire Mountain and Ice Ring Isle to retrieve the Power Bracelets and Iron Boots, respectively.
Light Arrows
- Main article: Light Arrow
In The Wind Waker, the Light Arrows are awarded to Link after he completes the Maze in Ganon's Tower. After exiting the Maze, Link will battle with Phantom Ganon one last time and must shoot him with a Light Arrow to defeat him for good. The Light Arrows are also the only item that can harm Puppet Ganon, and Zelda will use them to stun Ganondorf in the final battle, allowing Link to get a few hits in and eventually the final blow.
Bomb
- Main article: Bomb
Link uses bombs to create explosions, usually to remove objects from his path or to damage enemies. Link acquires the bombs from Niko after visiting Greatfish Isle for the first time. Link starts out being able to carry a maximum of 30 bombs, however this capacity can be upgraded twice, allowing Link to carry a maximum of 60 and eventually 99 bombs.
Hookshot
- Main article: Hookshot
The Hookshot is the dungeon item for the Wind Temple. Link acquires the Hookshot after defeating the Red Wizzrobe. The Hookshot can be used to latch onto certain objects, including wooden beams, trees and targets. When Link is wearing the Iron Boots, he can use the Hookshot to pull down statues that have a target on them for the Hookshot to latch onto. It is also required to defeat the boss of the Wind Temple, Molgera.
Skull Hammer
- Main article: Skull Hammer
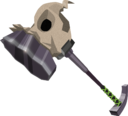
The Skull Hammer is found in the Forsaken Fortress the second time that Link goes to rescue Aryll. Almost immediately after arriving, Link is confronted by Phantom Ganon. After a few rounds of Dead Man's Volley, Phantom Ganon retreats and a chest appears containing the Skull Hammer.
Spoils Bag
- Main article: Spoils Bag
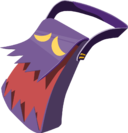
The Spoils Bag is an item received from Niko after completing his test on the pirate's ship. It is used to store various enemy spoils Link finds on his adventure (see "spoils").
Bait Bag
- Main article: Bait Bag
The Bait Bag is an item available to be bought at Beedle's Shop Ship for 20 Rupees. The Bait Bag is able to hold 8 of any combination of All-Purpose Bait and Hyoi Pears, also available at Beedle's Shop.
Delivery Bag
- Main article: Delivery Bag
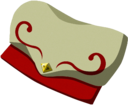
The Delivery Bag is an item given to Link by Quill, the Rito Postman on Dragon Roost Island. It is used to carry all kinds of usually one-use quest or trading items, like letters, flowers, or statues.
Pirate's Charm
- Main article: Pirate's Charm
Snuck into Link's pocket by Tetra before he is launched into the Forsaken Fortress, it is used as a form of communication between not just Link and Tetra, but also the King of Red Lions later on in the game. It is also referenced to as a portable Gossip Stone.
Hero's Charm
- Main article: Hero's Charm
The Hero's Charm is a wearable accessory that allows Link to see the remaining health of his enemies. In The Wind Waker, Link receives the Hero's Charm from Mrs. Marie after giving her a total of 40 Joy Pendants. In The Wind Waker HD, the Hero's Charm is in a treasure chest on the 50th floor of the Savage Labyrinth.
All-Purpose Bait
- Main article: All-Purpose Bait
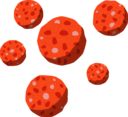
All-Purpose Bait can be purchased from Beedle after Link receives the Spoils Bag from Niko on the way to Forsaken Fortress for the first time. As the name implies, it has many uses. Link can use it to feed the Fishman at each island, who will in turn fill in Link's Sea Chart for that sector, or give Link the option to play a mini-game if that sector is already explored. Link can also spread some All-Purpose Bait on the ground in front of a Rat's hole and the rat will sell you Potions or even more bait.
Hyoi Pear
- Main article: Hyoi Pear
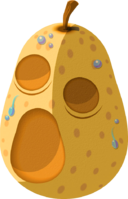
Hyoi Pears can be purchased from Beedle after Link receives the Spoils Bag from Niko on the way to Forsaken Fortress for the first time. If Seagulls are nearby, Link can offer a Hyoi Pear as bait for one, which will then allow him to control one until he chooses to stop or is hit by an enemy. While controlling a Seagull, Link will be able to get Rupees, Pieces of Heart and other items that would otherwise be unreachable.
Complimentary ID
- Main article: Complimentary ID
The Complimentary ID is mailed to Link from Beedle after Link has purchased 30 items from him. After his 30th purchase, Link will be able to find the Complimentary ID in any Postbox. The Complimentary ID is a one-time use item. When given to Beedle, he will "compliment" Link for his continued patronage, which will fully recover all of his Hearts.
Fill-Up Coupon
- Main article: Fill-Up Coupon
The Fill-Up Coupon is mailed to Link from Beedle after Link has purchased 60 items from him. After his 60th purchase, Link will be able to find the Fill-Up Coupon in any Postbox. The Fill-Up Coupon is a one-time use item. When given to Beedle, Link will receive a free replenishment for all consumable items, such as Bombs and Arrows, as well as a full recovery of Hearts.
Cabana Deed
- Main article: Cabana Deed
Link receives the Cabana Deed from Mrs. Marie after giving an additional 20 Joy Pendants to her. This allows Link to prove that he now owns the Private Oasis and enter the cabin. Inside, Link must crawl through a series of tunnels to reach a Treasure Chest. In The Wind Waker, the chest will contain a Triforce Chart. In The Wind Waker HD, the chest will contain a Triforce Shard.
Bottled Items
Bottle
- Main article: Bottle
Empty bottles are used to store all sorts of things. Link can use bottles for storing Water, Fairies, Potions, or even some of Grandma's delicious Elixir Soup. There are a total of four bottles that can be found in The Wind Waker
Bottled Water
- Main article: Water
Bottled Water can be used to make some withered plants grow. It is particularly useful when trying to access Dragon Roost Cavern. All that Link needs to do to collect some is to swipe an empty bottle near a water source.
Bottled Forest Water
- Main article: Forest Water
Forest Water is special water that only flows within Forest Haven. It can be used to help the Withered Trees grow. Once collected, it is only good for 20 minutes before it becomes normal water. In The Wind Waker HD, that time limit is increased to 30 minutes.
Forest Firefly
- Main article: Forest Firefly
Forest Fireflies are only found inside Forest Haven. If Link brings one back to Lenzo, he will place it in Link's Picto Box, creating the Deluxe Picto Box. In The Wind Waker HD, the Forest Firefly is no longer required to get the Deluxe Picto Box. However, if Link brings a Forest Firefly to Lenzo, he will award Link with a Joy Pendant for his hard work.
Bottled Fairy
- Main article: Fairy
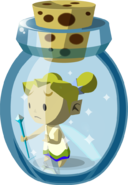
Link can use Fairies to restore some of his health. Link can also store a Fairy in a bottle to use at a later time. If Link loses all of his health and has a Fairy stored in a bottle, the Fairy will automatically come out of the bottle and restore Link to life and replenish some of his health.
Elixir Soup
- Main article: Elixir Soup
Grandma fills one of Link's empty bottles up with Elixir Soup after he heals her with a Fairy. In fact, she fills the bottle so full that there are two helpings worth. Elixir Soup will replenish all of Link's hearts, as well as all of his magic, and even temporarily doubles his attack strength. Link can return to get unlimited free refills of Elixir Soup as long as he has an empty bottle. However, he can only have one bottle of Elixir Soup at a time.
Red Potion
- Main article: Red Potion
Red Potions can be held in bottles until ready to use. When used, they restore all of Link's hearts. Red Potions can be purchased from Doc Bandam at the Chu Jelly Juice Shop on Windfall Island for 20 Rupees. If Link brings 5 Red Chu Jellies to Doc Bandam, he will fill Link's bottle with Red Potion for free.
Green Potion
- Main article: Green Potion
Green Potions can be held in bottles until ready to use. When used, they restore Link's entire Magic Meter. Green Potions must be unlocked before they can be purchased by bringing 15 Green Chu Jellies to Doc Bandam at the Chu Jelly Juice Shop on Windfall Island. Once unlocked, Link can purchase Green Potions for 10 Rupees. If Link brings 5 additional Green Chu Jellies to Doc Bandam, he will fill Link's bottle with Green Potion for free.
Blue Potion
- Main article: Blue Potion
Blue Potions can be held in bottles until ready to use. When used, they restore all of Link's health and magic. Blue Potions must be unlocked before they can be purchased by bringing 15 Blue Chu Jellies to Doc Bandam at the Chu Jelly Juice Shop on Windfall Island. Once unlocked, Link can purchase Blue Potions for 60 Rupees. If Link brings 5 additional Blue Chu Jellies to Doc Bandam, he will fill Link's bottle with Blue Potion for free. Alternatively, Link can also collect Boko Baba Seeds from killing Boko Babas and then giving 4 of them to Hollo who will mix a Blue Potion for Link.
Goddess Pearls
Din's Pearl
- Main article: Din's Pearl
Held by Prince Komali, Din's Pearl was given to him by his deceased grandmother. Feeling upset by the angered Valoo, Komali feels comforted when holding the pearl. Although Link requires the pearl to complete his quest, Komali refuses to just hand the pearl over to a "do nothing guy". Link must travel through Dragon Roost Cavern to find the source of Valoo's anger before Prince Komali will reward him with Din's Pearl.
Farore's Pearl
- Main article: Farore's Pearl
Farore's Pearl is held by the Great Deku Tree at Forest Haven. The Great Deku Tree was going to give the pearl to Link after the Korok's annual ceremony, however Makar has fallen into the Forbidden Woods, without whom they cannot complete the ceremony. Link must travel through the Forbidden Woods to rescue Makar so that the Koroks can perform their ceremony and receive Farore's Pearl from the Great Deku Tree.
Nayru's Pearl
- Main article: Nayru's Pearl
Nayru's Pearl is held by Jabun, who normally resides on Greatfish Isle. However, sensing that Ganondorf was coming to find the pearl, Jabun flees to Outset Island. After acquiring the Bombs from the Niko at Windfall Island, Link must travel to Outset Island to destroy the stone wall blocking the entrance to the cave that Jabun is in. After some convincing by the King of Red Lions, Jabun gives the pearl to Link.
Triforce Shards
Triforce Shard 1
- Main article: Triforce_Shard#The_Wind_Waker
The first Triforce Shard is obtained after Link collects Triforce Chart 1 from the Islet of Steel, gets the chart deciphered by Tingle and then sails to Greatfish Isle to pull it up from the bottom of the Great Sea.
Triforce Shard 2
- Main article: Triforce_Shard#The_Wind_Waker
The second Triforce Shard is obtained after Link collects Triforce Chart 2 from the Private Oasis, gets the chart deciphered by Tingle and then sails to Gale Isle to pull it up from the bottom of the Great Sea. In The Wind Waker HD, the second Triforce Shard is found at the Private Oasis in place of the Triforce Chart.
Triforce Shard 3
- Main article: Triforce_Shard#The_Wind_Waker
The third Triforce Shard is obtained after Link collects Triforce Chart 3 from Bird's Peak Rock, gets the chart deciphered by Tingle and then sails to Stone Watcher Island to pull it up from the bottom of the Great Sea.
Triforce Shard 4
- Main article: Triforce_Shard#The_Wind_Waker
The fourth Triforce Shard is obtained after Link collects Triforce Chart 4 from the Ghost Ship, gets the chart deciphered by Tingle and then sails to Outset Island to pull it up from the bottom of the Great Sea. In The Wind Waker HD, the fourth Triforce Shard is found on the Ghost Ship in place of the Triforce Chart.
Triforce Shard 5
- Main article: Triforce_Shard#The_Wind_Waker
The fifth Triforce Shard is obtained after Link collects Triforce Chart 5 from the golden warship near Needle Rock Isle, gets the chart deciphered by Tingle and then sails to Cliff Plateau Isles to pull it up from the bottom of the Great Sea.
Triforce Shard 6
- Main article: Triforce_Shard#The_Wind_Waker
The sixth Triforce Shard is obtained after Link collects Triforce Chart 6 from Outset Island, gets the chart deciphered by Tingle and then sails to Southern Triangle Island to pull it up from the bottom of the Great Sea. In The Wind Waker HD, the sixth Triforce Shard is found on Outset Island in place of the Triforce Chart.
Triforce Shard 7
- Main article: Triforce_Shard#The_Wind_Waker
The seventh Triforce Shard is obtained after Link collects Triforce Chart 7 from Stone Watcher Island, gets the chart deciphered by Tingle and then sails to Seven-Star Isles to pull it up from the bottom of the Great Sea. In The Wind Waker HD, the seventh Triforce Shard is found on Stone Watcher Island in place of the Triforce Chart.
Triforce Shard 8
- Main article: Triforce_Shard#The_Wind_Waker
The eighth Triforce Shard is obtained after Link collects Triforce Chart 8 from Overlook Island, gets the chart deciphered by Tingle and then sails to Two-Eye Reef to pull it up from the bottom of the Great Sea. In The Wind Waker HD, the eighth Triforce Shard is found on Overlook Island in place of the Triforce Chart.
Charts
Treasure Chart
- Main article: Treasure Chart
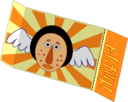
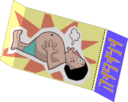
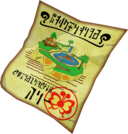
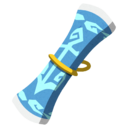
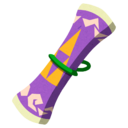
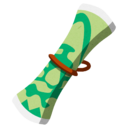
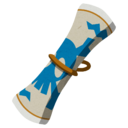
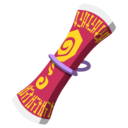
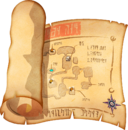
Treasure Charts are found throughout the Great Sea on islands, within dungeons or given to Link as a reward for doing tasks. When opened, they show the location of a sunken treasure along with a part of the island where the treasure is located. When Link goes searching for the treasure, a very bright ring of light can be seen indicating where the treasure is located. These treasures are usually either 200 Rupees, a Piece of Heart or a Special Chart.
Triforce Chart
- Main article: Triforce Chart
A total of 8 Triforce Charts can be found throughout the Great Sea, with each one leading to a Triforce Shard. Link is unable to read a Triforce Chart without having it deciphered by Tingle first for the hefty price of 398 Rupees each.
Tingle's Chart
- Main article: Tingle's Chart
Tingle's Chart is given to Link by Tingle after Link releases him from jail on Windfall Island. Tingle's Chart shows the location of Tingle Island, as well as the two Great Fairies that will upgrade Link's wallet.
IN-credible Chart
- Main article: IN-credible Chart
The IN-credible Chart is found inside a Postbox after Link rescues Aryll from Forsaken Fortress. Link must pay 201 Rupees to receive the letter from Tingle which includes the IN-credible Chart. The IN-credible chart shows the locations of all of the Triforce Charts. After the Tingle deciphers the Triforce Charts, he will also mark the locations of the Triforce Shards on the IN-credible Chart.
Ghost Ship Chart
- Main article: Ghost Ship Chart
The Ghost Ship Chart is used to show Link the current location of the Ghost Ship. It also allows Link to board the Ghost Ship once it is found. The Ghost Ship Chart is found by completing the Warp Jar maze on Diamond Steppe Island.
Beedle's Chart
- Main article: Beedle's Chart
Beedle's Chart can be found in a Postbox after winning the bombs from Niko on the Pirate Ship. Beedle's Chart shows the locations of all of the Beedle's Shop Ships, as well as the Masked Beedle Shop Ship at Rock Spire Isle.
Octo Chart
- Main article: Octo Chart
The Octo Chart can be found by using Treasure Chart #26 to collect it from the Great Sea. The Octo Chart shows the location of all of the Big Octos, as well as how many eyes each one has.
Great Fairy Chart
- Main article: Great Fairy Chart
The Great Fairy Chart can be found by using Treasure Chart #41 to collect it from the Great Sea. The Great Fairy Chart shows the location of all of the Great Fairies.
Sea Hearts Chart
- Main article: Sea Hearts Chart
The Sea Hearts Chart can be found by using Treasure Chart #32 to collect it from the Great Sea. The Sea Hearts Chart shows the location of all of the Treasure Charts that lead to a Piece of Heart and how many are on each island.
Island Hearts Chart
- Main article: Island Hearts Chart
The Island Hearts Chart can be found by using Treasure Chart #19 to collect it from the Great Sea. The Sea Hearts Chart shows the location of all of the islands that have a Piece of Heart and how many are on each island.
Secret Cave Chart
- Main article: Secret Cave Chart
The Secret Cave Chart can be found by using Treasure Chart #13 to collect it from the Great Sea. The Secret Cave Chart shows the location of all of the islands that have holes leading to underground caverns and how many are on each island.
Light Ring Chart
- Main article: Light Ring Chart
The Light Ring Chart can be found by using Treasure Chart #21 to collect it from the Great Sea. The Light Ring Chart shows the location of all of the Light Rings that only appear during nights with a full moon.
Platform Chart
- Main article: Platform Chart
The Platform Chart can be found by defeating all of the enemies within the Submarine near the Flight Control Platform. The Platform Chart shows the location of all of the Lookout Platforms throughout the Great Sea and how many are at each location.
Submarine Chart
- Main article: Submarine Chart
The Submarine Chart can be found in a secret cave at the Boating Course. The Submarine Chart shows the location of all of Submarines throughout the Great Sea.
Spoils
Boko Baba Seed
- Main article: Boko Baba Seed
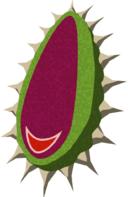
Boko Baba Seeds are spoils that may drop from a Boko Baba after it is defeated. If Link gives four of these to Hollo in Forest Haven, he will prepare a Blue Potion for Link.
Red Chu Jelly
- Main article: Chu Jelly
Red Chu Jelly can be collected from a Red ChuChu after it is defeated. If Link gives 5 Red Chu Jellies to Doc Bandam on Windfall Island, he will give Link a free Red Potion.
Green Chu Jelly
- Main article: Chu Jelly
Green Chu Jelly can be collected from a Green ChuChu after it is defeated. If Link gives 15 Green Chu Jellies to Doc Bandam on Windfall Island, it will unlock the Green Potion and Doc Bandam will give Link a free sample. If Link gives an additional 5 Green Chu Jellies to Doc Bandam, he will give Link another free Green Potion.
Blue Chu Jelly
- Main article: Chu Jelly
Blue Chu Jelly can be collected from a Blue ChuChu after it is defeated. If Link gives 15 Blue Chu Jellies to Doc Bandam on Windfall Island, it will unlock the Blue Potion and Doc Bandam will give Link a free sample. If Link gives an additional 5 Blue Chu Jellies to Doc Bandam, he will give Link another free Blue Potion. Blue Chu Jellies are quite rare, as there are only 23 Blue ChuChus in the entire game.
Golden Feather
- Main article: Golden Feather
Golden Feathers may drop from a Peahat, Kargarok or a Winged Mothula after they are defeated. If Link gives 20 of these to Hoskit on Dragon Roost Island, Hoskit will thank Link and give them to his girlfriend. Soon after, Link will receive a letter from Hoskit's girlfriend thanking him for the Golden Feathers. The letter will include a Piece of Heart.
Joy Pendant
- Main article: Joy Pendant
Joy Pendants are a common spoil that may drop from any Bokoblin after it is defeated. If Link gives 20 of these to Mrs. Marie on Windfall Island, she will give him the Cabana Deed. If Link gives her an additional 40 Joy Pendants, she will give Link the Hero's Charm. In The Wind Waker HD, if Link gives her an additional 40 Joy Pendants, she will give Link Treasure Chart #45.
Knight's Crest
- Main article: Knight's Crest
Knight's Crests usually drop from Darknuts after they are defeated and can occasionally be found in Treasure Chests. If Link collects 10 of these and shows them to Orca on Outset Island, Orca will teach him the Hurricane Spin.
Skull Necklace
- Main article: Skull Necklace
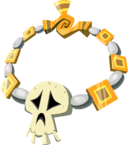
Skull Necklaces usually drop from Moblins after they are defeated and can occasionally be found in Treasure Chests. Giving 3 of these to Dampa on Windfall Island will allow Link to play a mini-game which can earn him 50 Rupees. If Link gives 20 of these to Maggie's Father on Windfall Island, he will give Link Treasure Chart #2.
Trading Sequence Items
The Wind Waker Trading Sequence
- Main article: The Wind Waker Trading Sequence
The Wind Waker Trading Sequence is a trading sequence containing 12 items that Link will need to collect. At the end, it grants Link a Piece of Heart and Magic Armor. However, it requires several rupees to complete. The sequence involves trading items from Zunari's Shop with Traveling Merchants around the Great Sea to gain new items, which are all listed below.
Town Flower
- Main article: Town Flower
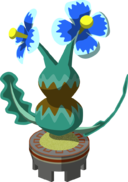
The Town Flower is the first item you get in the Island Trading Sequence. Zunari sells it to Link for 10 rupees to trade it to any of the Traveling Merchants on Bomb Island, Greatfish Isle, and Mother and Child Isles.
Sea Flower
- Main article: Sea Flower
The Sea Flower is the Second item you get in the trading sequence. To receive it, you must trade the Town Flower to one of the Merchants on Bomb Island, Greatfish Isle, or Mother and Child Isles for 20 rupees.
Exotic Flower
- Main article: Exotic Flower
The Exotic Flower is the third item you get in the trading sequence. To receive it, you must trade the Sea Flower to the Merchant on Greatfish Isle for 25 rupees.
Pinwheel
- Main article: Pinwheel
The Pinwheel is the fourth item you get in the trading sequence. To receive it, you must trade the Exotic Flower to the Merchant on Mother and Child Isles for 55 rupees.
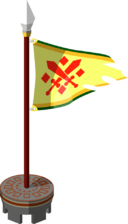
Sickle Moon Flag
- Main article: Sickle Moon Flag
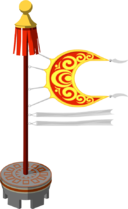
The Sickle Moon Flag is the fifth item you get in the trading sequence. To receive it, you must trade the Pinwheel to the Merchant on Bomb Island for 40 rupees.
Big Catch Flag
- Main article: Big Catch Flag
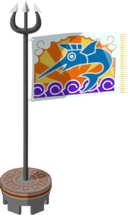
The Big Catch Flag is the sixth item you get in the trading sequence. To receive it, you must trade the Sickle Moon Flag to the Merchant on Mother and Child Isles for 85 rupees.
Big Sale Flag
- Main article: Big Sale Flag
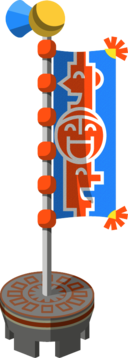
The Big Sale Flag is the ninth item you get in the trading sequence. To receive it, you must trade the Skull Tower Idol to the Merchant on Mother and Child Isles for 35 rupees.
Hero's Flag
- Main article: Hero's Flag
The Hero's Flag is the tenth item you get in the trading sequence. To receive it, you must trade the Big Sale Flag to the Merchant on Bomb Island for 75 rupees.
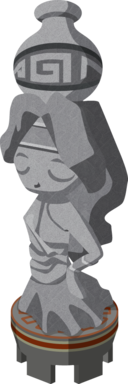
Fountain Idol
- Main article: Fountain Idol
The Fountain Idol is the seventh item you get in the trading sequence. To receive it, you must trade the Big Catch Flag to the Merchant on Bomb Island for 60 rupees.
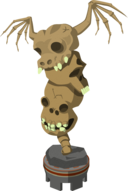
Skull Tower Idol
- Main article: Skull Tower Idol
The Skull Tower Idol is the eighth item you get in the trading sequence. To receive it, you must trade the Fountain Idol to the Merchant on Greatfish Isle for 60 rupees.
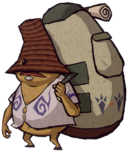
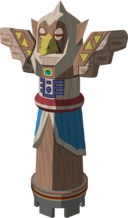
Postman Statue
- Main article: Postman Statue
The Postman Statue is the eleventh item you get in the trading sequence. To receive it, you must trade the Hero's Flag to the Merchant on Greatfish Isle for 100 rupees.
Shop Guru Statue
- Main article: Shop Guru Statue
The Shop Guru Statue is the last item you get in the trading sequence. To receive it, you must trade the Postman Statue to the Merchant on Mother and Child Isle for 200 rupees. The Merchant on Greatfish Isle really desires this statue and will give Link a Piece of Heart when traded.
Letters
Note to Mom
- Main article: Note to Mom
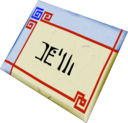
This letter is given to Link by Baito after he notices Link's help at the mail sorting, he then asks Link to sort 25 letters for him. After sorting 25 letters, Baito then gives Link the letter to deliver to his mom. The letter says how Link helped inspire him with his job, after sometime sending it, his mom reply's to Link giving him a Piece of Heart.
Father's Letter
- Main article: Father's Letter
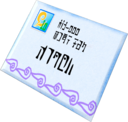
This letter is given to Link by Medli, it is written by the Rito Chieftain to encourage his son Prince Komali to receive his scale from Valoo. The letter explains to Komali that he has to be brave and Link is here to calm Valoo down. Also this is the only letter that is in the main story line.
Maggie's Letter
- Main article: Maggie's Letter
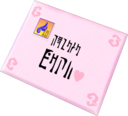
This letter is given to Link by Maggie in a sidequest in Windfall Island after you rescue Aryll from the Forsaken Fortress. Maggie explains to Link how she fell in love with Moe a Moblin from Forsaken Fortress and she wants Link to deliver the letter to him.
Moblin's Letter
- Main article: Moblin's Letter
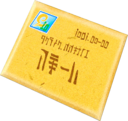
After sending Maggie's Letter in the Postbox, Link will comeback to find Maggie's father arguing with a Rito named Ilari. Frustrated, Ilari goes to the Cafe Bar where Link can talk to him, he will tell Link to deliver the Moblin's Letter to Maggie. When Link delivers the letter to Maggie, she will then give Link a Piece of Heart.
Dungeon Items
Dungeon Map
- Main article: Dungeon Map
In every dungeon there is a Dungeon Map. This map will show Link where every room in the dungeon is. After obtaining the Compass, it will also show what treasure chests are inside of the dungeon.
Compass
- Main article: Compass
The Compass displays the locations of Treasure Chests and the location of the Boss. In the Tower of the Gods, the Compass also displays the locations of the Servants of the Tower. Similarly, in the Earth Temple and the Wind Temple, the Compass displays the locations of Medli and Makar, respectively. Additionally, it will also display Link's current location and the door he just came through.
Small Key
- Main article: Small Key
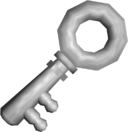
In most of the dungeons, Link can find Small Keys which are usually the rewards of solving puzzles. There are many small keys throughout the dungeon, and they can only be used once each to open a locked door.
Boss Key
- Main article: Boss Key
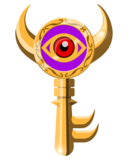
In every large dungeon there is a Boss Key. Link will need to find the key in order to unlock the boss door and complete the dungeon. Their location is often only apparent to Link at the end of the dungeon and they require the dungeon item to obtain it.


