- Chapter 1 – Zelda’s Rescue
- Chapter 2 – Eastern Palace
- Chapter 3 – Desert Palace
- Chapter 4 – Tower of Hera
- Chapter 5 – Hyrule Castle Tower
- Chapter 6 – Dark Palace
- Chapter 7 – Swamp Palace
- Chapter 8 – Skull Woods
- Chapter 9 – Gargoyle’s Domain
- Chapter 10 – Ice Palace
- Chapter 11 – Misery Mire
- Chapter 12 – Turtle Rock
- Chapter 13 – Ganon’s Tower
6.1 Dark World
Once you gain control of Link in the Dark World, climb down the Pyramid of Power along the right side. On the far right side of the Pyramid, you will find a Piece of Heart. Leap off the nearby ledge and run on over to grab the Heart Piece.

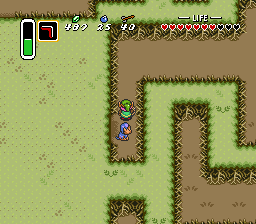
Leap off the pyramid and head right a screen. Before making our way to the first dungeon in the Dark World, there is a powerful item we can acquire. Along your way you’ll find an assortment of brand new enemies. Many of these creatures are Dark World counterparts to enemies found within the Light World.
Walk up two screens and right a screen to reach the area that was previously the Magic Potion Shop in the Light World. The building is now a merchant shop, but it doesn’t have much worth buying. Lift the large rock to the right of the shop and continue right a screen. Continue up a screen on the right side to reach the Lake of Ill Omen.


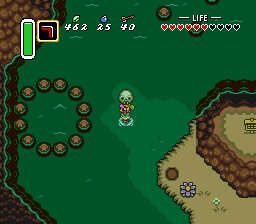
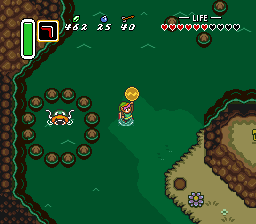
This area was previously the entrance to Zora’s Waterfall. There is a sign nearby that reads, “Curses to anyone who throws something into my circle of stones”. Naturally, Link should pickup the nearby skull rock and toss it into the circle of stones just to the left. A large Catfish will appear and will give you an item if you go away. The Catfish gives Link the Quake Medallion, a powerful item that defeats almost all the enemies that appear on screen. It is a required item that Link will use later in his quest.
Link is now ready to make his way to the first dungeon here in the Dark World. Make your way all the way back to the Pyramid of Power. From the pyramid head right a screen, down a screen, right a screen, and up a screen.

Follow the pathway on the right and you’ll come to a mark in the ground that looks like an arrow. Follow it up through the green bushy trees. Continue along this linear path all the way to the left and then all the way to the top portion of this area.


There is a large bushy green area found here. If you look closely above it, the markings signify the path that Link can walk through. Make your way through this bushy maze. Once you come out of the maze to the right, a monkey will be following you and asks if you can spare 10 rupees. Agree to do so and he’ll continue to follow you.

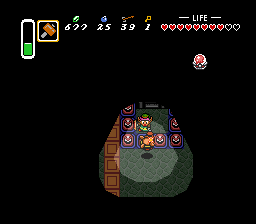
Walk to the northeast corner of this region with Kiki the Monkey following you. There is a large entrance that is locked. If you walk up to it, Kiki will offer to open the entrance in exchange for 100 rupees. Agree to do so and then enter the first dungeon of the Dark World, the Dark Palace.
6.2 Dark Palace
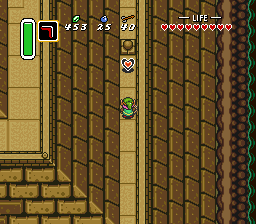
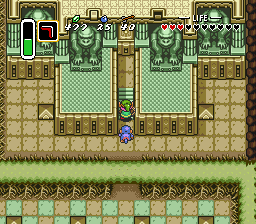
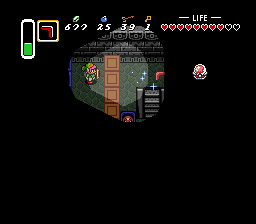
Once you enter the dungeon, step on the floor switch on the left side of the room and head up through the door that opens. Here you will find an enemy Helmasaur. These creatures cannot be harmed from the front as their helmet protects them. Slash them from behind or at their side to defeat them. Alternatively you can use a pot to toss at them. Climb down the steps to the lower floor.


You will find a pair of Medusa statues that will shoot fireballs out towards you. Avoid them and lift the pot at the bottom-left corner of the room. Step on the switch to cause a treasure chest to appear. Open it up to get a small key and then head back up the stairs.

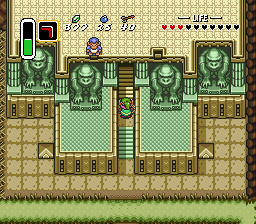
From the dungeon entrance, the pathway on the right side is completely optional. It will lead to the Dungeon Map, a fountain of fairies, and a small key. However, the dungeon can be completed without this small key. From the entrance head up two screens from the center of the room, using the small key you just got. You will encounter enemy Terrorpins here, but you cannot defeat them quite yet, so just run past them. You’ll also encounter a Blue Bari, which you can strike with your sword, but be sure to do so when it is not electrified. On the right side of the room, there are two blocks. Push the one on the right to the right, causing it to fall off. Drop down to the floor below.


Once you drop down, lift the nearby skull and step on the switch that is underneath. Open the nearby treasure chest to get a small key and then step into the portal at the top-right portion of the room. There is another portal that you can step in here, but don’t do so. This path leads to the Dungeon Map and an extra small key like I mentioned earlier. Instead, climb up the stairs at the top of the screen.


Push the statue to the left out of the way and then head up a screen in the center of the room once again. This time take the pathway on the left side. As you head up the narrow pathway, you’ll see part of the ground is cracked. Place a bomb to blow it open and then fall down the hole.


Walk to the top of the room and use the small key on the locked door. Walk up the steps and open the treasure chest to get the Big Key! Leap off the ledge to the right and once again step through the warp portal. Climb up the steps, push the block out of the way, and once again head up a screen.


Take the right pathway once again. This time walk past the blocks and head up a screen. Open the treasure chest found here to get a small key. There is an arrow on the ground and if you walk in that direction, Link will leap over the gap and safely land on the next platform. Climb the steps and make your way to the northwest corner of the room. Open the locked door and head up a screen.


This next room can be tricky. You need to lift the pots, quickly run northward and lift another set of pots while avoiding or defeating the two Helmasaurs. What makes it difficult is the floor will begin to crumble below you. The best strategy is to grab one of the skull pots when you first walk in and toss it at the Helmasaur. To get passed the second Helmasaur, you can use your Pegasus Shoes to dash by him, but you must quickly recover and lift the pots before he can get to you. Alternatively, you can use Ether to freeze him, or Quake or Magic Powder to transform him into slime, making him easy to defeat. Once you successfully make it across, head right a screen.


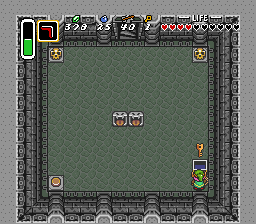
You can open the treasure chest here to get the Compass. Then walk down either of the two staircases in this room to get down to the lower floor. You can use your Lamp to light up the room if you’d like. There are a pair of Anti-Fairies in this room, so you can use Magic Powder to turn them into fairies and capture one if you’d like. A bunch of blue rupees can be found along the floor, so be sure to grab them. At the bottom of the room there are two treasure chests, one containing some arrows and the other containing a small key. Grab the small key and then head back up the stairs.


DO NOT go through the door that is at the south end of the room. That just leads back to one of the large central rooms and we don’t need to waste the small key. Instead, walk back left a screen and use the small key to open up the locked door here. This room is dark and is filled with a few green Kodongos, who will shoot fireballs towards Link. Walk through the maze and at the northwest corner of the room, Link will find a treasure chest with some bombs. From that treasure chest, you can make your way to the southwest corner of the room, and then the southeast corner of the room where there is a treasure chest containing a small key.


Just north of the small key treasure chest, there is a crack in the wall on the right side. Place a bomb and blow open the hole. Walk on through and open the big treasure chest to get the dungeon item, the Magic Hammer. With the Hammer in hand, use the Magic Mirror to return to the dungeon entrance.


From the dungeon entrance, head up two screens. Now that you have the Magic Hammer you can use it to flip the enemy Terrorpins on their backs, revealing their soft bellies. Slash at them with your sword to defeat them. Take the left pathway and head up a screen. Take the left pathway and leap over to the large central platform. The enemy Hardhat Beetles can be quite annoying here, along the Bumper in the center of the room. You can use either the Magic Hammer or the sword to harm them. Once they have been defeated, use your Boomerang to hit the crystal switch. This will lower the blue blocks that were blocking the path. Walk right across the lowered blue blocks and head right a screen.


Walk to the northeast corner of the room and lift the three skull pots. There is a floor switch in the corner of the room, but it won’t stay down. Link will need to pull the large statue nearby and have it stand right on top of the floor switch. This will keep the door open, so climb the steps and head on through.


There is a trio of Goriyas in this room that mirror your movements. The green ones are easy to defeat as you can just face directly at them and shoot them with an arrow. The red one will shoot a fireball towards you if it directly faces you. The trick is to face the red Goriya, but not directly in line. Shoot an arrow and then quickly move left or right, so that the Goriya will move right onto the direction the arrow is moving. After two arrow hits the red Goriya will be defeated and the door will open, so head on through.


There is a Blade Trap moving rapidly in this area. Wait until it passes you and then quickly run to the right side of the room. There is a statue here with a large eye. Pull out your bow and shoot an arrow at the eye. This will cause the wall to the right to move, revealing a staircase. Walk on over and head down the steps.


Use the Magic Hammer to smack the moles nearby, allowing Link to walk by. You can use the Hammer to flip over the Terrorpins and defeat them as well. Stand near the top-left portion of the room and shoot an arrow or toss the Boomerang at the crystal switch, switching which blocks are lowered. Use the last small key you have on the locked door and head left a room. NOTE: If you don’t have a small key, this is likely because you either missed one or used a small key on an unnecessary door. Remember, there is a small key in the room right before you got the Magic Hammer. Additionally, from the dungeon entrance, the pathway on the right leads to a small key.
Defeat the lone Terrorpin in this room and then head down a screen. This room has two torches that Link can light with the Lamp, as well as six Terrorpins. Defeat all the enemies and then head right through the door that opens up. Push the top-right block downward in this room and then step into the warp portal.


Walk up through this narrow area and defeat the four Terrorpins that are in your way. Once you are ready, head on through the locked door to take on the dungeon boss, the Helmasaur King.


The Helmasaur King will move around the room and has a variety of attacks. He will continuously swing his tail back and forth, but will occasionally swing it further, attempting to hit Link in front of him. The Helmasaur King will also shoot a ball of fire out towards Link, which will then separate into three separate balls. Each separate ball will then split into four balls, always going in the four diagonal directions. The Helmasaur King also deals damage on contact, so try to make sure he doesn’t move into you.
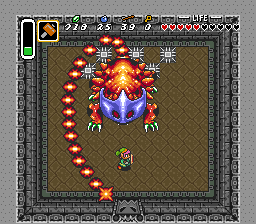
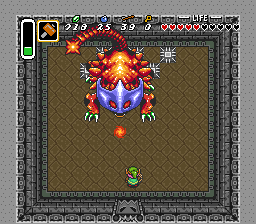
To defeat the Helmasaur King, you must first remove its front mask. Link can do this in two ways: by either hitting him with the Magic Hammer or by blowing up the mask with some bombs. The Helmasaur King also deals damage on contact, so try to make sure he doesn’t move into you.
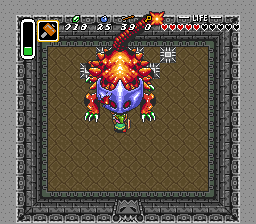

After the mask has been broken, a green jewel will be revealed on top of the Helmasaur King. Link can now strike this jewel with his sword or shoot an arrow at it. It will take any combination of 8 sword strikes or arrows to defeat.


After the Helmasaur King has been defeated, be sure to grab the heart container to increase your total health to 11 heart containers. Walk on over and grab the first crystal to speak with the first of the seven maidens.


- Chapter 1 – Zelda’s Rescue
- Chapter 2 – Eastern Palace
- Chapter 3 – Desert Palace
- Chapter 4 – Tower of Hera
- Chapter 5 – Hyrule Castle Tower
- Chapter 6 – Dark Palace
- Chapter 7 – Swamp Palace
- Chapter 8 – Skull Woods
- Chapter 9 – Gargoyle’s Domain
- Chapter 10 – Ice Palace
- Chapter 11 – Misery Mire
- Chapter 12 – Turtle Rock
- Chapter 13 – Ganon’s Tower
