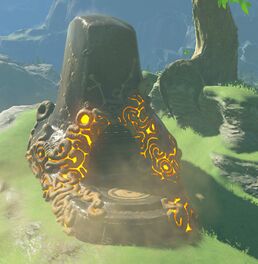
Mezza Lo Shrine
Games | ||
Location | ||
Inhabitants | ||
Items | ||
Rewards | ||
| Attributes | ||
|---|---|---|
Type | ||
| Guides | ||
Walkthrough | ||
Mezza Lo Shrine, also known as Ancient Trifecta, is one of the many Shrine of Trials from Breath of the Wild.
Requirements
Shrine Quest: The Crowned Beast
- Main article: The Crowned Beast
Talk to Kass to begin the Shrine Quest. Kass will give you a musical hint and it will require Link to find a Mountain Buck.[1]
Find a mountain buck in the area, mount it, and ride it to the pedestal next to Kass to complete the quest and unlock the shrine. This will be similar to mounting a wild horse and the best bet is to use the Stealth Set if you have it, as well as crouching down and slowly sneaking up on the buck.
Ancient Trifecta
This shrine contains a crystal switch located to the right from where you enter the shrine. When struck, this crystal rotates a platform in the center of the room clockwise through four positions. The area on the left has a treasure chest, the area on the opposite side has a floor switch, and the area on the right is where the Monk is located. In order to reach the monk, the switch at the north end of the room must be pressed down. This can be done by using Magnesis and grabbing the treasure chest that is on the left side.
As with many shrines in Breath of the Wild, there are numerous solutions to this puzzle, although it can be a bit tricky. Note that the laser in the room is being blocked by a large metallic block. If this block is moved, the laser will hit the crystal switch, rotating the platform. Link can use Stasis on the laser statue to temporarily freeze it, which will cause the laser to strike the crystal when it unfreezes. Link can also use Magnesis to control the large block and move it between the laser and the crystal, and then drop it, causing the laser to strike the switch again.
Solutions
- Easiest Solution (Grab the metal cube and place it on the floor switch that opens the door to the altar. Now use Stasis on the laser repeatedly, stepping onto the platform when it gets to you, continuing to use Stasis until you are at the altar.)
- In almost all cases, Link will need to hit the crystal switch a total of three times in order to make it to the monk.
- In almost all other cases, Link will also need to use Magnesis to grab the treasure chest and place it on the floor switch, opening the gate that leads to the monk.
Solution #1
- Move the block so that it is completely out of the way and not involved with the puzzle at all. It is possible to use the block on the floor switch instead of the treasure chest.
- Stand on the rotating platform and repeatedly use Stasis on the laser statue. Each time it freezes and unfreezes, the laser will strike the crystal switch, rotating the platform. Link can use Stasis on the laser statue from anywhere in the room.
Solution #2
- Place a bomb next to the crystal switch, but do not detonate it.
- Move the metallic block so that it anywhere near the center of the room.
- Stand on the rotating platform and grab the metal block with Magnesis. Move it so that it blocks the laser, and then move it away. The laser will strike the crystal, rotating the platform.
- Shoot an arrow at the crystal to rotate the moving platform again.
- Detonate the bomb to hit the crystal a third time and reach the area that leads to the Monk.
Solution #3
- Move the Metal block and place it in front of the ledge that leads to the treasure chest.
- Climb near the crystal and then leap off and use the Paraglider to reach the metal block.
- Use Magnesis to grab the treasure chest and place it on the floor switch.
- Return to the crystal switch and hit the orb so the moving platform is nearby.
- Use Magnesis to place the large metal block on top of the moving platform.
- Climb on top of the block and use the paraglider to travel over to the area that leads to the Monk.
References
- ↑ "Kass", A beast that wears a crown of bone,
Prancing through the lush green.
Mount the beast upon its throne,
For only then the shrine is seen.


