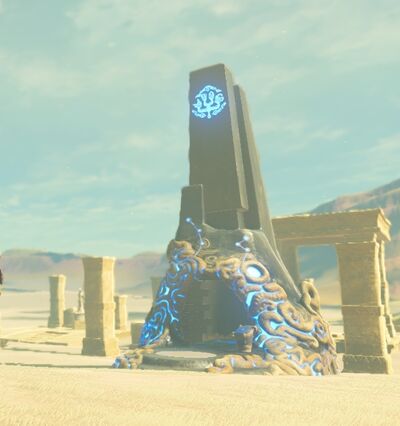
Takama Shiri Shrine
| This article describes a subject exclusive to game downloadable content and may not apply to the base game. |
Games | ||
Location | ||
Inhabitants | ||
Items | ||
Rewards | ||
Related | ||
| Attributes | ||
|---|---|---|
Type | ||
The Takama Shiri Shrine, also known as Dual Purpose, is one of the many Shrine of Trials from Breath of the Wild.
This shrine is located northwest of Gerudo Town, and is accessed during the Divine Beast Tamer's Trial, as a part of The Champions' Ballad DLC pack.
Requirements
- DLC pack 2: The Champions' Ballad downloaded.
- All four Divine Beasts completed.
- Complete the four additional Shrines on the Great Plateau
Discovering the Shrine
This objective requires you to get a Sand Seal. I recommend heading to Gerudo Town and speak with Frelly to rent out a sand seal. Once you are outside on the desert, head to the northwest of Gerudo Town. You will find a blue circle and once you move through it, another circle appears further ahead. Continue going through a series of circles until you make it to the end and the Takama Shiri Shrine appears.
Shrine Guide
The shrine is titled the Dual Purpose, as there a series of metallic platforms that you will need to pass through areas, as well as continue the electric current. In the first room use Magnesis to move both platforms to the left and make your way towards the locked gate. Then turn around and pull the two blocks to the other side, causing electric current to flow through and open the door.
In the second room, disconnect the first metallic block so that it is no longer charged. You can do this by moving the second block, or by moving the block closest to the electricity. Jump onto the first block and make your way along the perimeter to the right. From here create a safe path using the blocks to reach the platform that has the electricity.
Push a block so that it is right up against the locked gate, and a second block right next to it, so you can easily walk over to it. Now use remaining two blocks to transfer electricity across to the other side, causing the gate to open. Make sure neither of the blocks are touching the blocks closest to the gate, otherwise you won't be able to walk on them.
In this final room there is a treasure chest that you can get. Behind the blocks, if you look on the ground you'll find an electric pathway. Move the blocks so that electricity flows to the ground, opening the gate. You can open the treasure chest to get a Royal Bow.
Some of the blocks have a grating that you can climb up. First, move the blocks away from the electricity and arrange them so you can climb up to the platform next to the locked gate. From here, you want to grab the block on the top row and move it all the way against where the locked gate is located as we will need this to climb on top. Now arrange the six remaining blocks so that you can transfer electricity to the circuit on the other end of the room. Be sure the top row block that you can climb up is not electrified. Climb on hope and head to the next room where you will find the monk.
Items or equipment that provide the Unshockable bonus (such as the upgraded Rubber Set or the Thunder Helm) will allow you to walk across electrified blocks without harm.


