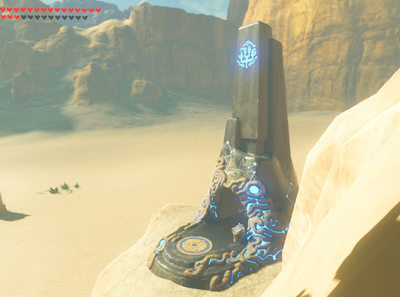
Keive Tala Shrine
| This article describes a subject exclusive to game downloadable content and may not apply to the base game. |
Games | ||
Location | East Barrens in the Gerudo Desert | |
Inhabitants | ||
Items | ||
Rewards | ||
Related | ||
| Attributes | ||
|---|---|---|
Type | ||
The Keive Tala Shrine, also known as Big or Small, is one of the many Shrine of Trials from Breath of the Wild.
This shrine is located near the East Barrens, and is accessed during the Divine Beast Tamer's Trial, as a part of The Champions' Ballad DLC pack.
Requirements
- DLC pack 2: The Champions' Ballad downloaded.
- All four Divine Beasts completed.
- Complete the four additional Shrines on the Great Plateau
- The quest: EX Champion Urbosa's Song must be trigged
- Defeat the Molduking in the East Barrens
Discovering the Shrine
Make your way over to the southeast portion of the Gerudo Desert, east of the Misae Suma Shrine and southwest of the South Lomei Labyrinth. You will find a traveler here, Traysi, and in the sand below a giant Molduking. This will trigger a battle with the Molduking. The battle itself is not much different than that of a regular Molduga Battle, but it is much stronger and more durable.
Throughout the sand region, there are some pillars that stick out of the ground. I recommended climbing up on top of one to stay away from Molduga's reach. Then toss a bomb, causing Molduga to come swallow it up. Explode it while it's inside to stun Molduga. Then jump down and deliver some sword strikes. Urbosa's Fury is also very useful against this Molduga. Repeat this process until the enemy has been defeated, causing the Keive Tala Shrine to appear.
Shrine Guide
The shrine is titled Big or Small, as you will need to use either big or small electric boxes to continue the chain of electricity throughout the shrine. Just to the left when you enter there is an electric charge that has a ball and chain that sticks into the water. Grab one of the small boxes to the right with Magnesis and place it here, causing the electricity to pass through.
If you follow the electric path, it splits, with one going to a glowing orange orb. Grab one of the second small boxes with Magnesis and connect the power to orange orb, causing the platform to rise. Then place the small block on top of it to continue the electric current.
Up ahead you will find a massive ball and chain. Grab it with Magnesis and toss it over the bar that extends outward from the wall, causing the electric current to pass through. The last point of interest requires use of the large block. However, it isn't quite tall enough. So first, use Cryonis to create and ice block and then toss the large block on top of the ice block, causing the electricity to go through the circuit, opening a path to the monk.
There is an optional treasure chest if you turn to the right. You can use motion controls to shoot the laser at the switches, activating or deactivating the platform. You have to line them up so the electric current passes through all four of them. This will cause the nearby gate to open and you can reach the treasure chest that contains a Radiant Shield.


