Mount Drena: Difference between revisions
No edit summary |
mNo edit summary |
||
| (40 intermediate revisions by 7 users not shown) | |||
| Line 1: | Line 1: | ||
{{Infobox|location | {{Infobox|location | ||
| image = [[File:Mount-Drena. | | image = [[File:Mount-Drena.jpg|400px]] | ||
| game = ''[[The Legend of Zelda: Breath of the Wild|Breath of the Wild]]'' | | caption = | ||
| game = ''[[The Legend of Zelda: Breath of the Wild|Breath of the Wild]]''<br/>''[[The Legend of Zelda: Tears of the Kingdom|Tears of the Kingdom]]'' | |||
| enemies = | |||
| inhab = | | inhab = | ||
| pointsint = | | pointsint = | ||
| location = [[Hebra]]/[[Central Hyrule]] border | |||
| item = | | item = | ||
| natseason = | | natseason = | ||
| related = [[ | | counterpart_header = Depths Counterpart | ||
| counterpart = [[Drena Canyon Mine]] | |||
| related = [[North Tabantha Snowfield]]<br/>[[South Tabantha Snowfield]]<br/>[[North Lomei Labyrinth]]<br/>[[Drenan Highlands]] | |||
}} | }} | ||
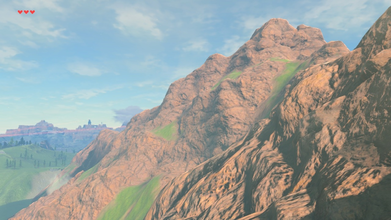
'''Mount Drena''' is a location found in ''[[The Legend of Zelda: Breath of the Wild|Breath of the Wild]]''. It is a | '''Mount Drena''' is a location found in ''[[The Legend of Zelda: Breath of the Wild|Breath of the Wild]]'' and ''[[The Legend of Zelda: Tears of the Kingdom|Tears of the Kingdom]]''. It is a long mountain ridge situated to the west of the [[Great Hyrule Forest]], extending into [[Hebra]]. | ||
== | ==''Breath of the Wild''== | ||
Mount Drena is a | Mount Drena is a mountain ridge found northeast of the [[Snowfield Stable]] and just east of the [[North Tabantha Snowfield]] with two peaks - one in [[Central Hyrule]], one in [[Hebra]], with a ragged ridge linking the two. | ||
===North Peak=== | |||
The northern peak, in Hebra, overlooks the [[North Lomei Labyrinth]] to the northeast and is bitterly cold. As such, [[Link (Breath of the Wild)|Link]] will need to either wear armor or consume food with high-level [[Cold Resistance]] in order to survive for an extended period of time. | |||
Throughout the mountain, there are many chests that Link can find with a variety of treasures, as well as other points of interest: | |||
*Just north of this peak of the mountain, there is a [[Bokoblin]] camp with a pair of [[Blue Bokoblin]]s on the watchtowers, and a trio of [[Black Bokoblin]]s huddled around a campfire. The many Bokoblins are protecting a treasure chest that holds 5 [[Ice Arrow]]s. | |||
*Another Bokoblin camp can be found at the south side of the peak, this one having the same arrangement of Blue and Black Bokoblins possibly alongside a more dangerous [[Silver Bokoblin]] (provided that the [[World Level]] has increased sufficiently). A treasure chest can be found here that contains 5 [[Shock Arrow]]s. Another treasure chest is found just southeast of here, down the cliff behind some destructible rocks. This one contains 5 [[Fire Arrow]]s. | |||
*At the peak of the mountain there are two boulders that Link can roll down the hill. If rolled to the southeast, they will travel quite a ways before landing in a hole, at which point a [[Korok]] will produce itself. A bit east of here, at a much lower elevation, there are some more destructible rocks on the side of a cliff with a treasure chest behind it that contains a [[Hylia Series]] [[Breath of the Wild Spears|spear]], such as a [[Knight's Halberd]]. | |||
*To the northeast of the peak, there is a block puzzle where Link can get a [[Korok Seed]]. Just south of there, Link will find some long-dead [[Guardian (Breath of the Wild)|Guardian]]s, as well as one [[Decayed Guardian]] that will only come to life when Link draws near. | |||
*Two more treasure chests can be found in the area, one is just to the east, a bit down the mountain. There is yet another pile of destructible boulders against the side of the cliff, behind which lies a treasure chest that contains a [[Silver Rupee]]. Another is much further to the northeast, almost to the North Lomei Labyrinth. There is another faulty wall here, and the treasure chest behind it has another Silver Rupee. | |||
== | ===South Peak=== | ||
While Link can spend quite a while collecting everything on the peak in Hebra, the southern peak holds far less for him than its northern brother. There is a Korok at the summit, and a chest containing a Hylia Series spear, such as a [[Royal Halberd]], at the top of the mountain. The weather in this area is temperate, with the exception of the highest point (low-level Cold Resistance is recommended here). | |||
== | ===Animals=== | ||
< | <gallery mode=nolines> | ||
File:Cold-darner.png|[[Cold Darner]] | |||
File:Great-horned-rhinoceros.jpg|[[Great-Horned Rhinoceros]] | |||
File:Tabantha-moose.jpg|[[Tabantha Moose]] | |||
File:White-pigeon.jpg|[[White Pigeon]] | |||
File:Winterwing-butterfly.png|[[Winterwing Butterfly]] | |||
</gallery> | |||
< | ===Items=== | ||
<gallery mode=nolines> | |||
File:Cool_Safflina.png|[[Cool Safflina]] | |||
File:Swift_Violet.png|[[Swift Violet]] | |||
</gallery> | |||
< | ===Enemies=== | ||
<gallery mode=nolines> | |||
File:Blue-Bokoblin-Model.png|[[Blue Bokoblin]] | |||
File:Black-Bokoblin-Model.png|[[Black Bokoblin]] | |||
File:Silver-Bokoblin.png|[[Silver Bokoblin]] | |||
File:Ice-chuchu.jpg|[[Ice ChuChu|Ice Chuchu]] | |||
File:Stalmoblin.jpg|[[Stalmoblin]] | |||
</gallery> | |||
<section begin= | ===Nearby Korok Seeds=== | ||
<section begin=Seed639summary />[[File:Korok639.png|200px|thumb|left|Pick up the rock on the peak of the mountain.]]<section end=Seed639summary />Pick up the rock at the moutain's peak.{{Korok Seed|Seed639}}{{Clear|left}} | |||
<section begin= | <section begin=Seed674summary />[[File:Korok674.png|200px|thumb|left|On top of the temple, use [[Magnesis]] to put the cube back in its rightful spot.]]<section end=Seed674summary />Solve the block puzzle with [[Magnesis]].{{Korok Seed|Seed674}}{{Clear|left}} | ||
<section begin= | <section begin=Seed681summary />[[File:Korok681.png|200px|thumb|left|Complete the block puzzle with the metal block.]]<section end=Seed681summary />Solve the block puzzle by making use of [[Magnesis]].{{Korok Seed|Seed681}}{{Clear|left}} | ||
{{Cat|Breath of the Wild Locations}} | <section begin=Seed682summary />[[File:Korok682.png|200px|thumb|left|Roll a boulder (from uphill to the northwest) into the hole.]]<section end=Seed682summary />Roll a boulder from the northwest into the hole down the slope.{{Korok Seed|Seed682}}{{Clear|left}} | ||
<section begin=Seed694summary />[[File:Korok694.png|200px|thumb|left|Complete the three rock circles, using the rock lying in one of the circles.]]<section end=Seed694summary />Correct the rock pattern by using the stray rock in the centre of the circle.{{Korok Seed|Seed694}}{{Clear|left}} | |||
<section begin=Seed760summary />[[File:Korok760.png|200px|thumb|left|Inside the Forgotten Temple, behind the [[Goddess Statue]]'s head, north of the shrine, lift the rock.]]<section end=Seed760summary />All the way at the very back of the Forgotten Temple, behind the [[Goddess Statue]]'s head, lift the rock.{{Korok Seed|Seed760}}{{Clear|left}} | |||
==''Tears of the Kingdom''== | |||
Mount Drena is a mountain range stretching from just west of the [[Great Hyrule Forest]], all the way to the [[North Tabantha Snowfield]]. It consists of two peaks - one in [[Hebra]], the other in [[Central Hyrule]]. The west end of Mount Drena is very cold, requiring Link to have [[Cold Resistance]] in order to survive. Early in the game, when the [[Blizzard]] is effecting [[Rito Village (Tears of the Kingdom)|Rito Village]], it will be continuously snowing at Mount Drena. | |||
Between the two peaks, just north of the main path, there is a small camp with a [[Bokoblin]], [[Blue Bokoblin]], and [[Blue Moblin]]. A treasure chest can be found at the camp containing five [[Arrow]]s. | |||
Just to the northwest of the southpeak of Mount Drena, there are some ruins that fell from the sky. Here there is a treasure chest partially buried that contains three [[Rocket]]s. | |||
Just south of the southeast peak of Mount Drena, there are some more ruins. In the center, there is a treasure chest that contains three [[Light]]s. | |||
In between the two mountain peaks, there is a crossroads along the main path. [[Addison]] can be found here holding a [[Hudson Sign]]. Link can help him hold the sign and as a reward, he'll give Link a [[Red Rupee]], some [[Meaty Rice Balls]], and a [[Bomb Flower]]. | |||
===Kikakin Shrine=== | |||
{{main|Kikakin Shrine}} | |||
At the southeast peak of Mount Drena, a shrine can be visible just slightly to the northeast. The [[Kikakin Shrine]], titled ''Shining in Darkness'', requires Link to carry a light through dark corridors, uncovering treasure chests along the way. | |||
===Korok Seeds=== | |||
*At the southeast peak of Mount Drena, there is a cork stuck in a stump. Attach the nearby [[Wing]] to the cork to weigh it down, causing the cork to pull out. | |||
*At the south end of the southeast peak, there is a Korok who got separated from his friend. Grab him and take him directly west, down the hill, to reunite him with his friend. | |||
*Southeast of the west peak, there is a boulder in a small crater. Just up to the northwest there a three-pronged pedestal. Place the boulder on the pedestal to get the [[Korok Seed]]. | |||
*East of the western peak, almost at the edge of the cliff. Near the bottom of this area on the cliffside, there is an overhang with a stump on the ceiling. Use [[Ascend]] to get through the stump and get the Korok Seed. | |||
*Northeast of the northern peak, there is a rock arrangement, with one rock missing. Pick up the nearby rock and place it in its proper location to get the Korok Seed. | |||
===Animals=== | |||
<gallery mode=nolines> | |||
File:Grassland_Fox_-_TotK_Compendium.png|[[Grassland Fox]] | |||
File:Maraudo_Wolf_-_TotK_Compendium.png|[[Maraudo Wolf]] | |||
File:Mountain_Goat_-_TotK_Compendium.png|[[Mountain Goat]] | |||
File:Pink_Heron_-_TotK_Compendium.png|[[Pink Heron]] | |||
</gallery> | |||
===Enemies=== | |||
<gallery mode=nolines> | |||
File:Bokoblin_-_TotK_Compendium.png|[[Bokoblin]] | |||
File:Blue_Bokoblin_-_TotK_Compendium.png|[[Blue Bokoblin]] | |||
File:Blue_Moblin_-_TotK_Compendium.png|[[Blue Moblin]] | |||
File:Electric_Chuchu_-_TotK_Compendium.png|[[Electric Chuchu]] | |||
File:Frost_Pebblit_-_TotK_Compendium.png|[[Frost Pebblit]] | |||
</gallery> | |||
===Bugs and Materials=== | |||
<gallery mode=nolines> | |||
File:Apple_-_TotK_icon.png|[[Apple]] | |||
File:Chillshroom_-_TotK_icon.png|[[Chillshroom]] | |||
File:Courser_Bee_Honey_-_TotK_icon.png|[[Courser Bee Honey]] | |||
File:Fire_Fruit_-_TotK_icon.png|[[Fire Fruit]] | |||
File:Hot-Footed_Frog_-_TotK_icon.png|[[Hot-Footed Frog]] | |||
File:Palm_Fruit_-_TotK_icon.png|[[Palm Fruit]] | |||
File:Restless_Cricket_-_TotK_icon.png|[[Restless Cricket]] | |||
File:Spicy_Pepper_-_TotK_icon.png|[[Spicy Pepper]] | |||
File:Splash_Fruit_-_TotK_icon.png|[[Splash Fruit]] | |||
File:Stambulb_-_TotK_icon.png|[[Stambulb]] | |||
File:Stamella_Shroom_-_TotK_icon.png|[[Stamella Shroom]] | |||
File:Summerwing_Butterfly_-_TotK_icon.png|[[Summerwing Butterfly]] | |||
File:Warm_Darner_-_TotK_icon.png|[[Warm Darner]] | |||
</gallery> | |||
==Gallery== | |||
<gallery widths="400px" heights="220px"> | |||
File:Mount-Drena.png | |||
File:Mount-Drena-Hudson-Sign.png|[[Addison]] and a [[Hudson Sign]] | |||
</gallery> | |||
{{Listbox|Breath of the Wild Central Hyrule Locations}} | |||
{{Listbox|Tears of the Kingdom Central Hyrule Locations}} | |||
{{Cat|Breath of the Wild Central Hyrule Locations}} | |||
{{cat|Tears of the Kingdom Central Hyrule Locations}} | |||
Latest revision as of 20:46, April 21, 2024

Games | ||
Location | Hebra/Central Hyrule border | |
Depths Counterpart | ||
Related | ||
Mount Drena is a location found in Breath of the Wild and Tears of the Kingdom. It is a long mountain ridge situated to the west of the Great Hyrule Forest, extending into Hebra.
Breath of the Wild
Mount Drena is a mountain ridge found northeast of the Snowfield Stable and just east of the North Tabantha Snowfield with two peaks - one in Central Hyrule, one in Hebra, with a ragged ridge linking the two.
North Peak
The northern peak, in Hebra, overlooks the North Lomei Labyrinth to the northeast and is bitterly cold. As such, Link will need to either wear armor or consume food with high-level Cold Resistance in order to survive for an extended period of time.
Throughout the mountain, there are many chests that Link can find with a variety of treasures, as well as other points of interest:
- Just north of this peak of the mountain, there is a Bokoblin camp with a pair of Blue Bokoblins on the watchtowers, and a trio of Black Bokoblins huddled around a campfire. The many Bokoblins are protecting a treasure chest that holds 5 Ice Arrows.
- Another Bokoblin camp can be found at the south side of the peak, this one having the same arrangement of Blue and Black Bokoblins possibly alongside a more dangerous Silver Bokoblin (provided that the World Level has increased sufficiently). A treasure chest can be found here that contains 5 Shock Arrows. Another treasure chest is found just southeast of here, down the cliff behind some destructible rocks. This one contains 5 Fire Arrows.
- At the peak of the mountain there are two boulders that Link can roll down the hill. If rolled to the southeast, they will travel quite a ways before landing in a hole, at which point a Korok will produce itself. A bit east of here, at a much lower elevation, there are some more destructible rocks on the side of a cliff with a treasure chest behind it that contains a Hylia Series spear, such as a Knight's Halberd.
- To the northeast of the peak, there is a block puzzle where Link can get a Korok Seed. Just south of there, Link will find some long-dead Guardians, as well as one Decayed Guardian that will only come to life when Link draws near.
- Two more treasure chests can be found in the area, one is just to the east, a bit down the mountain. There is yet another pile of destructible boulders against the side of the cliff, behind which lies a treasure chest that contains a Silver Rupee. Another is much further to the northeast, almost to the North Lomei Labyrinth. There is another faulty wall here, and the treasure chest behind it has another Silver Rupee.
South Peak
While Link can spend quite a while collecting everything on the peak in Hebra, the southern peak holds far less for him than its northern brother. There is a Korok at the summit, and a chest containing a Hylia Series spear, such as a Royal Halberd, at the top of the mountain. The weather in this area is temperate, with the exception of the highest point (low-level Cold Resistance is recommended here).
Animals


Items


Enemies


Nearby Korok Seeds

Pick up the rock at the moutain's peak.

Solve the block puzzle with Magnesis.

Solve the block puzzle by making use of Magnesis.

Roll a boulder from the northwest into the hole down the slope.

Correct the rock pattern by using the stray rock in the centre of the circle.

All the way at the very back of the Forgotten Temple, behind the Goddess Statue's head, lift the rock.
Tears of the Kingdom
Mount Drena is a mountain range stretching from just west of the Great Hyrule Forest, all the way to the North Tabantha Snowfield. It consists of two peaks - one in Hebra, the other in Central Hyrule. The west end of Mount Drena is very cold, requiring Link to have Cold Resistance in order to survive. Early in the game, when the Blizzard is effecting Rito Village, it will be continuously snowing at Mount Drena.
Between the two peaks, just north of the main path, there is a small camp with a Bokoblin, Blue Bokoblin, and Blue Moblin. A treasure chest can be found at the camp containing five Arrows.
Just to the northwest of the southpeak of Mount Drena, there are some ruins that fell from the sky. Here there is a treasure chest partially buried that contains three Rockets.
Just south of the southeast peak of Mount Drena, there are some more ruins. In the center, there is a treasure chest that contains three Lights.
In between the two mountain peaks, there is a crossroads along the main path. Addison can be found here holding a Hudson Sign. Link can help him hold the sign and as a reward, he'll give Link a Red Rupee, some Meaty Rice Balls, and a Bomb Flower.
Kikakin Shrine
- Main article: Kikakin Shrine
At the southeast peak of Mount Drena, a shrine can be visible just slightly to the northeast. The Kikakin Shrine, titled Shining in Darkness, requires Link to carry a light through dark corridors, uncovering treasure chests along the way.
Korok Seeds
- At the southeast peak of Mount Drena, there is a cork stuck in a stump. Attach the nearby Wing to the cork to weigh it down, causing the cork to pull out.
- At the south end of the southeast peak, there is a Korok who got separated from his friend. Grab him and take him directly west, down the hill, to reunite him with his friend.
- Southeast of the west peak, there is a boulder in a small crater. Just up to the northwest there a three-pronged pedestal. Place the boulder on the pedestal to get the Korok Seed.
- East of the western peak, almost at the edge of the cliff. Near the bottom of this area on the cliffside, there is an overhang with a stump on the ceiling. Use Ascend to get through the stump and get the Korok Seed.
- Northeast of the northern peak, there is a rock arrangement, with one rock missing. Pick up the nearby rock and place it in its proper location to get the Korok Seed.
Animals


Enemies


Bugs and Materials
Gallery

Addison and a Hudson Sign

