Gallery:Breath of the Wild Hyrule Compendium: Difference between revisions
(→Monsters: Okay, I don't have most of the actual numbers for these, but filling in the gaps...) |
m (Text replacement - "Dragon Bone Boko Bow" to "Dragon Bone Boko Bow") |
||
| (28 intermediate revisions by 4 users not shown) | |||
| Line 1: | Line 1: | ||
{{stub}} | {{stub}} | ||
Below is a gallery of every entry in the ''[[The Legend of Zelda: Breath of the Wild|Breath of the Wild]]'' [[Breath of the Wild Hyrule Compendium|Hyrule Compendium]]. Next to each entry, there are four numbers, indicating the entry number within the Hyrule Compendium. These differ, depending on whether [[Link]] is playing in regular mode or [[Master Mode]]. Additionally, there were added entries in the Hyrule Compendium with the release of The Champions' Ballad DLC. | |||
Below is a gallery of every entry in the [[Hyrule Compendium]]. Next to each entry, there are four numbers, indicating the entry number within the Hyrule Compendium. These differ, depending on whether [[Link]] is playing in regular mode or [[Master Mode]]. Additionally, there were added entries in the Hyrule Compendium with the release of The Champions' Ballad DLC. | |||
*Base game entry number | *Base game entry number | ||
| Line 11: | Line 10: | ||
===Creatures=== | ===Creatures=== | ||
{{Gallery|size=150|pad=0|margin=0}} | {{Gallery|size=150|pad=0|margin=0}} | ||
{{Gallery/Box|file=Hyrule-Compendium-Horse.png|caption=[[Horse]]<br/>001 / 001 / 001 / 001}} | {{Gallery/Box|file=Hyrule-Compendium-Horse.png|caption=[[Horse (Breath of the Wild)|Horse]]<br/>001 / 001 / 001 / 001}} | ||
{{Gallery/Box|file=Hyrule-Compendium-Giant-Horse.png|caption=[[Giant Horse]]<br/>002 / 002 / 002 / 002}} | {{Gallery/Box|file=Hyrule-Compendium-Giant-Horse.png|caption=[[Giant Horse]]<br/>002 / 002 / 002 / 002}} | ||
{{Gallery/Box|file=Hyrule-Compendium-White-Horse.png|caption=[[White Horse]]<br/>003 / 003 / 003 / 003}} | {{Gallery/Box|file=Hyrule-Compendium-White-Horse.png|caption=[[White Horse]]<br/>003 / 003 / 003 / 003}} | ||
| Line 95: | Line 94: | ||
{{Gallery/Box|file=Hyrule-Compendium-Fireproof-Lizard.png|caption=[[Fireproof Lizard]]<br/>083 / 083 / 083 / 083}} | {{Gallery/Box|file=Hyrule-Compendium-Fireproof-Lizard.png|caption=[[Fireproof Lizard]]<br/>083 / 083 / 083 / 083}} | ||
{{Gallery/Bottom}} | {{Gallery/Bottom}} | ||
===Monsters=== | ===Monsters=== | ||
| Line 107: | Line 105: | ||
{{Gallery/Box|file=Hyrule-Compendium-Ice-Keese.png|caption=[[Ice Keese]]<br/>090 / 090 / 090 / 090}} | {{Gallery/Box|file=Hyrule-Compendium-Ice-Keese.png|caption=[[Ice Keese]]<br/>090 / 090 / 090 / 090}} | ||
{{Gallery/Box|file=Hyrule-Compendium-Electric-Keese.png|caption=[[Electric Keese]]<br/>091 / 091 / 091 / 091}} | {{Gallery/Box|file=Hyrule-Compendium-Electric-Keese.png|caption=[[Electric Keese]]<br/>091 / 091 / 091 / 091}} | ||
{{Gallery/Box|file=Water-octorok.jpg|caption=[[Water Octorok]]<br/> | {{Gallery/Box|file=Water-octorok.jpg|caption=[[Water Octorok]]<br/>092 / 092 / 092 / 092}} | ||
{{Gallery/Box|file=Forest-octorok.jpg|caption=[[Forest Octorok]]<br/> | {{Gallery/Box|file=Forest-octorok.jpg|caption=[[Forest Octorok]]<br/>093 / 093 / 093 / 093}} | ||
{{Gallery/Box|file=Rock-octorok.jpg|caption=[[Rock Octorok]]<br/> | {{Gallery/Box|file=Rock-octorok.jpg|caption=[[Rock Octorok]]<br/>094 / 094 / 094 / 094}} | ||
{{Gallery/Box|file=Snow-octorok.jpg|caption=[[Snow Octorok]]<br/> | {{Gallery/Box|file=Snow-octorok.jpg|caption=[[Snow Octorok]]<br/>095 / 095 / 095 / 095}} | ||
{{Gallery/Box|file=Treasure-octorok.jpg|caption=[[Treasure Octorok]]<br/> | {{Gallery/Box|file=Treasure-octorok.jpg|caption=[[Treasure Octorok]]<br/>096 / 096 / 096 / 096}} | ||
{{Gallery/Box|file=Sky-octorok.jpg|caption=[[Sky Octorok]]<br/> | {{Gallery/Box|file=Sky-octorok.jpg|caption=[[Sky Octorok]]<br/>--- / --- / 097 / 097}} | ||
{{Gallery/Box|file=Fire-wizzrobe.jpg|caption=[[Fire Wizzrobe]]<br/> | {{Gallery/Box|file=Fire-wizzrobe.jpg|caption=[[Fire Wizzrobe]]<br/>097 / 097 / 098 / 098}} | ||
{{Gallery/Box|file=Ice-wizzrobe.jpg|caption=[[Ice Wizzrobe]]<br/> | {{Gallery/Box|file=Ice-wizzrobe.jpg|caption=[[Ice Wizzrobe]]<br/>098 / 098 / 099 / 099}} | ||
{{Gallery/Box|file=Electric-wizzrobe.jpg|caption=[[Electric Wizzrobe]]<br/> | {{Gallery/Box|file=Electric-wizzrobe.jpg|caption=[[Electric Wizzrobe]]<br/>099 / 099 / 100 / 100}} | ||
{{Gallery/Box|file=Meteo-wizzrobe.jpg|caption=[[Meteo Wizzrobe]]<br/> | {{Gallery/Box|file=Meteo-wizzrobe.jpg|caption=[[Meteo Wizzrobe]]<br/>100 / 100 / 101 / 101}} | ||
{{Gallery/Box|file=Blizzrobe.jpg|caption=[[Blizzrobe]]<br/> | {{Gallery/Box|file=Blizzrobe.jpg|caption=[[Blizzrobe]]<br/>101 / 101 / 102 / 102}} | ||
{{Gallery/Box|file=Thunder-wizzrobe.jpg|caption=[[Thunder Wizzrobe]]<br/> | {{Gallery/Box|file=Thunder-wizzrobe.jpg|caption=[[Thunder Wizzrobe]]<br/>102 / 102 / 103 / 103}} | ||
{{Gallery/Box|file=Hyrule-Compendium-Bokoblin.png|caption=[[Bokoblin]]<br/>103 / 103 / 104 / 104}} | {{Gallery/Box|file=Hyrule-Compendium-Bokoblin.png|caption=[[Bokoblin]]<br/>103 / 103 / 104 / 104}} | ||
{{Gallery/Box|file=Hyrule-Compendium-Blue-Bokoblin.png|caption=[[Blue Bokoblin]]<br/>104 / 104 / 105 / 105}} | {{Gallery/Box|file=Hyrule-Compendium-Blue-Bokoblin.png|caption=[[Blue Bokoblin]]<br/>104 / 104 / 105 / 105}} | ||
| Line 153: | Line 151: | ||
{{Gallery/Box|file=Hyrule-Compendium-Guardian-Scout-II.png|caption=[[Guardian Scout II]]<br/>131 / 131 / 136 / 136}} | {{Gallery/Box|file=Hyrule-Compendium-Guardian-Scout-II.png|caption=[[Guardian Scout II]]<br/>131 / 131 / 136 / 136}} | ||
{{Gallery/Box|file=Hyrule-Compendium-Guardian-Scout-III.png|caption=[[Guardian Scout III]]<br/>132 / 132 / 137 / 137}} | {{Gallery/Box|file=Hyrule-Compendium-Guardian-Scout-III.png|caption=[[Guardian Scout III]]<br/>132 / 132 / 137 / 137}} | ||
{{Gallery/Box|file=Hyrule-Compendium-Guardian-Scout-IV.png|caption=[[Guardian Scout IV]]<br/>133 / 133 / 138 / 138}}{{Gallery/Box|file=Yiga-footsoldier.jpg|caption=[[Yiga Footsoldier]]<br/> | {{Gallery/Box|file=Hyrule-Compendium-Guardian-Scout-IV.png|caption=[[Guardian Scout IV]]<br/>133 / 133 / 138 / 138}} | ||
{{Gallery/Box|file=Yiga-blademaster.jpg|caption=[[Yiga Blademaster]]<br/> | {{Gallery/Box|file=Yiga-footsoldier.jpg|caption=[[Yiga Footsoldier]]<br/>134 / 134 / 139 / 139}} | ||
{{Gallery/Box|file=Master-kohga.jpg|caption=[[Master Kohga]]<br/> | {{Gallery/Box|file=Yiga-blademaster.jpg|caption=[[Yiga Blademaster]]<br/>135 / 135 / 140 / 140}} | ||
{{Gallery/Box|file=Monk-maz-koshia.jpg|caption=[[Monk Maz Koshia]]<br/> | {{Gallery/Box|file=Master-kohga.jpg|caption=[[Master Kohga]]<br/>136 / 136 / 141 / 141}} | ||
{{Gallery/Box|file=Stone-talus.jpeg|caption=[[Stone Talus]]<br/> | {{Gallery/Box|file=Monk-maz-koshia.jpg|caption=[[Monk Maz Koshia]]<br/>--- / 137 / --- / 142}} | ||
{{Gallery/Box|file=Stone-talus-luminous.jpg|caption=[[Stone Talus (Luminous)]]<br/> | {{Gallery/Box|file=Stone-talus.jpeg|caption=[[Stone Talus]]<br/>137 / 138 / 142 / 143}} | ||
{{Gallery/Box|file=Stone-talus-rare.jpg|caption=[[Stone Talus (Rare)]]<br/> | {{Gallery/Box|file=Stone-talus-luminous.jpg|caption=[[Stone Talus (Luminous)]]<br/>138 / 139 / 143 / 144}} | ||
{{Gallery/Box|file=Igneo-talus.jpg|caption=[[Igneo Talus]]<br/> | {{Gallery/Box|file=Stone-talus-rare.jpg|caption=[[Stone Talus (Rare)]]<br/>139 / 140 / 144 / 145}} | ||
{{Gallery/Box|file=Frost-talus.jpg|caption=[[Frost Talus]]<br/> | {{Gallery/Box|file=Igneo-talus.jpg|caption=[[Igneo Talus]]<br/>140 / 141 / 145 / 146}} | ||
{{Gallery/Box|file=Stone-pebblit.jpg|caption=[[Stone Pebblit]]<br/> | {{Gallery/Box|file=Frost-talus.jpg|caption=[[Frost Talus]]<br/>141 / 142 / 146 / 147}} | ||
{{Gallery/Box|file=Igneo-pebblit.jpg|caption=[[Igneo Pebblit]]<br/> | {{Gallery/Box|file=Stone-pebblit.jpg|caption=[[Stone Pebblit]]<br/>142 / 143 / 147 / 148}} | ||
{{Gallery/Box|file=Frost-pebblit.jpg|caption=[[Frost Pebblit]]<br/> | {{Gallery/Box|file=Igneo-pebblit.jpg|caption=[[Igneo Pebblit]]<br/>143 / 144 / 148 / 149}} | ||
{{Gallery/Box|file=Igneo-talus-titan.jpg|caption=[[Igneo Talus Titan]]<br/> | {{Gallery/Box|file=Frost-pebblit.jpg|caption=[[Frost Pebblit]]<br/>144 / 145 / 149 / 150}} | ||
{{Gallery/Box|file=Hinox-botw.jpg|caption=[[Hinox]]<br/> | {{Gallery/Box|file=Igneo-talus-titan.jpg|caption=[[Igneo Talus Titan]]<br/>--- / 146 / --- / 151}} | ||
{{Gallery/Box|file=Blue-hinox.jpg|caption=[[Blue Hinox]]<br/> | {{Gallery/Box|file=Hinox-botw.jpg|caption=[[Hinox]]<br/>145 / 147 / 150 / 152}} | ||
{{Gallery/Box|file=Black-hinox.jpg|caption=[[Black Hinox]]<br/> | {{Gallery/Box|file=Blue-hinox.jpg|caption=[[Blue Hinox]]<br/>146 / 148 / 151 / 153}} | ||
{{Gallery/Box|file=Stalnox.jpg|caption=[[Stalnox]]<br/> | {{Gallery/Box|file=Black-hinox.jpg|caption=[[Black Hinox]]<br/>147 / 149 / 152 / 154}} | ||
{{Gallery/Box|file=Molduga.jpg|caption=[[Molduga]]<br/> | {{Gallery/Box|file=Stalnox.jpg|caption=[[Stalnox]]<br/>148 / 150 / 153 / 155}} | ||
{{Gallery/Box|file=Molduking.jpg|caption=[[Molduking]]<br/> | {{Gallery/Box|file=Molduga.jpg|caption=[[Molduga]]<br/>149 / 151 / 154 / 156}} | ||
{{Gallery/Box|file=Dinraal.jpg|caption=[[Dinraal]]<br/> | {{Gallery/Box|file=Molduking.jpg|caption=[[Molduking]]<br/>--- / 152 / --- / 157}} | ||
{{Gallery/Box|file=Naydra.jpg|caption=[[Naydra]]<br/> | {{Gallery/Box|file=Dinraal.jpg|caption=[[Dinraal]]<br/>150 / 153 / 155 / 158}} | ||
{{Gallery/Box|file=Farosh.jpg|caption=[[Farosh]]<br/> | {{Gallery/Box|file=Naydra.jpg|caption=[[Naydra]]<br/>151 / 154 / 156 / 159}} | ||
{{Gallery/Box|file=Cursed-bokoblin.jpg|caption=[[Cursed Bokoblin]]<br/> | {{Gallery/Box|file=Farosh.jpg|caption=[[Farosh]]<br/>152 / 155 / 157 / 160}} | ||
{{Gallery/Box|file=Cursed-moblin.jpg|caption=[[Cursed Moblin]]<br/> | {{Gallery/Box|file=Cursed-bokoblin.jpg|caption=[[Cursed Bokoblin]]<br/>153 / 156 / 158 / 161}} | ||
{{Gallery/Box|file=Cursed Lizalfos.jpg|caption=[[Cursed Lizalfos]]<br/> | {{Gallery/Box|file=Cursed-moblin.jpg|caption=[[Cursed Moblin]]<br/>154 / 157 / 159 / 162}} | ||
{{Gallery/Box|file=Thunderblight-ganon.jpg|caption=[[Thunderblight Ganon]]<br/> | {{Gallery/Box|file=Cursed Lizalfos.jpg|caption=[[Cursed Lizalfos]]<br/>155 / 158 / 160 / 163}} | ||
{{Gallery/Box|file=Fireblight-ganon.jpg|caption=[[Fireblight Ganon]]<br/> | {{Gallery/Box|file=Thunderblight-ganon.jpg|caption=[[Thunderblight Ganon]]<br/>156 / 159 / 161 / 164}} | ||
{{Gallery/Box|file=Waterblight-ganon.jpg|caption=[[Waterblight Ganon]]<br/> | {{Gallery/Box|file=Fireblight-ganon.jpg|caption=[[Fireblight Ganon]]<br/>157 / 160 / 162 / 165}} | ||
{{Gallery/Box|file=Windblight-ganon-2.jpg|caption=[[Windblight Ganon]]<br/> | {{Gallery/Box|file=Waterblight-ganon.jpg|caption=[[Waterblight Ganon]]<br/>158 / 161 / 163 / 166}} | ||
{{Gallery/Box|file=Calamity-ganon.jpg|caption=[[Calamity Ganon]]<br/> | {{Gallery/Box|file=Windblight-ganon-2.jpg|caption=[[Windblight Ganon]]<br/>159 / 162 / 164 / 167}} | ||
{{Gallery/Box|file=Dark-beast-ganon.jpg|caption=[[Dark Beast Ganon]]<br/> | {{Gallery/Box|file=Calamity-ganon.jpg|caption=[[Calamity Ganon]]<br/>160 / 163 / 165 / 168}} | ||
{{Gallery/Box|file=Dark-beast-ganon.jpg|caption=[[Dark Beast Ganon]]<br/>161 / 164 / 166 / 169}} | |||
{{Gallery/Bottom}} | {{Gallery/Bottom}} | ||
| Line 225: | Line 224: | ||
{{Gallery/Box|file=Hyrule-Compendium-Courser-Bee-Honey.png|caption=[[Courser Bee Honey]]<br/>197 / 200 / 202 / 205}} | {{Gallery/Box|file=Hyrule-Compendium-Courser-Bee-Honey.png|caption=[[Courser Bee Honey]]<br/>197 / 200 / 202 / 205}} | ||
{{Gallery/Bottom}} | {{Gallery/Bottom}} | ||
===Equipment=== | ===Equipment=== | ||
{{Gallery|size=150|pad=0|margin=0}} | {{Gallery|size=150|pad=0|margin=0}} | ||
{{Gallery/Box|file=Hyrule-Compendium-Master-Sword.png|caption=[[Master Sword]]<br/>198 / 201 / 203 / 206}} | |||
{{Gallery/Box|file=Hyrule-Compendium-Tree-Branch.png|caption=[[Tree Branch]]<br/>199 / 202 / 204 / 207}} | {{Gallery/Box|file=Hyrule-Compendium-Tree-Branch.png|caption=[[Tree Branch]]<br/>199 / 202 / 204 / 207}} | ||
{{Gallery/Box|file=Hyrule-Compendium-Torch.png|caption=[[Torch (Breath of the Wild)|Torch]]<br/>200 / 203 / 205 / 208}} | {{Gallery/Box|file=Hyrule-Compendium-Torch.png|caption=[[Torch (Breath of the Wild)|Torch]]<br/>200 / 203 / 205 / 208}} | ||
{{Gallery/Box|file=Hyrule-Compendium-Soup-Ladle.png|caption=[[Soup Ladle]]<br/>201 / 204 / 206 / 209}} | |||
{{Gallery/Box|file=Hyrule-Compendium-Boomerang.png|caption=[[Boomerang]]<br/>202 / 205 / 207 / 210}} | |||
{{Gallery/Box|file=Hyrule-Compendium-Spring-Loaded-Hammer.png|caption=[[Spring-Loaded Hammer]]<br/>202 / 205 / 208 / 211}} | |||
{{Gallery/Box|file=Hyrule-Compendium-Travelers-Sword.png|caption=[[Traveler's Sword]]<br/>204 / 207 / 209 / 212}} | {{Gallery/Box|file=Hyrule-Compendium-Travelers-Sword.png|caption=[[Traveler's Sword]]<br/>204 / 207 / 209 / 212}} | ||
{{Gallery/Box|file=Hyrule-Compendium-Soldiers-Broadsword.png|caption=[[Soldier's Broadsword]]<br/>205 / 208 / 210 / 213}} | {{Gallery/Box|file=Hyrule-Compendium-Soldiers-Broadsword.png|caption=[[Soldier's Broadsword]]<br/>205 / 208 / 210 / 213}} | ||
{{Gallery/Box|file=Hyrule-Compendium-Knights-Broadsword.png|caption=[[Knight's Broadsword]]<br/>206 / 209 / 211 / 214}} | {{Gallery/Box|file=Hyrule-Compendium-Knights-Broadsword.png|caption=[[Knight's Broadsword]]<br/>206 / 209 / 211 / 214}} | ||
{{Gallery/Box|file=Hyrule-Compendium-Royal-Broadsword.png|caption=[[Royal Broadsword]]<br/>207 / 210 / 212 / 215}} | {{Gallery/Box|file=Hyrule-Compendium-Royal-Broadsword.png|caption=[[Royal Broadsword]]<br/>207 / 210 / 212 / 215}} | ||
{{Gallery/Box|file=Hyrule-Compendium-Forest-Dweller's-Sword.png|caption=[[Forest Dweller's Sword]]<br/>208 / 211 / 213 / 216}} | |||
{{Gallery/Box|file=Hyrule-Compendium-Zora-Sword.png|caption=[[Zora Sword]]<br/>209 / 212 / 214 / 217}} | |||
{{Gallery/Box|file=Hyrule-Compendium-Feathered-Edge.png|caption=[[Feathered Edge]]<br/>210 / 213 / 215 / 218}} | |||
{{Gallery/Box|file=Hyrule-Compendium-Gerudo-Scimitar.png|caption=[[Gerudo Scimitar]]<br/>211 / 214 / 216 / 219}} | |||
{{Gallery/Box|file=Hyrule-Compendium-Moonlight-Scimitar.png|caption=[[Moonlight Scimitar]]<br/>212 / 215 / 217 / 220}} | |||
{{Gallery/Box|file=Hyrule-Compendium-Scimitar-of-the-Seven.png|caption=[[Scimitar of the Seven]]<br/>213 / 216 / 218 / 221}} | |||
{{Gallery/Box|file=Hyrule-Compendium-Eightfold-Blade.png|caption=[[Eightfold Blade]]<br/>214 / 217 / 219 / 222}} | |||
{{Gallery/Box|file=Hyrule-Compendium-Ancient-Short-Sword.png|caption=[[Ancient Short Sword]]<br/>215 / 218 / 220 / 223}} | |||
{{Gallery/Box|file=Hyrule-Compendium-Rusty-Broadsword.png|caption=[[Rusty Broadsword]]<br/>216 / 219 / 221 / 224}} | {{Gallery/Box|file=Hyrule-Compendium-Rusty-Broadsword.png|caption=[[Rusty Broadsword]]<br/>216 / 219 / 221 / 224}} | ||
{{Gallery/Box|file=Hyrule-Compendium-Royal-Guards-Sword.png|caption=[[Royal Guard's Sword]]<br/>217 / 222 / 221 / 225}} | {{Gallery/Box|file=Hyrule-Compendium-Royal-Guards-Sword.png|caption=[[Royal Guard's Sword]]<br/>217 / 222 / 221 / 225}} | ||
| Line 243: | Line 253: | ||
{{Gallery/Box|file=Hyrule-Compendium-Spiked-Boko-Club.png|caption=[[Spiked Boko Club]]<br/>222 / 225 / 227 / 230}} | {{Gallery/Box|file=Hyrule-Compendium-Spiked-Boko-Club.png|caption=[[Spiked Boko Club]]<br/>222 / 225 / 227 / 230}} | ||
{{Gallery/Box|file=Hyrule-Compendium-Dragonbone-Boko-Club.png|caption=[[Dragonbone Boko Club]]<br/>223 / 226 / 228 / 231}} | {{Gallery/Box|file=Hyrule-Compendium-Dragonbone-Boko-Club.png|caption=[[Dragonbone Boko Club]]<br/>223 / 226 / 228 / 231}} | ||
{{Gallery/Box|file=Hyrule-Compendium-Lizal-Boomerang.png|caption=[[Lizal Boomerang]]<br/>224 / 227 / 229 / 232}} | |||
{{Gallery/Box|file=Hyrule-Compendium-Lizal-Forked-Boomerang.png|caption=[[Lizal Forked Boomerang]]<br/>225 / 228 / 230 / 233}} | |||
{{Gallery/Box|file=Hyrule-Compendium-Lizal-Tri-Boomerang.png|caption=[[Lizal Tri-Boomerang]]<br/>226 / 229 / 231 / 234}} | |||
{{Gallery/Box|file=Hyrule-Compendium-Guardian-Sword.png|caption=[[Guardian Sword]]<br/>227 / 230 / 232 / 235}} | |||
{{Gallery/Box|file=Hyrule-Compendium-Guardian-Sword+.png|caption=[[Guardian Sword+]]<br/>228 / 231 / 233 / 236}} | |||
{{Gallery/Box|file=Hyrule-Compendium-Guardian-Sword++.png|caption=[[Guardian Sword++]]<br/>229 / 232 / 234 / 237}} | |||
{{Gallery/Box|file=Hyrule-Compendium-Lynel-Sword.png|caption=[[Lynel Sword]]<br/>230 / 233 / 235 / 238}} | |||
{{Gallery/Box|file=Hyrule-Compendium-Mighty-Lynel-Sword.png|caption=[[Mighty Lynel Sword]]<br/>231 / 234 / 236 / 239}} | |||
{{Gallery/Box|file=Hyrule-Compendium-Savage-Lynel-Sword.png|caption=[[Savage Lynel Sword]]<br/>232 / 235 / 237 / 240}} | |||
{{Gallery/Box|file=Hyrule-Compendium-Fire-Rod.png|caption=[[Fire Rod]]<br/>233 / 236 / 238 / 241}} | |||
{{Gallery/Box|file=Hyrule-Compendium-Meteor-Rod.png|caption=[[Meteor Rod]]<br/>234 / 237 / 239 / 242}} | |||
{{Gallery/Box|file=Hyrule-Compendium-Ice-Rod.png|caption=[[Ice Rod]]<br/>235 / 238 / 240 / 243}} | |||
{{Gallery/Box|file=Hyrule-Compendium-Blizzard-Rod.png|caption=[[Blizzard Rod]]<br/>236 / 239 / 241 / 244}} | |||
{{Gallery/Box|file=Hyrule-Compendium-Lightning-Rod.png|caption=[[Lightning Rod]]<br/>237 / 240 / 242 / 245}} | |||
{{Gallery/Box|file=Hyrule-Compendium-Thunderstorm-Rod.png|caption=[[Thunderstorm Rod]]<br/>238 / 241 / 243 / 246}} | |||
{{Gallery/Box|file=Hyrule-Compendium-Vicious-Sickle.png|caption=[[Vicious Sickle]]<br/>239 / 242 / 244 / 247}} | |||
{{Gallery/Box|file=Hyrule-Compendium-Demon-Carver.png|caption=[[Demon Carver]]<br/>240 / 243 / 245 / 248}} | |||
{{Gallery/Box|file=Hyrule-Compendium-One-Hit-Obliterator.png|caption=[[One-Hit Obliterator]]<br/>--- / 244 / --- / 249}} | |||
{{Gallery/Box|file=Hyrule-Compendium-Bokoblin-Arm.png|caption=[[Bokoblin Arm]]<br/>241 / 245 / 246 / 250}} | {{Gallery/Box|file=Hyrule-Compendium-Bokoblin-Arm.png|caption=[[Bokoblin Arm]]<br/>241 / 245 / 246 / 250}} | ||
{{Gallery/Box|file=Hyrule-Compendium-Lizalfos-Arm.png|caption=[[Lizalfos Arm]]<br/>242 / 246 / 247 / 251}} | {{Gallery/Box|file=Hyrule-Compendium-Lizalfos-Arm.png|caption=[[Lizalfos Arm]]<br/>242 / 246 / 247 / 251}} | ||
{{Gallery/Box|file=Hyrule-Compendium-Korok-Leaf.png|caption=[[Korok Leaf]]<br/>243 / 247 / 248 / 252}} | {{Gallery/Box|file=Hyrule-Compendium-Korok-Leaf.png|caption=[[Korok Leaf]]<br/>243 / 247 / 248 / 252}} | ||
{{Gallery/Box|file=Hyrule-Compendium-Farming-Hoe.png|caption=[[Farming Hoe]]<br/>244 / 248 / 249 / 253}} | {{Gallery/Box|file=Hyrule-Compendium-Farming-Hoe.png|caption=[[Farming Hoe]]<br/>244 / 248 / 249 / 253}} | ||
{{Gallery/Box|file=Hyrule-Compendium-Boat-Oar.png|caption=[[Boat Oar]]<br/>245 / 249 / 250 / 254}} | |||
{{Gallery/Box|file=Hyrule-Compendium-Woodcutters-Axe.png|caption=[[Woodcutter's Axe]]<br/>246 / 250 / 251 / 255}} | {{Gallery/Box|file=Hyrule-Compendium-Woodcutters-Axe.png|caption=[[Woodcutter's Axe]]<br/>246 / 250 / 251 / 255}} | ||
{{Gallery/Box|file=Hyrule-Compendium-Double-Axe.png|caption=[[Double Axe]]<br/>247 / 251 / 252 / 256}} | {{Gallery/Box|file=Hyrule-Compendium-Double-Axe.png|caption=[[Double Axe]]<br/>247 / 251 / 252 / 256}} | ||
| Line 274: | Line 303: | ||
{{Gallery/Box|file=Hyrule-Compendium-Spiked-Moblin-Club.png|caption=[[Spiked Moblin Club]]<br/>271 / 275 / 276 / 280}} | {{Gallery/Box|file=Hyrule-Compendium-Spiked-Moblin-Club.png|caption=[[Spiked Moblin Club]]<br/>271 / 275 / 276 / 280}} | ||
{{Gallery/Box|file=Hyrule-Compendium-Dragonbone-Moblin-Club.png|caption=[[Dragonbone Moblin Club]]<br/>272 / 276 / 277 / 281}} | {{Gallery/Box|file=Hyrule-Compendium-Dragonbone-Moblin-Club.png|caption=[[Dragonbone Moblin Club]]<br/>272 / 276 / 277 / 281}} | ||
{{Gallery/Box|file=Hyrule-Compendium-Ancient-Battle-Axe.png|caption=[[Ancient Battle Axe]]<br/>273 / 277 / 278 / 282}} | |||
{{Gallery/Box|file=Hyrule-Compendium-Ancient-Battle-Axe+.png|caption=[[Ancient Battle Axe+]]<br/>274 / 278 / 279 / 283}} | |||
{{Gallery/Box|file=Hyrule-Compendium-Ancient-Battle-Axe++.png|caption=[[Ancient Battle Axe++]]<br/>275 / 279 / 280 / 284}} | |||
{{Gallery/Box|file=Hyrule-Compendium-Lynel-Crusher.png|caption=[[Lynel Crusher]]<br/>276 / 280 / 281 / 285}} | |||
{{Gallery/Box|file=Hyrule-Compendium-Mighty-Lynel-Crusher.png|caption=[[Mighty Lynel Crusher]]<br/>277 / 281 / 282 / 286}} | |||
{{Gallery/Box|file=Hyrule-Compendium-Savage-Lynel-Crusher.png|caption=[[Savage Lynel Crusher]]<br/>278 / 282 / 283 / 287}} | |||
{{Gallery/Box|file=Hyrule-Compendium-Windcleaver.png|caption=[[Windcleaver]]<br/>279 / 283 / 284 / 288}} | {{Gallery/Box|file=Hyrule-Compendium-Windcleaver.png|caption=[[Windcleaver]]<br/>279 / 283 / 284 / 288}} | ||
{{Gallery/Box|file=Hyrule-Compendium-Moblin-Arm.png|caption=[[Moblin Arm]]<br/>280 / 284 / 285 / 289}} | {{Gallery/Box|file=Hyrule-Compendium-Moblin-Arm.png|caption=[[Moblin Arm]]<br/>280 / 284 / 285 / 289}} | ||
| Line 285: | Line 320: | ||
{{Gallery/Box|file=Hyrule-Compendium-Royal-Halberd.png|caption=[[Royal Halberd]]<br/>288 / 292 / 293 / 297}} | {{Gallery/Box|file=Hyrule-Compendium-Royal-Halberd.png|caption=[[Royal Halberd]]<br/>288 / 292 / 293 / 297}} | ||
{{Gallery/Box|file=Hyrule-Compendium-Forest-Dwellers-Spear.png|caption=[[Forest Dweller's Spear]]<br/>289 / 293 / 294 / 298}} | {{Gallery/Box|file=Hyrule-Compendium-Forest-Dwellers-Spear.png|caption=[[Forest Dweller's Spear]]<br/>289 / 293 / 294 / 298}} | ||
{{Gallery/Box|file=Hyrule-Compendium-Zora-Spear.png|caption=[[Zora Spear]]<br/>290 / 294 / 295 / 299}} | |||
{{Gallery/Box|file=Hyrule-Compendium-Silverscale-Spear.png|caption=[[Silverscale Spear]]<br/>291 / 295 / 296 / 300}} | |||
{{Gallery/Box|file=Hyrule-Compendium-Ceremonial-Trident.png|caption=[[Ceremonial Trident]]<br/>292 / 296 / 297 / 301}} | |||
{{Gallery/Box|file=Hyrule-Compendium-Lightscale-Trident.png|caption=[[Lightscale Trident]]<br/>293 / 297 / 298 / 302}} | |||
{{Gallery/Box|file=Hyrule-Compendium-Drillshaft.png|caption=[[Drillshaft]]<br/>294 / 298 / 299 / 303}} | |||
{{Gallery/Box|file=Hyrule-Compendium-Feathered-Spear.png|caption=[[Feathered Spear]]<br/>295 / 299 / 300 / 304}} | |||
{{Gallery/Box|file=Hyrule-Compendium-Gerudo-Spear.png|caption=[[Gerudo Spear]]<br/>296 / 300 / 301 / 305}} | |||
{{Gallery/Box|file=Hyrule-Compendium-Serpentine-Spear.png|caption=[[Serpentine Spear]]<br/>297 / 301 / 302 / 306}} | |||
{{Gallery/Box|file=Hyrule-Compendium-Ancient-Spear.png|caption=[[Ancient Spear]]<br/>298 / 302 / 303 / 307}} | |||
{{Gallery/Box|file=Hyrule-Compendium-Rusty-Halberd.png|caption=[[Rusty Halberd]]<br/>299 / 303 / 304 / 308}} | |||
{{Gallery/Box|file=Hyrule-Compendium-Royal-Guards-Spear.png|caption=[[Royal Guard's Spear]]<br/>300 / 304 / 305 / 309}} | |||
{{Gallery/Box|file=Hyrule-Compendium-Flamespear.png|caption=[[Flamespear]]<br/>301 / 305 / 306 / 310}} | |||
{{Gallery/Box|file=Hyrule-Compendium-Frostspear.png|caption=[[Frostspear]]<br/>302 / 306 / 307 / 311}} | |||
{{Gallery/Box|file=Hyrule-Compendium-Thunderspear.png|caption=[[Thunderspear]]<br/>303 / 307 / 308 / 312}} | |||
{{Gallery/Box|file=Hyrule-Compendium-Boko-Spear.png|caption=[[Boko Spear]]<br/>304 / 308 / 309 / 313}} | {{Gallery/Box|file=Hyrule-Compendium-Boko-Spear.png|caption=[[Boko Spear]]<br/>304 / 308 / 309 / 313}} | ||
{{Gallery/Box|file=Hyrule-Compendium-Spiked-Boko-Spear.png|caption=[[Spiked Boko Spear]]<br/>305 / 309 / 310 / 314}} | {{Gallery/Box|file=Hyrule-Compendium-Spiked-Boko-Spear.png|caption=[[Spiked Boko Spear]]<br/>305 / 309 / 310 / 314}} | ||
| Line 294: | Line 343: | ||
{{Gallery/Box|file=Hyrule-Compendium-Enhanced-Lizal-Spear.png|caption=[[Enhanced Lizal Spear]]<br/>311 / 315 / 316 / 320}} | {{Gallery/Box|file=Hyrule-Compendium-Enhanced-Lizal-Spear.png|caption=[[Enhanced Lizal Spear]]<br/>311 / 315 / 316 / 320}} | ||
{{Gallery/Box|file=Hyrule-Compendium-Forked-Lizal-Spear.png|caption=[[Forked Lizal Spear]]<br/>312 / 316 / 317 / 321}} | {{Gallery/Box|file=Hyrule-Compendium-Forked-Lizal-Spear.png|caption=[[Forked Lizal Spear]]<br/>312 / 316 / 317 / 321}} | ||
{{Gallery/Box|file=Hyrule-Compendium-Guardian-Spear.png|caption=[[Guardian Spear]]<br/>313 / 317 / 318 / 322}} | |||
{{Gallery/Box|file=Hyrule-Compendium-Guardian-Spear+.png|caption=[[Guardian Spear+]]<br/>314 / 318 / 319 / 323}} | |||
{{Gallery/Box|file=Hyrule-Compendium-Guardian-Spear++.png|caption=[[Guardian Spear++]]<br/>315 / 319 / 320 / 324}} | |||
{{Gallery/Box|file=Hyrule-Compendium-Lynel-Spear.png|caption=[[Lynel Spear]]<br/>316 / 320 / 321 / 325}} | |||
{{Gallery/Box|file=Hyrule-Compendium-Mighty-Lynel-Spear.png|caption=[[Mighty Lynel Spear]]<br/>317 / 321 / 322 / 326}} | |||
{{Gallery/Box|file=Hyrule-Compendium-Savage-Lynel-Spear.png|caption=[[Savage Lynel Spear]]<br/>318 / 322 / 323 / 327}} | |||
{{Gallery/Box|file=Hyrule-Compendium-Bow-of-Light.png|caption=[[Bow of Light]]<br/>319 / 323 / 324 / 328}} | |||
{{Gallery/Box|file=Hyrule-Compendium-Wooden-Bow.png|caption=[[Wooden Bow]]<br/>320 / 324 / 325 / 329}} | |||
{{Gallery/Box|file=Hyrule-Compendium-Travelers-Bow.png|caption=[[Traveler's Bow]]<br/>321 / 325 / 326 / 330}} | {{Gallery/Box|file=Hyrule-Compendium-Travelers-Bow.png|caption=[[Traveler's Bow]]<br/>321 / 325 / 326 / 330}} | ||
{{Gallery/Box|file=Hyrule-Compendium-Soldiers-Bow.png|caption=[[Soldier's Bow]]<br/>322 / 326 / 327 / 331}} | {{Gallery/Box|file=Hyrule-Compendium-Soldiers-Bow.png|caption=[[Soldier's Bow]]<br/>322 / 326 / 327 / 331}} | ||
{{Gallery/Box|file=Hyrule-Compendium-Knights-Bow.png|caption=[[Knight's Bow]]<br/>323 / 327 / 328 / 332}} | {{Gallery/Box|file=Hyrule-Compendium-Knights-Bow.png|caption=[[Knight's Bow]]<br/>323 / 327 / 328 / 332}} | ||
{{Gallery/Box|file=Hyrule-Compendium-Royal-Bow.png|caption=[[Royal Bow]]<br/>324 / 328 / 329 / 333}} | {{Gallery/Box|file=Hyrule-Compendium-Royal-Bow.png|caption=[[Royal Bow]]<br/>324 / 328 / 329 / 333}} | ||
{{Gallery/Box|file=Hyrule-Compendium-Forest-Dweller's-Bow.png|caption=[[Forest Dweller's Bow]]<br/>325 / 329 / 330 / 334}} | |||
{{Gallery/Box|file=Hyrule-Compendium-Silver-Bow.png|caption=[[Silver Bow]]<br/>326 / 330 / 331 / 335}} | |||
{{Gallery/Box|file=Hyrule-Compendium-Swallow-Bow.png|caption=[[Swallow Bow]]<br/>327 / 331 / 332 / 336}} | |||
{{Gallery/Box|file=Hyrule-Compendium-Falcon-Bow.png|caption=[[Falcon Bow]]<br/>328 / 332 / 333 / 337}} | |||
{{Gallery/Box|file=Hyrule-Compendium-Great-Eagle-Bow.png|caption=[[Great Eagle Bow]]<br/>329 / 333 / 334 / 338}} | |||
{{Gallery/Box|file=Hyrule-Compendium-Golden-Bow.png|caption=[[Golden Bow]]<br/>330 / 334 / 335 / 339}} | |||
{{Gallery/Box|file=Hyrule-Compendium-Phrenic-Bow.png|caption=[[Phrenic Bow]]<br/>331 / 335 / 336 / 340}} | |||
{{Gallery/Box|file=Hyrule-Compendium-Ancient-Bow.png|caption=[[Ancient Bow]]<br/>332 / 336 / 337 / 341}} | |||
{{Gallery/Box|file=Hyrule-Compendium-Royal-Guards-Bow.png|caption=[[Royal Guard's Bow]]<br/>333 / 337 / 338 / 342}} | |||
{{Gallery/Box|file=Hyrule-Compendium-Boko-Bow.png|caption=[[Boko Bow]]<br/>334 / 338 / 339 / 343}} | {{Gallery/Box|file=Hyrule-Compendium-Boko-Bow.png|caption=[[Boko Bow]]<br/>334 / 338 / 339 / 343}} | ||
{{Gallery/Box|file=Hyrule-Compendium-Spiked-Boko-Bow.png|caption=[[Spiked Boko Bow]]<br/>335 / 339 / 340 / 344}} | {{Gallery/Box|file=Hyrule-Compendium-Spiked-Boko-Bow.png|caption=[[Spiked Boko Bow]]<br/>335 / 339 / 340 / 344}} | ||
{{Gallery/Box|file=Hyrule-Compendium-Dragon-Bone-Boko-Bow.png|caption=[[Dragon Bone Boko Bow]]<br/>336 / 340 / 341 / 345}} | {{Gallery/Box|file=Hyrule-Compendium-Dragon-Bone-Boko-Bow.png|caption=[[Dragonbone Boko Bow|Dragon Bone Boko Bow]]<br/>336 / 340 / 341 / 345}} | ||
{{Gallery/Box|file=Hyrule-Compendium-Lizal-Bow.png|caption=[[Lizal Bow]]<br/>337 / 341 / 342 / 346}} | |||
{{Gallery/Box|file=Hyrule-Compendium-Strengthened-Lizal-Bow.png|caption=[[Strengthened Lizal Bow]]<br/>338 / 342 / 343 / 347}} | |||
{{Gallery/Box|file=Hyrule-Compendium-Steel-Lizal-Bow.png|caption=[[Steel Lizal Bow]]<br/>339 / 343 / 344 / 348}} | |||
{{Gallery/Box|file=Hyrule-Compendium-Lynel-Bow.png|caption=[[Lynel Bow]]<br/>340 / 344 / 345 / 349}} | |||
{{Gallery/Box|file=Hyrule-Compendium-Mighty-Lynel-Bow.png|caption=[[Mighty Lynel Bow]]<br/>341 / 345 / 346 / 350}} | |||
{{Gallery/Box|file=Hyrule-Compendium-Savage-Lynel-Bow.png|caption=[[Savage Lynel Bow]]<br/>342 / 346 / 347 / 351}} | |||
{{Gallery/Box|file=Hyrule-Compendium-Duplex-Bow.png|caption=[[Duplex Bow]]<br/>343 / 347 / 348 / 352}} | |||
{{Gallery/Box|file=Hyrule-Compendium-Arrow.png|caption=[[Arrow]]<br/>344 / 348 / 349 / 353}} | {{Gallery/Box|file=Hyrule-Compendium-Arrow.png|caption=[[Arrow]]<br/>344 / 348 / 349 / 353}} | ||
{{Gallery/Box|file=Hyrule-Compendium-Fire-Arrow.png|caption=[[Fire Arrow]]<br/>345 / 349 / 350 / 354}} | {{Gallery/Box|file=Hyrule-Compendium-Fire-Arrow.png|caption=[[Fire Arrow]]<br/>345 / 349 / 350 / 354}} | ||
| Line 307: | Line 380: | ||
{{Gallery/Box|file=Hyrule-Compendium-Bomb-Arrow.png|caption=[[Bomb Arrow]]<br/>348 / 352 / 353 / 357}} | {{Gallery/Box|file=Hyrule-Compendium-Bomb-Arrow.png|caption=[[Bomb Arrow]]<br/>348 / 352 / 353 / 357}} | ||
{{Gallery/Box|file=Hyrule-Compendium-Ancient-Arrow.png|caption=[[Ancient Arrow]]<br/>349 / 353 / 354 / 358}} | {{Gallery/Box|file=Hyrule-Compendium-Ancient-Arrow.png|caption=[[Ancient Arrow]]<br/>349 / 353 / 354 / 358}} | ||
{{Gallery/Box|file=Hyrule-Compendium-Hylian-Shield.png|caption=[[Hylian Shield]]<br/>350 / 354 / 355 / 359}} | |||
{{Gallery/Box|file=Hyrule-Compendium-Pot-Lid.png|caption=[[Pot Lid]]<br/>351 / 355 / 356 / 360}} | {{Gallery/Box|file=Hyrule-Compendium-Pot-Lid.png|caption=[[Pot Lid]]<br/>351 / 355 / 356 / 360}} | ||
{{Gallery/Box|file=Hyrule-Compendium-Wooden-Shield.png|caption=[[Wooden Shield]]<br/>352 / 356 / 357 / 361}} | |||
{{Gallery/Box|file=Hyrule-Compendium-Emblazoned-Shield.png|caption=[[Emblazoned Shield]]<br/>353 / 357 / 358 / 362}} | |||
{{Gallery/Box|file=Hyrule-Compendium-Hunters-Shield.png|caption=[[Hunter's Shield]]<br/>354 / 358 / 359 / 363}} | |||
{{Gallery/Box|file=Hyrule-Compendium-Fishermans-Shield.png|caption=[[Fisherman's Shield]]<br/>355 / 359 / 360 / 364}} | |||
{{Gallery/Box|file=Hyrule-Compendium-Travelers-Shield.png|caption=[[Traveler's Shield]]<br/>356 / 360 / 361 / 365}} | |||
{{Gallery/Box|file=Hyrule-Compendium-Soldiers-Shield.png|caption=[[Soldier's Shield]]<br/>357 / 361 / 362 / 366}} | |||
{{Gallery/Box|file=Hyrule-Compendium-Knights-Shield.png|caption=[[Knight's Shield]]<br/>358 / 362 / 363 / 367}} | |||
{{Gallery/Box|file=Hyrule-Compendium-Royal-Shield.png|caption=[[Royal Shield]]<br/>359 / 363 / 364 / 368}} | |||
{{Gallery/Box|file=Hyrule-Compendium-Forest-Dwellers-Shield.png|caption=[[Forest Dweller's Shield]]<br/>360 / 364 / 365 / 369}} | |||
{{Gallery/Box|file=Hyrule-Compendium-Silver-Shield.png|caption=[[Silver Shield]]<br/>361 / 365 / 366 / 370}} | |||
{{Gallery/Box|file=Hyrule-Compendium-Kite-Shield.png|caption=[[Kite Shield]]<br/>362 / 366 / 367 / 371}} | |||
{{Gallery/Box|file=Hyrule-Compendium-Gerudo-Shield.png|caption=[[Gerudo Shield]]<br/>363 / 367 / 368 / 372}} | |||
{{Gallery/Box|file=Hyrule-Compendium-Radiant-Shield.png|caption=[[Radiant Shield]]<br/>364 / 368 / 369 / 373}} | |||
{{Gallery/Box|file=Hyrule-Compendium-Daybreaker.png|caption=[[Daybreaker]]<br/>365 / 369 / 370 / 374}} | |||
{{Gallery/Box|file=Hyrule-Compendium-Shield-of-the-Minds-Eye.png|caption=[[Shield of the Mind's Eye]]<br/>366 / 370 / 371 / 375}} | |||
{{Gallery/Box|file=Hyrule-Compendium-Ancient-Shield.png|caption=[[Ancient Shield]]<br/>367 / 371 / 372 / 376}} | |||
{{Gallery/Box|file=Hyrule-Compendium-Rusty-Shield.png|caption=[[Rusty Shield]]<br/>368 / 372 / 373 / 377}} | |||
{{Gallery/Box|file=Hyrule-Compendium-Royal-Guards-Shield.png|caption=[[Royal Guard's Shield]]<br/>369 / 373 / 374 / 378}} | |||
{{Gallery/Box|file=Hyrule-Compendium-Boko-Shield.png|caption=[[Boko Shield]]<br/>370 / 374 / 375 / 379}} | {{Gallery/Box|file=Hyrule-Compendium-Boko-Shield.png|caption=[[Boko Shield]]<br/>370 / 374 / 375 / 379}} | ||
{{Gallery/Box|file=Hyrule-Compendium-Spiked-Boko-Shield.png|caption=[[Spiked Boko Shield]]<br/>371 / 375 / 376 / 380}} | {{Gallery/Box|file=Hyrule-Compendium-Spiked-Boko-Shield.png|caption=[[Spiked Boko Shield]]<br/>371 / 375 / 376 / 380}} | ||
{{Gallery/Box|file=Hyrule-Compendium-Dragonbone-Boko-Shield.png|caption=[[Dragonbone Boko Shield]]<br/>372 / 376 / 377 / 381}} | {{Gallery/Box|file=Hyrule-Compendium-Dragonbone-Boko-Shield.png|caption=[[Dragonbone Boko Shield]]<br/>372 / 376 / 377 / 381}} | ||
{{Gallery/Box|file=Hyrule-Compendium-Lizal-Shield.png|caption=[[Lizal Shield]]<br/>373 / 377 / 378 / 382}} | |||
{{Gallery/Box|file=Hyrule-Compendium-Reinforced-Lizal-Shield.png|caption=[[Reinforced Lizal Shield]]<br/>374 / 378 / 379 / 383}} | |||
{{Gallery/Box|file=Hyrule-Compendium-Steel-Lizal-Shield.png|caption=[[Steel Lizal Shield]]<br/>375 / 379 / 380 / 384}} | |||
{{Gallery/Box|file=Hyrule-Compendium-Guardian-Shield.png|caption=[[Guardian Shield]]<br/>376 / 380 / 381 / 385}} | |||
{{Gallery/Box|file=Hyrule-Compendium-Guardian-Shield+.png|caption=[[Guardian Shield+]]<br/>377 / 381 / 382 / 386}} | |||
{{Gallery/Box|file=Hyrule-Compendium-Guardian-Shield++.png|caption=[[Guardian Shield++]]<br/>378 / 382 / 383 / 387}} | |||
{{Gallery/Box|file=Hyrule-Compendium-Lynel-Shield.png|caption=[[Lynel Shield]]<br/>379 / 383 / 384 / 388}} | |||
{{Gallery/Box|file=Hyrule-Compendium-Mighty-Lynel-Shield.png|caption=[[Mighty Lynel Shield]]<br/>380 / 384 / 385 / 389}} | |||
{{Gallery/Box|file=Hyrule-Compendium-Savage-Lynel-Shield.png|caption=[[Savage Lynel Shield]]<br/>381 / 385 / 386 / 390}} | |||
{{Gallery/Bottom}} | {{Gallery/Bottom}} | ||
===Treasures=== | ===Treasures=== | ||
{{Gallery|size=150|pad=0|margin=0}} | {{Gallery|size=150|pad=0|margin=0}} | ||
{{Gallery/Box|file=Hyrule-Compendium-Treasure-Chest.png|caption=[[Treasure Chest]]<br/>382 / 386 / 387 / 391}} | |||
{{Gallery/Box|file=Hyrule-Compendium-Ore-Deposit.png|caption=[[Ore Deposit]]<br/>383 / 387 / 388 / 392}} | |||
{{Gallery/Box|file=Hyrule-Compendium-Rare-Ore-Deposit.png|caption=[[Rare Ore Deposit]]<br/>384 / 388 / 389 / 393}} | |||
{{Gallery/Box|file=Hyrule-Compendium-Luminous-Stone-Deposit.png|caption=[[Luminous Stone Deposit]]<br/>385 / 389 / 390 / 394}} | |||
{{Gallery/Bottom}} | {{Gallery/Bottom}} | ||
{{Galleries}} | {{Galleries}} | ||
{{cat|Breath of the Wild}} | {{cat|Breath of the Wild}} | ||
Latest revision as of 23:58, July 8, 2023
| This article is a stub. You can help the Zelda Dungeon Wiki by expanding it. |
Below is a gallery of every entry in the Breath of the Wild Hyrule Compendium. Next to each entry, there are four numbers, indicating the entry number within the Hyrule Compendium. These differ, depending on whether Link is playing in regular mode or Master Mode. Additionally, there were added entries in the Hyrule Compendium with the release of The Champions' Ballad DLC.
- Base game entry number
- Base game w/ The Champions Ballad DLC
- Master Mode entry number
- Master Mode w/ The Champions Ballad DLC
Gallery
Creatures

Horse
001 / 001 / 001 / 001
Giant Horse
002 / 002 / 002 / 002
White Horse
003 / 003 / 003 / 003
Lord of the Mountain
004 / 004 / 004 / 004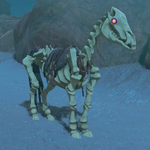
Stalhorse
005 / 005 / 005 / 005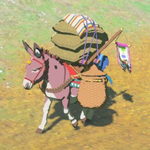
Donkey
006 / 006 / 006 / 006
Sand Seal
007 / 007 / 007 / 007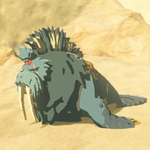
Patricia
008 / 008 / 008 / 008
Bushy-Tailed Squirrel
009 / 009 / 009 / 009
Woodland Boar
010 / 010 / 010 / 010
Red-Tusked Boar
011 / 011 / 011 / 011
Mountain Goat
012 / 012 / 012 / 012
White Goat
013 / 013 / 013 / 013
Mountain Buck
014 / 014 / 014 / 014
Mountain Doe
015 / 015 / 015 / 015
Water Buffalo
016 / 016 / 016 / 016
Hateno Cow
017 / 017 / 017 / 017
Highland Sheep
018 / 018 / 018 / 018
Grassland Fox
019 / 019 / 019 / 019
Snowcoat Fox
020 / 020 / 020 / 020
Maraudo Wolf
021 / 021 / 021 / 021
Wasteland Coyote
022 / 022 / 022 / 022
Cold-Footed Wolf
023 / 023 / 023 / 023
Tabantha Moose
024 / 024 / 024 / 024
Great-Horned Rhinoceros
025 / 025 / 025 / 025
Honeyvore Bear
026 / 026 / 026 / 026
Grizzlemaw Bear
027 / 027 / 027 / 027
Hylian Retriever
028 / 028 / 028 / 028
Blupee
029 / 029 / 029 / 029
Common Sparrow
030 / 030 / 030 / 030
Red Sparrow
031 / 031 / 031 / 031
Blue Sparrow
032 / 032 / 032 / 032
Rainbow Sparrow
033 / 033 / 033 / 033
Sand Sparrow
034 / 034 / 034 / 034
Golden Sparrow
035 / 035 / 035 / 035
Wood Pigeon
036 / 036 / 036 / 036
Rainbow Pigeon
037 / 037 / 037 / 037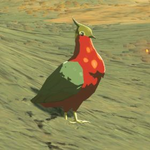
Hotfeather Pigeon
038 / 038 / 038 / 038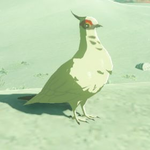
White Pigeon
039 / 039 / 039 / 039
Mountain Crow
040 / 040 / 040 / 040
Bright-Chested Duck
041 / 041 / 041 / 041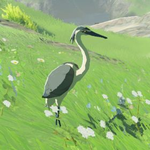
Blue-Winged Heron
042 / 042 / 042 / 042
Pink Heron
043 / 043 / 043 / 043
Islander Hawk
044 / 044 / 044 / 044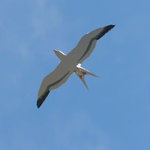
Seagull
045 / 045 / 045 / 045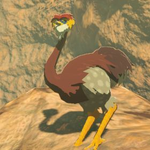
Eldin Ostrich
046 / 046 / 046 / 046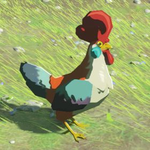
Cucco
047 / 047 / 047 / 047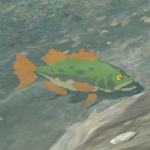
Hyrule Bass
048 / 048 / 048 / 048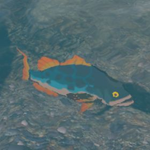
Hearty Bass
049 / 049 / 049 / 049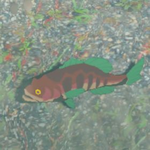
Staminoka Bass
050 / 050 / 050 / 050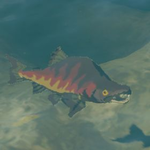
Hearty Salmon
051 / 051 / 051 / 051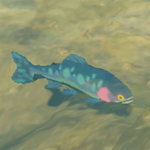
Chillfin Trout
052 / 052 / 052 / 052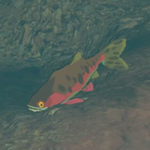
Sizzlefin Trout
053 / 053 / 053 / 053
Voltfin Trout
054 / 054 / 054 / 054
Stealthfin Trout
055 / 055 / 055 / 055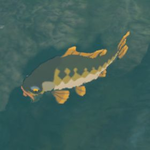
Mighty Carp
056 / 056 / 056 / 056
Armored Carp
057 / 057 / 057 / 057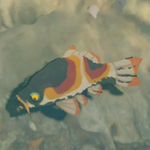
Sanke Carp
058 / 058 / 058 / 058
Mighty Porgy
059 / 059 / 059 / 059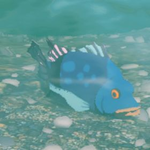
Armored Porgy
060 / 060 / 060 / 060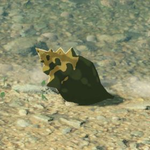
Sneaky River Snail
061 / 061 / 061 / 061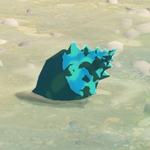
Hearty Blueshell Snail
062 / 062 / 062 / 062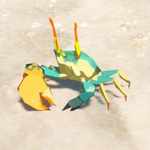
Razorclaw Crab
063 / 063 / 063 / 063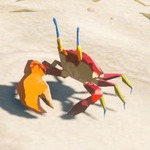
Ironshell Crab
064 / 064 / 064 / 064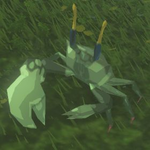
Bright-Eyed Crab
065 / 065 / 065 / 065
Fairy
066 / 066 / 066 / 066
Winterwing Butterfly
067 / 067 / 067 / 067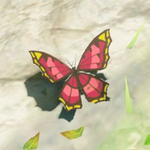
Summerwing Butterfly
068 / 068 / 068 / 068
Thunderwing Butterfly
069 / 069 / 069 / 069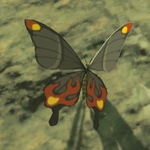
Smotherwing Butterfly
070 / 070 / 070 / 070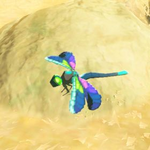
Cold Darner
071 / 071 / 071 / 071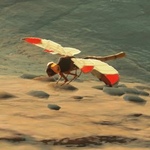
Warm Darner
072 / 072 / 072 / 072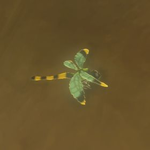
Electric Darner
073 / 073 / 073 / 073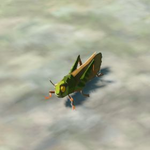
Restless Cricket
074 / 074 / 074 / 074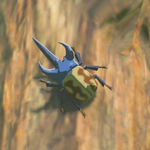
Bladed Rhino Beetle
075 / 075 / 075 / 075
Rugged Rhino Beetle
076 / 076 / 076 / 076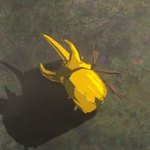
Energetic Rhino Beetle
077 / 077 / 077 / 077
Sunset Firefly
078 / 078 / 078 / 078
Hot-Footed Frog
079 / 079 / 079 / 079
Tireless Frog
080 / 080 / 080 / 080
Hightail Lizard
081 / 081 / 081 / 081
Hearty Lizard
082 / 082 / 082 / 082
Fireproof Lizard
083 / 083 / 083 / 083


Monsters

Chuchu
084 / 084 / 084 / 084
Fire Chuchu
085 / 085 / 085 / 085
Ice Chuchu
086 / 086 / 086 / 086
Electric Chuchu
087 / 087 / 087 / 087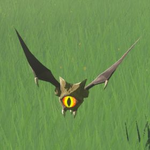
Keese
088 / 088 / 088 / 088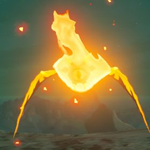
Fire Keese
089 / 089 / 089 / 089
Ice Keese
090 / 090 / 090 / 090
Electric Keese
091 / 091 / 091 / 091
Water Octorok
092 / 092 / 092 / 092
Forest Octorok
093 / 093 / 093 / 093
Rock Octorok
094 / 094 / 094 / 094
Snow Octorok
095 / 095 / 095 / 095
Treasure Octorok
096 / 096 / 096 / 096
Sky Octorok
--- / --- / 097 / 097
Fire Wizzrobe
097 / 097 / 098 / 098
Ice Wizzrobe
098 / 098 / 099 / 099
Electric Wizzrobe
099 / 099 / 100 / 100
Meteo Wizzrobe
100 / 100 / 101 / 101
Blizzrobe
101 / 101 / 102 / 102
Thunder Wizzrobe
102 / 102 / 103 / 103
Bokoblin
103 / 103 / 104 / 104
Blue Bokoblin
104 / 104 / 105 / 105
Black Bokoblin
105 / 105 / 106 / 106
Stalkoblin
106 / 106 / 107 / 107
Silver Bokoblin
107 / 107 / 108 / 108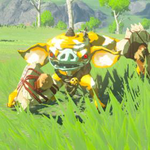
Golden Bokoblin
--- / --- / 109 / 109
Moblin
108 / 108 / 110 / 110
Blue Moblin
109 / 109 / 111 / 111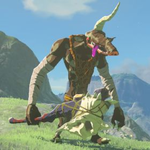
Black Moblin
110 / 110 / 112 / 112
Stalmoblin
111 / 111 / 113 / 113
Silver Moblin
112 / 112 / 114 / 114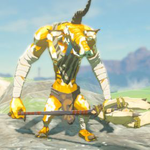
Golden Moblin
--- / --- / 115 / 115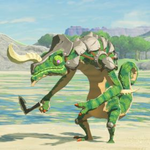
Lizalfos
113 / 113 / 116 / 116
Blue Lizalfos
114 / 114 / 117 / 117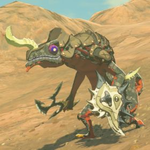
Black Lizalfos
115 / 115 / 118 / 118
Stalizalfos
116 / 116 / 119 / 119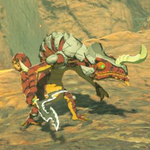
Fire-Breath Lizalfos
117 / 117 / 120 / 120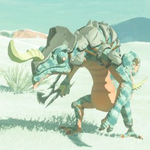
Ice-Breath Lizalfos
118 / 118 / 121 / 121
Electric Lizalfos
119 / 119 / 122 / 122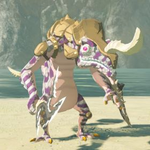
Silver Lizalfos
120 / 120 / 123 / 123
Golden Lizalfos
--- / --- / 124 / 124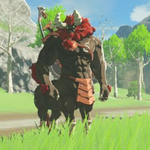
Lynel
121 / 121 / 125 / 125
Blue-Maned Lynel
122 / 122 / 126 / 126
White-Maned Lynel
123 / 123 / 127 / 127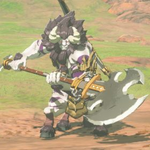
Silver Lynel
124 / 124 / 128 / 128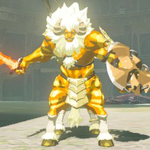
Golden Lynel
--- / --- / 129 / 129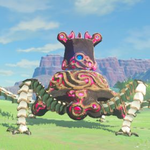
Guardian Stalker
125 / 125 / 130 / 130
Guardian Skywatcher
126 / 126 / 131 / 131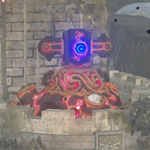
Guardian Turret
127 / 127 / 132 / 132
Sentry
128 / 128 / 133 / 133
Decayed Guardian
129 / 129 / 134 / 134
Guardian Scout I
130 / 130 / 135 / 135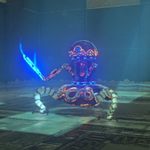
Guardian Scout II
131 / 131 / 136 / 136
Guardian Scout III
132 / 132 / 137 / 137
Guardian Scout IV
133 / 133 / 138 / 138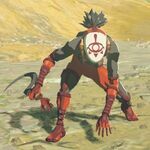
Yiga Footsoldier
134 / 134 / 139 / 139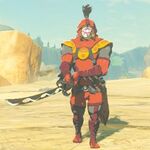
Yiga Blademaster
135 / 135 / 140 / 140
Master Kohga
136 / 136 / 141 / 141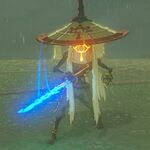
Monk Maz Koshia
--- / 137 / --- / 142
Stone Talus
137 / 138 / 142 / 143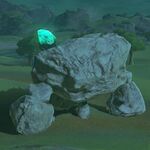
Stone Talus (Luminous)
138 / 139 / 143 / 144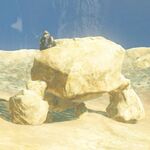
Stone Talus (Rare)
139 / 140 / 144 / 145
Igneo Talus
140 / 141 / 145 / 146
Frost Talus
141 / 142 / 146 / 147
Stone Pebblit
142 / 143 / 147 / 148
Igneo Pebblit
143 / 144 / 148 / 149
Frost Pebblit
144 / 145 / 149 / 150
Igneo Talus Titan
--- / 146 / --- / 151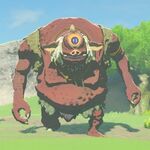
Hinox
145 / 147 / 150 / 152
Blue Hinox
146 / 148 / 151 / 153
Black Hinox
147 / 149 / 152 / 154
Stalnox
148 / 150 / 153 / 155
Molduga
149 / 151 / 154 / 156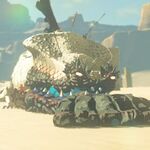
Molduking
--- / 152 / --- / 157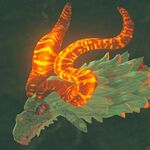
Dinraal
150 / 153 / 155 / 158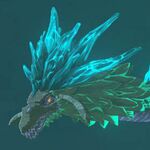
Naydra
151 / 154 / 156 / 159
Farosh
152 / 155 / 157 / 160
Cursed Bokoblin
153 / 156 / 158 / 161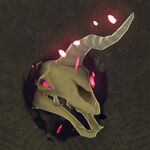
Cursed Moblin
154 / 157 / 159 / 162
Cursed Lizalfos
155 / 158 / 160 / 163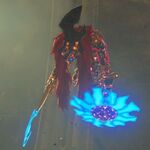
Thunderblight Ganon
156 / 159 / 161 / 164
Fireblight Ganon
157 / 160 / 162 / 165
Waterblight Ganon
158 / 161 / 163 / 166
Windblight Ganon
159 / 162 / 164 / 167
Calamity Ganon
160 / 163 / 165 / 168
Dark Beast Ganon
161 / 164 / 166 / 169


Materials

Apple
162 / 165 / 167 / 170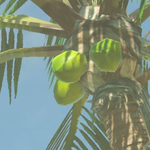
Palm Fruit
163 / 166 / 168 / 171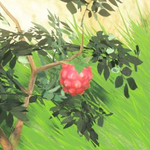
Wildberry
164 / 167 / 169 / 172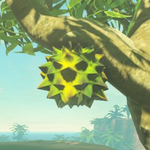
Hearty Durian
165 / 168 / 170 / 173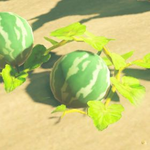
Hydromelon
166 / 169 / 171 / 174
Spicy Pepper
167 / 170 / 172 / 175
Voltfruit
168 / 171 / 173 / 176
Fleet-Lotus Seeds
169 / 172 / 174 / 177
Mighty Bananas
170 / 173 / 175 / 178
Hylian Shroom
171 / 174 / 176 / 179
Endura Shroom
172 / 175 / 177 / 180
Stamella Shroom
173 / 176 / 178 / 181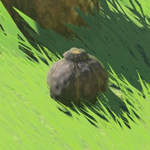
Hearty Truffle
174 / 177 / 179 / 182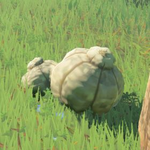
Big Hearty Truffle
175 / 178 / 180 / 183
Chillshroom
176 / 179 / 181 / 184
Sunshroom
177 / 180 / 182 / 185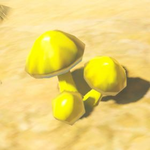
Zapshroom
178 / 181 / 183 / 186
Rushroom
179 / 182 / 184 / 187
Razorshroom
180 / 183 / 185 / 188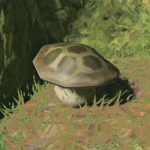
Ironshroom
181 / 184 / 186 / 189
Silent Shroom
182 / 185 / 187 / 190
Hyrule Herb
183 / 186 / 188 / 191
Hearty Radish
184 / 187 / 189 / 192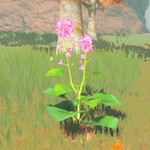
Big Hearty Radish
185 / 188 / 190 / 193
Cool Safflina
186 / 189 / 191 / 194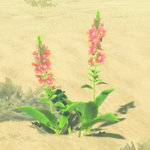
Warm Safflina
187 / 190 / 192 / 195
Electric Safflina
188 / 191 / 193 / 196
Swift Carrot
189 / 192 / 194 / 197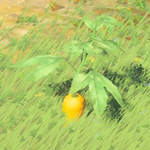
Endura Carrot
190 / 193 / 195 / 198
Fortified Pumpkin
191 / 194 / 196 / 199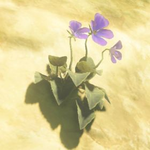
Swift Violet
192 / 195 / 197 / 200
Mighty Thistle
193 / 196 / 198 / 201
Armoranth
194 / 197 / 199 / 202
Blue Nightshade
195 / 198 / 200 / 203
Silent Princess
196 / 199 / 201 / 204
Courser Bee Honey
197 / 200 / 202 / 205


Equipment
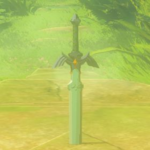
Master Sword
198 / 201 / 203 / 206
Tree Branch
199 / 202 / 204 / 207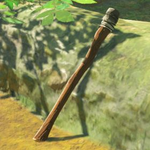
Torch
200 / 203 / 205 / 208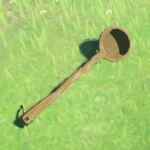
Soup Ladle
201 / 204 / 206 / 209
Boomerang
202 / 205 / 207 / 210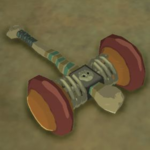
Spring-Loaded Hammer
202 / 205 / 208 / 211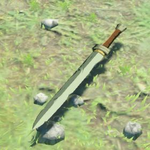
Traveler's Sword
204 / 207 / 209 / 212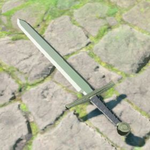
Soldier's Broadsword
205 / 208 / 210 / 213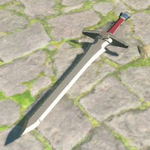
Knight's Broadsword
206 / 209 / 211 / 214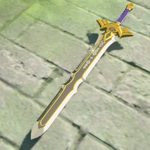
Royal Broadsword
207 / 210 / 212 / 215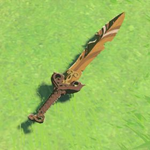
Forest Dweller's Sword
208 / 211 / 213 / 216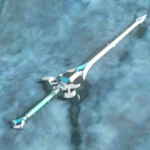
Zora Sword
209 / 212 / 214 / 217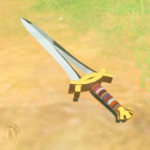
Feathered Edge
210 / 213 / 215 / 218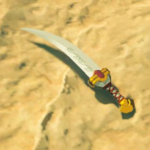
Gerudo Scimitar
211 / 214 / 216 / 219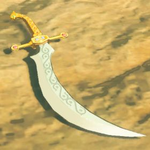
Moonlight Scimitar
212 / 215 / 217 / 220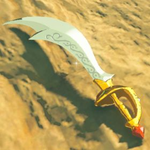
Scimitar of the Seven
213 / 216 / 218 / 221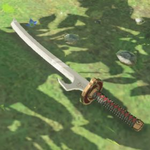
Eightfold Blade
214 / 217 / 219 / 222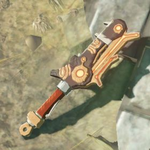
Ancient Short Sword
215 / 218 / 220 / 223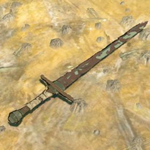
Rusty Broadsword
216 / 219 / 221 / 224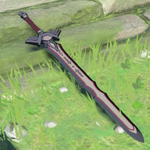
Royal Guard's Sword
217 / 222 / 221 / 225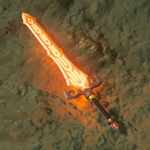
Flameblade
218 / 221 / 223 / 226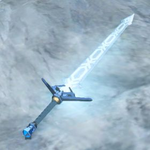
Frostblade
219 / 222 / 224 / 227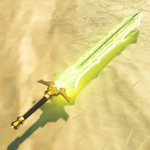
Thunderblade
220 / 223 / 225 / 228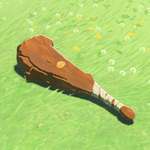
Boko Club
221 / 224 / 226 / 229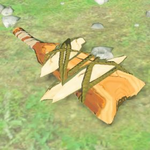
Spiked Boko Club
222 / 225 / 227 / 230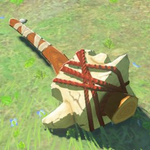
Dragonbone Boko Club
223 / 226 / 228 / 231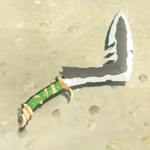
Lizal Boomerang
224 / 227 / 229 / 232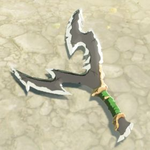
Lizal Forked Boomerang
225 / 228 / 230 / 233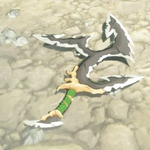
Lizal Tri-Boomerang
226 / 229 / 231 / 234
Guardian Sword
227 / 230 / 232 / 235
Guardian Sword+
228 / 231 / 233 / 236
Guardian Sword++
229 / 232 / 234 / 237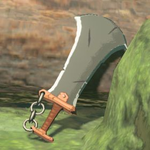
Lynel Sword
230 / 233 / 235 / 238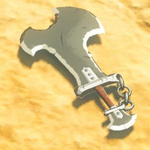
Mighty Lynel Sword
231 / 234 / 236 / 239
Savage Lynel Sword
232 / 235 / 237 / 240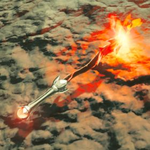
Fire Rod
233 / 236 / 238 / 241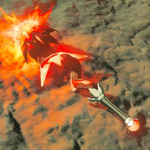
Meteor Rod
234 / 237 / 239 / 242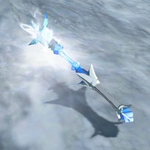
Ice Rod
235 / 238 / 240 / 243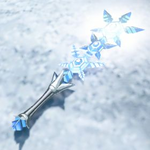
Blizzard Rod
236 / 239 / 241 / 244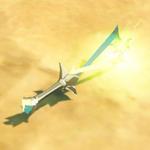
Lightning Rod
237 / 240 / 242 / 245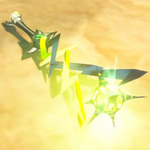
Thunderstorm Rod
238 / 241 / 243 / 246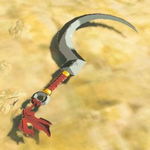
Vicious Sickle
239 / 242 / 244 / 247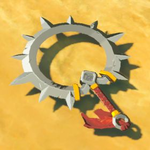
Demon Carver
240 / 243 / 245 / 248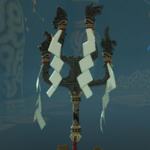
One-Hit Obliterator
--- / 244 / --- / 249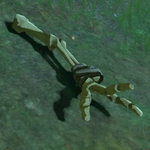
Bokoblin Arm
241 / 245 / 246 / 250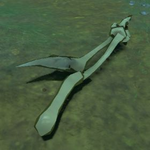
Lizalfos Arm
242 / 246 / 247 / 251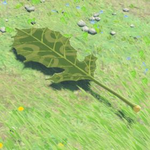
Korok Leaf
243 / 247 / 248 / 252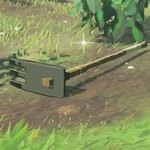
Farming Hoe
244 / 248 / 249 / 253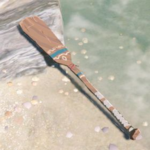
Boat Oar
245 / 249 / 250 / 254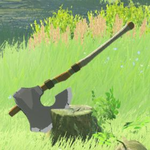
Woodcutter's Axe
246 / 250 / 251 / 255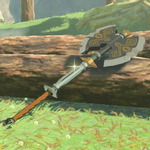
Double Axe
247 / 251 / 252 / 256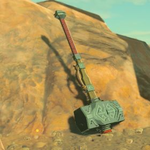
Iron Sledgehammer
248 / 252 / 253 / 257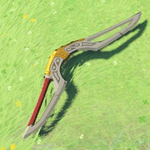
Giant Boomerang
249 / 253 / 254 / 258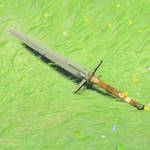
Traveler's Claymore
250 / 254 / 255 / 259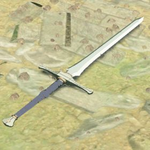
Soldier's Claymore
251 / 255 / 256 / 260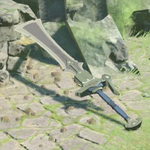
Knight's Claymore
252 / 256 / 257 / 261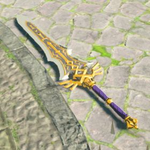
Royal Claymore
253 / 257 / 258 / 262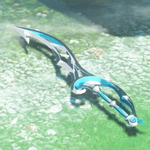
Silver Longsword
254 / 258 / 259 / 263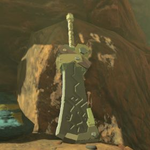
Cobble Crusher
255 / 259 / 260 / 264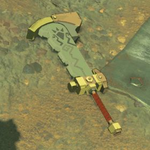
Stone Smasher
256 / 260 / 261 / 265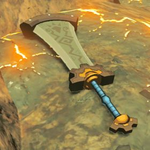
Boulder Breaker
257 / 261 / 262 / 266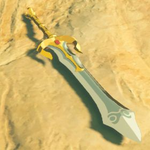
Golden Claymore
258 / 262 / 263 / 267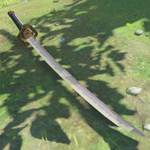
Eightfold Longblade
259 / 263 / 264 / 268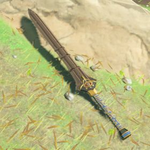
Edge of Duality
260 / 264 / 265 / 269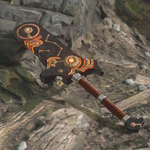
Ancient Bladesaw
261 / 265 / 266 / 270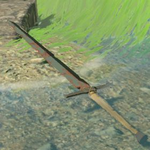
Rusty Claymore
262 / 266 / 267 / 271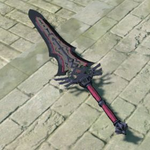
Royal Guard's Claymore
263 / 267 / 268 / 272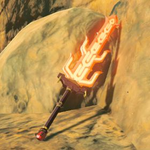
Great Flameblade
264 / 268 / 269 / 273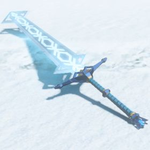
Great Frostblade
265 / 269 / 270 / 274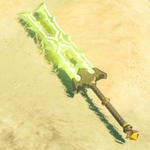
Great Thunderblade
266 / 270 / 271 / 275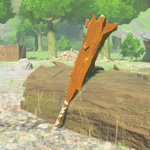
Boko Bat
267 / 271 / 272 / 276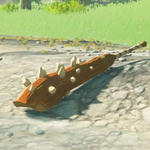
Spiked Boko Bat
268 / 272 / 273 / 277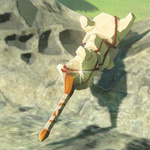
Dragonbone Boko Bat
269 / 273 / 274 / 278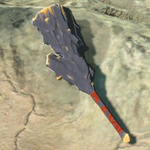
Moblin Club
270 / 274 / 275 / 279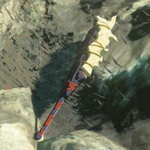
Spiked Moblin Club
271 / 275 / 276 / 280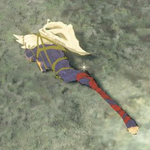
Dragonbone Moblin Club
272 / 276 / 277 / 281
Ancient Battle Axe
273 / 277 / 278 / 282
Ancient Battle Axe+
274 / 278 / 279 / 283
Ancient Battle Axe++
275 / 279 / 280 / 284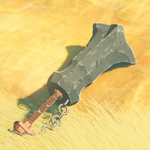
Lynel Crusher
276 / 280 / 281 / 285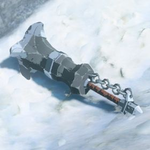
Mighty Lynel Crusher
277 / 281 / 282 / 286
Savage Lynel Crusher
278 / 282 / 283 / 287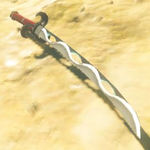
Windcleaver
279 / 283 / 284 / 288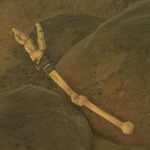
Moblin Arm
280 / 284 / 285 / 289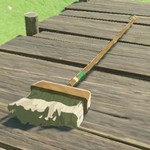
Wooden Mop
281 / 285 / 286 / 290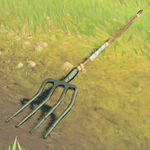
Farmer's Pitchfork
282 / 286 / 287 / 291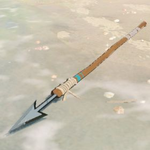
Fishing Harpoon
283 / 287 / 288 / 292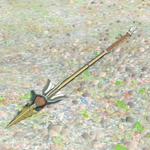
Throwing Spear
284 / 288 / 289 / 293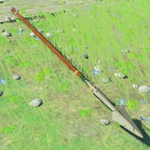
Traveler's Spear
285 / 289 / 290 / 294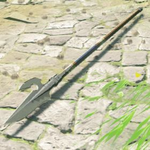
Soldier's Spear
286 / 290 / 291 / 295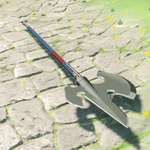
Knight's Halberd
287 / 291 / 292 / 296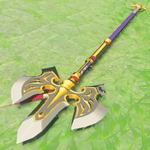
Royal Halberd
288 / 292 / 293 / 297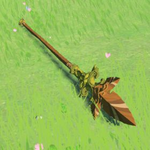
Forest Dweller's Spear
289 / 293 / 294 / 298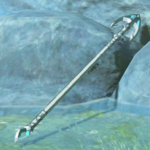
Zora Spear
290 / 294 / 295 / 299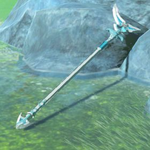
Silverscale Spear
291 / 295 / 296 / 300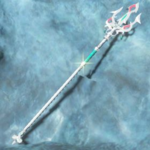
Ceremonial Trident
292 / 296 / 297 / 301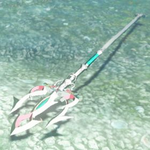
Lightscale Trident
293 / 297 / 298 / 302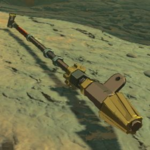
Drillshaft
294 / 298 / 299 / 303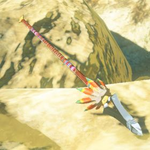
Feathered Spear
295 / 299 / 300 / 304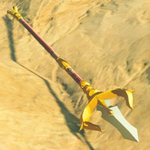
Gerudo Spear
296 / 300 / 301 / 305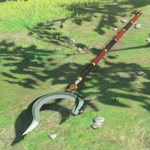
Serpentine Spear
297 / 301 / 302 / 306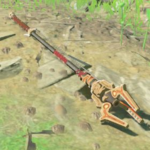
Ancient Spear
298 / 302 / 303 / 307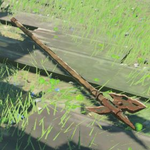
Rusty Halberd
299 / 303 / 304 / 308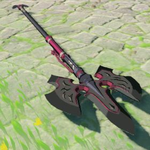
Royal Guard's Spear
300 / 304 / 305 / 309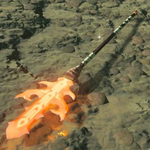
Flamespear
301 / 305 / 306 / 310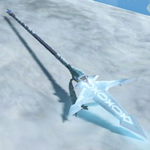
Frostspear
302 / 306 / 307 / 311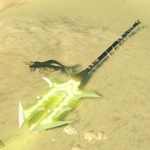
Thunderspear
303 / 307 / 308 / 312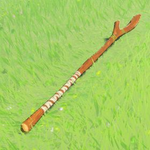
Boko Spear
304 / 308 / 309 / 313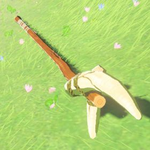
Spiked Boko Spear
305 / 309 / 310 / 314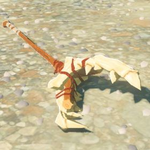
Dragonbone Boko Spear
306 / 310 / 311 / 315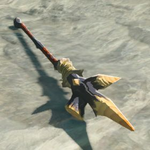
Moblin Spear
307 / 311 / 312 / 316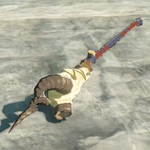
Spiked Moblin Spear
308 / 312 / 313 / 317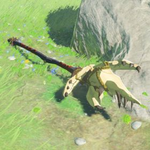
Dragonbone Moblin Spear
309 / 313 / 314 / 318
Lizal Spear
310 / 314 / 315 / 319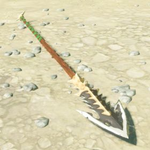
Enhanced Lizal Spear
311 / 315 / 316 / 320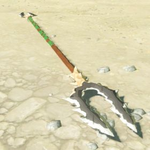
Forked Lizal Spear
312 / 316 / 317 / 321
Guardian Spear
313 / 317 / 318 / 322
Guardian Spear+
314 / 318 / 319 / 323
Guardian Spear++
315 / 319 / 320 / 324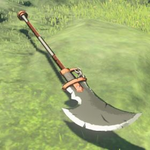
Lynel Spear
316 / 320 / 321 / 325
Mighty Lynel Spear
317 / 321 / 322 / 326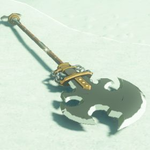
Savage Lynel Spear
318 / 322 / 323 / 327
Bow of Light
319 / 323 / 324 / 328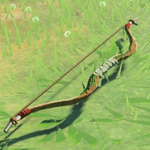
Wooden Bow
320 / 324 / 325 / 329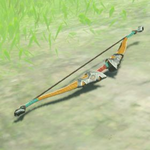
Traveler's Bow
321 / 325 / 326 / 330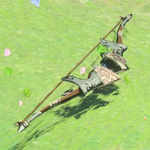
Soldier's Bow
322 / 326 / 327 / 331
Knight's Bow
323 / 327 / 328 / 332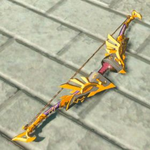
Royal Bow
324 / 328 / 329 / 333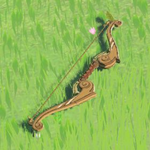
Forest Dweller's Bow
325 / 329 / 330 / 334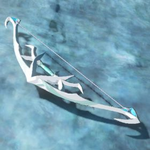
Silver Bow
326 / 330 / 331 / 335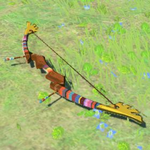
Swallow Bow
327 / 331 / 332 / 336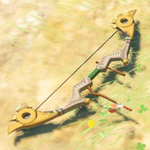
Falcon Bow
328 / 332 / 333 / 337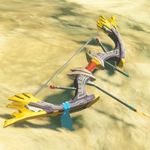
Great Eagle Bow
329 / 333 / 334 / 338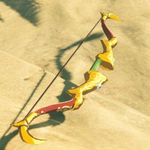
Golden Bow
330 / 334 / 335 / 339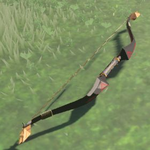
Phrenic Bow
331 / 335 / 336 / 340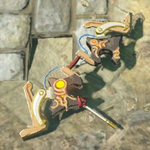
Ancient Bow
332 / 336 / 337 / 341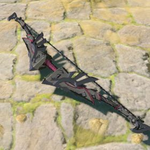
Royal Guard's Bow
333 / 337 / 338 / 342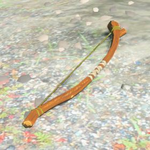
Boko Bow
334 / 338 / 339 / 343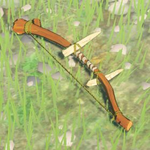
Spiked Boko Bow
335 / 339 / 340 / 344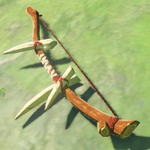
Dragon Bone Boko Bow
336 / 340 / 341 / 345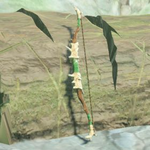
Lizal Bow
337 / 341 / 342 / 346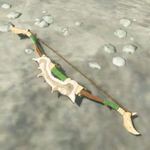
Strengthened Lizal Bow
338 / 342 / 343 / 347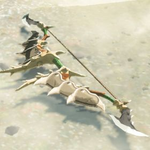
Steel Lizal Bow
339 / 343 / 344 / 348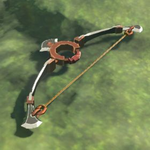
Lynel Bow
340 / 344 / 345 / 349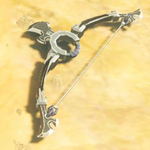
Mighty Lynel Bow
341 / 345 / 346 / 350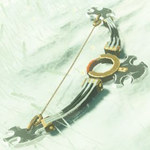
Savage Lynel Bow
342 / 346 / 347 / 351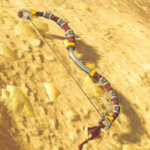
Duplex Bow
343 / 347 / 348 / 352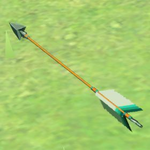
Arrow
344 / 348 / 349 / 353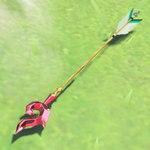
Fire Arrow
345 / 349 / 350 / 354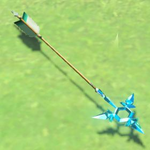
Ice Arrow
346 / 350 / 351 / 355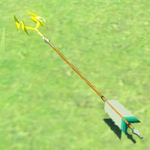
Shock Arrow
347 / 351 / 352 / 356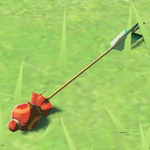
Bomb Arrow
348 / 352 / 353 / 357
Ancient Arrow
349 / 353 / 354 / 358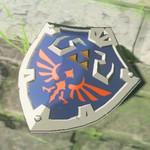
Hylian Shield
350 / 354 / 355 / 359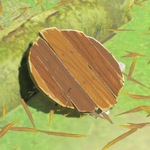
Pot Lid
351 / 355 / 356 / 360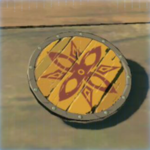
Wooden Shield
352 / 356 / 357 / 361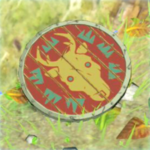
Emblazoned Shield
353 / 357 / 358 / 362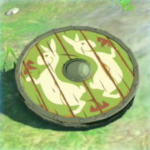
Hunter's Shield
354 / 358 / 359 / 363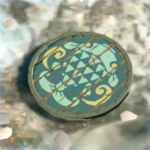
Fisherman's Shield
355 / 359 / 360 / 364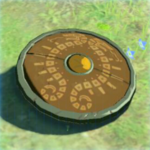
Traveler's Shield
356 / 360 / 361 / 365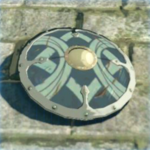
Soldier's Shield
357 / 361 / 362 / 366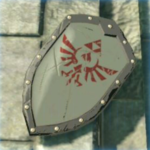
Knight's Shield
358 / 362 / 363 / 367
Royal Shield
359 / 363 / 364 / 368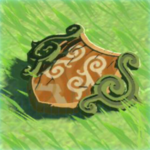
Forest Dweller's Shield
360 / 364 / 365 / 369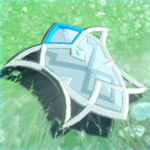
Silver Shield
361 / 365 / 366 / 370
Kite Shield
362 / 366 / 367 / 371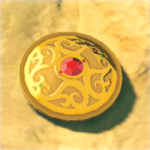
Gerudo Shield
363 / 367 / 368 / 372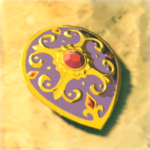
Radiant Shield
364 / 368 / 369 / 373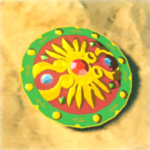
Daybreaker
365 / 369 / 370 / 374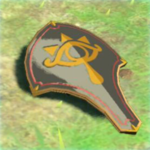
Shield of the Mind's Eye
366 / 370 / 371 / 375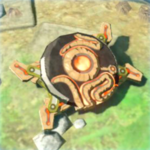
Ancient Shield
367 / 371 / 372 / 376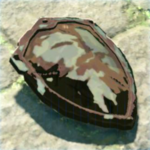
Rusty Shield
368 / 372 / 373 / 377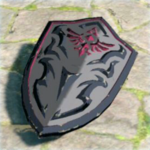
Royal Guard's Shield
369 / 373 / 374 / 378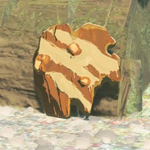
Boko Shield
370 / 374 / 375 / 379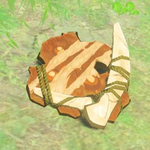
Spiked Boko Shield
371 / 375 / 376 / 380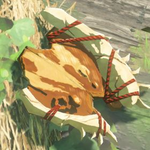
Dragonbone Boko Shield
372 / 376 / 377 / 381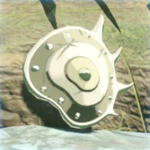
Lizal Shield
373 / 377 / 378 / 382
Reinforced Lizal Shield
374 / 378 / 379 / 383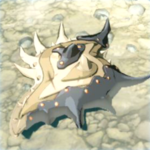
Steel Lizal Shield
375 / 379 / 380 / 384
Guardian Shield
376 / 380 / 381 / 385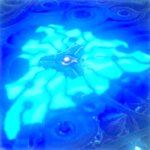
Guardian Shield+
377 / 381 / 382 / 386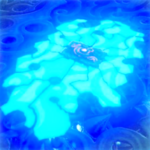
Guardian Shield++
378 / 382 / 383 / 387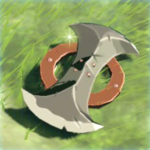
Lynel Shield
379 / 383 / 384 / 388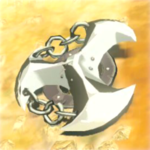
Mighty Lynel Shield
380 / 384 / 385 / 389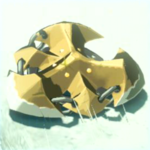
Savage Lynel Shield
381 / 385 / 386 / 390


Treasures

Treasure Chest
382 / 386 / 387 / 391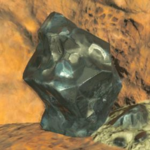
Ore Deposit
383 / 387 / 388 / 392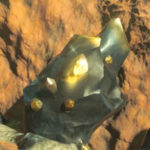
Rare Ore Deposit
384 / 388 / 389 / 393
Luminous Stone Deposit
385 / 389 / 390 / 394


