Kah Yah Shrine: Difference between revisions
Thortok2000 (talk | contribs) No edit summary |
m (Text replacement - "| item = Spirit Orb, " to "| reward = Spirit Orb | item = ") |
||
| (35 intermediate revisions by 18 users not shown) | |||
| Line 1: | Line 1: | ||
{{Infobox|shrine | |||
{{Infobox| | | image = [[File:KahYahShrine.jpg|258px]] | ||
| image | | caption = | ||
| game = ''[[The Legend of Zelda: Breath of the Wild|Breath of the Wild]]'' | | game = ''[[The Legend of Zelda: Breath of the Wild|Breath of the Wild]]'' | ||
| inhab = [[Kah Yah]] | | inhab = [[Kah Yah]] | ||
| location = [[Palmorae Ruins]] in [[Faron (Breath of the Wild)|Faron]] | |||
| pointsint = | | pointsint = | ||
| | | reward = [[Spirit Orb]] | ||
| | | item = [[Knight's Claymore]] | ||
| | | type = [[Shrine of Trials]] | ||
| related = | |||
}}<section begin=summary /><includeonly> | }}<section begin=summary /><includeonly> | ||
Quick Thinking<br><br> | ''Quick Thinking''<br><br> | ||
'''Requirements:''' ''Locked Mementos'' Main Quest<br> | '''Requirements:''' ''Locked Mementos'' Main Quest<br> | ||
'''Shrine Quest:''' {{MapLink|A Fragmented Monument}} | '''Shrine Quest:''' {{MapLink|A Fragmented Monument}} | ||
</includeonly><section end=summary /> | </includeonly><section end=summary /> | ||
'''Kah Yah Shrine''' is one of the many [[Shrine of Trials]] from ''[[The Legend of Zelda: Breath of the Wild|Breath of the Wild]]''. | '''Kah Yah Shrine''', also known as '''Quick Thinking''', is one of the many [[Shrine of Trials]] from ''[[The Legend of Zelda: Breath of the Wild|Breath of the Wild]]''. | ||
==Requirements== | ==Requirements== | ||
{{ShrineQuest|A Fragmented Monument}}{{Shrine}}{{Clear|left}} | {{ShrineQuest|A Fragmented Monument}}{{Shrine}}{{Clear|left}} | ||
<section begin=A Fragmented Monument /><includeonly> | <section begin=A Fragmented Monument /><includeonly> | ||
{{MapLink|Kah Yah Shrine}}<br><br> | {{MapLink|Kah Yah Shrine}}<br><br> | ||
'''Requirements:''' ''Locked Mementos'' Main Quest | '''Requirements:''' ''Locked Mementos'' Main Quest | ||
</includeonly><section end=A Fragmented Monument /> | </includeonly><section end=A Fragmented Monument /> | ||
Link will need to have first completed the ''[[Locked Mementos]]'' Main Quest and have acquired the [[Camera (Rune)]]. The shrine cannot be uncovered without engaging in the shrine quest. | |||
==Shrine Quest: ''A Fragmented Monument''== | |||
{{main|A Fragmented Monument}} | |||
Speak with [[Garini]] at the [[Palmorae Ruins]], located east of [[Lurelin Village]] to begin the quest. Garini tasks Link in finding the missing [[Monument Shard]]s and taking pictures of them so that he can decipher what the stone structure originally said. | |||
{{ | |||
One fragment is located just east of where Garini is located, right around the corner. A second is found at the west end of the [[Palmorae Beach]], near some rocks. The third monument shard is located at the tip of the [[Soka Point]]. After showing Garini all three pictures, Link will then need to crouch down on one of the pedestals. Garini will kneel down on the other, causing the Kah Yah Shrine to appear. | |||
== | ==Quick Thinking== | ||
On the left, you'll find a moving platform, along with some barrels. Grab one of the barrels and ride the platform. The objective is to ride all the way to the end without you or the barrel getting knocked off. Hold the barrel until you pass the first wall. Then place the barrel on the right side and crouch down, so you can pass underneath the second wall. Then lift the barrel and carry it to the end. Place it on the floor switch to open a gate back at the start. Run on over and open the chest to get a [[Small Key]]. | |||
The | |||
On the other side of the room, there is a treasure chest that contains a [[Knight's Claymore]]. This side of the room has a similar puzzle where Link will need to carry a barrel across the moving platform. Grab the barrel and step onto the moving platform. After passing the first arch, shoot the crystal with an [[Arrow]], causing the gates to rise and lower. After passing the second arch, shoot the crystal again, which allows Link to reach the end of the room. Place the barrel on the floor switch to unlock the gate with the treasure chest. | |||
Tip: If you want, you can completely ignore the barrels and weigh the switches down with gems. One gem should be enough for each switch and you can go back to retrieve your gem after opening each chest. | |||
Use the small key on the locked door at the altar. Then speak with [[Kah Yah]] to get the [[Spirit Orb]]. | |||
==Gallery== | |||
<gallery widths="400px" heights="220px"> | |||
File:Kah-Yah-Shrine-1.jpg|<center>Grab a barrel and step on the moving platform.</center> | |||
File:Kah-Yah-Shrine-2.jpg|<center>Duck underneath the wall to pass through.</center> | |||
File:Kah-Yah-Shrine-3.jpg|<center>Place the barrel on the switch.</center> | |||
File:Kah-Yah-Shrine-4.jpg|<center>Shoot the switch with an [[Arrow]] to open the gate.</center> | |||
File:Kah-Yah-Shrine-5.jpg|<center>Turn around and shoot the switch a second time.</center> | |||
File:Kah-Yah-Shrine-6.jpg|<center>Drop the barrel on the floor switch to open the gate.</center> | |||
</gallery> | |||
{{Listbox|Breath of the Wild Shrines|hide=hide}} | |||
{{Cat|Breath of the Wild Shrines}} | {{Cat|Breath of the Wild Shrines}} | ||
Latest revision as of 11:38, July 22, 2023

Games | ||
Location | ||
Inhabitants | ||
Items | ||
Rewards | ||
| Attributes | ||
|---|---|---|
Type | ||
Kah Yah Shrine, also known as Quick Thinking, is one of the many Shrine of Trials from Breath of the Wild.
Requirements
Link will need to have first completed the Locked Mementos Main Quest and have acquired the Camera (Rune). The shrine cannot be uncovered without engaging in the shrine quest.
Shrine Quest: A Fragmented Monument
- Main article: A Fragmented Monument
Speak with Garini at the Palmorae Ruins, located east of Lurelin Village to begin the quest. Garini tasks Link in finding the missing Monument Shards and taking pictures of them so that he can decipher what the stone structure originally said.
One fragment is located just east of where Garini is located, right around the corner. A second is found at the west end of the Palmorae Beach, near some rocks. The third monument shard is located at the tip of the Soka Point. After showing Garini all three pictures, Link will then need to crouch down on one of the pedestals. Garini will kneel down on the other, causing the Kah Yah Shrine to appear.
Quick Thinking
On the left, you'll find a moving platform, along with some barrels. Grab one of the barrels and ride the platform. The objective is to ride all the way to the end without you or the barrel getting knocked off. Hold the barrel until you pass the first wall. Then place the barrel on the right side and crouch down, so you can pass underneath the second wall. Then lift the barrel and carry it to the end. Place it on the floor switch to open a gate back at the start. Run on over and open the chest to get a Small Key.
On the other side of the room, there is a treasure chest that contains a Knight's Claymore. This side of the room has a similar puzzle where Link will need to carry a barrel across the moving platform. Grab the barrel and step onto the moving platform. After passing the first arch, shoot the crystal with an Arrow, causing the gates to rise and lower. After passing the second arch, shoot the crystal again, which allows Link to reach the end of the room. Place the barrel on the floor switch to unlock the gate with the treasure chest.
Tip: If you want, you can completely ignore the barrels and weigh the switches down with gems. One gem should be enough for each switch and you can go back to retrieve your gem after opening each chest.
Use the small key on the locked door at the altar. Then speak with Kah Yah to get the Spirit Orb.
Gallery
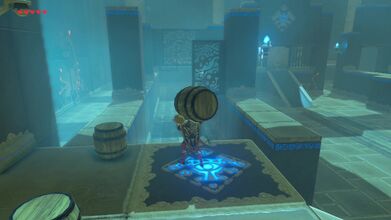
Grab a barrel and step on the moving platform. 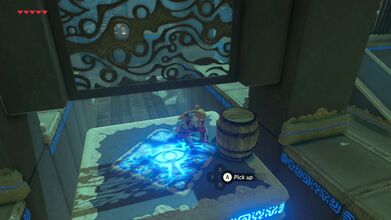
Duck underneath the wall to pass through. 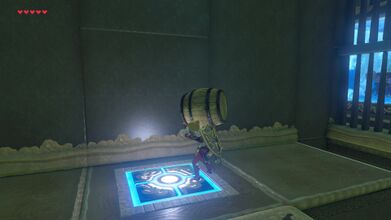
Place the barrel on the switch. 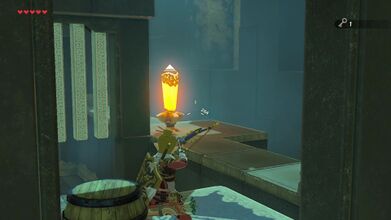
Shoot the switch with an Arrow to open the gate. 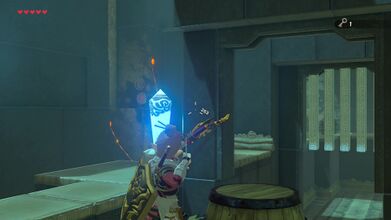
Turn around and shoot the switch a second time. 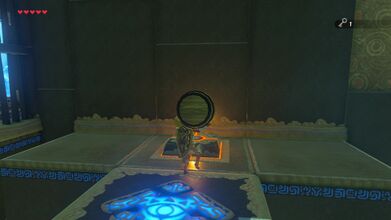
Drop the barrel on the floor switch to open the gate.


