Savage Labyrinth: Difference between revisions
m (Changed walkthrough link to new walkthrough.) |
mNo edit summary |
||
| (10 intermediate revisions by 5 users not shown) | |||
| Line 1: | Line 1: | ||
{{Infobox|dungeon | {{Infobox|dungeon | ||
| image = [[File:Savage Labyrinth (WW).jpg]] | | image = [[File:Savage Labyrinth (WW).jpg]] | ||
| caption = | |||
| game = ''[[The Legend of Zelda: The Wind Waker|The Wind Waker]]'' | | game = ''[[The Legend of Zelda: The Wind Waker|The Wind Waker]]'' | ||
| location = [[Outset Island]] | | location = [[Outset Island]] | ||
| Line 8: | Line 9: | ||
| inhab = | | inhab = | ||
| item = | | item = | ||
| reward = '''''The Wind Waker'''''<br>[[Triforce Chart]]<br>[[ | | reward = '''''The Wind Waker'''''<br/>[[Triforce Chart]]<br/>[[Piece of Heart]]<br/>'''''The Wind Waker HD'''''<br/>[[Triforce Shard]]<br/>[[Hero's Charm]] | ||
| walkthrough = [https://www.zeldadungeon.net/the-wind-waker-walkthrough/the-triforce/#c13_9 Text Walkthrough] | |||
| walkthrough = [ | | related = [[Cave of Ordeals]]<br/>[[Take 'Em All On]]<br/>[[Treacherous Tower]]<br>[[Trial of the Sword]] | ||
}} | }} | ||
The '''Savage | The '''Savage Labyrinth''' is a mini-dungeon in ''[[The Legend of Zelda: The Wind Waker|The Wind Waker]]''. | ||
== | ==Entrance== | ||
While the entrance to the Savage Labyrinth is on Outset Island, it is located on a cliff on the far east side of the island that | While the entrance to the Savage Labyrinth is on Outset Island, it is located on a cliff on the far east side of the island that is not accessible by foot. Link can either use the [[Deku Leaf]] to fly to the cliff or use the [[Hookshot]] to hook onto the tree on top of the ledge. While Link can access the ledge, the labyrinth is covered by a [[Stone Head]] that can only be lifted with the [[Power Bracelet]]s. | ||
==Overview== | ==Overview== | ||
The Savage Labyrinth consists of 50 floors, each split up into 5 different themed portions from the game's main dungeons along with enemies that | The Savage Labyrinth consists of 50 floors, each split up into 5 different themed portions from the game's main dungeons along with enemies that correspond with that area. Also, enemies do not drop spoils, recovery items, and pick-up items if Link defeats them, but he can use the [[Grappling Hook]] on many enemies like a [[Darknut]] to obtain items. In order to assemble the [[Triforce of Courage]], Link must come here to get the [[Triforce Chart]] in the GameCube version or a [[Triforce Shard]] in the [[The Legend of Zelda: The Wind Waker HD|HD]] version, both being on the 30th floor. Here, Link must use the [[Wind Waker]] to play the [[Wind's Requiem]] on the [[Wind Crest]] to reveal the [[Treasure Chest]] containing one of the two items. | ||
On the same floor, | On the same floor, Link can use the [[Mirror Shield]] to reflect light onto the [[Elephant Statue]] to optionally complete the rest of the labyrinth. When Link completes the labyrinth, he is rewarded with a [[Piece of Heart]] in the GameCube version or the [[Hero's Charm]] in ''The Wind Waker HD'' on the 50th floor. | ||
If Link wants to continue further on in the | If Link wants to continue further on in the labyrinth, he should not accidentally go into the exit [[warp]] on the 30th floor after he opens the [[Treasure Chest]] and obtains the item. | ||
The use of [[Potion]]s, [[ | The use of [[Potion]]s, [[Fairy|fairies]], or a combination of both is strongly recommended along with obtaining most or all of the [[Bottle]]s since recovery of health and items are not inside except at the 10th-level interval. As a result of this, Link should prepare before trying to complete the labyrinth. | ||
==Layout== | ==Layout== | ||
| Line 31: | Line 32: | ||
:E. [[Fairy|Fairies]] | :E. [[Fairy|Fairies]] | ||
# [[Keese]] | # [[Keese]] ×10 | ||
# [[Miniblin]] | # [[Miniblin]] ×6 | ||
# [[Bokoblin]] | # [[Bokoblin]] ×4 | ||
# [[Red ChuChu]] | # [[Red ChuChu]] ×6 | ||
# [[Magtail]] | # [[Magtail]] ×4 | ||
# Keese | # Keese ×4, Miniblin ×4 | ||
# [[Fire Keese]] | # [[Fire Keese]] ×4, Magtail ×2 | ||
# [[Bokoblin]] | # [[Bokoblin]] ×4, Fire Keese ×2 | ||
# Moblin | # Moblin ×2 | ||
# Recovery Floor, Optional Exit | # Recovery Floor, Optional Exit | ||
# [[Peahat]] | # [[Peahat]] ×6 | ||
# [[Green ChuChu]] | # [[Green ChuChu]] ×4 | ||
# [[Boko Baba]] | # [[Boko Baba]] ×5 | ||
# Green Bokoblin | # Green Bokoblin ×4 | ||
# Wingless [[Mothula]] | # Wingless [[Mothula]] ×5 | ||
# Boko Baba | # Boko Baba ×3, Peahat ×3 | ||
# Blue Bokoblin | # Blue Bokoblin ×4, Green ChuChu ×4 | ||
# Wingless Mothula | # Wingless Mothula ×3, Green Bokoblin ×2 | ||
# Winged Mothula | # Winged Mothula ×2 | ||
# Recovery Floor, Optional Exit | # Recovery Floor, Optional Exit | ||
# [[Wizzrobe]] | # [[Wizzrobe]] ×3 | ||
# [[Armos]] | # [[Armos]] ×4 | ||
# [[Armos Knight]] | # [[Armos Knight]] ×2 | ||
# [[Yellow ChuChu]] | # [[Yellow ChuChu]] ×6 | ||
# Red Bubble | # Red Bubble ×4 | ||
# Green Bokoblin | # Green Bokoblin ×2, Darknut ×1 | ||
# Armos | # Armos ×3, Wizzrobe ×1 | ||
# Armos Knight | # Armos Knight ×2, Red Bubble ×2 | ||
# Darknut | # Darknut ×2 | ||
# Recovery Floor, Triforce Chart (GC) or Triforce Shard (HD), Optional Exit | # Recovery Floor, Triforce Chart (GC) or Triforce Shard (HD), Optional Exit | ||
# [[ReDead]] | # [[ReDead]] ×6 | ||
# [[Blue Bubble]] | # [[Blue Bubble]] ×5 | ||
# [[Dark ChuChu]] | # [[Dark ChuChu]] ×6 | ||
# [[Poe]] | # [[Poe]] ×5 | ||
# Winged Mothula | # Winged Mothula ×3 | ||
# ReDead | # ReDead ×3, Moblin ×2 | ||
# Dark ChuChu | # Dark ChuChu ×5, Winged Mothula ×1 | ||
# Poe | # Poe ×5, Moblin ×2 | ||
# Blue Bubble | # Blue Bubble ×4, [[Stalfos]] ×2 | ||
# Recovery Floor, Optional Exit | # Recovery Floor, Optional Exit | ||
# Miniblin | # Miniblin ×24 | ||
# Red ChuChu | # Red ChuChu ×10, Green ChuChu ×10, Yellow ChuChu ×10 | ||
# Wizzrobe | # Wizzrobe ×5 | ||
# Bokoblin | # Bokoblin ×16 | ||
# ReDead | # ReDead ×4, Stalfos ×2 | ||
# Moblin | # Moblin ×3, Darknut ×2 | ||
# Wizzrobe | # Wizzrobe ×3, Darknut ×2, [[Electric Barrier]]s | ||
# Stalfos | # Stalfos ×3 | ||
# [[Mighty Darknut]] | # [[Mighty Darknut]] ×4 with [[Moblin Bust]] ×6 | ||
# Piece of Heart (GC) or Hero's Charm (HD) | # Piece of Heart (GC) or Hero's Charm (HD) | ||
==Gallery== | |||
<gallery> | |||
File:Savage-Labyrinth-Entrance-1.png|The entrance of the Savage Labyrinth | |||
File:Savage-Labyrinth-Entrance-2.png|The entrance of the Savage Labyrinth | |||
File:Savage-Labyrinth-1.png|Inside of the Savage Labyrinth | |||
File:Savage-Labyrinth-2.png|Inside of the Savage Labyrinth | |||
File:Savage-Labyrinth-3.png|Inside of the Savage Labyrinth | |||
File:Savage-Labyrinth-4.png|Inside of the Savage Labyrinth | |||
</gallery> | |||
{{Listbox|The Wind Waker Locations}} | |||
{{Cat|The Wind Waker Locations}} | {{Cat|The Wind Waker Locations}} | ||
Latest revision as of 22:38, October 21, 2023
.jpg)
Games | ||
Location | ||
Rewards | The Wind Waker | |
Related | ||
| Guides | ||
|---|---|---|
Walkthrough | ||
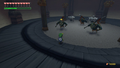
The Savage Labyrinth is a mini-dungeon in The Wind Waker.
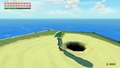
Entrance
While the entrance to the Savage Labyrinth is on Outset Island, it is located on a cliff on the far east side of the island that is not accessible by foot. Link can either use the Deku Leaf to fly to the cliff or use the Hookshot to hook onto the tree on top of the ledge. While Link can access the ledge, the labyrinth is covered by a Stone Head that can only be lifted with the Power Bracelets.
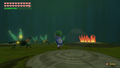
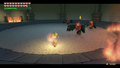
Overview
The Savage Labyrinth consists of 50 floors, each split up into 5 different themed portions from the game's main dungeons along with enemies that correspond with that area. Also, enemies do not drop spoils, recovery items, and pick-up items if Link defeats them, but he can use the Grappling Hook on many enemies like a Darknut to obtain items. In order to assemble the Triforce of Courage, Link must come here to get the Triforce Chart in the GameCube version or a Triforce Shard in the HD version, both being on the 30th floor. Here, Link must use the Wind Waker to play the Wind's Requiem on the Wind Crest to reveal the Treasure Chest containing one of the two items.
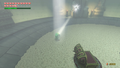
On the same floor, Link can use the Mirror Shield to reflect light onto the Elephant Statue to optionally complete the rest of the labyrinth. When Link completes the labyrinth, he is rewarded with a Piece of Heart in the GameCube version or the Hero's Charm in The Wind Waker HD on the 50th floor.
If Link wants to continue further on in the labyrinth, he should not accidentally go into the exit warp on the 30th floor after he opens the Treasure Chest and obtains the item.
The use of Potions, fairies, or a combination of both is strongly recommended along with obtaining most or all of the Bottles since recovery of health and items are not inside except at the 10th-level interval. As a result of this, Link should prepare before trying to complete the labyrinth.
Layout
- E. Fairies
- Keese ×10
- Miniblin ×6
- Bokoblin ×4
- Red ChuChu ×6
- Magtail ×4
- Keese ×4, Miniblin ×4
- Fire Keese ×4, Magtail ×2
- Bokoblin ×4, Fire Keese ×2
- Moblin ×2
- Recovery Floor, Optional Exit
- Peahat ×6
- Green ChuChu ×4
- Boko Baba ×5
- Green Bokoblin ×4
- Wingless Mothula ×5
- Boko Baba ×3, Peahat ×3
- Blue Bokoblin ×4, Green ChuChu ×4
- Wingless Mothula ×3, Green Bokoblin ×2
- Winged Mothula ×2
- Recovery Floor, Optional Exit
- Wizzrobe ×3
- Armos ×4
- Armos Knight ×2
- Yellow ChuChu ×6
- Red Bubble ×4
- Green Bokoblin ×2, Darknut ×1
- Armos ×3, Wizzrobe ×1
- Armos Knight ×2, Red Bubble ×2
- Darknut ×2
- Recovery Floor, Triforce Chart (GC) or Triforce Shard (HD), Optional Exit
- ReDead ×6
- Blue Bubble ×5
- Dark ChuChu ×6
- Poe ×5
- Winged Mothula ×3
- ReDead ×3, Moblin ×2
- Dark ChuChu ×5, Winged Mothula ×1
- Poe ×5, Moblin ×2
- Blue Bubble ×4, Stalfos ×2
- Recovery Floor, Optional Exit
- Miniblin ×24
- Red ChuChu ×10, Green ChuChu ×10, Yellow ChuChu ×10
- Wizzrobe ×5
- Bokoblin ×16
- ReDead ×4, Stalfos ×2
- Moblin ×3, Darknut ×2
- Wizzrobe ×3, Darknut ×2, Electric Barriers
- Stalfos ×3
- Mighty Darknut ×4 with Moblin Bust ×6
- Piece of Heart (GC) or Hero's Charm (HD)
Gallery

The entrance of the Savage Labyrinth
The entrance of the Savage Labyrinth
Inside of the Savage Labyrinth
Inside of the Savage Labyrinth
Inside of the Savage Labyrinth
Inside of the Savage Labyrinth


