Tanagar Canyon: Difference between revisions
| (18 intermediate revisions by 9 users not shown) | |||
| Line 1: | Line 1: | ||
{{Infobox|location | {{Infobox|location | ||
| image = [[File:Tanagar-Canyon.png|400px]] | | image = [[File:Tanagar-Canyon.png|400px]] | ||
| game = ''[[The Legend of Zelda: Breath of the Wild|Breath of the Wild]]'' | | caption = | ||
| game = ''[[The Legend of Zelda: Breath of the Wild|Breath of the Wild]]''<br/>''[[The Legend of Zelda: Tears of the Kingdom|Tears of the Kingdom]]'' | |||
| inhab = | | inhab = | ||
| pointsint = | | pointsint = | ||
| location = [[Hebra]]/[[Central Hyrule]] and Hebra/[[Gerudo (Province)|Gerudo]] borders | |||
| item = | | item = | ||
| natseason = | | natseason = | ||
| Line 9: | Line 11: | ||
}} | }} | ||
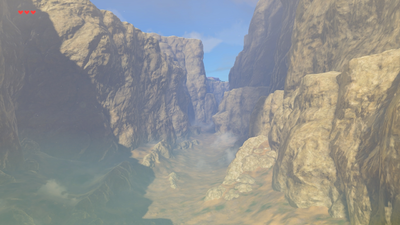
'''Tanagar Canyon''' is a very long canyon in ''[[The Legend of Zelda: Breath of the Wild|Breath of the Wild]]'' and ''[[The Legend of Zelda: Tears of the Kingdom|Tears of the Kingdom]]''. | |||
== | ==''Breath of the Wild''== | ||
The Canyon forms the border between [[Hebra]] and the [[Central Hyrule]] and [[Gerudo (Province)|Gerudo]] provinces. It extends from just north of the [[Gerudo Highlands]] all the way to the [[Forgotten Temple]], located east of the [[Snowfield Stable]]. | |||
Throughout the canyon, there are numerous windmills setup of varying heights. Most of the canyon is fairly desolate, but there are a few enemy [[Black Lizalfos]] and some [[Maraudo Wolf|Maraudo Wolves]] that roam around. There is very little vegetation, with just some [[Rushroom]]s on the cliffs, as well as some uncommon [[Cool Safflina]]. | |||
The [[Tabantha Great Bridge]] extends over the Tanagar Canyon, connecting the [[Hyrule Ridge]] and [[Tabantha Frontier]] regions. The area near the Tabantha Great Bridge is one of the locations where [[Dinraal]] passes by on some mornings. A fantastic way to farm some of Dinraal's materials is to first travel to the [[Tabantha Bridge Stable]]. Sit by the campfire until the morning and then run over to the bridge, Dinraal will pass underneath the bridge each morning around 7am and since it travels below the bridge, Link has plenty of time to aim his shot and gather whichever material he needs. | The [[Tabantha Great Bridge]] extends over the Tanagar Canyon, connecting the [[Hyrule Ridge]] and [[Tabantha Frontier]] regions. The area near the Tabantha Great Bridge is one of the locations where [[Dinraal]] passes by on some mornings. A fantastic way to farm some of Dinraal's materials is to first travel to the [[Tabantha Bridge Stable]]. Sit by the campfire until the morning and then run over to the bridge, Dinraal will pass underneath the bridge each morning around 7am and since it travels below the bridge, Link has plenty of time to aim his shot and gather whichever material he needs. | ||
| Line 18: | Line 22: | ||
Just south of the start of the Tanagar Canyon, there is a Bokoblin base with Red Bokoblin, [[Blue Bokoblin]], and [[Black Bokoblin]]. After defeating all the enemies, Link can open the treasure chest to get a [[Sapphire]] gem. | Just south of the start of the Tanagar Canyon, there is a Bokoblin base with Red Bokoblin, [[Blue Bokoblin]], and [[Black Bokoblin]]. After defeating all the enemies, Link can open the treasure chest to get a [[Sapphire]] gem. | ||
==Tanagar Canyon Course== | ===Tanagar Canyon Course=== | ||
{{main|Tanagar Canyon Course}} | {{main|Tanagar Canyon Course}} | ||
At the center of the canyon, Link will find the [[Tanagar Canyon Course]]. Located directly south of the [[Tabantha Great Bridge]], this is the location of the [[Boom Bam Golf]] mini-game. Link can speak with the [[Goron]] named [[Modar]] to play the game. It costs 20 [[Rupee]]s and plays as a single hole of golf. The goal is to use [[Stasis]] and hit the ball into the hole in as few hits as possible. If Link can get the ball into the hole within 4 or 5 hits, he will earn a [[Purple Rupee]]. However, the grand prize of a [[Silver Rupee]] is given if Link gets the ball into the hole within 3 hits. | At the center of the canyon, Link will find the [[Tanagar Canyon Course]]. Located directly south of the [[Tabantha Great Bridge]], this is the location of the [[Boom Bam Golf]] mini-game. Link can speak with the [[Goron]] named [[Modar]] to play the game. It costs 20 [[Rupee]]s and plays as a single hole of golf. The goal is to use [[Stasis]] and hit the ball into the hole in as few hits as possible. If Link can get the ball into the hole within 4 or 5 hits, he will earn a [[Purple Rupee]]. However, the grand prize of a [[Silver Rupee]] is given if Link gets the ball into the hole within 3 hits. | ||
==Dunba Taag | ===Dunba Taag Shrine=== | ||
{{main|Dunba Taag | {{main|Dunba Taag Shrine}} | ||
The [[Dunba Taag | The [[Dunba Taag Shrine]] can be found at the very bottom of the Tanagar Canyon, located just southeast of the stable. Also known as ''Build and Release'', the shrine requires Link to use [[Stasis]] and give items and objects kinetic energy where they can then be used to press switches or knock down large slabs. At the end of the shrine, meet up with [[Dunba Taag]] at the altar to get a [[Spirit Orb]]. | ||
==Animals== | ===Animals=== | ||
<gallery mode=nolines> | |||
File:Grassland-fox.jpg|[[Grassland Fox]] | |||
File:Maraudo-wolf.jpg|[[Maraudo Wolf]] | |||
File:Pink-heron.jpg|[[Pink Heron]] | |||
</gallery> | |||
==Enemies== | ===Enemies=== | ||
<gallery mode=nolines> | |||
File:Black-Lizalfos.png|[[Black Lizalfos]] | |||
File:Blue-Chuchu.png|[[ChuChu|Blue Chuchu]] | |||
File:Stalmoblin.jpg|[[Stalmoblin]] | |||
File:Stone-pebblit.jpg|[[Stone Pebblit]] | |||
</gallery> | |||
==Materials== | ===Materials=== | ||
<gallery mode=nolines> | |||
File:Cold-darner.png|[[Cold Darner]] | |||
File:Cool_Safflina.png|[[Cool Safflina]] | |||
File:Razorshroom.png|[[Razorshroom]] | |||
File:Rushroom.png|[[Rushroom]] | |||
File:Silent_Shroom.png|[[Silent Shroom]] | |||
File:Swift_Violet.png|[[Swift Violet]] | |||
File:Winterwing-butterfly.png|[[Winterwing Butterfly]] | |||
</gallery> | |||
==Nearby Korok Seeds== | ===Nearby Korok Seeds=== | ||
<section begin=Seed310summary />[[File:Korok310.png|200px|thumb|left|Run through the patches of flowers | <section begin=Seed310summary />[[File:Korok310.png|200px|thumb|left|Run through the patches of flowers 1–5.]]<section end=Seed310summary />Run through the patches in ascending order.{{Korok Seed|Seed310}}{{Clear|left}} | ||
<section begin=Seed311summary />[[File:Korok311.png|200px|thumb|left|Complete the circle of rocks.]]<section end=Seed311summary />Complete the rock circle.{{Korok Seed|Seed311}}{{Clear|left}} | <section begin=Seed311summary />[[File:Korok311.png|200px|thumb|left|Complete the circle of rocks.]]<section end=Seed311summary />Complete the rock circle.{{Korok Seed|Seed311}}{{Clear|left}} | ||
| Line 65: | Line 69: | ||
<section begin=Seed680summary />[[File:Korok680.png|200px|thumb|left|Solve the block puzzle, making the two patterns identical.]]<section end=Seed680summary />Use Magnesis to move the magnetic cube to make the patterns identical. The eastern pattern is rotated but should otherwise look the same.{{Korok Seed|Seed680}}{{Clear|left}} | <section begin=Seed680summary />[[File:Korok680.png|200px|thumb|left|Solve the block puzzle, making the two patterns identical.]]<section end=Seed680summary />Use Magnesis to move the magnetic cube to make the patterns identical. The eastern pattern is rotated but should otherwise look the same.{{Korok Seed|Seed680}}{{Clear|left}} | ||
<section begin=Seed688summary />[[File:Korok688.png|200px|thumb|left|Under rock.]]<section end=Seed688summary />Pick up the rock.{{Korok Seed|Seed688}}{{Clear|left}} | <section begin=Seed688summary />[[File:Korok688.png|200px|thumb|left|Under a rock, near the top of the canyon.]]<section end=Seed688summary />Pick up the rock.{{Korok Seed|Seed688}}{{Clear|left}} | ||
<section begin=Seed690summary />[[File:Korok690.png|200px|thumb|left|Shoot an acorn hanging from the lower part of the windmill.]]<section end=Seed690summary />Shoot the acorn.{{Korok Seed|Seed690}}{{Clear|left}} | <section begin=Seed690summary />[[File:Korok690.png|200px|thumb|left|Shoot an acorn hanging from the lower part of the windmill.]]<section end=Seed690summary />Shoot the acorn.{{Korok Seed|Seed690}}{{Clear|left}} | ||
| Line 71: | Line 75: | ||
<section begin=Seed746summary />[[File:Korok746.png|200px|thumb|left|Race from a cliff to the north to the finish to the south.]]<section end=Seed746summary />Run over the seed platform, glide across the canyon, and climb to the ring.{{Korok Seed|Seed746}}{{Clear|left}} | <section begin=Seed746summary />[[File:Korok746.png|200px|thumb|left|Race from a cliff to the north to the finish to the south.]]<section end=Seed746summary />Run over the seed platform, glide across the canyon, and climb to the ring.{{Korok Seed|Seed746}}{{Clear|left}} | ||
<section begin=Seed750summary />[[File:Korok750.png|200px|thumb|left|On the side of the cliff, blow up the cracked boulders then lift the small rock hidden behind them.]]<section end=Seed750summary />Blow up the boulders, pick up the rock.{{Korok Seed|Seed750}}{{Clear|left}} | <section begin=Seed750summary />[[File:Korok750.png|200px|thumb|left|On the side of the cliff just below the very top, blow up the cracked boulders then lift the small rock hidden behind them.]]<section end=Seed750summary />Blow up the boulders just below the top of the cliff, pick up the rock.{{Korok Seed|Seed750}}{{Clear|left}} | ||
<section begin=Seed751summary />[[File:Korok751.png|200px|thumb|left|Under a rock.]]<section end=Seed751summary />Pick up the rock.{{Korok Seed|Seed751}}{{Clear|left}} | <section begin=Seed751summary />[[File:Korok751.png|200px|thumb|left|Under a rock.]]<section end=Seed751summary />Pick up the rock.{{Korok Seed|Seed751}}{{Clear|left}} | ||
| Line 77: | Line 81: | ||
<section begin=Seed854summary />[[File:Korok854.png|200px|thumb|left|Follow the trail of flowers that starts next to the road to the north.]]<section end=Seed854summary />Follow the flower trail. It starts next to the road to the north.{{Korok Seed|Seed854}}{{Clear|left}} | <section begin=Seed854summary />[[File:Korok854.png|200px|thumb|left|Follow the trail of flowers that starts next to the road to the north.]]<section end=Seed854summary />Follow the flower trail. It starts next to the road to the north.{{Korok Seed|Seed854}}{{Clear|left}} | ||
{{Cat|Breath of the Wild Locations}} | ==''Tears of the Kingdom''== | ||
The Tanagar Canyon can be found just north of the [[Gerudo Highlands]] and extends all the way north to the [[Forgotten Temple]]. | |||
A [[Stone Talus (Rare)]] can be found, just beyond the third windmill. Just east of the [[Ancient Columns]], there are some [[Zonai Ruins]] down in the canyon. On top of the ruins there is a chest that contains five [[Bomb Flower]]s. | |||
===Gasas Shrine=== | |||
{{main|Gasas Shrine}} | |||
The [[Gasas Shrine]] can be found at the start of the canyon, at the far west end. Titled ''Well-Timed Cuts'', the shrine requires Link to cut ropes down using Arrows, to drop boxes, orbs, and treasure chests. | |||
===Korok Seeds=== | |||
*Just passed the second windwmill, going from west to east, there is a block puzzle on the higher ledge to the north. Place the block to complete the windmill puzzle to get the [[Korok Seed]]. | |||
*Just south of the third windmill, going from west to east, drop down to the far bottom of the canyon. Underneath the overhang, there is a stump on the ceiling. [[Ascend]] through to get the Korok Seed. | |||
*Directly south of the [[Tabantha Great Bridge]] there are some tall rocks at the bottom of the canyon. Tucked behind these is a small stump. Step on it and race to the yellow circle. Use [[Ascend]] to get through the Zonai Ruins and reach the circle quicker. | |||
*Near the windmill southeast of [[Rito Village (Tears of the Kingdom)|Rito Village]], there is a metal block puzzle at the very bottom of the canyon. Place the block in its proper location to get the Korok Seed. | |||
===Animals=== | |||
<gallery mode=nolines> | |||
</gallery> | |||
===Enemies=== | |||
<gallery mode=nolines> | |||
File:Bokoblin_-_TotK_Compendium.png|[[Bokoblin]] | |||
File:Black_Bokoblin_-_TotK_Compendium.png|[[Black Bokoblin]] | |||
File:Electric_Wizzrobe_-_TotK_Compendium.png|[[Electric Wizzrobe]] | |||
File:Keese_-_TotK_Compendium.png|[[Keese]] | |||
File:Stone_Pebblit_-_TotK_Compendium.png|[[Stone Pebblit]] | |||
File:Stone_Talus_(Rare)_-_TotK_Compendium.png|[[Stone Talus (Rare)]] | |||
</gallery> | |||
===Bugs and Materials=== | |||
<gallery mode=nolines> | |||
File:Cool_Safflina_-_TotK_icon.png|[[Cool Safflina]] | |||
File:Dazzlefruit_-_TotK_icon.png|[[Dazzlefruit]] | |||
File:Hylian_Shroom_-_TotK_icon.png|[[Hylian Shroom]] | |||
File:Razorshroom_-_TotK_icon.png|[[Razorshroom]] | |||
File:Rushroom_-_TotK_icon.png|[[Rushroom]] | |||
File:Silent_Shroom_-_TotK_icon.png|[[Silent Shroom]] | |||
File:Spicy_Pepper_-_TotK_icon.png|[[Spicy Pepper]] | |||
File:Swift_Violet_-_TotK_icon.png|[[Swift Violet]] | |||
File:Wildberry_-_TotK_icon.png|[[Wildberry]] | |||
</gallery> | |||
==Gallery== | |||
<gallery widths="400px" heights="220px"> | |||
File:Tanagar-Canyon-Stone-Talus.jpg|Fighting a [[Stone Talus (Rare)]] in ''Tears of the Kingdom'' | |||
</gallery> | |||
{{Listbox|Breath of the Wild Hebra Locations}} | |||
{{Cat|Breath of the Wild Hebra Locations}} | |||
{{cat|Tears of the Kingdom Hebra Locations}} | |||
Latest revision as of 17:55, February 10, 2024
Games | ||
Location | Hebra/Central Hyrule and Hebra/Gerudo borders | |
Related | ||
Tanagar Canyon is a very long canyon in Breath of the Wild and Tears of the Kingdom.
Breath of the Wild
The Canyon forms the border between Hebra and the Central Hyrule and Gerudo provinces. It extends from just north of the Gerudo Highlands all the way to the Forgotten Temple, located east of the Snowfield Stable.
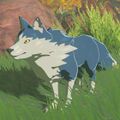
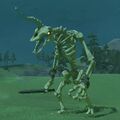
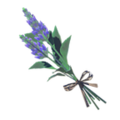
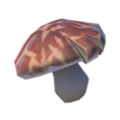
Throughout the canyon, there are numerous windmills setup of varying heights. Most of the canyon is fairly desolate, but there are a few enemy Black Lizalfos and some Maraudo Wolves that roam around. There is very little vegetation, with just some Rushrooms on the cliffs, as well as some uncommon Cool Safflina.
The Tabantha Great Bridge extends over the Tanagar Canyon, connecting the Hyrule Ridge and Tabantha Frontier regions. The area near the Tabantha Great Bridge is one of the locations where Dinraal passes by on some mornings. A fantastic way to farm some of Dinraal's materials is to first travel to the Tabantha Bridge Stable. Sit by the campfire until the morning and then run over to the bridge, Dinraal will pass underneath the bridge each morning around 7am and since it travels below the bridge, Link has plenty of time to aim his shot and gather whichever material he needs.
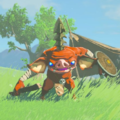
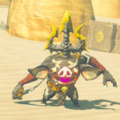
Just south of the start of the Tanagar Canyon, there is a Bokoblin base with Red Bokoblin, Blue Bokoblin, and Black Bokoblin. After defeating all the enemies, Link can open the treasure chest to get a Sapphire gem.
Tanagar Canyon Course
- Main article: Tanagar Canyon Course
At the center of the canyon, Link will find the Tanagar Canyon Course. Located directly south of the Tabantha Great Bridge, this is the location of the Boom Bam Golf mini-game. Link can speak with the Goron named Modar to play the game. It costs 20 Rupees and plays as a single hole of golf. The goal is to use Stasis and hit the ball into the hole in as few hits as possible. If Link can get the ball into the hole within 4 or 5 hits, he will earn a Purple Rupee. However, the grand prize of a Silver Rupee is given if Link gets the ball into the hole within 3 hits.
Dunba Taag Shrine
- Main article: Dunba Taag Shrine
The Dunba Taag Shrine can be found at the very bottom of the Tanagar Canyon, located just southeast of the stable. Also known as Build and Release, the shrine requires Link to use Stasis and give items and objects kinetic energy where they can then be used to press switches or knock down large slabs. At the end of the shrine, meet up with Dunba Taag at the altar to get a Spirit Orb.
Animals
Enemies
Materials
Nearby Korok Seeds
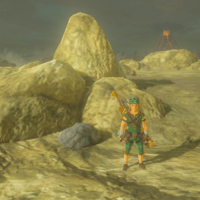
Run through the patches in ascending order.
Complete the rock circle.
Move the slab, then pick up the rock.
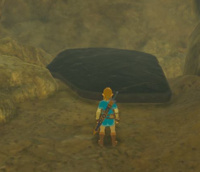
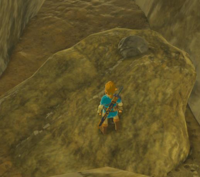
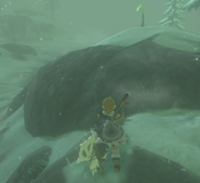
Pick up the rock.
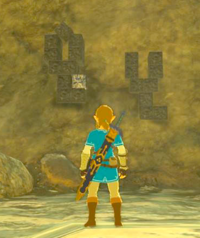
Solve the block puzzle.
Use Magnesis to move the magnetic cube to make the patterns identical. The eastern pattern is rotated but should otherwise look the same.
Pick up the rock.
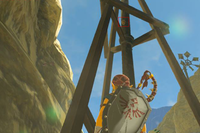
Shoot the acorn.
Run over the seed platform, glide across the canyon, and climb to the ring.
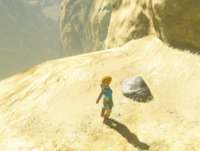
Blow up the boulders just below the top of the cliff, pick up the rock.
Pick up the rock.
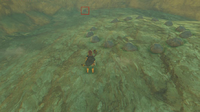
Follow the flower trail. It starts next to the road to the north.
Tears of the Kingdom
The Tanagar Canyon can be found just north of the Gerudo Highlands and extends all the way north to the Forgotten Temple.
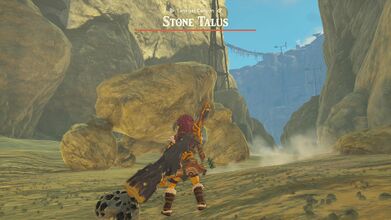
A Stone Talus (Rare) can be found, just beyond the third windmill. Just east of the Ancient Columns, there are some Zonai Ruins down in the canyon. On top of the ruins there is a chest that contains five Bomb Flowers.
Gasas Shrine
- Main article: Gasas Shrine
The Gasas Shrine can be found at the start of the canyon, at the far west end. Titled Well-Timed Cuts, the shrine requires Link to cut ropes down using Arrows, to drop boxes, orbs, and treasure chests.
Korok Seeds
- Just passed the second windwmill, going from west to east, there is a block puzzle on the higher ledge to the north. Place the block to complete the windmill puzzle to get the Korok Seed.
- Just south of the third windmill, going from west to east, drop down to the far bottom of the canyon. Underneath the overhang, there is a stump on the ceiling. Ascend through to get the Korok Seed.
- Directly south of the Tabantha Great Bridge there are some tall rocks at the bottom of the canyon. Tucked behind these is a small stump. Step on it and race to the yellow circle. Use Ascend to get through the Zonai Ruins and reach the circle quicker.
- Near the windmill southeast of Rito Village, there is a metal block puzzle at the very bottom of the canyon. Place the block in its proper location to get the Korok Seed.
Animals
Enemies
Bugs and Materials
Gallery
Fighting a Stone Talus (Rare) in Tears of the Kingdom


