Super Smash Bros. Brawl: Difference between revisions
mNo edit summary |
mNo edit summary |
||
| (22 intermediate revisions by 2 users not shown) | |||
| Line 9: | Line 9: | ||
{{Region|eu|y=2008|m=6|d=27}} | {{Region|eu|y=2008|m=6|d=27}} | ||
{{Region|au|y=2008|m=6|d=28}} | {{Region|au|y=2008|m=6|d=28}} | ||
| previous = ''[[Super Smash Bros. Melee]]'' | |||
| next = ''[[Super Smash Bros. for Nintendo 3DS and Wii U]]'' | |||
| developer = HAL Laboratory<br/>Sora<br/>Game Arts<br/>Monolith Soft<br/>Paon<br/>Intelligent Systems | | developer = HAL Laboratory<br/>Sora<br/>Game Arts<br/>Monolith Soft<br/>Paon<br/>Intelligent Systems | ||
| producer = Kazushige Nojima | | producer = Kazushige Nojima | ||
| director = Masahiro Sakurai | | director = Masahiro Sakurai | ||
}} | }} | ||
{{float|right|[[File:SSBB Character Selection.png|250px|thumb|A character selection screen with every character unlocked.]]}} | |||
'''''Super Smash Bros. Brawl''''' is a fighting game for the [[Nintendo Wii]], in which various [[Nintendo]] (and non-Nintendo) characters fight on a 2-D plane. It is the third game in the ''Super Smash Bros.'' series and it has 35 characters to play as. This game features multiple characters and stages from [[The Legend of Zelda (Series)|''The Legend of Zelda'' series]], along with many trophies and a few items. Most of the characters and items take their appearances from ''[[The Legend of Zelda: Twilight Princess|Twilight Princess]]''. | |||
==Zelda Fighters== | |||
There are five characters from the ''Zelda'' series that are playable in the game. (Technically, four characters are playable as Zelda and Sheik are paired together on the character selection screen.) | |||
==Zelda | |||
There are five characters from the Zelda series that are playable in the game. (Technically, four characters are playable as Zelda and Sheik are paired together on the character selection screen.) | |||
===Link=== | ===Link=== | ||
[[File:Link from Super Smash Bros. Brawl.png|200x300px|left]] | |||
[[Link]]'s design in the game is taken from ''[[The Legend of Zelda: Twilight Princess|Twilight Princess]]''. He is a returning character from the very start of the ''Super Smash Bros.'' series. He is usable from the very start of the game. His moves are based on items he gained in the game: [[Bow]], [[Bomb]]s, [[Clawshot]] and [[Gale Boomerang]]. He uses the [[Master Sword]] and [[Hylian Shield]], which has become a staple of the Links that appear in the Super Smash Bros. series. Link and Toon Link share a similar moveset. The main differences between them is in their abilities. Link is heavier and slower than Toon Link, but he is not as floaty and is more powerful than his toon counterpart. His Final Smash is shared once again. It is called Triforce Slash and it traps a character in a Triforce as Link slashes repeatedly. If another character touches the Triforce shape or Link during the attack, they could get trapped too, but they will definitely get damaged and knocked back significantly. Once the onslaught is done, Link will slash once more and send the other character flying, usually to their KO. | [[Link]]'s design in the game is taken from ''[[The Legend of Zelda: Twilight Princess|Twilight Princess]]''. He is a returning character from the very start of the ''Super Smash Bros.'' series. He is usable from the very start of the game. His moves are based on items he gained in the game: [[Bow]], [[Bomb]]s, [[Clawshot]] and [[Gale Boomerang]]. He uses the [[Master Sword]] and [[Hylian Shield]], which has become a staple of the Links that appear in the Super Smash Bros. series. Link and Toon Link share a similar moveset. The main differences between them is in their abilities. Link is heavier and slower than Toon Link, but he is not as floaty and is more powerful than his toon counterpart. His Final Smash is shared once again. It is called Triforce Slash and it traps a character in a Triforce as Link slashes repeatedly. If another character touches the Triforce shape or Link during the attack, they could get trapped too, but they will definitely get damaged and knocked back significantly. Once the onslaught is done, Link will slash once more and send the other character flying, usually to their KO. | ||
Link has the usual 6 palette swaps (color changes): Green, Red, Blue, Purple, Yellow and Dark Link versions of his tunic and hat. The shield also changes color slightly. | Link has the usual 6 palette swaps (color changes): Green, Red, Blue, Purple, Yellow and Dark Link versions of his tunic and hat. The shield also changes color slightly. | ||
{{clear|left}} | |||
===Zelda=== | ===Zelda=== | ||
[[File:Zelda Super Smash Bros Brawl.jpg|200x300px|left]] | |||
The [[Zelda|Princess Zelda]] that appears in the game takes the appearance of Zelda from ''Twilight Princess''. She is also a returning character from the previous game of the ''Super Smash Bros.'' series, ''[[Super Smash Bros. Melee]]'', from which she has been buffed out slightly. She ― along with Sheik ― is playable from the very start of the game. In the game, her attacks are magic based and she uses the spells from ''[[The Legend of Zelda: Ocarina of Time|Ocarina of Time]]'' (Namely [[Din's Fire]] for offense, [[Nayru's Love]] for defense and [[Farore's Wind]] for recovery). Zelda can use Transform to change into [[Sheik]]. Her attacks are fairly powerful and most have a good knockback, but Zelda is a lightweight and so is easily knocked back herself. Zelda shares her Final Smash with Sheik, which is her using a Light Arrow to inflict high amounts of damage and (usually) One-Hit KO opponents. | The [[Zelda|Princess Zelda]] that appears in the game takes the appearance of Zelda from ''Twilight Princess''. She is also a returning character from the previous game of the ''Super Smash Bros.'' series, ''[[Super Smash Bros. Melee]]'', from which she has been buffed out slightly. She ― along with Sheik ― is playable from the very start of the game. In the game, her attacks are magic based and she uses the spells from ''[[The Legend of Zelda: Ocarina of Time|Ocarina of Time]]'' (Namely [[Din's Fire]] for offense, [[Nayru's Love]] for defense and [[Farore's Wind]] for recovery). Zelda can use Transform to change into [[Sheik]]. Her attacks are fairly powerful and most have a good knockback, but Zelda is a lightweight and so is easily knocked back herself. Zelda shares her Final Smash with Sheik, which is her using a Light Arrow to inflict high amounts of damage and (usually) One-Hit KO opponents. | ||
Zelda has 6 costumes; normal design, Red version, Blue version, Green version, Dark version and one that has a similar color scheme to her ''Ocarina of Time'' and ''Melee'' counterpart. | Zelda has 6 costumes; normal design, Red version, Blue version, Green version, Dark version and one that has a similar color scheme to her ''Ocarina of Time'' and ''Melee'' counterpart. | ||
{{clear|left}} | |||
===Sheik=== | ===Sheik=== | ||
[[File:SuperSmashBrosBrawlSheik.jpg|200x300px|left]] | |||
Sheik's design is taken from ''Twilight Princess'' concept art, where she was supposedly going to appear. She returns, along with Zelda, from ''Super Smash Bros. Melee''. Sheik and Zelda work together like two halves; Zelda's flaws are more or less covered by Sheik while Zelda returns the favor by covering Sheik's weaknesses. Sheik is a fast character and not very light, but her attacks generally are not powerful and do not have strong knockback. She uses frequent martial arts, along with a chain and needles which can be charged up to throw them further. She can use Transform to change into Zelda at any point during a match, which also gives her invincibility for a short time. She shares her Final Smash ― Light Arrow ― with Zelda. | Sheik's design is taken from ''Twilight Princess'' concept art, where she was supposedly going to appear. She returns, along with Zelda, from ''Super Smash Bros. Melee''. Sheik and Zelda work together like two halves; Zelda's flaws are more or less covered by Sheik while Zelda returns the favor by covering Sheik's weaknesses. Sheik is a fast character and not very light, but her attacks generally are not powerful and do not have strong knockback. She uses frequent martial arts, along with a chain and needles which can be charged up to throw them further. She can use Transform to change into Zelda at any point during a match, which also gives her invincibility for a short time. She shares her Final Smash ― Light Arrow ― with Zelda. | ||
Like her Final Smash, her palette swaps are also shared with Zelda. This is all because they are considered to be part of each other and so their characters are bundled together. | Like her Final Smash, her palette swaps are also shared with Zelda. This is all because they are considered to be part of each other and so their characters are bundled together. | ||
{{clear|left}} | |||
===Ganondorf=== | ===Ganondorf=== | ||
[[File:Ganondorf Brawl.png|left|200px]] | |||
Ganondorf's design is taken from ''Twilight Princess'' like the three characters before. He also returns from ''Super Smash Bros. Melee'', but has been significantly changed. Ganondorf was considered a clone of Captain Falcon in ''Melee'', while in ''Brawl'', he is now given different animations (even though they do share similar moves). He is a powerhouse character, making him very heavy, slow and all moves give very high amounts of knockback. Ganondorf is an unlockable character in the game. Three ways to unlock him are; play 200 brawls, complete Classic Mode with Link/Zelda on Hard or get Ganondorf to join the party in the Subspace Emissary. With the exception of the latter option, Ganondorf must be beaten in a 1v1 match on Final Destination before unlocking completely. Ganondorf's moveset is very similar to Captain Falcon's. The Warlock Punch is extremely similar to the famous Falcon Punch, but it is more powerful, but slower. The main differences Ganondorf has to Captain Falcon is that his moves are more powerful and cause more knockback on characters. Beast [[Ganon]] is his Final Smash. Ganondorf changes into his Beast form and roars/stomps on the ground with front legs ― which causes all the characters touching the stage to be paralysed. Ganon then dashes off to the side of the stage, dragging along any characters he touches along to their KO. Ganondorf then returns to the point where he activated the Final Smash to continue as usual. | Ganondorf's design is taken from ''Twilight Princess'' like the three characters before. He also returns from ''Super Smash Bros. Melee'', but has been significantly changed. Ganondorf was considered a clone of Captain Falcon in ''Melee'', while in ''Brawl'', he is now given different animations (even though they do share similar moves). He is a powerhouse character, making him very heavy, slow and all moves give very high amounts of knockback. Ganondorf is an unlockable character in the game. Three ways to unlock him are; play 200 brawls, complete Classic Mode with Link/Zelda on Hard or get Ganondorf to join the party in the Subspace Emissary. With the exception of the latter option, Ganondorf must be beaten in a 1v1 match on Final Destination before unlocking completely. Ganondorf's moveset is very similar to Captain Falcon's. The Warlock Punch is extremely similar to the famous Falcon Punch, but it is more powerful, but slower. The main differences Ganondorf has to Captain Falcon is that his moves are more powerful and cause more knockback on characters. Beast [[Ganon]] is his Final Smash. Ganondorf changes into his Beast form and roars/stomps on the ground with front legs ― which causes all the characters touching the stage to be paralysed. Ganon then dashes off to the side of the stage, dragging along any characters he touches along to their KO. Ganondorf then returns to the point where he activated the Final Smash to continue as usual. | ||
Ganondorf has the regular amount of 6 palette swaps: Grey/Purple Armor (default), Black Armor, Blue Armor, Red Armor, Green Armor and Brown Armor. | Ganondorf has the regular amount of 6 palette swaps: Grey/Purple Armor (default), Black Armor, Blue Armor, Red Armor, Green Armor and Brown Armor. | ||
{{clear|left}} | |||
===Toon Link=== | ===Toon Link=== | ||
[[File:SSBB Toon Link.png|left|200px]] | |||
[[Toon Link]] is a character based on the Link in ''[[The Legend of Zelda: The Wind Waker|The Wind Waker]]'', ''[[The Legend of Zelda: Phantom Hourglass|Phantom Hourglass]]'', and ''[[The Legend of Zelda: Spirit Tracks|Spirit Tracks]]''. He acts as a replacement for Young Link, who was the second version of Link in ''Super Smash Bros. Melee''. In the game, he uses the shield from ''The Wind Waker'', as well as the [[Master Sword]], the [[Boomerang]], the Hero's Bow, the Bombs, and the [[Hookshot]]. Statistically, he is faster than Link, but also weaker and lighter. His Final Smash ― Triforce Slash ― is shared with Link. | [[Toon Link]] is a character based on the Link in ''[[The Legend of Zelda: The Wind Waker|The Wind Waker]]'', ''[[The Legend of Zelda: Phantom Hourglass|Phantom Hourglass]]'', and ''[[The Legend of Zelda: Spirit Tracks|Spirit Tracks]]''. He acts as a replacement for Young Link, who was the second version of Link in ''Super Smash Bros. Melee''. In the game, he uses the shield from ''The Wind Waker'', as well as the [[Master Sword]], the [[Boomerang]], the Hero's Bow, the Bombs, and the [[Hookshot]]. Statistically, he is faster than Link, but also weaker and lighter. His Final Smash ― Triforce Slash ― is shared with Link. | ||
Toon Link has 6 color sets, which are Green, Red, Blue, and Purple tunic/ hat color changes, as well as one styled as [[Dark Link]] and one based on the appearance of Link in Zelda 1 and 2. | Toon Link has 6 color sets, which are Green, Red, Blue, and Purple tunic/ hat color changes, as well as one styled as [[Dark Link]] and one based on the appearance of Link in Zelda 1 and 2. | ||
{{clear|left}} | |||
===Tingle | ==Assist Trophies== | ||
[[Tingle]] is | ===Tingle=== | ||
[[File:Tingle Assist Trophy - SSBB key art.jpg|200px|right|Tingle key art from ''[[Super Smash Bros. Brawl]]'']] | |||
[[Tingle]] is the only ''The Legend of Zelda'' series Assist Trophy in ''Brawl''. He can either help or hinder the player, by doing one of several actions. | |||
* He can make it rain Hammers/Golden Hammers, even if the two items have been turned off before the match. | * He can make it rain Hammers/Golden Hammers, even if the two items have been turned off before the match. | ||
* He summons a lot of balloons in the background and flies away with them, nothing happens. | * He summons a lot of balloons in the background and flies away with them, nothing happens. | ||
* He can make it rain banana peels, causing players to trip all over the place. | * He can make it rain banana peels, causing players to trip all over the place. | ||
* He can release lots of flowers, causing the screen to zoom in and focus on the player's character. | * He can release lots of flowers, causing the screen to zoom in and focus on the player's character. | ||
* He can give all characters the Superspicy Curry effect. | * He can give all characters the Superspicy Curry effect. | ||
{{clear}} | |||
==Zelda Stages== | ==Zelda Stages== | ||
| Line 62: | Line 72: | ||
===Bridge of Eldin=== | ===Bridge of Eldin=== | ||
[[File:Bridge of Eldin - SSBB.png|right|220px]] | |||
As the name implies, it is a stage based on the [[Bridge of Eldin]] from ''Twilight Princess''. It is a flat stage where the dangers really come from what happens to the stage rather than what is on the stage the whole time.<br/> | As the name implies, it is a stage based on the [[Bridge of Eldin]] from ''Twilight Princess''. It is a flat stage where the dangers really come from what happens to the stage rather than what is on the stage the whole time.<br/> | ||
At random points, [[King Bulblin]] comes along the stage riding on [[Lord Bullbo]], damaging any players he comes into, and usually drops a bomb in the center of the bridge, blowing it up. Sometimes, a [[Bulblin]] will follow him along and fall down the hole created. Eventually, a Twilight portal will open and refill the gap in the bridge with a new piece. Once the hole is present, players can fall down and lose a stock. | At random points, [[King Bulblin]] comes along the stage riding on [[Lord Bullbo]], damaging any players he comes into, and usually drops a bomb in the center of the bridge, blowing it up. Sometimes, a [[Bulblin]] will follow him along and fall down the hole created. Eventually, a Twilight portal will open and refill the gap in the bridge with a new piece. Once the hole is present, players can fall down and lose a stock. | ||
In the background of the stage, [[Hyrule Castle]] is present in its ''Twilight Princess'' incarnation. | In the background of the stage, [[Hyrule Castle]] is present in [[Hyrule Castle (Twilight Princess)|its ''Twilight Princess'' incarnation]]. | ||
{{clear}} | |||
===Pirate Ship=== | ===Pirate Ship=== | ||
The stage is based on [[ | [[File:Pirate Ship - SSBB.png|right|220px]] | ||
The stage is based on [[Tetra]]'s [[Pirate Ship]] and the Great Sea from ''The Wind Waker''. The stage is surrounded by water that can cause characters to drown if they stay in it too long. It has a couple of platforms on the sail that players can jump to and there is a catapult like contraption at the left side of the stage that comes out every now and again which ― if a character is standing on it and it pops up ― can throw a character instantly past the left blast line. If no character is on it when it pops up, nothing else happens and it retreats back down into the stage. | |||
There are several different events on the stage: | There are several different events on the stage: | ||
| Line 77: | Line 90: | ||
===Temple (Melee Stage)=== | ===Temple (Melee Stage)=== | ||
The Temple stage makes a return from ''Super Smash Bros. Melee''. It is a multi-level stage which is based on Zelda II's Temples. It is not a stage full of traps; but rather, it is a very large stage that has no dangers other than the usual blastlines. In the background of the stage, there are several buildings | [[File:Temple - SSBB.png|220px|right]] | ||
The Temple stage makes a return from ''Super Smash Bros. Melee''. It is a multi-level stage which is based on Zelda II's Temples. It is not a stage full of traps; but rather, it is a very large stage that has no dangers other than the usual blastlines. In the background of the stage, there are several buildings. | |||
Temple is actually one of the most disliked stages in ''Melee'' and ''Brawl'' because | Temple is actually one of the most disliked stages in ''Melee'' and ''Brawl'' - because it is so large, players can run all over the stage to dodge any combat and that taunt parties (matches where players continuously taunt and do not fight each other) often take place there. | ||
{{clear}} | |||
==Roles in Subspace Emissary== | ==Roles in Subspace Emissary== | ||
The Subspace Emissary is the Story Mode in Super Smash Bros. Brawl and it incorporates all but three of the unlockable characters in the storyline, one of which is Toon Link. | The Subspace Emissary is the Story Mode in ''Super Smash Bros. Brawl'' and it incorporates all but three of the unlockable characters in the storyline, one of which is Toon Link. | ||
The main plot is that an evil entity called Tabuu is going to take over the Smash Brothers World. Several characters are on Tabuu's side (because of the fact that Master Hand has been taken captive) including a mysterious character called the Ancient Minister who has control over ROBs and knows where to get special bombs called Subspace Bombs ― they suck up certain parts of the world and leave a dome of Subspace stuff behind. The characters all form four or five groups that have different tasks to complete and bosses to face before they all meet up and go to get Tabuu. They enter a mysterious place called Subspace where they find Tabuu, who fires his Off Waves to turn them all into trophies. By a very convenient plot device, all the heroes are revived. They join forces with the characters who were on Tabuu's side originally and they all make their way through the very lengthy and annoying, Great Maze. Once that horror is over and done with, they all face off with Tabuu and destroy him, returning their worlds to normal. | The main plot is that an evil entity called Tabuu is going to take over the Smash Brothers World. Several characters are on Tabuu's side (because of the fact that Master Hand has been taken captive) including a mysterious character called the Ancient Minister who has control over ROBs and knows where to get special bombs called Subspace Bombs ― they suck up certain parts of the world and leave a dome of Subspace stuff behind. The characters all form four or five groups that have different tasks to complete and bosses to face before they all meet up and go to get Tabuu. They enter a mysterious place called Subspace where they find Tabuu, who fires his Off Waves to turn them all into trophies. By a very convenient plot device, all the heroes are revived. They join forces with the characters who were on Tabuu's side originally and they all make their way through the very lengthy and annoying, Great Maze. Once that horror is over and done with, Sonic the Hedgehog shows up and breaks Tabuu's butterfly wings, then they all face off with Tabuu and destroy him, returning their worlds to normal. | ||
There are two different storylines that can take place depending on the player's choice near the start of the story. | There are two different storylines that can take place depending on the player's choice near the start of the story. | ||
| Line 91: | Line 106: | ||
Zelda is one of the more important characters in the plot of Subspace Emissary. She and Princess Peach are the way the story gets split in two. | Zelda is one of the more important characters in the plot of Subspace Emissary. She and Princess Peach are the way the story gets split in two. | ||
Zelda | Peach and Zelda are watching a friendly match between Mario and Kirby, when a large ominous ship appears along with some red clouds. The ship drops spores called Shadow Bugs onto the ground which begin to form into Primids (a common enemy in Subspace Emissary). Zelda uses Farore's Wind to join the battle below. Once all the enemies are defeated, the Ancient Minister shows up and drops a Subspace bomb. Two ROBs come out and activate the bomb. Mario runs to stop it, but is shot far away by a cannonball. Kirby just looks up to where Mario disappeared, but turns around as he hears someone scream. Both Zelda and Peach are stuck in cages and being held captive by Petey Piranha (an enemy from Super Mario Sunshine and a playable character from Mario Kart: Double Dash). | ||
'''This is where the differences are. If you save Peach, Zelda will get trapped and vice versa'''<br/>'''Saved Zelda''' | '''This is where the differences are. If you save Peach, Zelda will get trapped and vice versa'''<br/>'''Saved Zelda''' | ||
Kirby defeats Petey and Zelda escapes her cage easily. Wario just turns up with a strange gun called a Dark Cannon and points it at Zelda | Kirby defeats Petey and Zelda escapes her cage easily. Wario just turns up with a strange gun called a Dark Cannon and points it at Kirby and Zelda. Wario then notices Peach laying helplessly on the ground under her cage and shoots the gun at her. An arrow pierces right through the princess' body and turns her into a trophy. He then picks up the trophied Princess and runs off with her. Kirby and Zelda chase after him, but the counter on the Subspace Bomb is almost out. The bomb 'blows up' and covered the entire stadium, but Kirby and the rescued princess ride away from the blast on a Warp Star. Up above the clouds, the Warp Star collides with the giant ship called the Halberd and the princess and Kirby get knocked onto it. They go to the opposite side of the ship to find an Arwing battling against the Halberd. The Halberd shoots out a claw at the Arwing and it knocks off one of the wings. The Arwing falls to the ground and knocks Kirby and Zelda off the edge of the Halberd and into the clouds. They go through the clouds briefly before reaching solid ground once again, they then continue their search for the Halberd on the ground. | ||
The pair then come across a lake. Kirby hears something and runs off to investigate, leaving Zelda alone. Bowser turns up with another Dark Cannon and makes her a trophy. A Fake Bowser turns up and becomes Shadow Bugs that cover Zelda's trophy to make a fake of her. Soon after, Link and Yoshi come running past and Fake Zelda points a Dark Cannon at them, but the gun is destroyed by Pit and Mario ― who proceed to fight the fake Zelda. They win and Zelda turns into nothing. Unfortunately for Mario and Pit, Link looks up just to see Zelda's fake trophy melt away and this kinda makes him angry. He runs up the hill to attack Mario, but Mario dodges. Mario and Pit then face off against Link and Yoshi. Mario and Pit beat Link and Yoshi ― who turn into trophies. King Dedede turns up in his weird car thing and uses his claw to pick up the two trophies. As this happens, Mario sees Peach's trophy in Dedede's car. Kirby reappears at the back of the car to cut off the claw and release/reawaken Link and Yoshi. Link then shoots an arrow at the car as it tries to come back around and it starts to splutter and stop. The five set off to find Dedede and the other trophies. | The pair then come across a lake. Kirby hears something and runs off to investigate, leaving Zelda alone. Bowser turns up with another Dark Cannon and makes her a trophy. A Fake Bowser turns up and becomes Shadow Bugs that cover Zelda's trophy to make a fake of her. Soon after, Link and Yoshi come running past and Fake Zelda points a Dark Cannon at them, but the gun is destroyed by Pit and Mario ― who proceed to fight the fake Zelda. They win and Zelda turns into nothing. Unfortunately for Mario and Pit, Link looks up just to see Zelda's fake trophy melt away and this kinda makes him angry. He runs up the hill to attack Mario, but Mario dodges. Mario and Pit then face off against Link and Yoshi. Mario and Pit beat Link and Yoshi ― who turn into trophies. King Dedede turns up in his weird car thing and uses his claw to pick up the two trophies. As this happens, Mario sees Peach's trophy in Dedede's car. Kirby reappears at the back of the car to cut off the claw and release/reawaken Link and Yoshi. Link then shoots an arrow at the car as it tries to come back around and it starts to splutter and stop. The five set off to find Dedede and the other trophies. | ||
| Line 103: | Line 118: | ||
King Dedede makes Luigi a trophy in order to lure Wario to stop his weird car thing, which has Zelda and Ness in it already. Wario takes the bait and tries to take Luigi too, but he is swarmed by Waddle Dees, who put Luigi in the car that Dedede now steals. Dedede then passes by a trophied Mario and Pit and tries to take them too, but Kirby stops him and Pit shoots an arrow at the car and causes it to start failing. | King Dedede makes Luigi a trophy in order to lure Wario to stop his weird car thing, which has Zelda and Ness in it already. Wario takes the bait and tries to take Luigi too, but he is swarmed by Waddle Dees, who put Luigi in the car that Dedede now steals. Dedede then passes by a trophied Mario and Pit and tries to take them too, but Kirby stops him and Pit shoots an arrow at the car and causes it to start failing. | ||
Dedede takes the three trophies to his personal castle and puts Dedede broches on all three of them, having to take one | Dedede takes the three trophies to his personal castle and puts Dedede broches on all three of them, having to take one from himself to put it on Zelda. Suddenly, Bowser and his Koopa Troop come and break down the ceiling. This knocks out Dedede and Bowser takes Zelda's trophy. Back outside, Bowser takes the Zelda trophy to his Koopa Clown Car. He is ambushed by Mario, Link and co. During the small battle, the Dedede brooch falls off Zelda and Kirby swallows it. Bowser gets away with Zelda while all of the Smashers go toward the Halberd. | ||
'''Doesn't matter anymore''' | '''Doesn't matter anymore''' | ||
| Line 111: | Line 126: | ||
Out there, Fox is piloting a new Arwing and is shooting the Halberd's main cannons. Unfortunately, Peach is in front of it and almost gets hit by the lasers and the explosions. Sheik thinks that Fox is trying to attack Peach and appears on the top of the Arwing and breaks the cover. Fox and Sheik fall down to the Halberd and begin to fight. Peach stops them and offers Fox tea. Being confused, Fox turns to Sheik who has already started drinking. Fox takes the cup and the three have a small tea party. The tea party is rudely interrupted by several falling figures of Mr. Game & Watch, followed by Snake and Lucario. Shadow Bugs come out of Mr. Game & Watch and create a new enemy called Duon. Falco turns up last minute to join the fight. After Duon is defeated and Mr. Game & Watch is back to normal, Fox goes to shoot him, but Peach stops him. She scolds Mr. Game & Watch, but then offers him her Parasol, which he enjoys. Meta Knight takes back the Halberd and flies it over to meet the other groups. | Out there, Fox is piloting a new Arwing and is shooting the Halberd's main cannons. Unfortunately, Peach is in front of it and almost gets hit by the lasers and the explosions. Sheik thinks that Fox is trying to attack Peach and appears on the top of the Arwing and breaks the cover. Fox and Sheik fall down to the Halberd and begin to fight. Peach stops them and offers Fox tea. Being confused, Fox turns to Sheik who has already started drinking. Fox takes the cup and the three have a small tea party. The tea party is rudely interrupted by several falling figures of Mr. Game & Watch, followed by Snake and Lucario. Shadow Bugs come out of Mr. Game & Watch and create a new enemy called Duon. Falco turns up last minute to join the fight. After Duon is defeated and Mr. Game & Watch is back to normal, Fox goes to shoot him, but Peach stops him. She scolds Mr. Game & Watch, but then offers him her Parasol, which he enjoys. Meta Knight takes back the Halberd and flies it over to meet the other groups. | ||
Now all the Smashers enter Subspace and get hit by Tabuu's offwaves. Ness, Luigi and Kirby save all the Smashers and they all get revived. Link and Zelda see Ganondorf's trophy and both decide to revive him. Everyone enters the Great Maze, | Now all the Smashers enter Subspace and get hit by Tabuu's offwaves. Ness, Luigi and Kirby save all the Smashers and they all get revived. Link and Zelda see Ganondorf's trophy and both decide to revive him. Everyone enters the Great Maze, then Sonic the Hedgehog shows up and breaks Tabuu's butterfly wings, after which they all face off with Tabuu and destroy him, returning their world to normal. | ||
===Link=== | ===Link=== | ||
| Line 122: | Line 137: | ||
'''Zelda Captured''' | '''Zelda Captured''' | ||
Link and Yoshi stop a Fake Peach from using the Dark Cannon to shoot Mario and Pit. The pair go into a battle against Peach, in which they win and the fake disappears. Link | Link and Yoshi stop a Fake Peach from using the Dark Cannon to shoot Mario and Pit. The pair go into a battle against Peach, in which they win and the fake disappears. Link looks back at Mario with an angry expression, makes Mario so angry at him as he runs up toward Link to attack him. He dodges to the side as Mario's fist comes down to where he was standing. Link and Yoshi then face off against Mario and Pit, who then lose. Dedede then turns up to take the two trophies. As Dedede's passing, Link catches a glance of Zelda's trophy in the back. Kirby stops Dedede and revives the two. Pit then shoots an arrow at the incoming car that Dedede is using, causing it to start failing. The four then team up to follow Dedede's failing car to get back the other trophies. | ||
'''Doesn't matter anymore''' | '''Doesn't matter anymore''' | ||
| Line 128: | Line 143: | ||
Link and co. find Dedede's abandoned car outside a cave, which is pretty much a load of tunnels going round and round that they all go through. Once at Dedede's Castle, they all see Bowser 'running' off with Zelda's trophy. Mario goes to attack Bowser, but Bowser uses Zelda a shield and Mario moves his attack away as he did not want to hurt the princess. Bowser then flies off with Zelda and Link and co. run after. | Link and co. find Dedede's abandoned car outside a cave, which is pretty much a load of tunnels going round and round that they all go through. Once at Dedede's Castle, they all see Bowser 'running' off with Zelda's trophy. Mario goes to attack Bowser, but Bowser uses Zelda a shield and Mario moves his attack away as he did not want to hurt the princess. Bowser then flies off with Zelda and Link and co. run after. | ||
After this, all the characters meet up and enter Subspace. Here they get his by Tabuu's Off Waves and get turned into trophies. Kirby is the one to revive both Zelda | After this, all the characters meet up and enter Subspace. Here they get his by Tabuu's Off Waves and get turned into trophies. Kirby is the one to revive both Link and Zelda. If both of them are found, they agree to revive Ganondorf and add him to the good side before entering the Great Maze. After Sonic the Hedgehog shows up, they all fight Tabuu and win. | ||
===Ganondorf=== | ===Ganondorf=== | ||
| Line 139: | Line 154: | ||
Inside Subspace, Bowser is walking in front of Ganondorf, who pulls out a Dark Cannon and backstabs Bowser. Ganondorf kicks the trophied Bowser out of the way and walks forward to talk to Master Hand. He bows and, as he looks up, Ganondorf sees golden chains attached to Master Hand. Looking up higher, he sees Tabuu 'holding' the chains. This enrages Ganondorf and he jumps up very high to Fal- er, Warlock Punch Tabuu in the face. Tabuu just reflects Ganondorf's attack and turns him into a trophy. The trophy then hits Master Hand and causes the chains to break. Master Hand then turns on Tabuu and tries to attack and fails, falling to the 'floor' limply. | Inside Subspace, Bowser is walking in front of Ganondorf, who pulls out a Dark Cannon and backstabs Bowser. Ganondorf kicks the trophied Bowser out of the way and walks forward to talk to Master Hand. He bows and, as he looks up, Ganondorf sees golden chains attached to Master Hand. Looking up higher, he sees Tabuu 'holding' the chains. This enrages Ganondorf and he jumps up very high to Fal- er, Warlock Punch Tabuu in the face. Tabuu just reflects Ganondorf's attack and turns him into a trophy. The trophy then hits Master Hand and causes the chains to break. Master Hand then turns on Tabuu and tries to attack and fails, falling to the 'floor' limply. | ||
Later on, if Zelda | Later on, if Link and Zelda are revived by Kirby, the two agree to revive Ganondorf. He is confused by this action at first, but after Link and Zelda make their way toward the Great Maze, he charges up some dark magic and goes with the two into the Not-So-Great Maze. After the maze, Sonic the Hedgehog shows up and attacks to break his wings, Tabuu is defeated and the characters are all standing on a rock, looking toward where the large Subspace Rift was. | ||
===Toon Link=== | ===Toon Link=== | ||
| Line 145: | Line 160: | ||
==Zelda Items== | ==Zelda Items== | ||
<gallery widths=300 heights=160> | |||
File:Heart Container - SSBB.png|[[Heart Container]]<br/>Utilising the ''[[The Legend of Zelda: Twilight Princess|Twilight Princess]]'' design, rather than the ''[[The Legend of Zelda: Ocarina of Time|Ocarina of Time]]'' design seen in ''[[Super Smash Bros. Melee]]'', this reduces a character's damage meter by 100 percentage points. | |||
File:Deku Nut - SSBB.png|[[Deku Nut]]<br/>This item causes characters to be stunned and easier to hit, but this only happens on the ground. If someone is hit in the air by the item, it will cause them 18% damage and ― most likely ― KO them. | |||
File:Bunny Hood - SSBB.png|[[Bunny Hood]]<br/>This item returns from ''Melee''. It makes the character who picked it up move quicker and jump higher, but only lasts for about 12 seconds ― unless it is knocked off by a hard hit. | |||
</gallery> | |||
==Zelda Trophies== | ==Zelda Trophies== | ||
[[Link]]: To obtain, | <gallery widths=240 heights=135> | ||
File:Link - SSB Brawl Trophy with text.png|[[Link]]: To obtain, complete Classic Mode as Link. | |||
Triforce Slash (Link): To obtain, | File:Triforce Slash (Link) - SSB Brawl Trophy with text.png|Triforce Slash (Link): To obtain, complete All-Star Mode as Link. | ||
File:Zelda - SSB Brawl Trophy with text.png|[[Zelda]]: To obtain, complete Classic Mode as Zelda. | |||
[[Zelda]]: To obtain, | File:Light Arrow (Zelda) - SSB Brawl Trophy with text.png|[[Light Arrow]] (Zelda): To obtain, complete All-Star Mode as Zelda. | ||
File:Sheik - SSB Brawl Trophy with text.png|[[Sheik]]: To obtain, complete Classic Mode as Sheik. | |||
[[Light Arrow]] (Zelda): To obtain, | File:Light Arrow (Sheik) - SSB Brawl Trophy with text.png|Light Arrow (Sheik): To obtain, complete All-Star Mode as Sheik. | ||
File:Ganondorf - SSB Brawl Trophy with text.png|[[Ganon]]dorf: To obtain, complete Classic Mode as Ganondorf. | |||
[[Sheik]]: To obtain, | File:Beast Ganon - SSB Brawl Trophy with text.png|Beast [[Ganon]]: To obtain, complete All-Star Mode as Ganondorf. | ||
File:Toon Link - SSB Brawl Trophy with text.png|[[Toon Link]]: To obtain, complete Classic Mode as Toon Link. | |||
Light Arrow (Sheik): To obtain, | File:Triforce Slash (Toon Link) - SSB Brawl Trophy with text.png|Triforce Slash (Toon Link): To obtain, complete All-Star Mode as Toon Link. | ||
File:Heart Container - SSB Brawl Trophy with text.png|[[Heart Container]]: Randomly obtained. (Found in Subspace Emissary) | |||
[[Ganon | File:Bunny Hood - SSB Brawl Trophy with text.png|[[Bunny Hood]]: Randomly obtained. | ||
File:Deku Nuts - SSB Brawl Trophy with text.png|[[Deku Nut]]s: Randomly obtained. | |||
Beast [[Ganon]]: To obtain, | File:Tingle - SSB Brawl Trophy with text.png|[[Tingle]]: Randomly obtained. | ||
File:Wolf Link - SSB Brawl Trophy with text.png|[[Wolf Link]]: Randomly obtained. | |||
[[Toon Link]]: To obtain, | File:Robed Zelda (With Hood) - SSB Brawl Trophy with text.png|Robed Zelda (With Hood): Randomly obtained. | ||
File:Midna - SSB Brawl Trophy with text.png|[[Midna]]: Randomly obtained. | |||
Triforce Slash (Toon Link): To obtain, | File:Ilia - SSB Brawl Trophy with text.png|[[Ilia]]: Randomly obtained. | ||
File:Malo - SSB Brawl Trophy with text.png|[[Malo]]: Randomly obtained. | |||
[[Heart Container]]: | File:Zant - SSB Brawl Trophy with text.png|[[Zant]]: Randomly obtained. | ||
File:King Bulblin - SSB Brawl Trophy with text.png|[[King Bulblin]]: Randomly obtained. | |||
[[Bunny Hood]]: | File:Agitha - SSB Brawl Trophy with text.png|[[Agitha]]: Randomly obtained. | ||
File:Darknut - SSB Brawl Trophy with text.png|[[Darknut]]: Randomly obtained. | |||
[[Deku Nut]]s: | File:Bulblin - SSB Brawl Trophy with text.png|[[Bulblin]]: Randomly obtained. | ||
File:Ooccoo & Son - SSB Brawl Trophy with text.png|[[Ooccoo]] & [[Ooccoo Jr.|Son]]: Randomly obtained. | |||
[[Tingle]]: | File:Shadow Beast - SSB Brawl Trophy with text.png|[[Shadow Beast]]: Randomly obtained. | ||
File:Yeta - SSB Brawl Trophy with text.png|[[Yeta]]: Randomly obtained. | |||
[[Wolf Link]]: | File:Ashei - SSB Brawl Trophy with text.png|[[Ashei]]: Randomly obtained. | ||
File:Darbus - SSB Brawl Trophy with text.png|[[Darbus]]: Randomly obtained. | |||
Robed Zelda (With Hood): | File:Ralis - SSB Brawl Trophy with text.png|[[Prince Ralis|Ralis]]: Randomly obtained. | ||
File:Goron - SSB Brawl Trophy with text.png|[[Goron]]: Randomly obtained. | |||
[[Midna]]: | File:Zora - SSB Brawl Trophy with text.png|[[Zora]]: Randomly obtained | ||
File:Sages - SSB Brawl Trophy with text.png|[[Ancient Sages|Sages]]: Randomly obtained. | |||
[[Ilia]]: | File:Outset Link - SSB Brawl Trophy with text.png|[[Outset Island|Outset]] Link: To obtain, clear Target Smash Level 5 with all characters, or use one of the hammers to smash the glass box early. | ||
File:Zelda (Wind Waker) - SSB Brawl Trophy with text.png|Zelda (Wind Waker): Randomly obtained. | |||
[[Malo]]: | File:Ganondorf (Wind Waker) - SSB Brawl Trophy with text.png|Ganondorf (Wind Waker): Randomly obtained | ||
File:Medli - SSB Brawl Trophy with text.png|[[Medli]]: Randomly obtained. | |||
[[Zant]]: | File:Aryll - SSB Brawl Trophy with text.png|[[Aryll]]: Randomly obtained. | ||
File:Tetra - SSB Brawl Trophy with text.png|[[Tetra]]: Randomly obtained. | |||
[[King Bulblin]]: | File:Helmaroc King - SSB Brawl Trophy with text.png|[[Helmaroc King]]: Randomly obtained. | ||
File:Salvatore - SSB Brawl Trophy with text.png|[[Salvatore]]: Randomly obtained. | |||
[[Agitha]]: | File:Link's Grandma - SSB Brawl Trophy with text.png|[[Grandma|Link's Grandma]]: Randomly obtained. | ||
File:Valoo - SSB Brawl Trophy with text.png|[[Valoo]]: Randomly obtained. | |||
[[Darknut]]: | File:Pigs - SSB Brawl Trophy with text.png|[[Pig]]s: Randomly obtained. | ||
File:Great Fairy - SSB Brawl Trophy with text.png|[[Great Fairy]]: Randomly obtained. | |||
[[Bulblin]]: | File:King of Red Lions - SSB Brawl Trophy with text.png|[[King of Red Lions]]: Randomly obtained. | ||
File:Pirate Ship - SSB Brawl Trophy with text.png|[[Pirate Ship]]: Randomly obtained. | |||
[[Ooccoo]] & Son: | |||
</gallery> | |||
==Zelda Stickers== | ==Zelda Stickers== | ||
The stickers are a new concept used in Super Smash Bros. Brawl. The stickers can be combined and saved, and each has its own increasing/decreasing ability to help players while playing through the Subspace Emissary. There are 700 stickers to collect; here is a list of all the Zelda stickers that are available to collect. | The stickers are a new concept used in ''Super Smash Bros. Brawl''. The stickers can be combined and saved, and each has its own increasing/decreasing ability to help players while playing through the Subspace Emissary. There are 700 stickers to collect; here is a list of all the ''Legend of Zelda'' stickers that are available to collect. | ||
<gallery> | |||
File:Aryll (Zelda - Wind Waker) - SSB Brawl Sticker.png|[[Aryll]] (The Wind Waker): Ups Electric Attacks by 8. Can be used by all characters. | |||
File:Barkle (Freshly-Picked Tingle's Rosy Rupeeland) - SSB Brawl Sticker.png|[[Barkle]] ([[Freshly-Picked Tingle's Rosy Rupeeland]]): Ups Tail Attacks by 32. Can be used by Yoshi, Pikachu, Diddy Kong and Pokémon Trainer. | |||
File:Boomerang (Zelda - Wind Waker) - SSB Brawl Sticker.png|Boomerang (The Wind Waker): Ups Weapon Attacks by 4. Can be used by Link, Zelda, Ganondorf and Toon Link. | |||
File:Colin (Zelda - Twilight Princess) - SSB Brawl Sticker.png|Colin (Twilight Princess): Ups Direct Special Attacks by 4. Can be used by Link, Zelda, Ganondorf and Toon Link. | |||
File:Daphnes Nohansen Hyrule (Zelda - WW) - SSB Brawl Sticker.png|[[Daphnes Nohansen Hyrule]] (The Wind Waker): Ups Electric Attacks by 31. Can be used by Link, Zelda, Ganondorf and Toon Link. | |||
File:Darknut (Zelda - Wind Waker) - SSB Brawl Sticker.png|Darknut (The Wind Waker): Ups Slash Attacks by 13. Can be used by Link, Zelda, Ganondorf and Toon Link. | |||
File:Deku Baba (Zelda - Ocarina of Time) - SSB Brawl Sticker.png|[[Deku Baba]] (''[[The Legend of Zelda: Ocarina of Time|Ocarina of Time]]''): Ups Arm/Leg Attacks by 4. Can be used by all characters. | |||
File:Deku Link (Zelda - Majora's Mask) - SSB Brawl Sticker.png|[[Deku Link]] (''[[The Legend of Zelda: Majora's Mask|Majora's Mask]]''): Ups Electric Resistance by 5. Can be used by all characters. | |||
File:Deku Nut (Zelda - Ocarina of Time) - SSB Brawl Sticker.png|Deku Nut (Ocarina of Time): Ups Indirect Special Attacks by 4. Can be used by all characters. | |||
File:Epona & Link (Zelda - Ocarina of Time) - SSB Brawl Sticker.png|[[Epona]] and Link (Ocarina of Time): Ups Arm/Leg Attacks by 9. Can be used by Link, Zelda, Ganondorf and Toon Link. | |||
File:Ezlo (Zelda - Minish Cap) - SSB Brawl Sticker.png|[[Ezlo]] (''[[The Legend of Zelda: The Minish Cap|The Minish Cap]]''): Ups Head Attacks by 19. Can be used by all characters. | |||
File:Fairy (Zelda - Twilight Princess) - SSB Brawl Sticker.png|[[Fairy]] (Twilight Princess): Ups Tail Attacks by 7. Can be used by Yoshi, Pikachu, Diddy Kong and Pokémon Trainer. | |||
File:Fierce Deity Link (Zelda - MM) - SSB Brawl Sticker.png|[[Fierce Deity's Mask|Fierce Deity Link]] (Majora's Mask): Ups Slash Attacks by 21. Can be used by Link, Zelda, Ganondorf and Toon Link. | |||
File:Ganondorf (Zelda - Ocarina of Time) - SSB Brawl Sticker.png|Ganondorf (Ocarina of Time): Ups Darkness Attacks by 29. Can be used by Ganondorf. | |||
File:Ganondorf (Zelda - Wind Waker) - SSB Brawl Sticker.png|Ganondorf (The Wind Waker): Ups Darkness Attacks by 33. Can be used by Ganondorf. | |||
File:Gleeok (The Legend of Zelda) - SSB Brawl Sticker.png|[[Gleeok (The Legend of Zelda)|Gleeok]] (''[[The Legend of Zelda]]''): Ups Launch Power by 20. Can be used by all characters. | |||
File:Goron (Zelda - Ocarina of Time) - SSB Brawl Sticker.png|[[Goron]] (Ocarina of Time): Ups Arm Attacks by 21. Can be used by all characters. | |||
File:Green Rupee (Zelda - Twilight Princess) - SSB Brawl Sticker.png|[[Rupee|Green Rupee]] (Twilight Princess): Ups Body/Spin Attacks by 5. Can be used by all characters. | |||
File:Happy Mask Salesman (Zelda - MM) - SSB Brawl Sticker.png|[[Happy Mask Salesman]] (Majora's Mask): Ups Leg Attacks by 9. Can be used by Link, Zelda, Ganondorf and Toon Link. | |||
File:Hookshot (Zelda - Ocarina of Time) - SSB Brawl Sticker.png|Hookshot (Ocarina of Time): Ups Weapon Attacks by 4. Can be used by all characters. | |||
File:Horse Call (Zelda - Twilight Princess) - SSB Brawl Sticker.png|[[Horse Call]] (Twilight Princess): Ups Magic Attacks by 9. Can be used by Zelda. | |||
File:Hylian Shield (Zelda - Minish Cap) - SSB Brawl Sticker.png|Hylian Shield [sic] (The Minish Cap): Ups Shield Recovery by 5. Can be used by all characters. | |||
File:Hylian Shield (Zelda - Twilight Princess) - SSB Brawl Sticker.png|Hylian Shield (Twilight Princess): Ups Slash Resistance by 10. Can be used by Link, Zelda, Ganondorf and Toon Link. | |||
File:Kafei & Keaton Mask (Zelda - MM) - SSB Brawl Sticker.png|[[Kafei]] & [[Keaton Mask]] (Majora's Mask): Ups Shield Recovery by 10. Can be used by all characters. | |||
File:King Bulblin & Lord Bullbo (Zelda - TP) - SSB Brawl Sticker.png|King Bulblin & Lord Bullbo (Twilight Princess): Ups Leg Attacks by 19. Can be used by all characters. | |||
File:King Dodongo (Zelda - Ocarina of Time) - SSB Brawl Sticker.png|[[King Dodongo]] (Ocarina of Time): Ups Flame Attacks by 38. Can be used by all characters. | |||
File:King of Red Lions & Link (Zelda - WW) - SSB Brawl Sticker.png|King of Red Lions & Link (The Wind Waker): Ups Explosive Attacks by 20. Can be used by all characters. | |||
File:King Zora (Zelda - Ocarina of Time) - SSB Brawl Sticker.png|[[King Zora De Bon XVI|King Zora]] (Ocarina of Time): Ups Electric Resistance by 33. Can be used by all characters. | |||
File:Lantern (Zelda - Twilight Princess) - SSB Brawl Sticker.png|[[Lantern]] (Twilight Princess): Ups Flame Resistance by 7. Can be used by Link, Zelda, Ganondorf and Toon Link. | |||
File:Legend of Outset (Zelda - Wind Waker) - SSB Brawl Sticker.png|[[Outset Island|Legend of Outset]] (The Wind Waker): Ups Arm Attacks by 26. Can be used by Link, Zelda, Ganondorf and Toon Link. | |||
File:Light Arrow (Zelda - Twilight Princess) - SSB Brawl Sticker.png|Light Arrow (Twilight Princess): Ups Slash Attacks by 8. Can be used by all characters. | |||
File:Linebeck (Zelda - Phantom Hourglass) - SSB Brawl Sticker.png|[[Linebeck]] (Phantom Hourglass): Ups Throwing Attacks by 20. Can be used by Link, Zelda, Ganondorf and Toon Link. | |||
File:Link & Pigs (Zelda - Wind Waker) - SSB Brawl Sticker.png|Link & [[Pig]]s (The Wind Waker): Ups the chance of Sticker Drops by 40. Can be used by all characters. | |||
File:Link (The Legend of Zelda) - SSB Brawl Sticker.png|Link (The Legend of Zelda): Ups Indirect Special Attacks by 17. Can be used by all characters. | |||
File:Link (Zelda - Link to the Past) - SSB Brawl Sticker.png|Link (''[[The Legend of Zelda: A Link to the Past|A Link to the Past]]''): Ups Electric Resistance by 31. Can be used by Link, Zelda, Ganondorf and Toon Link. | |||
File:Link (Zelda - Twilight Princess) - SSB Brawl Sticker.png|Link (Twilight Princess): Ups Slash Resistance by 27. Can be used by Link, Zelda, Ganondorf and Toon Link. | |||
File:Link (Zelda - Wind Waker) - SSB Brawl Sticker.png|Link (The Wind Waker): Ups Flame Attacks by 31. Can be used by Link, Zelda, Ganondorf and Toon Link. | |||
File:Link with Goron Mask (Zelda - MM) - SSB Brawl Sticker.png|Link with [[Goron Mask]] (Majora's Mask): Ups Slash Attacks by 17. Can be used by Link, Zelda, Ganondorf and Toon Link. | |||
File:Link's Grandma (Zelda - Wind Waker) - SSB Brawl Sticker.png|Link's Grandma (The Wind Waker): Ups Arm/Leg Attacks by 2. Can be used by Link, Zelda, Ganondorf and Toon Link. | |||
File:Lon Lon Milk (Zelda - Ocarina of Time) - SSB Brawl Sticker.png|[[Lon Lon Milk]] (Ocarina of Time): Ups Launch Power by 18. Can be used by Link, Zelda, Ganondorf and Toon Link. | |||
File:Makar (Zelda - Wind Waker) - SSB Brawl Sticker.png|[[Makar]] (The Wind Waker): Ups Slash Resistance by 4. Can be used by Link, Zelda, Ganondorf and Toon Link. | |||
File:Malo (Zelda - Twilight Princess) - SSB Brawl Sticker.png|Malo (Twilight Princess): Ups Launch Resistance by 19. Can be used by all characters. | |||
File:Medli (Zelda - Wind Waker) - SSB Brawl Sticker.png|Medli (The Wind Waker): Ups Leg Attacks by 9. Can be used by all characters. | |||
File:Midna & Wolf Link (Zelda - Twilight Princess) - SSB Brawl Sticker.png|Midna and Wolf Link (Twilight Princess): Ups Leg Attacks by 26. Can be used by Link, Zelda, Ganondorf and Toon Link. | |||
File:Midna (Zelda - Twilight Princess) - SSB Brawl Sticker.png|Midna (Twilight Princess): Detracts 50 from Dizzy Time. Can be used by all characters. | |||
File:Moblin (Zelda - Wind Waker) - SSB Brawl Sticker.png|[[Moblin]] (The Wind Waker): Ups Slash Attacks by 15. Can be used by Link, Zelda, Ganondorf and Toon Link. | |||
File:Ocarina of Time (Zelda - Ocarina of Time) - SSB Brawl Sticker.png|[[Ocarina of Time]] (Ocarina of Time): Ups Arm Attacks by 4. Can be used by all characters. | |||
File:Octorok (Zelda - Ocarina of Time) - SSB Brawl Sticker.png|[[Octorok]] (Ocarina of Time): Ups Leg Attacks by 4. Can be used by Link, Zelda, Ganondorf and Toon Link. | |||
File:Ooccoo (Zelda - Twilight Princess) - SSB Brawl Sticker.png|Ooccoo (Twilight Princess): Ups Explosive Attacks by 7. Can be used by all characters. | |||
File:Phantom Ganon (Zelda - Ocarina of Time) - SSB Brawl Sticker.png|[[Phantom Ganon]] (Ocarina of Time): Ups Darkness Attacks by 40. Can be used by Ganondorf. | |||
File:Piece of Heart (Zelda - Twilight Princess) - SSB Brawl Sticker.png|[[Piece of Heart]] (Twilight Princess): Ups Hearts Container Effect by 50. Can be used by Link, Zelda, Ganondorf and Toon Link. | |||
File:Pinkle (Freshly-Picked Tingle's Rosy Rupeeland) - SSB Brawl Sticker.png - SSB Brawl Sticker.png|[[Pinkle]] (Tingle's Rosy Rupeeland): Ups Magic Attacks by 15. Can be used by Peach and Zelda. | |||
File:Postman (Zelda - Majora's Mask) - SSB Brawl Sticker.png|[[Postman]] (Majora's Mask): Ups Direct Special Attacks by 3. Can be used by all characters. | |||
File:Postman (Zelda - Twilight Princess) - SSB Brawl Sticker.png|Postman (Twilight Princess): Ups Leg Attacks by 11. Can be used by all characters. | |||
File:ReDead (Zelda - Ocarina of Time) - SSB Brawl Sticker.png|[[ReDead]] (Ocarina of Time): Ups Weapon Attacks by 5. Can be used by all characters. | |||
File:Rusl (Zelda - Twilight Princess) - SSB Brawl Sticker.png|[[Rusl]] (Twilight Princess): Ups Explosive Attacks by 11. Can be used by all characters. | |||
File:Salvatore (Zelda - Wind Waker) - SSB Brawl Sticker.png|Salvatore (The Wind Waker): Ups Electric Attacks by 9. Can be used by Link, Zelda, Ganondorf and Toon Link. | |||
File:Shadow Beast (Zelda - Twilight Princess) - SSB Brawl Sticker.png|Shadow Beast (Twilight Princess): Ups Darkness Attacks by 28. Can be used by Ganondorf. | |||
File:Sheik (Zelda - Ocarina of Time) - SSB Brawl Sticker.png|Sheik (Ocarina of Time): Ups Body/Spin Attacks by 17. Can be used by Link, Zelda, Ganondorf and Toon Link. | |||
File:Skull Kid (Zelda - Majora's Mask) - SSB Brawl Sticker.png|[[Skull Kid]] (Majora's Mask): Ups Leg Attacks by 20. Can be used by all characters. | |||
File:Skull Kid (Zelda - Ocarina of Time) - SSB Brawl Sticker.png|Skull Kid (Ocarina of Time): Ups Darkness Attacks by 7. Can be used by Ganondorf. | |||
File:Skulltula (Zelda - Ocarina of Time) - SSB Brawl Sticker.png|[[Skulltula]] (Ocarina of Time): Ups Arm Attacks by 7. Can be used by all characters. | |||
File:Spinner (Zelda - Twilight Princess) - SSB Brawl Sticker.png|[[Spinner]] (Twilight Princess): Ups Body/Spin Attacks by 4. Can be used by all characters. | |||
File:Tetra (Zelda - Wind Waker) - SSB Brawl Sticker.png|Tetra (The Wind Waker): Ups Flame Attacks by 25. Can be used by all characters. | |||
File:The Great Fairy (Zelda - Wind Waker) - SSB Brawl Sticker.png|[[Great Fairy|The Great Fairy]] (The Wind Waker): Ups Magic Attacks by 21. Can be used by Peach and Zelda. | |||
File:Tingle (Freshly-Picked Tingle's Rosy Rupeeland) - SSB Brawl Sticker.png - SSB Brawl Sticker.png|Tingle (Tingle's Rosy Rupeeland): Ups Arm Attacks by 12. Can be used by all characters. | |||
File:Tingle (Zelda - Wind Waker) - SSB Brawl Sticker.png|Tingle (The Wind Waker): Ups Flame Resistance by 19. Can be used by Link, Zelda, Ganondorf and Toon Link. | |||
File:Valoo (Zelda - Wind Waker) - SSB Brawl Sticker.png|[[Valoo]] (The Wind Waker): Ups Indirect Special Attacks by 19. Can be used by all characters. | |||
File:Young Zelda (Zelda - Minish Cap) - SSB Brawl Sticker.png|[[Zelda|Young Zelda]] (The Minish Cap): Ups Battering Resistance by 16. Can be used by Link, Zelda, Ganondorf and Toon Link. | |||
File:Young Zelda (Zelda - Ocarina of Time) - SSB Brawl Sticker.png|Young Zelda (Ocarina of Time): Ups Electric Attacks by 20. Can be used by all characters. | |||
File:Zant (Zelda - Twilight Princess) - SSB Brawl Sticker.png|Zant (Twilight Princess): Ups Weapon Attacks by 7. Can be used by Link, Zelda, Ganondorf and Toon Link. | |||
File:Zelda (Zelda - Link to the Past) - SSB Brawl Sticker.png|Zelda (A Link to the Past): Ups Magic Attacks by 27. Can be used by Peach and Zelda. | |||
File:Zelda (Zelda - Ocarina of Time) - SSB Brawl Sticker.png|Zelda (Ocarina of Time): Ups Flame Resistance by 18. Can be used by Link, Zelda, Ganondorf and Toon Link. | |||
File:Zora (Zelda - Ocarina of Time) - SSB Brawl Sticker.png|[[Zora]] (Ocarina of Time): Ups Launch Resistance by 31. Can be used by all characters. | |||
File:Zora Link (Zelda - Majora's Mask) - SSB Brawl Sticker.png|[[Zora Link]] (Majora's Mask): Ups Swim Time by 60. Can be used by all characters. | |||
</gallery> | |||
==Trivia== | |||
* [[Link]] is left-handed in ''Super Smash Bros. Brawl'', meaning that the design of his model would have been taken from ''[[The Legend of Zelda: Twilight Princess|Twilight Princess]]'' on the [[Nintendo GameCube]], the canon version. | |||
[[ | * The [[Bunny Hood]] appears in ''Brawl'' and allows faster characters (mainly Sonic) to outrun stage hazards, namely the cars on Big Blue. | ||
* The description of the [[Aryll]] trophy in ''Brawl'' incorrectly states that she has a 'turtle-marked telescope' in the NTSC version of the game. The PAL version corrected this. | |||
* While [[Darknut]]s have been an enemy since the original ''[[The Legend of Zelda]]'', the trophy in ''Brawl'' only says that they are from ''[[The Legend of Zelda: Twilight Princess|Twilight Princess]]''. | |||
* In the [[Wolf Link]] trophy of ''Brawl'', [[Midna]]'s left hand is colored grey while the rest of her is black. | |||
[[ | |||
[[ | |||
[[ | |||
[[ | |||
[[ | |||
[[ | |||
Link | |||
==External links== | |||
*[https://www.smashbros.com/wii/en_us/ Smash Bros. DOJO!! (Official ''Super Smash Bros. Brawl'' website)] | |||
{{cat|Games}} | |||
{{GamesFooter}} | |||
{{cat|Super Smash Bros. Series}} | |||
Latest revision as of 13:42, December 11, 2023
| This article describes a subject that is or may be outside the core Zelda canon. |

Previous | ||
Next | ||
| Release | ||
|---|---|---|
Platform | Date | |
| Credits | ||
Developer | HAL Laboratory | |
Producer | Kazushige Nojima | |
Director | Masahiro Sakurai | |

Super Smash Bros. Brawl is a fighting game for the Nintendo Wii, in which various Nintendo (and non-Nintendo) characters fight on a 2-D plane. It is the third game in the Super Smash Bros. series and it has 35 characters to play as. This game features multiple characters and stages from The Legend of Zelda series, along with many trophies and a few items. Most of the characters and items take their appearances from Twilight Princess.
Zelda Fighters
There are five characters from the Zelda series that are playable in the game. (Technically, four characters are playable as Zelda and Sheik are paired together on the character selection screen.)
Link

Link's design in the game is taken from Twilight Princess. He is a returning character from the very start of the Super Smash Bros. series. He is usable from the very start of the game. His moves are based on items he gained in the game: Bow, Bombs, Clawshot and Gale Boomerang. He uses the Master Sword and Hylian Shield, which has become a staple of the Links that appear in the Super Smash Bros. series. Link and Toon Link share a similar moveset. The main differences between them is in their abilities. Link is heavier and slower than Toon Link, but he is not as floaty and is more powerful than his toon counterpart. His Final Smash is shared once again. It is called Triforce Slash and it traps a character in a Triforce as Link slashes repeatedly. If another character touches the Triforce shape or Link during the attack, they could get trapped too, but they will definitely get damaged and knocked back significantly. Once the onslaught is done, Link will slash once more and send the other character flying, usually to their KO.
Link has the usual 6 palette swaps (color changes): Green, Red, Blue, Purple, Yellow and Dark Link versions of his tunic and hat. The shield also changes color slightly.
Zelda

The Princess Zelda that appears in the game takes the appearance of Zelda from Twilight Princess. She is also a returning character from the previous game of the Super Smash Bros. series, Super Smash Bros. Melee, from which she has been buffed out slightly. She ― along with Sheik ― is playable from the very start of the game. In the game, her attacks are magic based and she uses the spells from Ocarina of Time (Namely Din's Fire for offense, Nayru's Love for defense and Farore's Wind for recovery). Zelda can use Transform to change into Sheik. Her attacks are fairly powerful and most have a good knockback, but Zelda is a lightweight and so is easily knocked back herself. Zelda shares her Final Smash with Sheik, which is her using a Light Arrow to inflict high amounts of damage and (usually) One-Hit KO opponents.
Zelda has 6 costumes; normal design, Red version, Blue version, Green version, Dark version and one that has a similar color scheme to her Ocarina of Time and Melee counterpart.
Sheik

Sheik's design is taken from Twilight Princess concept art, where she was supposedly going to appear. She returns, along with Zelda, from Super Smash Bros. Melee. Sheik and Zelda work together like two halves; Zelda's flaws are more or less covered by Sheik while Zelda returns the favor by covering Sheik's weaknesses. Sheik is a fast character and not very light, but her attacks generally are not powerful and do not have strong knockback. She uses frequent martial arts, along with a chain and needles which can be charged up to throw them further. She can use Transform to change into Zelda at any point during a match, which also gives her invincibility for a short time. She shares her Final Smash ― Light Arrow ― with Zelda.
Like her Final Smash, her palette swaps are also shared with Zelda. This is all because they are considered to be part of each other and so their characters are bundled together.
Ganondorf

Ganondorf's design is taken from Twilight Princess like the three characters before. He also returns from Super Smash Bros. Melee, but has been significantly changed. Ganondorf was considered a clone of Captain Falcon in Melee, while in Brawl, he is now given different animations (even though they do share similar moves). He is a powerhouse character, making him very heavy, slow and all moves give very high amounts of knockback. Ganondorf is an unlockable character in the game. Three ways to unlock him are; play 200 brawls, complete Classic Mode with Link/Zelda on Hard or get Ganondorf to join the party in the Subspace Emissary. With the exception of the latter option, Ganondorf must be beaten in a 1v1 match on Final Destination before unlocking completely. Ganondorf's moveset is very similar to Captain Falcon's. The Warlock Punch is extremely similar to the famous Falcon Punch, but it is more powerful, but slower. The main differences Ganondorf has to Captain Falcon is that his moves are more powerful and cause more knockback on characters. Beast Ganon is his Final Smash. Ganondorf changes into his Beast form and roars/stomps on the ground with front legs ― which causes all the characters touching the stage to be paralysed. Ganon then dashes off to the side of the stage, dragging along any characters he touches along to their KO. Ganondorf then returns to the point where he activated the Final Smash to continue as usual.
Ganondorf has the regular amount of 6 palette swaps: Grey/Purple Armor (default), Black Armor, Blue Armor, Red Armor, Green Armor and Brown Armor.
Toon Link

Toon Link is a character based on the Link in The Wind Waker, Phantom Hourglass, and Spirit Tracks. He acts as a replacement for Young Link, who was the second version of Link in Super Smash Bros. Melee. In the game, he uses the shield from The Wind Waker, as well as the Master Sword, the Boomerang, the Hero's Bow, the Bombs, and the Hookshot. Statistically, he is faster than Link, but also weaker and lighter. His Final Smash ― Triforce Slash ― is shared with Link.
Toon Link has 6 color sets, which are Green, Red, Blue, and Purple tunic/ hat color changes, as well as one styled as Dark Link and one based on the appearance of Link in Zelda 1 and 2.
Assist Trophies
Tingle

Tingle is the only The Legend of Zelda series Assist Trophy in Brawl. He can either help or hinder the player, by doing one of several actions.
- He can make it rain Hammers/Golden Hammers, even if the two items have been turned off before the match.
- He summons a lot of balloons in the background and flies away with them, nothing happens.
- He can make it rain banana peels, causing players to trip all over the place.
- He can release lots of flowers, causing the screen to zoom in and focus on the player's character.
- He can give all characters the Superspicy Curry effect.
Zelda Stages
Three Zelda stages appear in the game.
Bridge of Eldin

As the name implies, it is a stage based on the Bridge of Eldin from Twilight Princess. It is a flat stage where the dangers really come from what happens to the stage rather than what is on the stage the whole time.
At random points, King Bulblin comes along the stage riding on Lord Bullbo, damaging any players he comes into, and usually drops a bomb in the center of the bridge, blowing it up. Sometimes, a Bulblin will follow him along and fall down the hole created. Eventually, a Twilight portal will open and refill the gap in the bridge with a new piece. Once the hole is present, players can fall down and lose a stock.
In the background of the stage, Hyrule Castle is present in its Twilight Princess incarnation.
Pirate Ship

The stage is based on Tetra's Pirate Ship and the Great Sea from The Wind Waker. The stage is surrounded by water that can cause characters to drown if they stay in it too long. It has a couple of platforms on the sail that players can jump to and there is a catapult like contraption at the left side of the stage that comes out every now and again which ― if a character is standing on it and it pops up ― can throw a character instantly past the left blast line. If no character is on it when it pops up, nothing else happens and it retreats back down into the stage.
There are several different events on the stage:
- At some points, the ship will hit a rock and not move for a while. Players can stand and fight on the rock, but they must get back onto the ship as it starts to move again unless they want to lose a life.
- The King of Red Lions shows up on the right of the stage for short amounts of time. Players can fight and stand on it, but they must get back onto the ship as King of Red Lions moves away again.
- A tornado whisks the ship up into the air at times, giving players no chance of landing in water and getting a second chance to get back up to the stage after using their recovery. The ship will be dropped back down after the time has run out.
- In the background, a sentry tower appears that bombards the ship with bombs. The bombs inflict damage onto the characters and can cause them to fly past one of the blast lines.
Temple (Melee Stage)

The Temple stage makes a return from Super Smash Bros. Melee. It is a multi-level stage which is based on Zelda II's Temples. It is not a stage full of traps; but rather, it is a very large stage that has no dangers other than the usual blastlines. In the background of the stage, there are several buildings.
Temple is actually one of the most disliked stages in Melee and Brawl - because it is so large, players can run all over the stage to dodge any combat and that taunt parties (matches where players continuously taunt and do not fight each other) often take place there.
Roles in Subspace Emissary
The Subspace Emissary is the Story Mode in Super Smash Bros. Brawl and it incorporates all but three of the unlockable characters in the storyline, one of which is Toon Link.
The main plot is that an evil entity called Tabuu is going to take over the Smash Brothers World. Several characters are on Tabuu's side (because of the fact that Master Hand has been taken captive) including a mysterious character called the Ancient Minister who has control over ROBs and knows where to get special bombs called Subspace Bombs ― they suck up certain parts of the world and leave a dome of Subspace stuff behind. The characters all form four or five groups that have different tasks to complete and bosses to face before they all meet up and go to get Tabuu. They enter a mysterious place called Subspace where they find Tabuu, who fires his Off Waves to turn them all into trophies. By a very convenient plot device, all the heroes are revived. They join forces with the characters who were on Tabuu's side originally and they all make their way through the very lengthy and annoying, Great Maze. Once that horror is over and done with, Sonic the Hedgehog shows up and breaks Tabuu's butterfly wings, then they all face off with Tabuu and destroy him, returning their worlds to normal.
There are two different storylines that can take place depending on the player's choice near the start of the story.
Zelda/Sheik
Zelda is one of the more important characters in the plot of Subspace Emissary. She and Princess Peach are the way the story gets split in two.
Peach and Zelda are watching a friendly match between Mario and Kirby, when a large ominous ship appears along with some red clouds. The ship drops spores called Shadow Bugs onto the ground which begin to form into Primids (a common enemy in Subspace Emissary). Zelda uses Farore's Wind to join the battle below. Once all the enemies are defeated, the Ancient Minister shows up and drops a Subspace bomb. Two ROBs come out and activate the bomb. Mario runs to stop it, but is shot far away by a cannonball. Kirby just looks up to where Mario disappeared, but turns around as he hears someone scream. Both Zelda and Peach are stuck in cages and being held captive by Petey Piranha (an enemy from Super Mario Sunshine and a playable character from Mario Kart: Double Dash).
This is where the differences are. If you save Peach, Zelda will get trapped and vice versa
Saved Zelda
Kirby defeats Petey and Zelda escapes her cage easily. Wario just turns up with a strange gun called a Dark Cannon and points it at Kirby and Zelda. Wario then notices Peach laying helplessly on the ground under her cage and shoots the gun at her. An arrow pierces right through the princess' body and turns her into a trophy. He then picks up the trophied Princess and runs off with her. Kirby and Zelda chase after him, but the counter on the Subspace Bomb is almost out. The bomb 'blows up' and covered the entire stadium, but Kirby and the rescued princess ride away from the blast on a Warp Star. Up above the clouds, the Warp Star collides with the giant ship called the Halberd and the princess and Kirby get knocked onto it. They go to the opposite side of the ship to find an Arwing battling against the Halberd. The Halberd shoots out a claw at the Arwing and it knocks off one of the wings. The Arwing falls to the ground and knocks Kirby and Zelda off the edge of the Halberd and into the clouds. They go through the clouds briefly before reaching solid ground once again, they then continue their search for the Halberd on the ground.
The pair then come across a lake. Kirby hears something and runs off to investigate, leaving Zelda alone. Bowser turns up with another Dark Cannon and makes her a trophy. A Fake Bowser turns up and becomes Shadow Bugs that cover Zelda's trophy to make a fake of her. Soon after, Link and Yoshi come running past and Fake Zelda points a Dark Cannon at them, but the gun is destroyed by Pit and Mario ― who proceed to fight the fake Zelda. They win and Zelda turns into nothing. Unfortunately for Mario and Pit, Link looks up just to see Zelda's fake trophy melt away and this kinda makes him angry. He runs up the hill to attack Mario, but Mario dodges. Mario and Pit then face off against Link and Yoshi. Mario and Pit beat Link and Yoshi ― who turn into trophies. King Dedede turns up in his weird car thing and uses his claw to pick up the two trophies. As this happens, Mario sees Peach's trophy in Dedede's car. Kirby reappears at the back of the car to cut off the claw and release/reawaken Link and Yoshi. Link then shoots an arrow at the car as it tries to come back around and it starts to splutter and stop. The five set off to find Dedede and the other trophies.
Captured Zelda
King Dedede makes Luigi a trophy in order to lure Wario to stop his weird car thing, which has Zelda and Ness in it already. Wario takes the bait and tries to take Luigi too, but he is swarmed by Waddle Dees, who put Luigi in the car that Dedede now steals. Dedede then passes by a trophied Mario and Pit and tries to take them too, but Kirby stops him and Pit shoots an arrow at the car and causes it to start failing.
Dedede takes the three trophies to his personal castle and puts Dedede broches on all three of them, having to take one from himself to put it on Zelda. Suddenly, Bowser and his Koopa Troop come and break down the ceiling. This knocks out Dedede and Bowser takes Zelda's trophy. Back outside, Bowser takes the Zelda trophy to his Koopa Clown Car. He is ambushed by Mario, Link and co. During the small battle, the Dedede brooch falls off Zelda and Kirby swallows it. Bowser gets away with Zelda while all of the Smashers go toward the Halberd.
Doesn't matter anymore
Snake, Meta Knight and Lucario have been sneaking around the Halberd for a while and they come across a room where both Zelda and Peach's trophies are stuck in cages. Before the trio can do anything to free the princesses, Shadow Bugs coat them and create fakes. The three face off against the fakes and beat them. The two princesses get revived and Snake tells them to stay put. Of course, they do not. Sheik comes out of the room followed by a giggling Peach and the pair make their way to the deck of the Halberd.
Out there, Fox is piloting a new Arwing and is shooting the Halberd's main cannons. Unfortunately, Peach is in front of it and almost gets hit by the lasers and the explosions. Sheik thinks that Fox is trying to attack Peach and appears on the top of the Arwing and breaks the cover. Fox and Sheik fall down to the Halberd and begin to fight. Peach stops them and offers Fox tea. Being confused, Fox turns to Sheik who has already started drinking. Fox takes the cup and the three have a small tea party. The tea party is rudely interrupted by several falling figures of Mr. Game & Watch, followed by Snake and Lucario. Shadow Bugs come out of Mr. Game & Watch and create a new enemy called Duon. Falco turns up last minute to join the fight. After Duon is defeated and Mr. Game & Watch is back to normal, Fox goes to shoot him, but Peach stops him. She scolds Mr. Game & Watch, but then offers him her Parasol, which he enjoys. Meta Knight takes back the Halberd and flies it over to meet the other groups.
Now all the Smashers enter Subspace and get hit by Tabuu's offwaves. Ness, Luigi and Kirby save all the Smashers and they all get revived. Link and Zelda see Ganondorf's trophy and both decide to revive him. Everyone enters the Great Maze, then Sonic the Hedgehog shows up and breaks Tabuu's butterfly wings, after which they all face off with Tabuu and destroy him, returning their world to normal.
Link
Link is first seen taking the Master Sword out of its pedestal. He then continues walking through some Woods with what is presumed to be Navi and he meets up with a sleeping Yoshi. Some Shadow Bugs fall from the Halberd and Link and Yoshi team up to beat all of the enemies. Link and Yoshi then decide to team up and follow the Halberd.
Zelda Saved
Link and Yoshi are running past a lake, unknowing that Fake Zelda is pointing a Dark Cannon at them. Mario and Pit stop the Dark Cannon and defeat Fake Zelda. Link looks up and sees a Zelda trophy fade away at the same time as Mario turns to look at him with an angry expression. This makes Link angry and so he decides to try and attack Mario, which leads to Link and Yoshi being turned into trophies themselves. King Dedede shows up and picks up the two trophies, but Kirby stops him and revives the two. Link then shoots an arrow at the car that Dedede is using as it is coming back at them all, which causes it to fail. The five then run after the slowly failing car to catch Dedede.
Zelda Captured
Link and Yoshi stop a Fake Peach from using the Dark Cannon to shoot Mario and Pit. The pair go into a battle against Peach, in which they win and the fake disappears. Link looks back at Mario with an angry expression, makes Mario so angry at him as he runs up toward Link to attack him. He dodges to the side as Mario's fist comes down to where he was standing. Link and Yoshi then face off against Mario and Pit, who then lose. Dedede then turns up to take the two trophies. As Dedede's passing, Link catches a glance of Zelda's trophy in the back. Kirby stops Dedede and revives the two. Pit then shoots an arrow at the incoming car that Dedede is using, causing it to start failing. The four then team up to follow Dedede's failing car to get back the other trophies.
Doesn't matter anymore
Link and co. find Dedede's abandoned car outside a cave, which is pretty much a load of tunnels going round and round that they all go through. Once at Dedede's Castle, they all see Bowser 'running' off with Zelda's trophy. Mario goes to attack Bowser, but Bowser uses Zelda a shield and Mario moves his attack away as he did not want to hurt the princess. Bowser then flies off with Zelda and Link and co. run after.
After this, all the characters meet up and enter Subspace. Here they get his by Tabuu's Off Waves and get turned into trophies. Kirby is the one to revive both Link and Zelda. If both of them are found, they agree to revive Ganondorf and add him to the good side before entering the Great Maze. After Sonic the Hedgehog shows up, they all fight Tabuu and win.
Ganondorf
Ganondorf is first seen giving Bowser orders to find whichever Princess has been captured. He is able to watch as Dedede's Castle is taken over by a Subspace bomb. Master Hand then appears on the screen to give Ganondorf orders.
Later on in the Subspace Bomb Factory, Samus and Pikachu prepare to fight the Ancient Minister to stop him using any more Subspace Bombs, but nothing happens. Donkey/Diddy Kong, Olimar and Captain Falcon turn up to join them. Ganondorf shows up in hologram form and instructs the ROBs to detonate the bombs. The Ancient Minister stops the ROBs, but Ganondorf uses a button to make the ROBs shoot the Ancient Minister and start the detonation of the bombs. Samus and co. trying to separate the ROBs and the bombs but to no avail. Ganondorf laughs and the hologram disappears into a large flock of enemies.
Soon after, all the bombs 'explode' and a large Subspace Rift is left behind. A large gunship comes out of it with Ganondorf and Bowser in control. The large gun at the front shoots out a large shot that creates another Subspace Rift. The Halberd comes into the vision of the pair and Ganondorf orders for the guns to start shooting at the Halberd. The Halberd dodges all the shots, but one manages to destroy it. Samus' gunship, Olimar's ship, an Arwing and the Falcon Flyer come out of the wreckage and begin dodging the shots. Kirby comes from the side on a Dragoon and cuts right through the Subspace Canon, causing it to start exploding. Ganondorf and Bowser walk back into Subspace as the other ships make it in as well.
Inside Subspace, Bowser is walking in front of Ganondorf, who pulls out a Dark Cannon and backstabs Bowser. Ganondorf kicks the trophied Bowser out of the way and walks forward to talk to Master Hand. He bows and, as he looks up, Ganondorf sees golden chains attached to Master Hand. Looking up higher, he sees Tabuu 'holding' the chains. This enrages Ganondorf and he jumps up very high to Fal- er, Warlock Punch Tabuu in the face. Tabuu just reflects Ganondorf's attack and turns him into a trophy. The trophy then hits Master Hand and causes the chains to break. Master Hand then turns on Tabuu and tries to attack and fails, falling to the 'floor' limply.
Later on, if Link and Zelda are revived by Kirby, the two agree to revive Ganondorf. He is confused by this action at first, but after Link and Zelda make their way toward the Great Maze, he charges up some dark magic and goes with the two into the Not-So-Great Maze. After the maze, Sonic the Hedgehog shows up and attacks to break his wings, Tabuu is defeated and the characters are all standing on a rock, looking toward where the large Subspace Rift was.
Toon Link
Toon Link is one of the three characters not a part of the Subspace Emissary. Instead, a door appears early on in "The Forest" stage that takes the player to a battle with Toon Link on the Pirate Ship.
Zelda Items
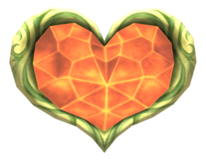
Heart Container
Utilising the Twilight Princess design, rather than the Ocarina of Time design seen in Super Smash Bros. Melee, this reduces a character's damage meter by 100 percentage points.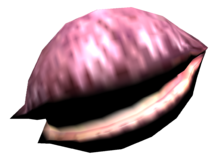
Deku Nut
This item causes characters to be stunned and easier to hit, but this only happens on the ground. If someone is hit in the air by the item, it will cause them 18% damage and ― most likely ― KO them.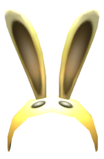
Bunny Hood
This item returns from Melee. It makes the character who picked it up move quicker and jump higher, but only lasts for about 12 seconds ― unless it is knocked off by a hard hit.


Zelda Trophies
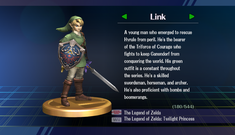
Link: To obtain, complete Classic Mode as Link.
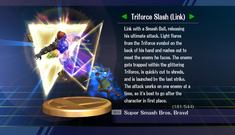
Triforce Slash (Link): To obtain, complete All-Star Mode as Link.
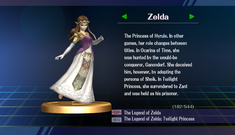
Zelda: To obtain, complete Classic Mode as Zelda.

Light Arrow (Zelda): To obtain, complete All-Star Mode as Zelda.
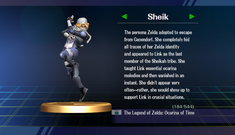
Sheik: To obtain, complete Classic Mode as Sheik.
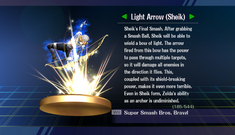
Light Arrow (Sheik): To obtain, complete All-Star Mode as Sheik.

Ganondorf: To obtain, complete Classic Mode as Ganondorf.
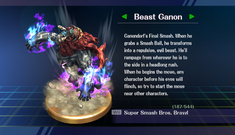
Beast Ganon: To obtain, complete All-Star Mode as Ganondorf.
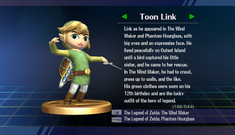
Toon Link: To obtain, complete Classic Mode as Toon Link.
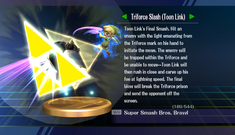
Triforce Slash (Toon Link): To obtain, complete All-Star Mode as Toon Link.
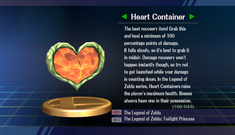
Heart Container: Randomly obtained. (Found in Subspace Emissary)
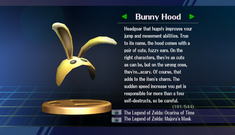
Bunny Hood: Randomly obtained.
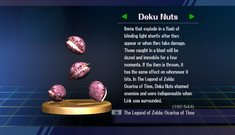
Deku Nuts: Randomly obtained.
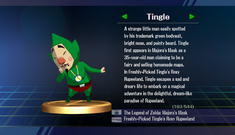
Tingle: Randomly obtained.
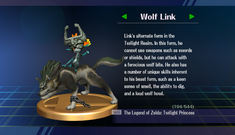
Wolf Link: Randomly obtained.
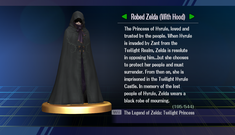
Robed Zelda (With Hood): Randomly obtained.
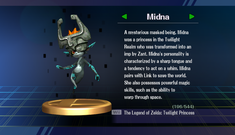
Midna: Randomly obtained.

Ilia: Randomly obtained.
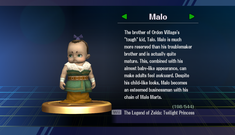
Malo: Randomly obtained.
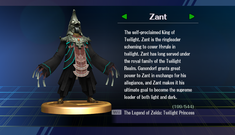
Zant: Randomly obtained.
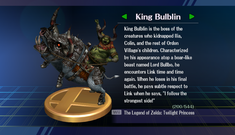
King Bulblin: Randomly obtained.
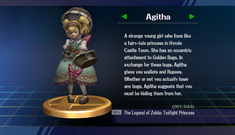
Agitha: Randomly obtained.
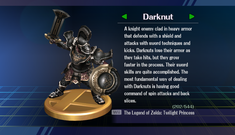
Darknut: Randomly obtained.

Bulblin: Randomly obtained.
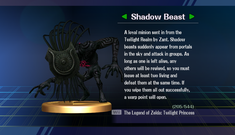
Shadow Beast: Randomly obtained.
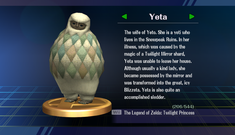
Yeta: Randomly obtained.
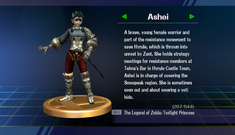
Ashei: Randomly obtained.
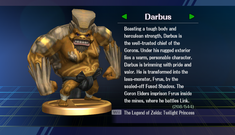
Darbus: Randomly obtained.
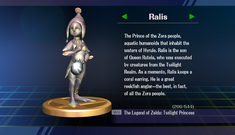
Ralis: Randomly obtained.
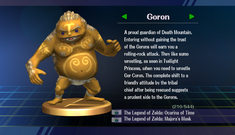
Goron: Randomly obtained.
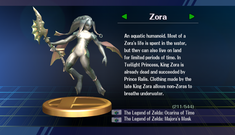
Zora: Randomly obtained
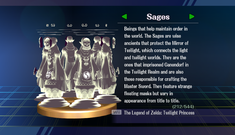
Sages: Randomly obtained.
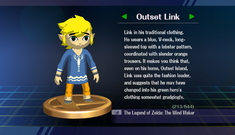
Outset Link: To obtain, clear Target Smash Level 5 with all characters, or use one of the hammers to smash the glass box early.
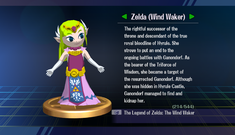
Zelda (Wind Waker): Randomly obtained.
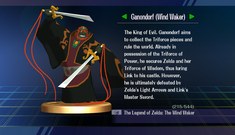
Ganondorf (Wind Waker): Randomly obtained
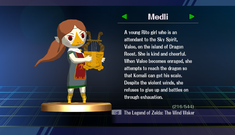
Medli: Randomly obtained.
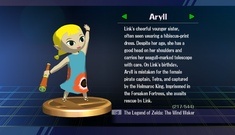
Aryll: Randomly obtained.
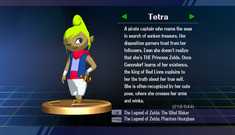
Tetra: Randomly obtained.
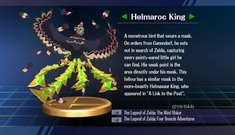
Helmaroc King: Randomly obtained.
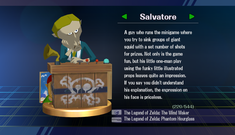
Salvatore: Randomly obtained.
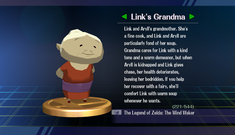
Link's Grandma: Randomly obtained.
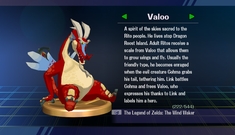
Valoo: Randomly obtained.
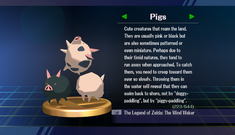
Pigs: Randomly obtained.
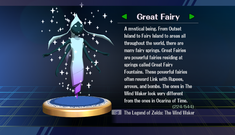
Great Fairy: Randomly obtained.
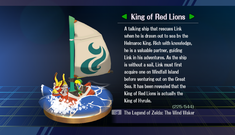
King of Red Lions: Randomly obtained.
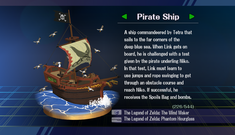
Pirate Ship: Randomly obtained.

_-_SSB_Brawl_Trophy_with_text.png)


_-_SSB_Brawl_Trophy_with_text.png)


_-_SSB_Brawl_Trophy_with_text.png)


_-_SSB_Brawl_Trophy_with_text.png)
_-_SSB_Brawl_Trophy_with_text.png)


Zelda Stickers
The stickers are a new concept used in Super Smash Bros. Brawl. The stickers can be combined and saved, and each has its own increasing/decreasing ability to help players while playing through the Subspace Emissary. There are 700 stickers to collect; here is a list of all the Legend of Zelda stickers that are available to collect.
Aryll (The Wind Waker): Ups Electric Attacks by 8. Can be used by all characters.
Barkle (Freshly-Picked Tingle's Rosy Rupeeland): Ups Tail Attacks by 32. Can be used by Yoshi, Pikachu, Diddy Kong and Pokémon Trainer.

Boomerang (The Wind Waker): Ups Weapon Attacks by 4. Can be used by Link, Zelda, Ganondorf and Toon Link.
Colin (Twilight Princess): Ups Direct Special Attacks by 4. Can be used by Link, Zelda, Ganondorf and Toon Link.
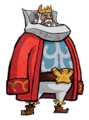
Daphnes Nohansen Hyrule (The Wind Waker): Ups Electric Attacks by 31. Can be used by Link, Zelda, Ganondorf and Toon Link.
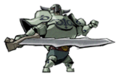
Darknut (The Wind Waker): Ups Slash Attacks by 13. Can be used by Link, Zelda, Ganondorf and Toon Link.
Deku Baba (Ocarina of Time): Ups Arm/Leg Attacks by 4. Can be used by all characters.

Deku Link (Majora's Mask): Ups Electric Resistance by 5. Can be used by all characters.

Deku Nut (Ocarina of Time): Ups Indirect Special Attacks by 4. Can be used by all characters.
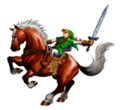
Epona and Link (Ocarina of Time): Ups Arm/Leg Attacks by 9. Can be used by Link, Zelda, Ganondorf and Toon Link.
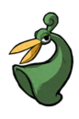
Ezlo (The Minish Cap): Ups Head Attacks by 19. Can be used by all characters.

Fairy (Twilight Princess): Ups Tail Attacks by 7. Can be used by Yoshi, Pikachu, Diddy Kong and Pokémon Trainer.
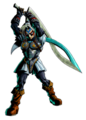
Fierce Deity Link (Majora's Mask): Ups Slash Attacks by 21. Can be used by Link, Zelda, Ganondorf and Toon Link.
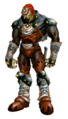
Ganondorf (Ocarina of Time): Ups Darkness Attacks by 29. Can be used by Ganondorf.
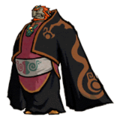
Ganondorf (The Wind Waker): Ups Darkness Attacks by 33. Can be used by Ganondorf.
Gleeok (The Legend of Zelda): Ups Launch Power by 20. Can be used by all characters.
Goron (Ocarina of Time): Ups Arm Attacks by 21. Can be used by all characters.

Green Rupee (Twilight Princess): Ups Body/Spin Attacks by 5. Can be used by all characters.
Happy Mask Salesman (Majora's Mask): Ups Leg Attacks by 9. Can be used by Link, Zelda, Ganondorf and Toon Link.

Hookshot (Ocarina of Time): Ups Weapon Attacks by 4. Can be used by all characters.
Horse Call (Twilight Princess): Ups Magic Attacks by 9. Can be used by Zelda.
![Hylian Shield [sic] (The Minish Cap): Ups Shield Recovery by 5. Can be used by all characters.](/wiki/images/f/f6/Hylian_Shield_%28Zelda_-_Minish_Cap%29_-_SSB_Brawl_Sticker.png)
Hylian Shield [sic] (The Minish Cap): Ups Shield Recovery by 5. Can be used by all characters.

Hylian Shield (Twilight Princess): Ups Slash Resistance by 10. Can be used by Link, Zelda, Ganondorf and Toon Link.
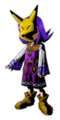
Kafei & Keaton Mask (Majora's Mask): Ups Shield Recovery by 10. Can be used by all characters.
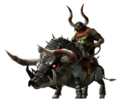
King Bulblin & Lord Bullbo (Twilight Princess): Ups Leg Attacks by 19. Can be used by all characters.
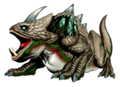
King Dodongo (Ocarina of Time): Ups Flame Attacks by 38. Can be used by all characters.
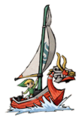
King of Red Lions & Link (The Wind Waker): Ups Explosive Attacks by 20. Can be used by all characters.
King Zora (Ocarina of Time): Ups Electric Resistance by 33. Can be used by all characters.
Lantern (Twilight Princess): Ups Flame Resistance by 7. Can be used by Link, Zelda, Ganondorf and Toon Link.
Legend of Outset (The Wind Waker): Ups Arm Attacks by 26. Can be used by Link, Zelda, Ganondorf and Toon Link.
Light Arrow (Twilight Princess): Ups Slash Attacks by 8. Can be used by all characters.
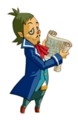
Linebeck (Phantom Hourglass): Ups Throwing Attacks by 20. Can be used by Link, Zelda, Ganondorf and Toon Link.
Link & Pigs (The Wind Waker): Ups the chance of Sticker Drops by 40. Can be used by all characters.
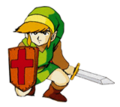
Link (The Legend of Zelda): Ups Indirect Special Attacks by 17. Can be used by all characters.
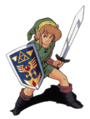
Link (A Link to the Past): Ups Electric Resistance by 31. Can be used by Link, Zelda, Ganondorf and Toon Link.
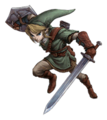
Link (Twilight Princess): Ups Slash Resistance by 27. Can be used by Link, Zelda, Ganondorf and Toon Link.

Link (The Wind Waker): Ups Flame Attacks by 31. Can be used by Link, Zelda, Ganondorf and Toon Link.
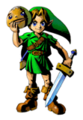
Link with Goron Mask (Majora's Mask): Ups Slash Attacks by 17. Can be used by Link, Zelda, Ganondorf and Toon Link.

Link's Grandma (The Wind Waker): Ups Arm/Leg Attacks by 2. Can be used by Link, Zelda, Ganondorf and Toon Link.

Lon Lon Milk (Ocarina of Time): Ups Launch Power by 18. Can be used by Link, Zelda, Ganondorf and Toon Link.

Makar (The Wind Waker): Ups Slash Resistance by 4. Can be used by Link, Zelda, Ganondorf and Toon Link.
Malo (Twilight Princess): Ups Launch Resistance by 19. Can be used by all characters.
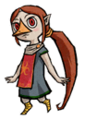
Medli (The Wind Waker): Ups Leg Attacks by 9. Can be used by all characters.
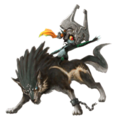
Midna and Wolf Link (Twilight Princess): Ups Leg Attacks by 26. Can be used by Link, Zelda, Ganondorf and Toon Link.
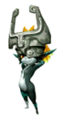
Midna (Twilight Princess): Detracts 50 from Dizzy Time. Can be used by all characters.
Moblin (The Wind Waker): Ups Slash Attacks by 15. Can be used by Link, Zelda, Ganondorf and Toon Link.

Ocarina of Time (Ocarina of Time): Ups Arm Attacks by 4. Can be used by all characters.

Octorok (Ocarina of Time): Ups Leg Attacks by 4. Can be used by Link, Zelda, Ganondorf and Toon Link.
Ooccoo (Twilight Princess): Ups Explosive Attacks by 7. Can be used by all characters.
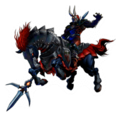
Phantom Ganon (Ocarina of Time): Ups Darkness Attacks by 40. Can be used by Ganondorf.
Piece of Heart (Twilight Princess): Ups Hearts Container Effect by 50. Can be used by Link, Zelda, Ganondorf and Toon Link.
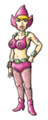
Pinkle (Tingle's Rosy Rupeeland): Ups Magic Attacks by 15. Can be used by Peach and Zelda.

Postman (Majora's Mask): Ups Direct Special Attacks by 3. Can be used by all characters.
Postman (Twilight Princess): Ups Leg Attacks by 11. Can be used by all characters.
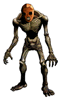
ReDead (Ocarina of Time): Ups Weapon Attacks by 5. Can be used by all characters.
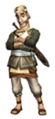
Rusl (Twilight Princess): Ups Explosive Attacks by 11. Can be used by all characters.
Salvatore (The Wind Waker): Ups Electric Attacks by 9. Can be used by Link, Zelda, Ganondorf and Toon Link.
Shadow Beast (Twilight Princess): Ups Darkness Attacks by 28. Can be used by Ganondorf.
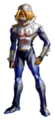
Sheik (Ocarina of Time): Ups Body/Spin Attacks by 17. Can be used by Link, Zelda, Ganondorf and Toon Link.
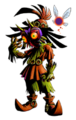
Skull Kid (Majora's Mask): Ups Leg Attacks by 20. Can be used by all characters.
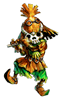
Skull Kid (Ocarina of Time): Ups Darkness Attacks by 7. Can be used by Ganondorf.
Skulltula (Ocarina of Time): Ups Arm Attacks by 7. Can be used by all characters.

Spinner (Twilight Princess): Ups Body/Spin Attacks by 4. Can be used by all characters.
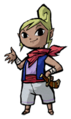
Tetra (The Wind Waker): Ups Flame Attacks by 25. Can be used by all characters.
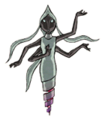
The Great Fairy (The Wind Waker): Ups Magic Attacks by 21. Can be used by Peach and Zelda.
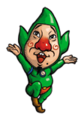
Tingle (Tingle's Rosy Rupeeland): Ups Arm Attacks by 12. Can be used by all characters.
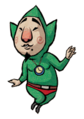
Tingle (The Wind Waker): Ups Flame Resistance by 19. Can be used by Link, Zelda, Ganondorf and Toon Link.
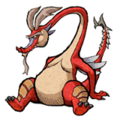
Valoo (The Wind Waker): Ups Indirect Special Attacks by 19. Can be used by all characters.
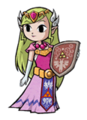
Young Zelda (The Minish Cap): Ups Battering Resistance by 16. Can be used by Link, Zelda, Ganondorf and Toon Link.
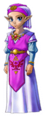
Young Zelda (Ocarina of Time): Ups Electric Attacks by 20. Can be used by all characters.
Zant (Twilight Princess): Ups Weapon Attacks by 7. Can be used by Link, Zelda, Ganondorf and Toon Link.
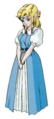
Zelda (A Link to the Past): Ups Magic Attacks by 27. Can be used by Peach and Zelda.
Zelda (Ocarina of Time): Ups Flame Resistance by 18. Can be used by Link, Zelda, Ganondorf and Toon Link.
Zora (Ocarina of Time): Ups Launch Resistance by 31. Can be used by all characters.
Zora Link (Majora's Mask): Ups Swim Time by 60. Can be used by all characters.
_-_SSB_Brawl_Sticker.png)
_-_SSB_Brawl_Sticker.png)
_-_SSB_Brawl_Sticker.png)
_-_SSB_Brawl_Sticker.png)
_-_SSB_Brawl_Sticker.png)
_-_SSB_Brawl_Sticker.png)
_-_SSB_Brawl_Sticker.png)
_-_SSB_Brawl_Sticker.png)
_-_SSB_Brawl_Sticker.png)
_-_SSB_Brawl_Sticker.png)
_-_SSB_Brawl_Sticker.png)
_-_SSB_Brawl_Sticker.png)
_-_SSB_Brawl_Sticker.png)
_-_SSB_Brawl_Sticker.png)
_-_SSB_Brawl_Sticker.png)
_-_SSB_Brawl_Sticker.png)
_-_SSB_Brawl_Sticker.png)
_-_SSB_Brawl_Sticker.png)
_-_SSB_Brawl_Sticker.png)
_-_SSB_Brawl_Sticker.png)
_-_SSB_Brawl_Sticker.png)
![Hylian Shield [sic] (The Minish Cap): Ups Shield Recovery by 5. Can be used by all characters.](/wiki/File:Hylian_Shield_(Zelda_-_Minish_Cap)_-_SSB_Brawl_Sticker.png)
_-_SSB_Brawl_Sticker.png)
_-_SSB_Brawl_Sticker.png)
_-_SSB_Brawl_Sticker.png)
_-_SSB_Brawl_Sticker.png)
_-_SSB_Brawl_Sticker.png)
_-_SSB_Brawl_Sticker.png)
_-_SSB_Brawl_Sticker.png)
_-_SSB_Brawl_Sticker.png)
_-_SSB_Brawl_Sticker.png)
_-_SSB_Brawl_Sticker.png)
_-_SSB_Brawl_Sticker.png)
_-_SSB_Brawl_Sticker.png)
_-_SSB_Brawl_Sticker.png)
_-_SSB_Brawl_Sticker.png)
_-_SSB_Brawl_Sticker.png)
_-_SSB_Brawl_Sticker.png)
_-_SSB_Brawl_Sticker.png)
_-_SSB_Brawl_Sticker.png)
_-_SSB_Brawl_Sticker.png)
_-_SSB_Brawl_Sticker.png)
_-_SSB_Brawl_Sticker.png)
_-_SSB_Brawl_Sticker.png)
_-_SSB_Brawl_Sticker.png)
_-_SSB_Brawl_Sticker.png)
_-_SSB_Brawl_Sticker.png)
_-_SSB_Brawl_Sticker.png)
_-_SSB_Brawl_Sticker.png)
_-_SSB_Brawl_Sticker.png)
_-_SSB_Brawl_Sticker.png)
_-_SSB_Brawl_Sticker.png)
_-_SSB_Brawl_Sticker.png)
_-_SSB_Brawl_Sticker.png)
_-_SSB_Brawl_Sticker.png)
_-_SSB_Brawl_Sticker.png)
_-_SSB_Brawl_Sticker.png)
_-_SSB_Brawl_Sticker.png)
_-_SSB_Brawl_Sticker.png)
_-_SSB_Brawl_Sticker.png)
_-_SSB_Brawl_Sticker.png)
_-_SSB_Brawl_Sticker.png)
_-_SSB_Brawl_Sticker.png)
_-_SSB_Brawl_Sticker.png_-_SSB_Brawl_Sticker.png)
_-_SSB_Brawl_Sticker.png)
_-_SSB_Brawl_Sticker.png)
_-_SSB_Brawl_Sticker.png)
_-_SSB_Brawl_Sticker.png)
_-_SSB_Brawl_Sticker.png)
_-_SSB_Brawl_Sticker.png)
_-_SSB_Brawl_Sticker.png)
_-_SSB_Brawl_Sticker.png)
Trivia
- Link is left-handed in Super Smash Bros. Brawl, meaning that the design of his model would have been taken from Twilight Princess on the Nintendo GameCube, the canon version.
- The Bunny Hood appears in Brawl and allows faster characters (mainly Sonic) to outrun stage hazards, namely the cars on Big Blue.
- The description of the Aryll trophy in Brawl incorrectly states that she has a 'turtle-marked telescope' in the NTSC version of the game. The PAL version corrected this.
- While Darknuts have been an enemy since the original The Legend of Zelda, the trophy in Brawl only says that they are from Twilight Princess.
- In the Wolf Link trophy of Brawl, Midna's left hand is colored grey while the rest of her is black.