Gallery:The Wind Waker Characters: Difference between revisions

From Zelda Dungeon Wiki
Jump to navigation Jump to search
Want an adless experience? Log in or Create an account.
m (Convert to standard <gallery> so this can use the Media Viewer and better serve *as* a gallery)
Line 2: Line 2:


===Major Characters===
<center>{{Gallery}}
<gallery>
{{Gallery/Box|file=Link-Artwork-The-Wind-Waker.png||link=Link (The Wind Waker)#Phantom Hourglass|caption=[[Link (The Wind Waker)#Phantom Hourglass|Link]]}}
File:Link-Artwork-The-Wind-Waker.png|[[Link (The Wind Waker)#Phantom Hourglass|Link]]
{{Gallery/Box|file=Aryll.png|link=Aryll|caption=[[Aryll]]}}
File:Aryll.png|[[Aryll]]
{{Gallery/Box|file=Tetra-Artwork-The-Wind-Waker.png|link=Tetra|caption=[[Tetra]]}}
File:Tetra-Artwork-The-Wind-Waker.png|[[Tetra]]
{{Gallery/Box|file=Princess-Zelda-Artwork-The-Wind-Waker.png|link=Zelda|caption=[[Zelda]]}}
File:Princess-Zelda-Artwork-The-Wind-Waker.png|[[Zelda]]
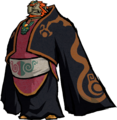
{{Gallery/Box|file=Ganondorf-Artwork-The-Wind-Waker.png|link=Ganondorf|caption=[[Ganondorf]]}}
File:Ganondorf-Artwork-The-Wind-Waker.png|[[Ganondorf]]
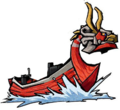
{{Gallery/Box|file=King-of-Red-Lions-Artwork-The-Wind-Waker.png|link=King_of_Red_Lions|caption=[[King of Red Lions]]}}
File:King-of-Red-Lions-Artwork-The-Wind-Waker.png|[[King of Red Lions]]
{{Gallery/Box|file=Daphnes-Nohansen-Hyrule.png|link=Daphnes_Nohansen_Hyrule|caption=[[Daphnes Nohansen Hyrule]]}}
File:Daphnes-Nohansen-Hyrule.png|[[Daphnes Nohansen Hyrule]]
{{Gallery/Bottom}}</center>
</gallery>


===Minor Characters===
====Outset Island====
<center>{{Gallery}}
<gallery>
{{Gallery/Box|file=Abe-Artwork-The-Wind-Waker.png||link=Abe|caption=[[Abe]]}}
File:Abe-Artwork-The-Wind-Waker.png|[[Abe]]
{{Gallery/Box|file=Grandmother-Artwork-The-Wind-Waker.png||link=Grandma|caption=[[Grandma]]}}
File:Grandmother-Artwork-The-Wind-Waker.png|[[Grandma]]
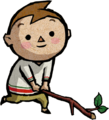
{{Gallery/Box|file=Joel-Artwork-The-Wind-Waker.png|link=Joel_(The_Wind_Waker)|caption=[[Joel (The Wind Waker)|Joel]]}}
File:Joel-Artwork-The-Wind-Waker.png|[[Joel (The Wind Waker)|Joel]]
{{Gallery/Box|file=Mesa-Artwork.png|link=Mesa|caption=[[Mesa]]}}
File:Mesa-Artwork.png|[[Mesa]]
{{Gallery/Box|file=Orca-Artwork-The-Wind-Waker.png|link=Orca|caption=[[Orca]]}}
File:Orca-Artwork-The-Wind-Waker.png|[[Orca]]
{{Gallery/Box|file=Rose-Artwork-The-Wind-Waker.png|link=Rose|caption=[[Rose]]}}
File:Rose-Artwork-The-Wind-Waker.png|[[Rose]]
{{Gallery/Box|file=TWW Sturgeon.png|link=Sturgeon_(The_Wind_Waker)|caption=[[Sturgeon (The Wind Waker)|Sturgeon]]}}
File:TWW Sturgeon.png|[[Sturgeon (The Wind Waker)|Sturgeon]]
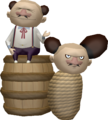
{{Gallery/Box|file=Sue-Belle.png||link=Sue-Belle|caption=[[Sue-Belle]]}}
File:Sue-Belle.png|[[Sue-Belle]]
{{Gallery/Box|file=Zill-Artwork-The-Wind-Waker.png|link=Zill_(The_Wind_Waker)|caption=[[Zill (The Wind Waker)|Zill]]}}
File:Zill-Artwork-The-Wind-Waker.png|[[Zill (The Wind Waker)|Zill]]
{{Gallery/Bottom}}</center>
</gallery>


====Windfall Island====
<center>{{Gallery}}
<gallery>
{{Gallery/Box|file=Anton.png|link=Anton_(The_Wind_Waker)|caption=[[Anton (The Wind Waker)|Anton]]}}
File:Anton.png|[[Anton (The Wind Waker)|Anton]]
{{Gallery/Box|file=Cannon_WindWaker.png||link=Bomb-Master_Cannon|caption=[[Bomb-Master Cannon]]}}
File:Cannon_WindWaker.png|[[Bomb-Master Cannon]]
{{Gallery/Box|file=Candy_Figurine_(TWW).png|link=Candy_(The_Wind_Waker)|caption=[[Candy (The Wind Waker)|Candy]]}}
File:Candy_Figurine_(TWW).png|[[Candy (The Wind Waker)|Candy]]
{{Gallery/Box|file=Dampa-Model.png||link=Dampa|caption=[[Dampa]]}}
File:Dampa-Model.png|[[Dampa]]
{{Gallery/Box|file=Doc-Bandam.png||link=Doc_Bandam|caption=[[Doc Bandam]]}}
File:Doc-Bandam.png|[[Doc Bandam]]
{{Gallery/Box|file=Garrickson-Model.png||link=Garrickson|caption=[[Garrickson]]}}
File:Garrickson-Model.png|[[Garrickson]]
{{Gallery/Box|file=Gillian-Model.png|link=Gillian|caption=[[Gillian]]}}
File:Gillian-Model.png|[[Gillian]]
{{Gallery/Box|file=Gossack_Figurine_(TWW).png|link=Gossack|caption=[[Gossack]]}}
File:Gossack_Figurine_(TWW).png|[[Gossack]]
{{Gallery/Box|file=Gummy_Figurine_(TWW).png|link=Gummy|caption=[[Gummy]]}}
File:Gummy_Figurine_(TWW).png|[[Gummy]]
{{Gallery/Box|file=Ivan_-_TWW_key_art.png|link=Ivan|caption=[[Ivan]]}}
File:Ivan_-_TWW_key_art.png|[[Ivan]]
{{Gallery/Box|file=Jan-Artwork.png|link=Jan|caption=[[Jan]]}}
File:Jan-Artwork.png|[[Jan]]
{{Gallery/Box|file=Jin-Art.png|link=Jin|caption=[[Jin]]}}
File:Jin-Art.png|[[Jin]]
{{Gallery/Box|file=Jun-Roberto-Art.png|link=Jun-Roberto|caption=[[Jun-Roberto]]}}
File:Jun-Roberto-Art.png|[[Jun-Roberto]]
{{Gallery/Box|file=Joanna.png|link=Joanna|caption=[[Joanna]]}}
File:Joanna.png|[[Joanna]]
{{Gallery/Box|file=Kamo-Model.png|link=Kamo|caption=[[Kamo]]}}
File:Kamo-Model.png|[[Kamo]]
{{Gallery/Box|file=Kane_Figurine_(TWW).png|link=Kane|caption=[[Kane]]}}
File:Kane_Figurine_(TWW).png|[[Kane]]
{{Gallery/Box|file=Kreeb.png|link=Kreeb|caption=[[Kreeb]]}}
File:Kreeb.png|[[Kreeb]]
{{Gallery/Box|file=Lenzo.png|link=Lenzo|caption=[[Lenzo]]}}
File:Lenzo.png|[[Lenzo]]
{{Gallery/Box|file=Linda-Model.png|link=Linda|caption=[[Linda]]}}
File:Linda-Model.png|[[Linda]]
{{Gallery/Box|file=Maggie.png||link=Maggie|caption=[[Maggie]]}}
File:Maggie.png|[[Maggie]]
{{Gallery/Box|file=Maggie's-Father.png||link=Maggie's_Father|caption=[[Maggie's Father]]}}
File:Maggie's-Father.png|[[Maggie's Father]]
{{Gallery/Box|file=Mila.png||link=Mila|caption=[[Mila]]}}
File:Mila.png|[[Mila]]
{{Gallery/Box|file=Mila's-Father.png||link=Mila's_Father|caption=[[Mila's Father]]}}
File:Mila's-Father.png|[[Mila's Father]]
{{Gallery/Box|file=Minenco_Figurine_(TWW).png|link=Minenco|caption=[[Minenco]]}}
File:Minenco_Figurine_(TWW).png|[[Minenco]]
{{Gallery/Box|file=Missy-Model.png||link=Missy_(The_Wind_Waker)|Missy|caption=[[Missy (The Wind Waker)|Missy]]}}
File:Missy-Model.png|[[Missy (The Wind Waker)|Missy]]}}
{{Gallery/Box|file=Mrs-Marie.png|link=Mrs._Marie|caption=[[Mrs. Marie]]}}
File:Mrs-Marie.png|[[Mrs. Marie]]
{{Gallery/Box|file=Pompie_-_TWW_Figurine.png|link=Pompie|caption=[[Pompie]]}}
File:Pompie_-_TWW_Figurine.png|[[Pompie]]
{{Gallery/Box|file=Potava.png|link=Potova|caption=[[Potova]]}}
File:Potava.png|[[Potova]]
{{Gallery/Box|file=TWW-Salvatore.png|link=Salvatore|caption=[[Salvatore]]}}
File:TWW-Salvatore.png|[[Salvatore]]
{{Gallery/Box|file=Sam-Model.png|link=Sam|caption=[[Sam]]}}
File:Sam-Model.png|[[Sam]]
{{Gallery/Box|file=Tott-Artwork-The-Wind-Waker.png|link=Tott|caption=[[Tott]]}}
File:Tott-Artwork-The-Wind-Waker.png|[[Tott]]
{{Gallery/Box|file=Vera_-_TWW_Figurine.png|link=Vera|caption=[[Vera]]}}
File:Vera_-_TWW_Figurine.png|[[Vera]]
{{Gallery/Box|file=Zunari_-_TWW_key_art.png|link=Zunari|caption=[[Zunari]]}}
File:Zunari_-_TWW_key_art.png|[[Zunari]]
{{Gallery/Bottom}}</center>
</gallery>


====Dragon Roost Island====
<center>{{Gallery}}
<gallery>
{{Gallery/Box|file=Akoot-Model.png|link=Akoot|caption=[[Akoot]]}}
File:Akoot-Model.png|[[Akoot]]
{{Gallery/Box|file=Baito.png|link=Baito|caption=[[Baito]]}}
File:Baito.png|[[Baito]]
{{Gallery/Box|file=Basht-Model.png|link=Basht|caption=[[Basht]]}}
File:Basht-Model.png|[[Basht]]
{{Gallery/Box|file=Bisht-Model.png|link=Bisht|caption=[[Bisht]]}}
File:Bisht-Model.png|[[Bisht]]
{{Gallery/Box|file=Hoskit-Model.png|link=Hoskit|caption=[[Hoskit]]}}
File:Hoskit-Model.png|[[Hoskit]]
{{Gallery/Box|file=Ilari-Model.png|link=Ilari|caption=[[Ilari]]}}
File:Ilari-Model.png|[[Ilari]]
{{Gallery/Box|file=Koboli_Figurine_(TWW).png|link=Koboli|caption=[[Koboli]]}}
File:Koboli_Figurine_(TWW).png|[[Koboli]]
{{Gallery/Box|file=Kogoli_Figurine_(TWW).png|link=Kogoli|caption=[[Kogoli]]}}
File:Kogoli_Figurine_(TWW).png|[[Kogoli]]
{{Gallery/Box|file=Medli-Artwork-The-Wind-Waker.png|link=Medli|caption=[[Medli]]}}
File:Medli-Artwork-The-Wind-Waker.png|[[Medli]]
{{Gallery/Box|file=Namali_Figurine_(TWW).png|link=Namali|caption=[[Namali]]}}
File:Namali_Figurine_(TWW).png|[[Namali]]
{{Gallery/Box|file=Pashli_Figurine_(TWW).png|link=Pashli|caption=[[Pashli]]}}
File:Pashli_Figurine_(TWW).png|[[Pashli]]
{{Gallery/Box|file=Prince_Komali_WW.png|link=Prince_Komali|caption=[[Prince Komali]]}}
File:Prince_Komali_WW.png|[[Prince Komali]]
{{Gallery/Box|file=Quill.png|link=Quill|caption=[[Quill]]}}
File:Quill.png|[[Quill]]
{{Gallery/Box|file=TWW-RitoChieftain-Artwork.png|link=Rito_Chieftain|caption=[[Rito Chieftain]]}}
File:TWW-RitoChieftain-Artwork.png|[[Rito Chieftain]]
{{Gallery/Box|file=Skett-Model.png|link=Skett|caption=[[Skett]]}}
File:Skett-Model.png|[[Skett]]
{{Gallery/Bottom}}</center>
</gallery>


====Forest Haven====
<center>{{Gallery}}
<gallery>
{{Gallery/Box|file=Deku_Tree(WW).png|link=Great_Deku_Tree|caption=[[Great Deku Tree]]}}
File:Deku_Tree(WW).png|[[Great Deku Tree]]
{{Gallery/Box|file=TWW-Hollo-Artwork.png|link=Hollo|caption=[[Hollo]]}}
File:TWW-Hollo-Artwork.png|[[Hollo]]
{{Gallery/Bottom}}</center>
</gallery>


====Great Sea====
====Great Sea====
<center>{{Gallery}}
<gallery>
{{Gallery/Box|file=Cyclos-Artwork-The-Wind-Waker.png||link=Cyclos|caption=[[Cyclos]]}}
File:Cyclos-Artwork-The-Wind-Waker.png|[[Cyclos]]
{{Gallery/Box|file=Gonzo-Wind-Waker-Art.png||link=Gonzo|caption=[[Gonzo]]}}
File:Gonzo-Wind-Waker-Art.png|[[Gonzo]]
{{Gallery/Box|file=HelmarocKing_Large.png||link=Helmaroc_King|caption=[[Helmaroc King]]}}
File:HelmarocKing_Large.png|[[Helmaroc King]]
{{Gallery/Box|file=Jabun-Artwork-The-Wind-Waker.png||link=Jabun|caption=[[Jabun]]}}
File:Jabun-Artwork-The-Wind-Waker.png|[[Jabun]]
{{Gallery/Box|file=TWW-Loot-Model.png||link=Loot|caption=[[Loot]]}}
File:TWW-Loot-Model.png|[[Loot]]
{{Gallery/Box|file=Mako.png||link=Mako|caption=[[Mako]]}}
File:Mako.png|[[Mako]]
{{Gallery/Box|file=Niko-Wind-Waker-Artwork.png||link=Niko|caption=[[Niko]]}}
File:Niko-Wind-Waker-Artwork.png|[[Niko]]
{{Gallery/Box|file=Nudge.png||link=Nudge|caption=[[Nudge]]}}
File:Nudge.png|[[Nudge]]
{{Gallery/Box|file=TWW-Obli-Model.png||link=Obli|caption=[[Obli]]}}
File:TWW-Obli-Model.png|[[Obli]]
{{Gallery/Box|file=Senza.png||link=Senza|caption=[[Senza]]}}
File:Senza.png|[[Senza]]
{{Gallery/Box|file=Tingle_-_TWW_key_art.png||link=Tingle|caption=[[Tingle]]}}
File:Tingle_-_TWW_key_art.png|[[Tingle]]
{{Gallery/Box|file=TWW-Willi-Model.png||link=Willi|caption=[[Willi]]}}
File:TWW-Willi-Model.png|[[Willi]]
{{Gallery/Box|file=Zephos-Artwork-The-Wind-Waker.png||link=Zephos|caption=[[Zephos]]}}
File:Zephos-Artwork-The-Wind-Waker.png|[[Zephos]]
{{Gallery/Box|file=Zuko.png||link=Zuko|caption=[[Zuko]]}}
File:Zuko.png|[[Zuko]]
{{Gallery/Bottom}}</center>
</gallery>


{{Galleries}}
{{Galleries}}
{{cat|The Wind Waker Characters| Gallery}}

Revision as of 12:53, March 1, 2023

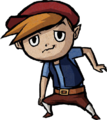
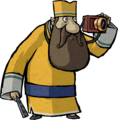
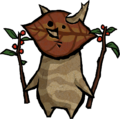
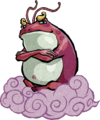
Below is a listing of all the characters that appear in The Wind Waker.

Major Characters

Minor Characters

Outset Island

Windfall Island

Dragon Roost Island

Forest Haven

Great Sea