Twilight Princess Heart Pieces: Difference between revisions
mNo edit summary |
|||
| (27 intermediate revisions by 7 users not shown) | |||
| Line 1: | Line 1: | ||
''[[The Legend of Zelda: Twilight Princess]]'' | Below is a listing of all available Pieces of Heart found in ''[[The Legend of Zelda: Twilight Princess|Twilight Princess]]''. There are a total of 45 heart pieces scattered across [[Hyrule]], offering 9 [[Heart Container]]s to [[Link (Twilight Princess)|Link]]'s total health, for a maximum of 20 hearts. | ||
Please note that in certain versions of the game, the entire overworld is mirrored. This guide is primarily written for the following versions of the game: | |||
*[[The Legend of Zelda: Twilight Princess HD|Twilight Princess HD]] (Normal Mode) | |||
*[[The Legend of Zelda: Twilight Princess|Twilight Princess]] (GameCube Version) | |||
If you are playing either of the following versions of the game, you can still use this guide, but the directions will be reversed (e.g. east -> west, right -> left): | |||
*[[The Legend of Zelda: Twilight Princess HD|Twilight Princess HD]] (Hero Mode) | |||
*[[The Legend of Zelda: Twilight Princess|Twilight Princess]] (Wii Version) | |||
==Locations== | |||
{{ | {{Gallery|size=400|pad=5|align=left|margin=87}} | ||
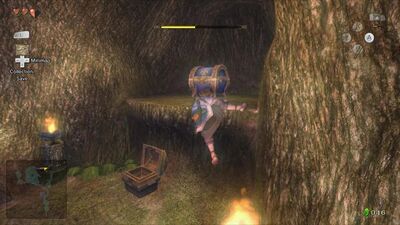
<section begin=1 />{{Gallery/Box|file=tp_heart_01.jpg|caption='''Location''': [[Faron Woods]] | |||
'''Conditions''': Acquire the [[Lantern]] | |||
In the | '''Heart Piece #1''': In the deeper part of Faron Woods, you'll find a cave to the northeast where you initially find a [[Small Key]]. If you fail to get it your first time through, you'll have to use the [[Lantern]] to get through the fog and make your way to the cave. Inside, light the two torches to make a large chest appear on the platform containing your first heart piece.}}<section end=1 /> | ||
<section begin=2 />{{Gallery/Box|file=tp_heart_02.jpg|caption='''Location''': [[Forest Temple (Twilight Princess)|Forest Temple]] | |||
'''Conditions''': Acquire [[Bomb]]s (Optional) | |||
In the | '''Heart Piece #2''': In the room with the [[Bombling]]s and [[Deku Like]]s, one of the Deku Likes is blocking an alcove with a large chest. To defeat it, you can climb up to the platform above it, hit the nearby [[Bombling]] and drop it over the edge so it swallows it. Alternatively, you can return later when you have [[Bomb]]s. | ||
'''NOTE''': If you complete the Forest Temple without getting this piece, you'll need the [[Clawshot]] to return to this room.}}<section end=2 /> | |||
<section | |||
<section begin=3 />{{Gallery/Box|file=tp_heart_03.jpg|caption='''Location''': [[Forest Temple (Twilight Princess)|Forest Temple]] | |||
'''Conditions''': Acquire the [[Gale Boomerang]] | |||
'''Heart Piece #3''': In the room with the [[Tile Worm]]s, blow out all the torches using the [[Gale Boomerang]] to reveal a hidden alcove with a large chest, open it to obtain the third heart piece. | |||
'''NOTE''': If you complete the Forest Temple without getting this piece, you'll need the [[Clawshot]] to return to this room.}}<section end=3 /> | |||
<section | |||
<section begin=4 />{{Gallery/Box|file=tp_heart_04.jpg|caption='''Location''': [[Hyrule Field]] (North of [[Faron Woods]]) | |||
'''Conditions''': Acquire the [[Gale Boomerang]] | |||
In the | '''Heart Piece #4''': In the portion of [[Hyrule Field]] just north of Faron Woods, go straight forward (from [[Faron Province]]) and you'll come to a rise with two [[Bulblin|Bulblin Warrior]]s. After defeating them, look at the tree to the north (before the bridge) and you'll find a [[Piece of Heart]] in its branches. Use the Gale Boomerang to bring it over.}}<section end=4 /> | ||
<section begin=5 />{{Gallery/Box|file=tp_heart_05.jpg|caption='''Location''': [[Kakariko Gorge]] | |||
<section begin= | |||
Location: [[Kakariko | |||
'''Conditions''': Acquire the [[Gale Boomerang]] | |||
'''Heart Piece #5''': In the portion of Hyrule Field just south of [[Kakariko Village (Twilight Princess)|Kakariko Village]], there are two large rock formations in the distance towards the center of Hyrule. There's a Piece of Heart atop the larger one, so use the [[Gale Boomerang]] to bring it over.}}<section end=5 /> | |||
<section begin=6 />{{Gallery/Box|file=tp_heart_06.jpg|caption='''Location''': [[Ordon Village]] | |||
<section begin= | |||
Location: [[ | |||
'''Conditions''': Regain possession of [[Epona]] | |||
'''Heart Piece #6''': After restoring light to the [[Eldin Province]] and recovering [[Epona]], you can return to Ordon Village and help [[Fado (Twilight Princess)|Fado]] herd the goats during the day. If you can manage to herd all 20 goats in under three minutes, he'll gift you with this Piece of Heart.}}<section end=6 /> | |||
<section begin=7 />{{Gallery/Box|file=tp_heart_07.jpg|caption='''Location''': [[Goron Mines]] | |||
'''Conditions''': Acquire the [[Iron Boots]] | |||
'''Heart Piece #7''': In the room where you walk around on the ceiling due to the large magnetic field, you can walk to the far northeast corner and find a hidden platform with a large chest containing the Piece of Heart.}}<section end=7 /> | |||
<section begin=8 />{{Gallery/Box|file=tp_heart_08.jpg|caption='''Location''': [[Goron Mines]] | |||
<section begin= | |||
Location: [[ | |||
'''Conditions''': Acquire the [[Iron Boots]] | |||
'''Heart Piece #8''': In the room just north of the large central chamber, the room is divided into two areas. On the north side of the room there are two [[Beamos]] in the center, while along the west wall there is a magnetic field. Walk up it using the [[Iron Boots]] and turn south to find a platform with a large chest containing the heart piece.}}<section end=8 /> | |||
<section begin=9 />{{Gallery/Box|file=tp_heart_09.jpg|caption='''Location''': [[Kakariko Village (Twilight Princess)|Kakariko Village]] | |||
'''Conditions''': Acquire the [[Hero's Bow]] | |||
'''Heart Piece #9''': After completing the [[Goron Mines]], [[Talo]] can be found atop the highest building in the village. To get up there, speak with the [[Goron]] at the building's base and climb up the ladder. Speak with Talo, who will ask you to teach him how to use the bow. | |||
You'll appear down near the Sanctuary along with [[Malo]]. After shooting two relatively easy targets, Talo will yell at you to shoot a pole at the corner of the high building. Just aim carefully at the corner of the building itself, pull the bowstring all the way back, raise your cross arrow a bit and release. Malo will gift you with a Piece of Heart if you can hit it.}}<section end=9 /> | |||
<section | |||
<section begin=10 />{{Gallery/Box|file=tp_heart_10.jpg|caption='''Location''': [[Kakariko Village (Twilight Princess)|Kakariko Village]] | |||
'''Conditions''': Acquire the [[Hero's Bow]], [[Bomb]]s, [[Gale Boomerang]] | |||
Once you | '''Heart Piece #10''': There are some boulders just above the [[Eldin Spring]]. Once you buy Bombs from [[Barnes Bombs]], you can combine them with the Hero's Bow to create [[Bomb Arrow]]s. Blast the boulders to reveal a Piece of Heart. Use the Gale Boomerang to bring it down.}}<section end=10 /> | ||
<section begin=11 />{{Gallery/Box|file=tp_heart_11.jpg|caption='''Location''': [[Kakariko Village (Twilight Princess)|Kakariko Village]] | |||
'''Conditions''': Acquire [[Bomb]]s, [[Iron Boots]] | |||
'''Heart Piece #11''': Blow up the boulder near the Eldin Spring and follow the path to drop down into the spring itself. Put on the Iron Boots to sink down where you can find a large chest containing the heart piece.}}<section end=11 /> | |||
<section begin=12 />{{Gallery/Box|file=tp_heart_12.jpg|caption='''Location''': [[Death Mountain]] | |||
'''Conditions''': Complete the [[Goron Mines]] | |||
'''Heart Piece #12''': Once you have completed the Goron Mines, there will be [[Goron]]s along the trail leading up to Death Mountain. These friendly dudes will allow you to get on their back and shoot you up the ledges. From Kakariko Village, speak with the second Goron you come to, get on his back and face off to the left instead. Hold forward on the analog stick and you'll be able to grab onto the ledge and pull yourself up. | |||
Follow this higher path to the north and you'll find an alcove off to the left. Enter and drop down to find a large chest containing a Piece of Heart.}}<section end=12 /> | |||
<section begin=13 />{{Gallery/Box|file=tp_heart_13.jpg|caption='''Location''': [[Kakariko Gorge Cavern]] | |||
<section begin= | |||
Location: [[ | |||
'''Conditions''': Acquire [[Bomb]]s, [[Lantern]] | |||
'''Heart Piece #13''': In the southern area of Kakariko Gorge is a boulder blocking a cave. Blow it up, enter, and use your Lantern to navigate through this enemy-filled area. | |||
At the forks, go: right, right, left, right to find a dead end with a [[Skulltula]]. Defeat it, then light the torches to make a large chest appear containing a Piece of Heart.}}<section end=13 /> | |||
<section begin=14 />{{Gallery/Box|file=tp_heart_14.jpg|caption='''Location''': [[Hyrule Field]] (North of [[Kakariko Village (Twilight Princess)|Kakariko Village]]) | |||
'''Conditions''': Acquire the [[Hero's Bow]], [[Bomb]]s | |||
'''Heart Piece #14''': When you exit Kakariko Village to the north, you'll arrive in a large portion of Hyrule Field to the east of [[Castle Town]]. You'll find some boulders in this rocky area. Blow them up with [[Bomb]]s and follow the path to some vines and more boulders. Use [[Bomb Arrow]]s to blow up the boulders on the ledge, then jump across the gap to grab the vines. Pull yourself up and continue on to find a large chest on a ledge containing the heart piece.}}<section end=14 /> | |||
<section begin=15 />{{Gallery/Box|file=tp_heart_15.jpg|caption='''Location''': [[Castle Town]] | |||
'''Conditions''': Enough Rupees to donate to [[Charlo]] (1,000) | |||
'''Heart Piece #15''': In Castle Town, there's an old man by the name of [[Charlo]] hanging out near the west exit just north of [[Purlo]]'s tent. When you speak with him, he'll ask you to donate. By giving him 1,000 [[Rupee]]s, you'll be rewarded with a Piece of Heart. If you are short of Rupees, you can exchange any [[Golden Bugs]] you may have with [[Agitha]] in Castle Town.}}<section end=15 /> | |||
<section begin=16 />{{Gallery/Box|file=tp_heart_16.jpg|caption='''Location''': [[Hena's Fishing Hole]] | |||
'''Conditions''': Enough Rupees to go fishing (20) | |||
'''Heart Piece #16''': When in [[Hena's Fishing Hole]], look towards the central pillars to see a Piece of Heart atop the rock formation. When in the boat, you can use the [[Fishing Rod]] to bring it over to you. Alternatively, you could use the [[Gale Boomerang]] and lock on from the shore.}}<section end=16 /> | |||
<section begin=17 />{{Gallery/Box|file=tp_heart_17.jpg|caption='''Location''': [[Isle of Riches]] | |||
<section begin= | |||
Location: [[ | |||
'''Conditions''': Enough Rupees to play [[Falbi's Flight-by-Fowl]] (20) | |||
'''Heart Piece #17''': In [[Lake Hylia (The Minish Cap)|Lake Hylia]], speak with [[Fyer]] to get shot up to the top of Lake Hylia (Hyrule Field). From here, you can play [[Falbi's Flight-by-Fowl]] to glide with a [[Cucco]] to the [[Isle of Riches]]. Use the Analog Stick to move around and slow down. The second to top tier (the highest and smallest one that isn't spinning) has a large chest that contains a Piece of Heart.}}<section end=17 /> | |||
<section begin=18 />{{Gallery/Box|file=tp_heart_18.jpg|caption='''Location''': [[Lake Hylia Cavern]] | |||
'''Conditions''': Acquire [[Bomb]]s, [[Lantern]] | |||
In the | '''Heart Piece #18''': In the southern portion of Lake Hylia is a ladder. Climb up it and blow up the boulder to the south to reveal a cavern. Inside, you'll need your Lantern to see through the darkness, as well as bombs to clear boulders in the way. At the end of the lengthy cavern, you'll finally come to a large chest containing a Piece of Heart.}}<section end=18 /> | ||
<section begin=19 />{{Gallery/Box|file=tp_heart_19.jpg|caption='''Location''': [[Lakebed Temple]] | |||
<section begin= | |||
Location: | |||
'''Conditions''': Acquire the [[Clawshot]] | |||
'''Heart Piece #19''': Once you have restored the water flow from both the east and west sides, you can turn the stairs so that water flows into the lower east section. Return to the room with the rotating platforms and stalactites you had to shoot down for a small key earlier. By filling this area with water, it raises a bridge that was an obstacle earlier and allows us to access a new area. | |||
Once you get there, stand on the switch to open the gate up ahead, then use the [[Clawshot]] on target to get on the other side before the gate closes. Open the large chest for a Piece of Heart.}}<section end=19 /> | |||
<section begin=20 />{{Gallery/Box|file=tp_heart_20.jpg|caption='''Location''': [[Lakebed Temple]] | |||
<section begin= | |||
Location: [[ | |||
'''Conditions''': Acquire the [[Clawshot]] | |||
'''Heart Piece #20''': In the middle of the ceiling of the large central chamber (with the spinning staircase) is a giant chandelier. You can get up there by using the various targets in all of the compass directions. On top, you will find a large chest with the heart piece.}}<section end=20 /> | |||
<section begin=21 />{{Gallery/Box|file=tp_heart_21.jpg|caption='''Location''': [[Sacred Grove]] | |||
<section begin= | |||
Location: [[ | |||
'''Conditions''': Acquire the [[Master Sword]], [[Shadow Crystal]], [[Bomb]]s | |||
'''Heart Piece #21''': Once you have acquired the [[Master Sword]] and [[Shadow Crystal]], you can enter the small area to the side where we fought [[Skull Kid]] the first time. There is a large boulder here that you can blow up with [[Bomb]]s to reveal a sparkly spot you can see in wolf form. Dig down into it to find a cavern filled with [[Baba Serpent]]s. Defeat them all (use the [[Gale Boomerang]] on the ones hanging from the ceiling) to make a large chest appear containing the heart piece. | |||
'''NOTE:''' If you fail to get this the first time through, you can always get it later when you return to the [[Sacred Grove]] and unlock the [[Twilight Portal]].}}<section end=21 /> | |||
<section begin=22 />{{Gallery/Box|file=tp_heart_22.jpg|caption='''Location''': [[West Castle Town Bridge]] | |||
'''Conditions''': Progress in the [[Malo Mart]] side-quest | |||
'''Heart Piece #22''': The [[Goron]] at the bridge leading from Castle Town to the portion of Hyrule Field just north of Kakariko Village will leave this behind as thanks for energizing him with [[Hot Spring Water]]. Check our our [[Malo Mart]] guide for detailed instructions on how to get this Piece of Heart.}}<section end=22 /> | |||
<section begin=23 />{{Gallery/Box|file=tp_heart_23.jpg|caption='''Location''': [[Lanayru Spring]] | |||
'''Conditions''': Acquire the [[Clawshot]], [[Lantern]] | |||
'''Heart Piece #23''': After you've acquired the Clawshot, you can enter [[Lanayru Spring]] in Lake Hylia, and to either the left or right, you'll find some vines. Use the Clawshot to get across and follow it to a hidden room in the back (far south). Inside, light the two torches with your Lantern to make a large chest appear containing the heart piece.}}<section end=23 /> | |||
<section begin=24 />{{Gallery/Box|file=tp_heart_24.jpg|caption='''Location''': [[Lake Hylia (The Minish Cap)|Lake Hylia]] | |||
'''Conditions''': Acquire the [[Master Sword]], [[Shadow Crystal]] | |||
'''Heart Piece #24''': After you have restored light to the [[Lanayru Province]] and obtained the Master Sword and Shadow Crystal, you can return to Lake Hylia and meet up with a new character named [[Plumm]]. Simply approach any [[Hawk Grass]] while in wolf form to make him appear. He has a mini-game available for free in which you ride a [[Kargarok]] up [[Zora's River]] popping balloons. Get only oranges or only strawberries to get over 10,000 points, and he'll give you a Piece of Heart in reward.}}<section end=24 /> | |||
<section begin=25 />{{Gallery/Box|file=tp_heart_25.jpg|caption='''Location''': [[Bridge of Eldin Cavern]] | |||
{{ | |||
'''Conditions''': Acquire the [[Clawshot]], [[Iron Boots]] | |||
'''Heart Piece #25''': Just north of the [[Bridge of Eldin]] is an upper platform that you can reach with the [[Clawshot]] (by latching onto the target against the wall). Follow this path to the east to find a cavern. Inside, follow the very obvious path, jumping down and using the [[Iron Boots]] to get sucked into the magnetic fields. At the end of the cavern (at the very bottom), you will find a large chest with your prize.}}<section end=25 /> | |||
<section begin=26 />{{Gallery/Box|file=tp_heart_26.jpg|caption='''Location''': [[Bulblin Fortress]] | |||
<section begin= | |||
Location: [[ | |||
'''Conditions''': None | |||
'''Heart Piece #26''': In the [[Gerudo Desert]], just before entering the [[Arbiter's Grounds]] is the [[Bulblin Fortress]]. In the northeast corner some Bulblins are roasting a [[Bullbo]] over a fire. Slash the Bullbo with your sword until it explodes, revealing a Piece of Heart. Brutal!}}<section end=26 /> | |||
<section begin=27 />{{Gallery/Box|file=tp_heart_27.jpg|caption='''Location''': [[Arbiter's Grounds]] | |||
'''Conditions''': Acquire the [[Clawshot]] | |||
'''Heart Piece #27''': In the large, central room where the blue flames are stolen by the [[Poe]]s, there's a chest to either side of the stairs. On the right side the chest contains a Piece of Heart. When getting it, it's recommended to [[Clawshot]] over and roll back along the platforms (otherwise, you will be unable to get back without drowning in quicksand).}}<section end=27 /> | |||
<section begin=28 />{{Gallery/Box|file=tp_heart_28.jpg|caption='''Location''': [[Arbiter's Grounds]] | |||
'''Conditions''': Acquire the [[Spinner]] | |||
In the | '''Heart Piece #28''': In the room with lots of [[Spinner]] rails, the mid level you can get to has a rotating spike, but to the far east side there's a chest on the upper platform along with a [[Stalfos]]. Defeat it, then open the chest for a Piece of Heart.}}<section end=28 /> | ||
<section begin=29 />{{Gallery/Box|file=tp_heart_29.jpg|caption='''Location''': North of the [[Great Bridge of Hylia]] | |||
'''Conditions''': Acquire the [[Spinner]], [[Bomb]]s | |||
'''Heart Piece #29''': Between the Great Bridge of Hylia and the area north of Castle Town, there's a back route that's blocked off by boulders. After you've blown them up, you can access this shortcut which has rails along the bottom. One set of rails leads upwards, then breaks off into several rails that go back and forth. Repeatedly use the Spinner to jump back and forth and eventually you'll get to a platform with a large chest containing a heart piece.}}<section end=29 /> | |||
<section begin=30 />{{Gallery/Box|file=tp_heart_30.jpg|caption='''Location''': North of the [[Bridge of Eldin]] | |||
<section begin= | |||
Location: [[ | |||
'''Conditions''': Acquire the [[Spinner]] | |||
'''Heart Piece #30''': Just north of the Bridge of Eldin is a small bridge across the black abyss (right next to the entrance to the [[Hidden Village]]). Use the rails along the north wall to get to a platform with grass. Transform into a wolf and dig down into the sparkly spot in the center. Inside, kill the three [[Stalfos]] to make a large chest appear containing the Piece of Heart.}}<section end=30 /> | |||
<section begin=31 />{{Gallery/Box|file=tp_heart_31.jpg|caption='''Location''': [[Snowpeak Ruins]] | |||
'''Conditions''': Acquire [[Bomb]]s (or [[Ball and Chain]]) | |||
In the first room of the east ( | '''Heart Piece #31''': On the second floor, the room to the far southwest has some [[Freezard]]s in cages and a cannon. At the top, there's a target against the wall in the corner. The floor here looks uneven, meaning you can use [[Bomb]]s to blow it up. Alternatively, you can use the [[Ball and Chain]] to break it. Fall down into a mysterious room on the first floor where there's a large chest. Open it to get a [[Piece of Heart]], then use the target to get back to the second floor.}}<section end=31 /> | ||
<section begin=32 />{{Gallery/Box|file=tp_heart_32.jpg|caption='''Location''': [[Snowpeak Ruins]] | |||
'''Conditions''': Acquire [[Bomb]]s (or [[Ball and Chain]]) | |||
'''Heart Piece #32''': Once you reach the entrance room on the second floor, use the [[Ball and Chain]] on the target that's next to the west (GCN) door. This will unveil a target so you can get back up quickly in case you fall down during this next puzzle. | |||
Jump onto the chandelier, then turn to the south where you'll see two more in a row. On your mini-map, you'll also see there's a chest to the far south. Using the Ball and Chain to strike the chandeliers, you'll be able to steadily work your way south, eventually jumping to the platform and opening the chest.}}<section end=32 /> | |||
<section begin=33 />{{Gallery/Box|file=tp_heart_33.jpg|caption='''Location''': [[Ice Block Cavern]] | |||
'''Conditions''': Acquire the [[Ball and Chain]], [[Bomb]]s | |||
'''Heart Piece #33''': In the portion of Hyrule Field just north of Castle Town, head to the lower portion of the rocky area to the far north. Here, you'll find a [[Tektite]] and [[Lizalfos]] along with a boulder blocking a cave. Blow it up (or use the Ball and Chain) and head inside. | |||
Break through the ice with the Ball and Chain, then you'll have three rooms of block puzzles to complete. For details on how to do this, check our [[Ice Block Cavern#Puzzle #1|Block Puzzle Guide]]. When you get to the final room, you'll gain access to a large chest containing a Piece of Heart.}}<section end=33 /> | |||
<section begin=34 />{{Gallery/Box|file=tp_heart_34.jpg|caption='''Location''': [[Snowpeak]] | |||
'''Conditions''': Complete the [[Snowpeak Ruins]] | |||
'''Heart Piece #34''': After completing the Snowpeak Ruins, you can warp to the top of [[Snowpeak]] and speak with [[Yeto]] and [[Yeta]] to race them. | |||
The first race is against [[Yeto]], who isn't that hard. Simply hold forward the entire time and you'll easily stay ahead of him. Warp back to the top and this time, speak with [[Yeta]]. She's much faster and she also jumps up to a shortcut halfway through that you can see on your map. Be sure to take this shortcut too otherwise you'll be unable to beat her. In reward, she'll give you a Piece of Heart.}}<section end=34 /> | |||
<section begin=35 />{{Gallery/Box|file=tp_heart_35.jpg|caption='''Location''': [[Temple of Time (Dungeon)|Temple of Time]] | |||
'''Conditions''': Acquire the [[Dominion Rod]] | |||
'''Heart Piece #35''': In the room with several [[Lizalfos]], [[Dinolfos|Dynalfos]] and walls that move back and forth, there's a chest in the corner, but you're unable to get to it due to the electric barrier. Use either the giant statue with the [[Dominion Rod]] or one of the nearby little statues to step on the switch on the other side of the barrier. This will temporarily deactivate it, allowing you to go back there and open the chest.}}<section end=35 /> | |||
<section begin=36 />{{Gallery/Box|file=tp_heart_36.jpg|caption='''Location''': [[Temple of Time (Dungeon)|Temple of Time]] | |||
'''Conditions''': Acquire the [[Dominion Rod]] | |||
'''Heart Piece #36''': In the room with the spinning mechanism to raise and lower the platform, go to the bottom and collect the small statue, then take it to the mid level and collect that small statue as well. Take them both to the south and place them on the floor switches (or use the giant statue when on your way back to the entrance). This allows you to access the far southern room. | |||
Defeat the enemies in here, then use the Dominion Rod to move the little statue on the upper platform to the far south. Walk it down the ledge and onto the floor switch. Pick up one of the other nearby little statues and do the same on the opposite side. When both switches are pressed down, this makes a large chest appear in the east alcove.}}<section end=36 /> | |||
<section begin=37 />{{Gallery/Box|file=tp_heart_37.jpg|caption='''Location''': [[Temple of Time (Dungeon)|Temple of Time]] (Entrance) | |||
'''Conditions''': Acquire the [[Dominion Rod]] | |||
'''Heart Piece #37''': In the entrance area of the Temple of Time, before entering the dungeon itself, there is an Owl Statue to either side of the exit. Use the Dominion Rod to move the one on the east side to reveal an alcove housing a large chest. Open it to get the Piece of Heart.}}<section end=37 /> | |||
<section begin=38 />{{Gallery/Box|file=tp_heart_38.jpg|caption='''Location''': [[Hidden Village]] | |||
'''Conditions''': Restore Ilia's memory | |||
'''Heart Piece #38''': After returning [[Horse Call|Ilia's Charm]] to her, you can return to the Hidden Village and you'll find a ton of cats everywhere. If you talk to the cats as a wolf, they'll say you should find the "cucco leader." Break through the glass of the large building on the east side to find the Cucco. He asks you to "play with them", meaning you speak to each one. You'll start from one end of the village and have to work your way to the other side. If you are successful, you'll be rewarded with a Piece of Heart that you have to go and pick up. Be sure to grab it before you leave or you'll have to do it all over again!}}<section end=38 /> | |||
<section begin=39 />{{Gallery/Box|file=tp_heart_39.jpg|caption='''Location''': [[Bridge of Eldin]] | |||
'''Conditions''': Acquire the [[Dominion Rod]] | |||
'''Heart Piece #39''': On the north side of the Bridge of Eldin, you'll find an [[Owl Statue]] is on an upper ledge (follow the mark on your map). Use the Dominion Rod to pull it down and walk it to the south side of the bridge. At the end, you'll see there's a lower area you can drop it down into. Do so, then place it in the middle of this area. Once you have it situated nicely, use it to jump across to a ladder, which takes you up on top of the wall next to the bridge. Defeat the [[Bulblin Archer]] up here and open the large chest to get a Piece of Heart.}}<section end=39 /> | |||
<section begin=40 />{{Gallery/Box|file=tp_heart_40.jpg|caption='''Location''': [[Ordon Woods]] | |||
'''Conditions''': Acquire the [[Dominion Rod]] | |||
'''Heart Piece #40''': Once you have acquired the Dominion Rod, you have to go to [[Ordon Woods]] (area just north of Ordon Village where [[Coro]] the Lantern Salesman can be found) to get a [[Sky Character]] (your map is marked with its location). Move the statue into the circular hole in the ground on the other side of the tree. A short cinematic will show a nearby rock and move across the shadow and up to some branches. | |||
Transform into a wolf, stand on the rock and face towards the statue to make [[Midna]]'s icon appear. Use her to jump to an upper area that leads just above the Faron Woods with a hidden chest containing this heart piece.}}<section end=40 /> | |||
<section begin=41 />{{Gallery/Box|file=tp_heart_41.jpg|caption='''Location''': [[City in the Sky]] | |||
'''Conditions''': Acquire the [[Double Clawshots]] | |||
'''Heart Piece #41''': In the large cylinder-shaped room with the [[Big Baba]] at the bottom, there's a chest you can see on your map on the 2nd floor. Get to that level in that room, then work your way across the skinny platforms with the [[Baba Serpent]]. Once you get to the far west side, you'll see the chest is directly ahead on your map. | |||
Shoot the two [[Keese]] that are hanging from the ceiling of the alcove, then grab onto the wall on your left. Hold the Analog Stick to the side to make Link steadily work his way across. At the end, drop to find your prize.}}<section end=41 /> | |||
<section begin=42 />{{Gallery/Box|file=tp_heart_42.jpg|caption='''Location''': [[City in the Sky]] | |||
'''Conditions''': Acquire the [[Double Clawshots]] | |||
'''Heart Piece #42''': In the southern portion of the dungeon on the 3rd floor, there's an outdoors area where a ton of [[Peahat]]s form a "V" shape. Using the [[Double Clawshots]], go along them and follow them to the south. It'll take you to an otherwise unreachable platform with a large chest.}}<section end=42 /> | |||
<section begin=43 />{{Gallery/Box|file=tp_heart_43.jpg|caption='''Location''': [[Kakariko Gorge]] | |||
'''Conditions''': Acquire the [[Double Clawshots]] | |||
'''Heart Piece #43''': In the far west side of Kakariko Gorge there's a large rock formation that is out in the abyss. Against the side is a target. Once you have the Double Clawshots, you'll be able to grapple back and forth to get to some lower vines. Grab on and climb around the other side to find a platform with a large chest containing a Piece of Heart.}}<section end=43 /> | |||
<section begin=44 />{{Gallery/Box|file=tp_heart_44.jpg|caption='''Location''': [[Palace of Twilight]] | |||
'''Conditions''': Acquire a [[Sol]] (or Light-Infused [[Master Sword]]) | |||
'''Heart Piece #44''': In the east wing of the dungeon there's four "waterfalls" of black fog. In one of them (which you can see on your map) is an alcove with a chest. Place the [[Sol]] near the "fogfall" to make it temporarily disappear. Clawshot the target against the wall to get to an upper area with the large chest. Alternatively, you can return here when you have infused the Master Sword with Light.}}<section end=44 /> | |||
<section begin=45 />{{Gallery/Box|file=tp_heart_45.jpg|caption='''Location''': [[Palace of Twilight]] | |||
'''Conditions''': Acquire a [[Sol]] (or Light-Infused [[Master Sword]]) | |||
'''Heart Piece #45''': In the first room of the west wing of the dungeon there's a dark orb to the far north on the lower level. By exposing it to the light of the [[Sol]], it will activate two platforms, each one taking you to the alcove on that side of the room. The eastern platform takes you to the alcove with a large chest containing the final Piece of Heart. Alternatively, you can return to this room when you have infused the Master Sword with Light.}}<section end=45 /> | |||
{{Gallery/Bottom}}</onlyinclude> | |||
{{cat|Twilight Princess}} | |||
{{cat|Guides}} | |||
Latest revision as of 13:49, March 19, 2023
Below is a listing of all available Pieces of Heart found in Twilight Princess. There are a total of 45 heart pieces scattered across Hyrule, offering 9 Heart Containers to Link's total health, for a maximum of 20 hearts.
Please note that in certain versions of the game, the entire overworld is mirrored. This guide is primarily written for the following versions of the game:
- Twilight Princess HD (Normal Mode)
- Twilight Princess (GameCube Version)
If you are playing either of the following versions of the game, you can still use this guide, but the directions will be reversed (e.g. east -> west, right -> left):
- Twilight Princess HD (Hero Mode)
- Twilight Princess (Wii Version)
Locations
Location: Faron Woods
Conditions: Acquire the Lantern
Heart Piece #1: In the deeper part of Faron Woods, you'll find a cave to the northeast where you initially find a Small Key. If you fail to get it your first time through, you'll have to use the Lantern to get through the fog and make your way to the cave. Inside, light the two torches to make a large chest appear on the platform containing your first heart piece.
Location: Forest Temple
Conditions: Acquire Bombs (Optional)
Heart Piece #2: In the room with the Bomblings and Deku Likes, one of the Deku Likes is blocking an alcove with a large chest. To defeat it, you can climb up to the platform above it, hit the nearby Bombling and drop it over the edge so it swallows it. Alternatively, you can return later when you have Bombs.
NOTE: If you complete the Forest Temple without getting this piece, you'll need the Clawshot to return to this room.
Location: Forest Temple
Conditions: Acquire the Gale Boomerang
Heart Piece #3: In the room with the Tile Worms, blow out all the torches using the Gale Boomerang to reveal a hidden alcove with a large chest, open it to obtain the third heart piece.
NOTE: If you complete the Forest Temple without getting this piece, you'll need the Clawshot to return to this room.
Location: Hyrule Field (North of Faron Woods)
Conditions: Acquire the Gale Boomerang
Heart Piece #4: In the portion of Hyrule Field just north of Faron Woods, go straight forward (from Faron Province) and you'll come to a rise with two Bulblin Warriors. After defeating them, look at the tree to the north (before the bridge) and you'll find a Piece of Heart in its branches. Use the Gale Boomerang to bring it over.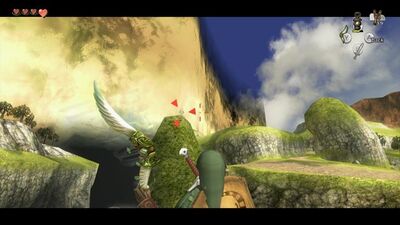
Location: Kakariko Gorge
Conditions: Acquire the Gale Boomerang
Heart Piece #5: In the portion of Hyrule Field just south of Kakariko Village, there are two large rock formations in the distance towards the center of Hyrule. There's a Piece of Heart atop the larger one, so use the Gale Boomerang to bring it over.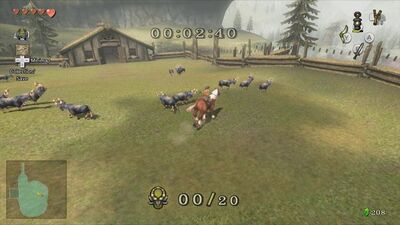
Location: Ordon Village
Conditions: Regain possession of Epona
Heart Piece #6: After restoring light to the Eldin Province and recovering Epona, you can return to Ordon Village and help Fado herd the goats during the day. If you can manage to herd all 20 goats in under three minutes, he'll gift you with this Piece of Heart.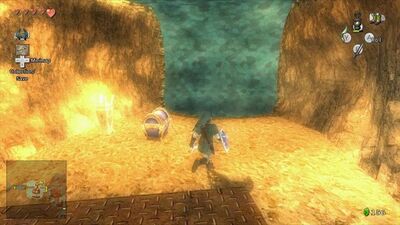
Location: Goron Mines
Conditions: Acquire the Iron Boots
Heart Piece #7: In the room where you walk around on the ceiling due to the large magnetic field, you can walk to the far northeast corner and find a hidden platform with a large chest containing the Piece of Heart.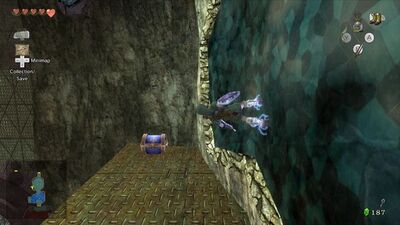
Location: Goron Mines
Conditions: Acquire the Iron Boots
Heart Piece #8: In the room just north of the large central chamber, the room is divided into two areas. On the north side of the room there are two Beamos in the center, while along the west wall there is a magnetic field. Walk up it using the Iron Boots and turn south to find a platform with a large chest containing the heart piece.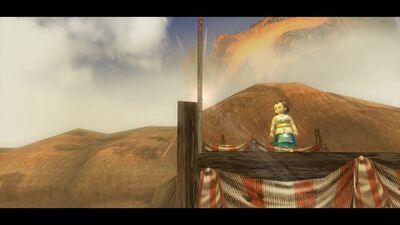
Location: Kakariko Village
Conditions: Acquire the Hero's Bow
Heart Piece #9: After completing the Goron Mines, Talo can be found atop the highest building in the village. To get up there, speak with the Goron at the building's base and climb up the ladder. Speak with Talo, who will ask you to teach him how to use the bow.
You'll appear down near the Sanctuary along with Malo. After shooting two relatively easy targets, Talo will yell at you to shoot a pole at the corner of the high building. Just aim carefully at the corner of the building itself, pull the bowstring all the way back, raise your cross arrow a bit and release. Malo will gift you with a Piece of Heart if you can hit it.
Location: Kakariko Village
Conditions: Acquire the Hero's Bow, Bombs, Gale Boomerang
Heart Piece #10: There are some boulders just above the Eldin Spring. Once you buy Bombs from Barnes Bombs, you can combine them with the Hero's Bow to create Bomb Arrows. Blast the boulders to reveal a Piece of Heart. Use the Gale Boomerang to bring it down.
Location: Kakariko Village
Conditions: Acquire Bombs, Iron Boots
Heart Piece #11: Blow up the boulder near the Eldin Spring and follow the path to drop down into the spring itself. Put on the Iron Boots to sink down where you can find a large chest containing the heart piece.
Location: Death Mountain
Conditions: Complete the Goron Mines
Heart Piece #12: Once you have completed the Goron Mines, there will be Gorons along the trail leading up to Death Mountain. These friendly dudes will allow you to get on their back and shoot you up the ledges. From Kakariko Village, speak with the second Goron you come to, get on his back and face off to the left instead. Hold forward on the analog stick and you'll be able to grab onto the ledge and pull yourself up.
Follow this higher path to the north and you'll find an alcove off to the left. Enter and drop down to find a large chest containing a Piece of Heart.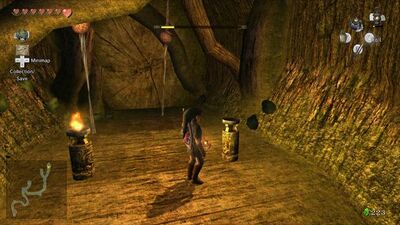
Location: Kakariko Gorge Cavern
Conditions: Acquire Bombs, Lantern
Heart Piece #13: In the southern area of Kakariko Gorge is a boulder blocking a cave. Blow it up, enter, and use your Lantern to navigate through this enemy-filled area.
At the forks, go: right, right, left, right to find a dead end with a Skulltula. Defeat it, then light the torches to make a large chest appear containing a Piece of Heart.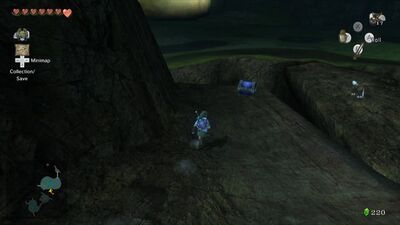
Location: Hyrule Field (North of Kakariko Village)
Conditions: Acquire the Hero's Bow, Bombs
Heart Piece #14: When you exit Kakariko Village to the north, you'll arrive in a large portion of Hyrule Field to the east of Castle Town. You'll find some boulders in this rocky area. Blow them up with Bombs and follow the path to some vines and more boulders. Use Bomb Arrows to blow up the boulders on the ledge, then jump across the gap to grab the vines. Pull yourself up and continue on to find a large chest on a ledge containing the heart piece.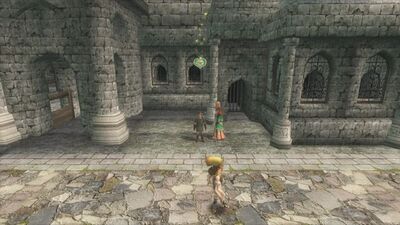
Location: Castle Town
Conditions: Enough Rupees to donate to Charlo (1,000)
Heart Piece #15: In Castle Town, there's an old man by the name of Charlo hanging out near the west exit just north of Purlo's tent. When you speak with him, he'll ask you to donate. By giving him 1,000 Rupees, you'll be rewarded with a Piece of Heart. If you are short of Rupees, you can exchange any Golden Bugs you may have with Agitha in Castle Town.
Location: Hena's Fishing Hole
Conditions: Enough Rupees to go fishing (20)
Heart Piece #16: When in Hena's Fishing Hole, look towards the central pillars to see a Piece of Heart atop the rock formation. When in the boat, you can use the Fishing Rod to bring it over to you. Alternatively, you could use the Gale Boomerang and lock on from the shore.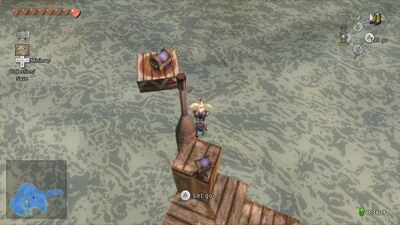
Location: Isle of Riches
Conditions: Enough Rupees to play Falbi's Flight-by-Fowl (20)
Heart Piece #17: In Lake Hylia, speak with Fyer to get shot up to the top of Lake Hylia (Hyrule Field). From here, you can play Falbi's Flight-by-Fowl to glide with a Cucco to the Isle of Riches. Use the Analog Stick to move around and slow down. The second to top tier (the highest and smallest one that isn't spinning) has a large chest that contains a Piece of Heart.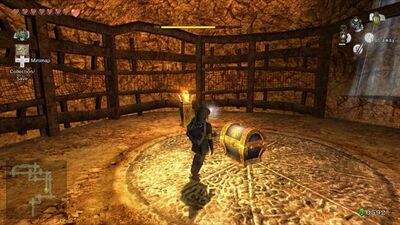
Location: Lake Hylia Cavern
Heart Piece #18: In the southern portion of Lake Hylia is a ladder. Climb up it and blow up the boulder to the south to reveal a cavern. Inside, you'll need your Lantern to see through the darkness, as well as bombs to clear boulders in the way. At the end of the lengthy cavern, you'll finally come to a large chest containing a Piece of Heart.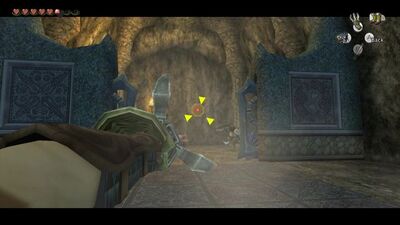
Location: Lakebed Temple
Conditions: Acquire the Clawshot
Heart Piece #19: Once you have restored the water flow from both the east and west sides, you can turn the stairs so that water flows into the lower east section. Return to the room with the rotating platforms and stalactites you had to shoot down for a small key earlier. By filling this area with water, it raises a bridge that was an obstacle earlier and allows us to access a new area.
Once you get there, stand on the switch to open the gate up ahead, then use the Clawshot on target to get on the other side before the gate closes. Open the large chest for a Piece of Heart.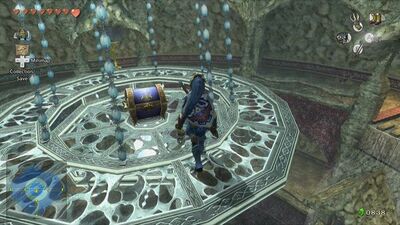
Location: Lakebed Temple
Conditions: Acquire the Clawshot
Heart Piece #20: In the middle of the ceiling of the large central chamber (with the spinning staircase) is a giant chandelier. You can get up there by using the various targets in all of the compass directions. On top, you will find a large chest with the heart piece.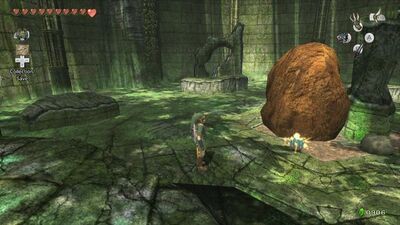
Location: Sacred Grove
Conditions: Acquire the Master Sword, Shadow Crystal, Bombs
Heart Piece #21: Once you have acquired the Master Sword and Shadow Crystal, you can enter the small area to the side where we fought Skull Kid the first time. There is a large boulder here that you can blow up with Bombs to reveal a sparkly spot you can see in wolf form. Dig down into it to find a cavern filled with Baba Serpents. Defeat them all (use the Gale Boomerang on the ones hanging from the ceiling) to make a large chest appear containing the heart piece.
NOTE: If you fail to get this the first time through, you can always get it later when you return to the Sacred Grove and unlock the Twilight Portal.
Location: West Castle Town Bridge
Conditions: Progress in the Malo Mart side-quest
Heart Piece #22: The Goron at the bridge leading from Castle Town to the portion of Hyrule Field just north of Kakariko Village will leave this behind as thanks for energizing him with Hot Spring Water. Check our our Malo Mart guide for detailed instructions on how to get this Piece of Heart.
Location: Lanayru Spring
Conditions: Acquire the Clawshot, Lantern
Heart Piece #23: After you've acquired the Clawshot, you can enter Lanayru Spring in Lake Hylia, and to either the left or right, you'll find some vines. Use the Clawshot to get across and follow it to a hidden room in the back (far south). Inside, light the two torches with your Lantern to make a large chest appear containing the heart piece.
Location: Lake Hylia
Conditions: Acquire the Master Sword, Shadow Crystal
Heart Piece #24: After you have restored light to the Lanayru Province and obtained the Master Sword and Shadow Crystal, you can return to Lake Hylia and meet up with a new character named Plumm. Simply approach any Hawk Grass while in wolf form to make him appear. He has a mini-game available for free in which you ride a Kargarok up Zora's River popping balloons. Get only oranges or only strawberries to get over 10,000 points, and he'll give you a Piece of Heart in reward.
Location: Bridge of Eldin Cavern
Conditions: Acquire the Clawshot, Iron Boots
Heart Piece #25: Just north of the Bridge of Eldin is an upper platform that you can reach with the Clawshot (by latching onto the target against the wall). Follow this path to the east to find a cavern. Inside, follow the very obvious path, jumping down and using the Iron Boots to get sucked into the magnetic fields. At the end of the cavern (at the very bottom), you will find a large chest with your prize.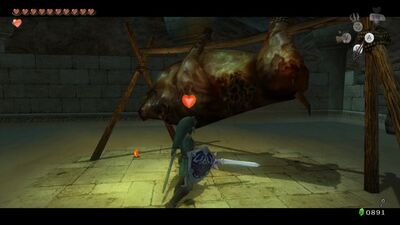
Location: Bulblin Fortress
Conditions: None
Heart Piece #26: In the Gerudo Desert, just before entering the Arbiter's Grounds is the Bulblin Fortress. In the northeast corner some Bulblins are roasting a Bullbo over a fire. Slash the Bullbo with your sword until it explodes, revealing a Piece of Heart. Brutal!
Location: Arbiter's Grounds
Conditions: Acquire the Clawshot
Heart Piece #27: In the large, central room where the blue flames are stolen by the Poes, there's a chest to either side of the stairs. On the right side the chest contains a Piece of Heart. When getting it, it's recommended to Clawshot over and roll back along the platforms (otherwise, you will be unable to get back without drowning in quicksand).
Location: Arbiter's Grounds
Conditions: Acquire the Spinner
Heart Piece #28: In the room with lots of Spinner rails, the mid level you can get to has a rotating spike, but to the far east side there's a chest on the upper platform along with a Stalfos. Defeat it, then open the chest for a Piece of Heart.
Location: North of the Great Bridge of Hylia
Heart Piece #29: Between the Great Bridge of Hylia and the area north of Castle Town, there's a back route that's blocked off by boulders. After you've blown them up, you can access this shortcut which has rails along the bottom. One set of rails leads upwards, then breaks off into several rails that go back and forth. Repeatedly use the Spinner to jump back and forth and eventually you'll get to a platform with a large chest containing a heart piece.
Location: North of the Bridge of Eldin
Conditions: Acquire the Spinner
Heart Piece #30: Just north of the Bridge of Eldin is a small bridge across the black abyss (right next to the entrance to the Hidden Village). Use the rails along the north wall to get to a platform with grass. Transform into a wolf and dig down into the sparkly spot in the center. Inside, kill the three Stalfos to make a large chest appear containing the Piece of Heart.
Location: Snowpeak Ruins
Conditions: Acquire Bombs (or Ball and Chain)
Heart Piece #31: On the second floor, the room to the far southwest has some Freezards in cages and a cannon. At the top, there's a target against the wall in the corner. The floor here looks uneven, meaning you can use Bombs to blow it up. Alternatively, you can use the Ball and Chain to break it. Fall down into a mysterious room on the first floor where there's a large chest. Open it to get a Piece of Heart, then use the target to get back to the second floor.
Location: Snowpeak Ruins
Conditions: Acquire Bombs (or Ball and Chain)
Heart Piece #32: Once you reach the entrance room on the second floor, use the Ball and Chain on the target that's next to the west (GCN) door. This will unveil a target so you can get back up quickly in case you fall down during this next puzzle.
Jump onto the chandelier, then turn to the south where you'll see two more in a row. On your mini-map, you'll also see there's a chest to the far south. Using the Ball and Chain to strike the chandeliers, you'll be able to steadily work your way south, eventually jumping to the platform and opening the chest.
Location: Ice Block Cavern
Conditions: Acquire the Ball and Chain, Bombs
Heart Piece #33: In the portion of Hyrule Field just north of Castle Town, head to the lower portion of the rocky area to the far north. Here, you'll find a Tektite and Lizalfos along with a boulder blocking a cave. Blow it up (or use the Ball and Chain) and head inside.
Break through the ice with the Ball and Chain, then you'll have three rooms of block puzzles to complete. For details on how to do this, check our Block Puzzle Guide. When you get to the final room, you'll gain access to a large chest containing a Piece of Heart.
Location: Snowpeak
Conditions: Complete the Snowpeak Ruins
Heart Piece #34: After completing the Snowpeak Ruins, you can warp to the top of Snowpeak and speak with Yeto and Yeta to race them.
The first race is against Yeto, who isn't that hard. Simply hold forward the entire time and you'll easily stay ahead of him. Warp back to the top and this time, speak with Yeta. She's much faster and she also jumps up to a shortcut halfway through that you can see on your map. Be sure to take this shortcut too otherwise you'll be unable to beat her. In reward, she'll give you a Piece of Heart.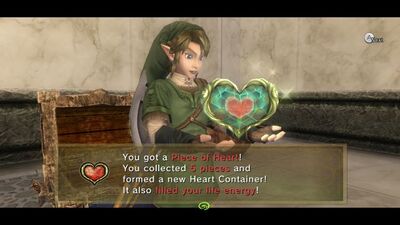
Location: Temple of Time
Conditions: Acquire the Dominion Rod
Heart Piece #35: In the room with several Lizalfos, Dynalfos and walls that move back and forth, there's a chest in the corner, but you're unable to get to it due to the electric barrier. Use either the giant statue with the Dominion Rod or one of the nearby little statues to step on the switch on the other side of the barrier. This will temporarily deactivate it, allowing you to go back there and open the chest.
Location: Temple of Time
Conditions: Acquire the Dominion Rod
Heart Piece #36: In the room with the spinning mechanism to raise and lower the platform, go to the bottom and collect the small statue, then take it to the mid level and collect that small statue as well. Take them both to the south and place them on the floor switches (or use the giant statue when on your way back to the entrance). This allows you to access the far southern room.
Defeat the enemies in here, then use the Dominion Rod to move the little statue on the upper platform to the far south. Walk it down the ledge and onto the floor switch. Pick up one of the other nearby little statues and do the same on the opposite side. When both switches are pressed down, this makes a large chest appear in the east alcove.
Location: Temple of Time (Entrance)
Conditions: Acquire the Dominion Rod
Heart Piece #37: In the entrance area of the Temple of Time, before entering the dungeon itself, there is an Owl Statue to either side of the exit. Use the Dominion Rod to move the one on the east side to reveal an alcove housing a large chest. Open it to get the Piece of Heart.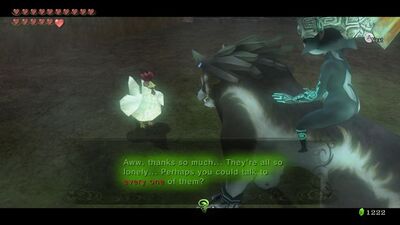
Location: Hidden Village
Conditions: Restore Ilia's memory
Heart Piece #38: After returning Ilia's Charm to her, you can return to the Hidden Village and you'll find a ton of cats everywhere. If you talk to the cats as a wolf, they'll say you should find the "cucco leader." Break through the glass of the large building on the east side to find the Cucco. He asks you to "play with them", meaning you speak to each one. You'll start from one end of the village and have to work your way to the other side. If you are successful, you'll be rewarded with a Piece of Heart that you have to go and pick up. Be sure to grab it before you leave or you'll have to do it all over again!
Location: Bridge of Eldin
Conditions: Acquire the Dominion Rod
Heart Piece #39: On the north side of the Bridge of Eldin, you'll find an Owl Statue is on an upper ledge (follow the mark on your map). Use the Dominion Rod to pull it down and walk it to the south side of the bridge. At the end, you'll see there's a lower area you can drop it down into. Do so, then place it in the middle of this area. Once you have it situated nicely, use it to jump across to a ladder, which takes you up on top of the wall next to the bridge. Defeat the Bulblin Archer up here and open the large chest to get a Piece of Heart.
Location: Ordon Woods
Conditions: Acquire the Dominion Rod
Heart Piece #40: Once you have acquired the Dominion Rod, you have to go to Ordon Woods (area just north of Ordon Village where Coro the Lantern Salesman can be found) to get a Sky Character (your map is marked with its location). Move the statue into the circular hole in the ground on the other side of the tree. A short cinematic will show a nearby rock and move across the shadow and up to some branches.
Transform into a wolf, stand on the rock and face towards the statue to make Midna's icon appear. Use her to jump to an upper area that leads just above the Faron Woods with a hidden chest containing this heart piece.
Location: City in the Sky
Conditions: Acquire the Double Clawshots
Heart Piece #41: In the large cylinder-shaped room with the Big Baba at the bottom, there's a chest you can see on your map on the 2nd floor. Get to that level in that room, then work your way across the skinny platforms with the Baba Serpent. Once you get to the far west side, you'll see the chest is directly ahead on your map.
Shoot the two Keese that are hanging from the ceiling of the alcove, then grab onto the wall on your left. Hold the Analog Stick to the side to make Link steadily work his way across. At the end, drop to find your prize.
Location: City in the Sky
Conditions: Acquire the Double Clawshots
Heart Piece #42: In the southern portion of the dungeon on the 3rd floor, there's an outdoors area where a ton of Peahats form a "V" shape. Using the Double Clawshots, go along them and follow them to the south. It'll take you to an otherwise unreachable platform with a large chest.
Location: Kakariko Gorge
Conditions: Acquire the Double Clawshots
Heart Piece #43: In the far west side of Kakariko Gorge there's a large rock formation that is out in the abyss. Against the side is a target. Once you have the Double Clawshots, you'll be able to grapple back and forth to get to some lower vines. Grab on and climb around the other side to find a platform with a large chest containing a Piece of Heart.
Location: Palace of Twilight
Conditions: Acquire a Sol (or Light-Infused Master Sword)
Heart Piece #44: In the east wing of the dungeon there's four "waterfalls" of black fog. In one of them (which you can see on your map) is an alcove with a chest. Place the Sol near the "fogfall" to make it temporarily disappear. Clawshot the target against the wall to get to an upper area with the large chest. Alternatively, you can return here when you have infused the Master Sword with Light.
Location: Palace of Twilight
Conditions: Acquire a Sol (or Light-Infused Master Sword)
Heart Piece #45: In the first room of the west wing of the dungeon there's a dark orb to the far north on the lower level. By exposing it to the light of the Sol, it will activate two platforms, each one taking you to the alcove on that side of the room. The eastern platform takes you to the alcove with a large chest containing the final Piece of Heart. Alternatively, you can return to this room when you have infused the Master Sword with Light.


