Category:Skyward Sword Items: Difference between revisions
Jump to navigation
Jump to search
Want an adless experience? Log in or Create an account.
No edit summary |
No edit summary |
||
| Line 3: | Line 3: | ||
<onlyinclude>{{Gallery|size=80|pad=5|title=Items in ''[[The Legend of Zelda: Skyward Sword]]''.}} | <onlyinclude>{{Gallery|size=80|pad=5|title=Items in ''[[The Legend of Zelda: Skyward Sword]]''.}} | ||
{{Gallery/Box|file=|link=Adventure Pouch|caption=[[Adventure Pouch]]}} | {{Gallery/Box|file=|link=Adventure Pouch|caption=[[Adventure Pouch]]}} | ||
{{Gallery/Box|file=|link=Air Potion|caption=[[Air Potion]]}} | {{Gallery/Box|file=AirPotion-SS-Icon.png|link=Air Potion|caption=[[Air Potion]]}} | ||
{{Gallery/Box|file=|link=Air Potion +|caption=[[Air Potion +]]}} | {{Gallery/Box|file=AirPotion+-SS-Icon.png|link=Air Potion +|caption=[[Air Potion +]]}} | ||
{{Gallery/Box|file=|link=Ancient Fruit|caption=[[Ancient Fruit]]}} | {{Gallery/Box|file=|link=Ancient Fruit|caption=[[Ancient Fruit]]}} | ||
{{Gallery/Box|file=|link=Ancient Sea Chart|caption=[[Ancient Sea Chart]]}} | {{Gallery/Box|file=|link=Ancient Sea Chart|caption=[[Ancient Sea Chart]]}} | ||
| Line 13: | Line 13: | ||
{{Gallery/Box|file=SS Beetle.png|link=Beetle|caption=[[Beetle]]}} | {{Gallery/Box|file=SS Beetle.png|link=Beetle|caption=[[Beetle]]}} | ||
{{Gallery/Box|file=Bigbugnetss.jpg|link=Big Bug Net|caption=[[Big Bug Net]]}} | {{Gallery/Box|file=Bigbugnetss.jpg|link=Big Bug Net|caption=[[Big Bug Net]]}} | ||
{{Gallery/Box|file=|link=Big Wallet|caption=[[Big Wallet]]}} | {{Gallery/Box|file=BigWallet-SS-Icon.png|link=Big Wallet|caption=[[Big Wallet]]}} | ||
{{Gallery/Box|file=|link=Bird Statuette|caption=[[Bird Statuette]]}} | {{Gallery/Box|file=|link=Bird Statuette|caption=[[Bird Statuette]]}} | ||
{{Gallery/Box|file=|link=Blessed Idol|caption=[[Blessed Idol]]}} | {{Gallery/Box|file=|link=Blessed Idol|caption=[[Blessed Idol]]}} | ||
{{Gallery/Box|file=SSBomb.png|link=Bomb|caption=[[Bomb]]}} | {{Gallery/Box|file=SSBomb.png|link=Bomb|caption=[[Bomb]]}} | ||
{{Gallery/Box|file=|link=Bomb Bag|caption=[[Bomb Bag]]}} | {{Gallery/Box|file=|link=Bomb Bag|caption=[[Bomb Bag]]}} | ||
{{Gallery/Box|file= | {{Gallery/Box|file=Bow-SS-Icon.png|link=Bow|caption=[[Bow]]}} | ||
{{Gallery/Box|file=|link=Braced Shield|caption=[[Braced Shield]]}} | {{Gallery/Box|file=BracedShield-SS-Icon.png|link=Braced Shield|caption=[[Braced Shield]]}} | ||
{{Gallery/Box|file=|link=Bug Medal|caption=[[Bug Medal]]}} | {{Gallery/Box|file=|link=Bug Medal|caption=[[Bug Medal]]}} | ||
{{Gallery/Box|file=Bugnetss.jpg|link=Bug Net|caption=[[Bug Net]]}} | {{Gallery/Box|file=Bugnetss.jpg|link=Bug Net|caption=[[Bug Net]]}} | ||
| Line 25: | Line 25: | ||
{{Gallery/Box|file=|link=Cawlin's Letter|caption=[[Cawlin's Letter]]}} | {{Gallery/Box|file=|link=Cawlin's Letter|caption=[[Cawlin's Letter]]}} | ||
{{Gallery/Box|file=Clawshotss.jpg|link=Clawshot|caption=[[Clawshot]]s}} | {{Gallery/Box|file=Clawshotss.jpg|link=Clawshot|caption=[[Clawshot]]s}} | ||
{{Gallery/Box|file=|link=Cold Pumpkin Soup|caption=[[Cold Pumpkin Soup]]}} | {{Gallery/Box|file=ColdPumpkinSoup-SS-Icon.png|link=Cold Pumpkin Soup|caption=[[Cold Pumpkin Soup]]}} | ||
{{Gallery/Box|file=|link=Cursed Medal|caption=[[Cursed Medal]]}} | {{Gallery/Box|file=|link=Cursed Medal|caption=[[Cursed Medal]]}} | ||
{{Gallery/Box|file=|link=Deku Seed|caption=[[Deku Seed]]}} | {{Gallery/Box|file=|link=Deku Seed|caption=[[Deku Seed]]}} | ||
{{Gallery/Box|file=Mittsss.jpg|link=Digging Mitts|caption=[[Digging Mitts]]}} | {{Gallery/Box|file=Mittsss.jpg|link=Digging Mitts|caption=[[Digging Mitts]]}} | ||
{{Gallery/Box|file=|link=Divine Shield|caption=[[Divine Shield]]}} | {{Gallery/Box|file=DivineShield-SS-Icon.png|link=Divine Shield|caption=[[Divine Shield]]}} | ||
{{Gallery/Box|file=|link=Dragon Sculpture|caption=[[Dragon Sculpture]]}} | {{Gallery/Box|file=|link=Dragon Sculpture|caption=[[Dragon Sculpture]]}} | ||
{{Gallery/Box|file=|link=Dungeon Map|caption=[[Dungeon Map]]}} | {{Gallery/Box|file=|link=Dungeon Map|caption=[[Dungeon Map]]}} | ||
{{Gallery/Box|file=|link=Empty Bottle|caption=[[Empty Bottle]]}} | {{Gallery/Box|file=EmptyBottle-SS-Icon.png|link=Empty Bottle|caption=[[Empty Bottle]]}} | ||
{{Gallery/Box|file=|link=Empty Pocket|caption=[[Empty Pocket]]}} | {{Gallery/Box|file=|link=Empty Pocket|caption=[[Empty Pocket]]}} | ||
{{Gallery/Box|file=|link=Extra Wallet|caption=[[Extra Wallet]]}} | {{Gallery/Box|file=|link=Extra Wallet|caption=[[Extra Wallet]]}} | ||
{{Gallery/Box|file=|link=Fairy|caption=[[Fairy]]}} | {{Gallery/Box|file=Fairy-SS-Icon.png|link=Fairy|caption=[[Fairy]]}} | ||
{{Gallery/Box|file=|link=Fireshield Earrings|caption=[[Fireshield Earrings]]}} | {{Gallery/Box|file=FireshieldEarrings-SS-Icon.png|link=Fireshield Earrings|caption=[[Fireshield Earrings]]}} | ||
{{Gallery/Box|file=|link=Fortified Shield|caption=[[Fortified Shield]]}} | {{Gallery/Box|file=FortifiedShield-SS-Icon.png|link=Fortified Shield|caption=[[Fortified Shield]]}} | ||
{{Gallery/Box|file=|link=Giant Wallet|caption=[[Giant Wallet]]}} | {{Gallery/Box|file=GiantWallet-SS-Icon.png|link=Giant Wallet|caption=[[Giant Wallet]]}} | ||
{{Gallery/Box|file=|link=Glittering Spores|caption=[[Glittering Spores]]}} | {{Gallery/Box|file=|link=Glittering Spores|caption=[[Glittering Spores]]}} | ||
{{Gallery/Box|file=|link=Golden Carving|caption=[[Golden Carving]]}} | {{Gallery/Box|file=|link=Golden Carving|caption=[[Golden Carving]]}} | ||
{{Gallery/Box|file=|link=Goddess Longsword|caption=[[Goddess Longsword]]}} | {{Gallery/Box|file=GoddessLongsword-SS-Icon.png|link=Goddess Longsword|caption=[[Goddess Longsword]]}} | ||
{{Gallery/Box|file=|link=Goddess Shield|caption=[[Goddess Shield]]}} | {{Gallery/Box|file=GoddessShield-SS-Icon.png|link=Goddess Shield|caption=[[Goddess Shield]]}} | ||
{{Gallery/Box|file=|link=Goddess Sword|caption=[[Goddess Sword]]}} | {{Gallery/Box|file=GoddessSword-SS-Icon.png|link=Goddess Sword|caption=[[Goddess Sword]]}} | ||
{{Gallery/Box|file=|link=Goddess White Sword|caption=[[Goddess White Sword]]}} | {{Gallery/Box|file=GoddessWhiteSword-SS-Icon.png|link=Goddess White Sword|caption=[[Goddess White Sword]]}} | ||
{{Gallery/Box|file=|link=Goddess's Harp|caption=[[Goddess's Harp]]}} | {{Gallery/Box|file=Goddess'sHarp-SS-Icon.png|link=Goddess's Harp|caption=[[Goddess's Harp]]}} | ||
{{Gallery/Box|file=|link=Gratitude Crystal|caption=[[Gratitude Crystal]]}} | {{Gallery/Box|file=|link=Gratitude Crystal|caption=[[Gratitude Crystal]]}} | ||
{{Gallery/Box|file=|link=Guardian Potion|caption=[[Guardian Potion]]}} | {{Gallery/Box|file=GuardianPotion-SS-Icon.png|link=Guardian Potion|caption=[[Guardian Potion]]}} | ||
{{Gallery/Box|file=|link=Guardian Potion +|caption=[[Guardian Potion +]]}} | {{Gallery/Box|file=GuardianPotion+-SS-Icon.png|link=Guardian Potion +|caption=[[Guardian Potion +]]}} | ||
{{Gallery/Box|file=Gust Bellow.png|link=Gust Bellows|caption=[[Gust Bellows]]}} | {{Gallery/Box|file=Gust Bellow.png|link=Gust Bellows|caption=[[Gust Bellows]]}} | ||
{{Gallery/Box|file=RecoveryHeart.png|link=Recovery Heart|caption=[[Recovery Heart|Heart]]}} | {{Gallery/Box|file=RecoveryHeart.png|link=Recovery Heart|caption=[[Recovery Heart|Heart]]}} | ||
{{Gallery/Box|file=Heartcontainer.jpg|link=Heart Container|caption=[[Heart Container]]}} | {{Gallery/Box|file=Heartcontainer.jpg|link=Heart Container|caption=[[Heart Container]]}} | ||
{{Gallery/Box|file=|link=Heart Medal|caption=[[Heart Medal]]}} | {{Gallery/Box|file=|link=Heart Medal|caption=[[Heart Medal]]}} | ||
{{Gallery/Box|file=|link=Heart Potion|caption=[[Heart Potion]]}} | {{Gallery/Box|file=HeartPotion-SS-Icon.png|link=Heart Potion|caption=[[Heart Potion]]}} | ||
{{Gallery/Box|file=|link=Heart Potion +|caption=[[Heart Potion +]]}} | {{Gallery/Box|file=HeartPotion+-SS-Icon.png|link=Heart Potion +|caption=[[Heart Potion +]]}} | ||
{{Gallery/Box|file=|link=Heart Potion ++|caption=[[Heart Potion ++]]}} | {{Gallery/Box|file=HeartPotion++-SS-Icon.png|link=Heart Potion ++|caption=[[Heart Potion ++]]}} | ||
{{Gallery/Box|file=|link=Hook Beetle|caption=[[Hook Beetle]]}} | {{Gallery/Box|file=HookBeetle-SS-Icon.png|link=Hook Beetle|caption=[[Hook Beetle]]}} | ||
{{Gallery/Box|file=|link=Hot Pumpkin Soup|caption=[[Hot Pumpkin Soup]]}} | {{Gallery/Box|file=HotPumpkinSoup-SS-Icon.png|link=Hot Pumpkin Soup|caption=[[Hot Pumpkin Soup]]}} | ||
{{Gallery/Box|file=Shieldss.jpg|link=Hylian Shield|caption=[[Hylian Shield]]}} | {{Gallery/Box|file=Shieldss.jpg|link=Hylian Shield|caption=[[Hylian Shield]]}} | ||
{{Gallery/Box|file= | {{Gallery/Box|file=IronBow-SS-Icon.png|link=Iron Bow|caption=[[Iron Bow]]}} | ||
{{Gallery/Box|file= | {{Gallery/Box|file=IronShield-SS-Icon.png|link=Iron Shield|caption=[[Iron Shield]]}} | ||
{{Gallery/Box|file=|link=Large Bomb Bag|caption=[[Large Bomb Bag]]}} | {{Gallery/Box|file=|link=Large Bomb Bag|caption=[[Large Bomb Bag]]}} | ||
{{Gallery/Box|file=|link=Large Quiver|caption=[[Large Quiver]]}} | {{Gallery/Box|file=|link=Large Quiver|caption=[[Large Quiver]]}} | ||
| Line 68: | Line 68: | ||
{{Gallery/Box|file=|link=Life Tree Seedling|caption=[[Life Tree Seedling]]}} | {{Gallery/Box|file=|link=Life Tree Seedling|caption=[[Life Tree Seedling]]}} | ||
{{Gallery/Box|file=|link=Light Fruit|caption=[[Light Fruit]]}} | {{Gallery/Box|file=|link=Light Fruit|caption=[[Light Fruit]]}} | ||
{{Gallery/Box|file=|link=Unpowered Master Sword|caption=[[Unpowered Master Sword|Master Sword]]}} | {{Gallery/Box|file=MasterSword-SS-Icon.png|link=Unpowered Master Sword|caption=[[Unpowered Master Sword|Master Sword]]}} | ||
{{Gallery/Box|file=|link=Medium Bomb Bag|caption=[[Medium Bomb Bag]]}} | {{Gallery/Box|file=|link=Medium Bomb Bag|caption=[[Medium Bomb Bag]]}} | ||
{{Gallery/Box|file=|link=Medium Quiver|caption=[[Medium Quiver]]}} | {{Gallery/Box|file=|link=Medium Quiver|caption=[[Medium Quiver]]}} | ||
{{Gallery/Box|file=|link=Medium Seed Satchel|caption=[[Medium Seed Satchel]]}} | {{Gallery/Box|file=|link=Medium Seed Satchel|caption=[[Medium Seed Satchel]]}} | ||
{{Gallery/Box|file=|link=Medium Wallet|caption=[[Medium Wallet]]}} | {{Gallery/Box|file=MediumWallet-SS-Icon.png|link=Medium Wallet|caption=[[Medium Wallet]]}} | ||
{{Gallery/Box|file= | {{Gallery/Box|file=MogmaMitts-SS-Icon.png|link=Mogma Mitts|caption=[[Mogma Mitts]]}} | ||
{{Gallery/Box|file=|link=Mushroom Spores|caption=[[Mushroom Spores]]}} | {{Gallery/Box|file=|link=Mushroom Spores|caption=[[Mushroom Spores]]}} | ||
{{Gallery/Box|file=|link=Mysterious Crystals|caption=[[Mysterious Crystals]]}} | {{Gallery/Box|file=|link=Mysterious Crystals|caption=[[Mysterious Crystals]]}} | ||
{{Gallery/Box|file=|link=Piece of Heart|caption=[[Piece of Heart]]}} | {{Gallery/Box|file=|link=Piece of Heart|caption=[[Piece of Heart]]}} | ||
{{Gallery/Box|file=|link=Piece of the Key|caption=[[Piece of the Key]]}} | {{Gallery/Box|file=|link=Piece of the Key|caption=[[Piece of the Key]]}} | ||
{{Gallery/Box|file=|link=Practice Sword|caption=[[Practice Sword]]}} | {{Gallery/Box|file=PracticeSword-SS-Icon.png|link=Practice Sword|caption=[[Practice Sword]]}} | ||
{{Gallery/Box|file=|link=Quick Beetle|caption=[[Quick Beetle]]}} | {{Gallery/Box|file=QuickBeetle-SS-Icon.png|link=Quick Beetle|caption=[[Quick Beetle]]}} | ||
{{Gallery/Box|file=|link=Rattle|caption=[[Rattle]]}} | {{Gallery/Box|file=|link=Rattle|caption=[[Rattle]]}} | ||
{{Gallery/Box|file=|link=Reinforced Shield|caption=[[Reinforced Shield]]}} | {{Gallery/Box|file=ReinforcedShield-SS-Icon.png|link=Reinforced Shield|caption=[[Reinforced Shield]]}} | ||
{{Gallery/Box|file=|link=Revitalizing Potion|caption=[[Revitalizing Potion]]}} | {{Gallery/Box|file=RevitalizingPotion-SS-Icon.png|link=Revitalizing Potion|caption=[[Revitalizing Potion]]}} | ||
{{Gallery/Box|file=|link=Revitalizing Potion +|caption=[[Revitalizing Potion +]]}} | {{Gallery/Box|file=RevitalizingPotion+-SS-Icon.png|link=Revitalizing Potion +|caption=[[Revitalizing Potion +]]}} | ||
{{Gallery/Box|file=|link=Revitalizing Potion ++|caption=[[Revitalizing Potion ++]]}} | {{Gallery/Box|file=RevitalizingPotion++-SS-Icon.png|link=Revitalizing Potion ++|caption=[[Revitalizing Potion ++]]}} | ||
{{Gallery/Box|file= | {{Gallery/Box|file=Rupees-SS-Icon.png|link=Rupee|caption=[[Rupee]]}} | ||
{{Gallery/Box|file=|link=Rupee Medal|caption=[[Rupee Medal]]}} | {{Gallery/Box|file=|link=Rupee Medal|caption=[[Rupee Medal]]}} | ||
{{Gallery/Box|file=|link=Rupoor|caption=[[Rupoor]]}} | {{Gallery/Box|file=|link=Rupoor|caption=[[Rupoor]]}} | ||
{{Gallery/Box|file=|link=Sacred Bow|caption=[[Sacred Bow]]}} | {{Gallery/Box|file=SacredBow-SS-Icon.png|link=Sacred Bow|caption=[[Sacred Bow]]}} | ||
{{Gallery/Box|file=|link=Sacred Shield|caption=[[Sacred Shield]]}} | {{Gallery/Box|file=SacredShield-SS-Icon.png|link=Sacred Shield|caption=[[Sacred Shield]]}} | ||
{{Gallery/Box|file=|link=Sacred Tear|caption=[[Sacred Tear]]}} | {{Gallery/Box|file=|link=Sacred Tear|caption=[[Sacred Tear]]}} | ||
{{Gallery/Box|file=|link=Sacred Water|caption=[[Sacred Water]]}} | {{Gallery/Box|file=SacredWater-SS-Icon.png|link=Sacred Water|caption=[[Sacred Water]]}} | ||
{{Gallery/Box|file=|link=Sailcloth|caption=[[Sailcloth]]}} | {{Gallery/Box|file=Sailcloth-SS-Icon.png|link=Sailcloth|caption=[[Sailcloth]]}} | ||
{{Gallery/Box|file=Scattershot SS.png|link=Scattershot|caption=[[Scattershot]]}} | {{Gallery/Box|file=Scattershot SS.png|link=Scattershot|caption=[[Scattershot]]}} | ||
{{Gallery/Box|file=SkywardSwordSlingshot.png|link=Slingshot|caption=[[Slingshot]]}} | {{Gallery/Box|file=SkywardSwordSlingshot.png|link=Slingshot|caption=[[Slingshot]]}} | ||
| Line 99: | Line 99: | ||
{{Gallery/Box|file=|link=Small Quiver|caption=[[Small Quiver]]}} | {{Gallery/Box|file=|link=Small Quiver|caption=[[Small Quiver]]}} | ||
{{Gallery/Box|file=|link=Small Seed Satchel|caption=[[Small Seed Satchel]]}} | {{Gallery/Box|file=|link=Small Seed Satchel|caption=[[Small Seed Satchel]]}} | ||
{{Gallery/Box|file=|link=Small Wallet|caption=[[Small Wallet]]}} | {{Gallery/Box|file=SmallWallet-SS-Icon.png|link=Small Wallet|caption=[[Small Wallet]]}} | ||
{{Gallery/Box|file=|link=Spirit Vessel|caption=[[Spirit Vessel]]}} | {{Gallery/Box|file=|link=Spirit Vessel|caption=[[Spirit Vessel]]}} | ||
{{Gallery/Box|file=|link=Squid Carving|caption=[[Squid Carving]]}} | {{Gallery/Box|file=|link=Squid Carving|caption=[[Squid Carving]]}} | ||
{{Gallery/Box|file=|link=Stamina Fruit|caption=[[Stamina Fruit]]}} | {{Gallery/Box|file=|link=Stamina Fruit|caption=[[Stamina Fruit]]}} | ||
{{Gallery/Box|file=|link=Stamina Potion|caption=[[Stamina Potion]]}} | {{Gallery/Box|file=StaminaPotion-SS-Icon.png|link=Stamina Potion|caption=[[Stamina Potion]]}} | ||
{{Gallery/Box|file=|link=Stamina Potion +|caption=[[Stamina Potion +]]}} | {{Gallery/Box|file=StaminaPotion+-SS-Icon.png|link=Stamina Potion +|caption=[[Stamina Potion +]]}} | ||
{{Gallery/Box|file=|link=Stone of Trials|caption=[[Stone of Trials]]}} | {{Gallery/Box|file=|link=Stone of Trials|caption=[[Stone of Trials]]}} | ||
{{Gallery/Box|file=|link=Tear of Din|caption=[[Tear of Din]]}} | {{Gallery/Box|file=|link=Tear of Din|caption=[[Tear of Din]]}} | ||
{{Gallery/Box|file=|link=Tear of Farore|caption=[[Tear of Farore]]}} | {{Gallery/Box|file=|link=Tear of Farore|caption=[[Tear of Farore]]}} | ||
{{Gallery/Box|file=|link=Tear of Nayru|caption=[[Tear of Nayru]]}} | {{Gallery/Box|file=|link=Tear of Nayru|caption=[[Tear of Nayru]]}} | ||
{{Gallery/Box|file=|link=Tough Beetle|caption=[[Tough Beetle]]}} | {{Gallery/Box|file=ToughBeetle-SS-Icon.png|link=Tough Beetle|caption=[[Tough Beetle]]}} | ||
{{Gallery/Box|file=|link=Treasure|caption=[[Treasure]]}} | {{Gallery/Box|file=Treasures-SS-Icon.png|link=Treasure|caption=[[Treasure]]}} | ||
{{Gallery/Box|file=|link=Treasure Medal|caption=[[Treasure Medal]]}} | {{Gallery/Box|file=|link=Treasure Medal|caption=[[Treasure Medal]]}} | ||
{{Gallery/Box|file=Triforce (Ocarina of Time).png|link=Triforce|caption=[[Triforce]]}} | {{Gallery/Box|file=Triforce (Ocarina of Time).png|link=Triforce|caption=[[Triforce]]}} | ||
| Line 116: | Line 116: | ||
{{Gallery/Box|file=|link=Triforce of Power|caption=[[Triforce of Power]]}} | {{Gallery/Box|file=|link=Triforce of Power|caption=[[Triforce of Power]]}} | ||
{{Gallery/Box|file=|link=Triforce of Wisdom|caption=[[Triforce of Wisdom]]}} | {{Gallery/Box|file=|link=Triforce of Wisdom|caption=[[Triforce of Wisdom]]}} | ||
{{Gallery/Box|file=|link=Tycoon Wallet|caption=[[Tycoon Wallet]]}} | {{Gallery/Box|file=TycoonWallet-SS-Icon.png|link=Tycoon Wallet|caption=[[Tycoon Wallet]]}} | ||
{{Gallery/Box|file=Masterswordss.jpg|link=Master Sword|caption=[[Master Sword|True Master Sword]]}} | {{Gallery/Box|file=Masterswordss.jpg|link=Master Sword|caption=[[Master Sword|True Master Sword]]}} | ||
{{Gallery/Box|file=|link=Vitality Medal|caption=[[Vitality Medal]]}} | {{Gallery/Box|file=|link=Vitality Medal|caption=[[Vitality Medal]]}} | ||
{{Gallery/Box|file=|link=Water|caption=[[Water]]}} | {{Gallery/Box|file=Water-SS-Icon.png|link=Water|caption=[[Water]]}} | ||
{{Gallery/Box|file=|link=Water Dragon's Scale|caption=[[Water Dragon's Scale]]}} | {{Gallery/Box|file=WaterDragonScale-SS-Icon.png|link=Water Dragon's Scale|caption=[[Water Dragon's Scale]]}} | ||
{{Gallery/Box|file=SS Whip2.png|link=Whip|caption=[[Whip]]}} | {{Gallery/Box|file=SS Whip2.png|link=Whip|caption=[[Whip]]}} | ||
{{Gallery/Box|file= | {{Gallery/Box|file=WoodenShield-SS-Icon.png.png|link=Wooden Shield|caption=[[Wooden Shield]]}} | ||
{{Gallery/Bottom}} | {{Gallery/Bottom}} | ||
{{Cat|Items|Skyward Sword}} | {{Cat|Items|Skyward Sword}} | ||
{{Cat|Skyward Sword|Items}} | {{Cat|Skyward Sword|Items}} | ||
Revision as of 10:36, November 14, 2011
Here is a listing of all of the items found within The Legend of Zelda: Skyward Sword.
- Items in The Legend of Zelda: Skyward Sword.


Pages in category "Skyward Sword Items"
The following 149 pages are in this category, out of 149 total.
A
B
D
G
H
I
L
M
R
S
- Sacred Bow
- Sacred Flames
- Sacred Tear
- Sacred Water
- Sailcloth
- Scattershot
- Shield
- Silver Rupee
- Skyward Sword Bugs
- Skyward Sword Treasure
- Skyward Sword Upgrades
- Slingshot
- Small Bomb Bag
- Small Key
- Small Quiver
- Small Seed Satchel
- Small Wallet
- Spirit Vessel
- Squid Carving
- Stamina Fruit
- Stamina Potion
- Stamina Potion +
- Stone of Trials
T
Media in category "Skyward Sword Items"
The following 2 files are in this category, out of 2 total.
 Amber relic.jpg 160 × 120; 27 KB
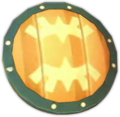 Banded Shield SS.png 311 × 302; 126 KB

