Lanayru Mining Facility: Difference between revisions
mNo edit summary |
No edit summary |
||
| Line 1: | Line 1: | ||
{{Infobox|dungeon | {{Infobox|dungeon | ||
| image = [[File:Lanayru Mining Facility.jpg]] | | image = [[File:Lanayru Mining Facility.jpg]] | ||
| caption | | caption = | ||
| game = ''[[The Legend of Zelda: Skyward Sword|Skyward Sword]]'' | | game = ''[[The Legend of Zelda: Skyward Sword|Skyward Sword]]'' | ||
| boss = [[Moldarach|Thousand-Year Arachnid Moldarach]] | | boss = [[Moldarach|Thousand-Year Arachnid Moldarach]] | ||
| enemies = [[Aracha]]<br/>[[Armos]]<br/>[[Beamos]]<br/>[[ | | enemies = [[Aracha]]<br/>[[Armos]]<br/>[[Beamos]]<br/>[[Electro Spume]]<br/>[[Froak]]<br/>[[Sentrobe]]<br/>[[Staldra]]<br/>[[Thunder Keese]]<br/>[[Yellow ChuChu]] | ||
| item = [[Gust Bellows]] | | item = [[Gust Bellows]] | ||
| reward = [[Goddess's Harp]]<br/>Access to the [[Temple of Time]] | | reward = [[Goddess's Harp]]<br/>Access to the [[Temple of Time]] | ||
| walkthrough = [ | | walkthrough = [https://www.zeldadungeon.net/skyward-sword-walkthrough/lanayru-mining-facility/ Text Walkthrough] | ||
[https://www.youtube.com/watch?v=pyTmY6puDS0 Video Walkthrough (Part 1)] | |||
[https://www.youtube.com/watch?v=u_zaXjNitmU Video Walkthrough (Part 2)] | |||
[https://www.youtube.com/watch?v=2VCJBpLSxWs Video Walkthrough (Part 3)] | |||
[https://www.youtube.com/watch?v=u64HoMw5qFQ Video Walkthrough (Part 4)] | |||
[https://www.youtube.com/watch?v=3q-k4373XDA Video Walkthrough (Part 5)] | |||
}} | }} | ||
{{ZD|[ | {{ZD|[https://www.zeldadungeon.net/skyward-sword-walkthrough/lanayru-mining-facility/ '''Skyward Sword''' Walkthrough<br/>Chapter 7: Lanayru Mining Facility]}} | ||
{{Fi}} | {{Fi}} | ||
| Line 23: | Line 28: | ||
{{Gallery/Box|file=BeamosSS.png|link=Beamos|caption=[[Beamos]]}} | {{Gallery/Box|file=BeamosSS.png|link=Beamos|caption=[[Beamos]]}} | ||
{{Gallery/Box|file=No_Image.png|link=Electro Spume|caption=[[Electro Spume]]}} | {{Gallery/Box|file=No_Image.png|link=Electro Spume|caption=[[Electro Spume]]}} | ||
| Line 35: | Line 38: | ||
{{Gallery/Box|file=ThunderKeese-SS.png|link=Thunder Keese|caption=[[Thunder Keese]]}} | {{Gallery/Box|file=ThunderKeese-SS.png|link=Thunder Keese|caption=[[Thunder Keese]]}} | ||
{{Gallery/Box|file=ChuChu-Yellow-SS.png|link=Yellow ChuChu|caption=[[Yellow ChuChu]]}} | |||
{{Gallery/Bottom}} | {{Gallery/Bottom}} | ||
Revision as of 18:39, March 7, 2021
Games | ||
Boss | ||
Enemies | ||
Items | ||
Rewards | Goddess's Harp | |
| Guides | ||
|---|---|---|
Walkthrough | ||

|
In-depth guide:
Skyward Sword Walkthrough Chapter 7: Lanayru Mining Facility |
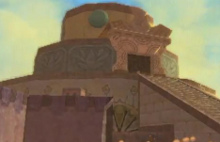
The Lanayru Mining Facility is the third Dungeon in Skyward Sword. The dungeon is based around a sand/time theme, as well as an underlying high-tech theme. The Timeshift Stones found outside are central to this dungeon. The dungeon is based around only a few rooms, with the boss door located only a few rooms away from the entrance. The dungeon item, the Gust Bellows, can be used to clear sand from an area and turn propellers. In general, the Timeshift Stones of this temple affect only a single room, with the time distortion ending at the door, but the later areas of the dungeon have unrefined Timeshift Stones in mine carts, their effect is limited to a small sphere of space. The dungeon also features conveyor belts that are active only in the past; they impede Link's movement in one direction, but speed it up in the other. The facility is linked via underground rail to the Temple of Time and possibly other locations within the Lanayru area, as underneath the sand in the boss chamber, there is a turntable for railroad cars, with closed tunnels branching outwards.
Enemies
- Enemies in Lanayru Mining Facility
Trivia
- The Lanayru Mining Facility appears to be a refinery for the Timeshift Stones mined in the Lanayru Mine area.


