Gallery:The Legend of Zelda: Difference between revisions
mNo edit summary |
No edit summary |
||
| Line 45: | Line 45: | ||
</gallery> | </gallery> | ||
==Enemies== | ==Game Manual== | ||
===Enemies=== | |||
<gallery> | <gallery> | ||
File:Armos-LoZ-Art.png|[[Armos]] | File:Armos-LoZ-Art.png|[[Armos]] | ||
| Line 80: | Line 81: | ||
</gallery> | </gallery> | ||
==Bosses== | ===Bosses=== | ||
<gallery> | <gallery> | ||
File:Aquamentus-LoZ-Art.png|[[Aquamentus (The Legend of Zelda)|Aquamentus]] | File:Aquamentus-LoZ-Art.png|[[Aquamentus (The Legend of Zelda)|Aquamentus]] | ||
| Line 92: | Line 93: | ||
</gallery> | </gallery> | ||
==Items== | ===Items=== | ||
<gallery> | <gallery> | ||
File:Wooden-Sword.png|[[Sword (The Legend of Zelda)|original Sword]] | File:Wooden-Sword.png|[[Sword (The Legend of Zelda)|original Sword]] | ||
| Line 129: | Line 130: | ||
File:Orange-Rupee.png|[[Rupee]] | File:Orange-Rupee.png|[[Rupee]] | ||
</gallery> | </gallery> | ||
==Art and Artifacts== | |||
<gallery> | |||
File:Arts-Artifacts-Aquamentus.jpg|[[Aquamentus]] | |||
File:Arts-Artifacts-Armos.jpg|[[Armos]] | |||
File:Arts-Artifacts-Blade-Trap.jpg|[[Blade Trap]] | |||
File:Arts-Artifacts-Boulder.jpg|[[Boulder]] | |||
File:Arts-Artifacts-Bubble.jpg|[[Bubble]] | |||
File:Arts-Artifacts-Darknut.jpg|[[Darknut]] | |||
File:Arts-Artifacts-Digdogger.jpg|[[Digdogger]] | |||
File:Arts-Artifacts-Dodongo.jpg|[[Dodongo]] | |||
File:Arts-Artifacts-Ganon.jpg|[[Ganon]] | |||
File:Arts-Artifacts-Gel.jpg|[[Gel]] | |||
File:Arts-Artifacts-Ghini.jpg|[[Ghini]] | |||
File:Arts-Artifacts-Gibdo.jpg|[[Gibdo]] | |||
File:Arts-Artifacts-Gleeok.jpg|[[Gleeok]] | |||
File:Arts-Artifacts-Gleeok-Head.jpg|[[Gleeok Head]] | |||
File:Arts-Artifacts-Gohma.jpg|[[Gohma]] | |||
File:Arts-Artifacts-Goriya.jpg|[[Goriya]] | |||
File:Arts-Artifacts-Keese.jpg|[[Keese]] | |||
File:Arts-Artifacts-Lanmolas.jpg|[[Lanmolas]] | |||
File:Arts-Artifacts-Leever.jpg|[[Leever]] | |||
File:Arts-Artifacts-Like-Like.jpg|[[Like Like]] | |||
File:Arts-Artifacts-Lynel.jpg|[[Lynel]] | |||
File:Arts-Artifacts-Manhandla.jpg|[[Manhandla]] | |||
File:Arts-Artifacts-Moblin.jpg|[[Moblin]] | |||
File:Arts-Artifacts-Moldorm.jpg|[[Moldorm]] | |||
File:Arts-Artifacts-Octorok.jpg|[[Octorok]] | |||
File:Arts-Artifacts-Patra.jpg|[[Patra]] | |||
File:Arts-Artifacts-Peahat.jpg|[[Peahat]] | |||
File:Arts-Artifacts-Pols-Voice.jpg|[[Pols Voice]] | |||
File:Arts-Artifacts-River-Zora.jpg|[[River Zora]] | |||
File:Arts-Artifacts-Rope.jpg|[[Rope]] | |||
File:Arts-Artifacts-Stalfos.jpg|[[Stalfos]] | |||
File:Arts-Artifacts-Stone-Statue.jpg|[[Stone Statue]] | |||
File:Arts-Artifacts-Tektite.jpg|[[Tektite]] | |||
File:Arts-Artifacts-Vire.jpg|[[Vire]] | |||
File:Arts-Artifacts-Wallmaster.jpg|[[Wallmaster]] | |||
File:Arts-Artifacts-Wizzrobe.jpg|[[Wizzrobe]] | |||
File:Arts-Artifacts-Zol.jpg|[[Zol]] | |||
</gallery> | |||
==Hyrule Historia Concept Artwork== | ==Hyrule Historia Concept Artwork== | ||
Revision as of 04:27, October 25, 2021
Below is a collection of official artwork and other media from The Legend of Zelda
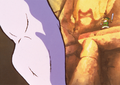
Scene Artwork
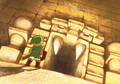
Entrance to a Labyrinth
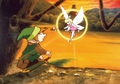
Link and a Fairy
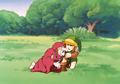
Link and Impa
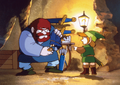
Link and a merchant
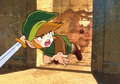
Link diving through a doorway
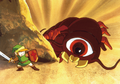
Link fight a Red Lanmola
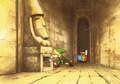
Link inside a Labyrinth
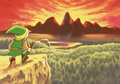
Link looking down at Hyrule
Link sneaking around
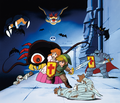
Link and Zelda, surrounded by enemies from the 1994 Japanese re-release of The Legend of Zelda.


Characters
Link kneeling with Shield, left handed
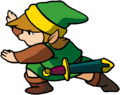
Link kneeling, right handed
Link kneeling
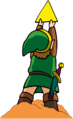
Link pushing motion
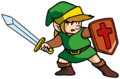
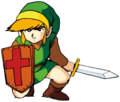
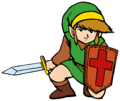
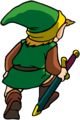
Link with sword and shield
Link holding the Triforce Shard
Link Diving
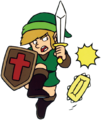
Link dodging trap
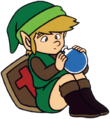
Link drinking potion

Link holding the Triforce of Courage
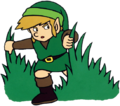
Link in the grass
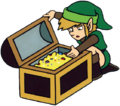
Link opening a Treasure Chest
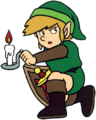
Link with the Red Candle
Link and his inventory

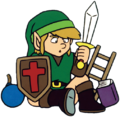
Link standing with his sword and shield

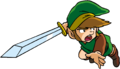
Link shooting a Sword Beam

Link Thinking

Link Thinking
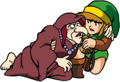
Link and Impa
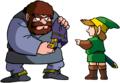
Link and Merchant
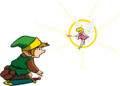
Link and Fairy


Game Manual
Enemies


.png)


Bosses

Gleeok Head

Teaser Image for Ganon


Items


Art and Artifacts


Hyrule Historia Concept Artwork


