A Link to the Past Enemies: Difference between revisions
Jump to navigation
Jump to search
Want an adless experience? Log in or Create an account.
No edit summary |
(re-add gallery but includeonly/onlyinclude the transcluded stuff) |
||
| (One intermediate revision by one other user not shown) | |||
| Line 152: | Line 152: | ||
{{Galleries}} | {{Galleries}} | ||
<onlyinclude><includeonly>{{CD/Header|Light World Overworld}} | |||
{{CD/Header|Light World Overworld}} | |||
{{CD|file=Archer.png|link=Archer|caption1=Blue Archer|var1=Blue | {{CD|file=Archer.png|link=Archer|caption1=Blue Archer|var1=Blue | ||
|file2=Green-Archer-Sprite-1.png|caption2=Green Archer|var2=Green}} | |file2=Green-Archer-Sprite-1.png|caption2=Green Archer|var2=Green}} | ||
| Line 349: | Line 348: | ||
{{CD|file=Wall-Turret-2.png|link=Wall Turret}} | {{CD|file=Wall-Turret-2.png|link=Wall Turret}} | ||
{{CD|file=Winder.png|link=Winder}} | {{CD|file=Winder.png|link=Winder}} | ||
{{CD/End|}} | {{CD/End|}}</includeonly></onlyinclude> | ||
Revision as of 17:50, January 4, 2019
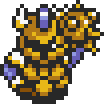
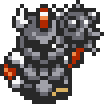
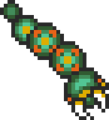
Listed below is a gallery of artwork and enemy sprites for the enemies and traps found throughout A Link to the Past. The listing includes multiple variations of many of the enemies that appear. In rare cases, this includes enemies found exclusively within the Game Boy Advance re-release of A Link to the Past.
In this complete Enemy Guide you'll find detailed descriptions of all of the enemies including their attacks, defense, speed, what threat they are to Link, and methods to defeat them. You can click on the enemy names or their pictures to get to their individual pages.
Alex MegaCaveman's Artwork
Enemy Sprites


