Destroy the Yiga Clan!: Difference between revisions
m (Text replacement - "{{References}}↵↵{{Listbox|" to "{{References}} {{clear}} {{Listbox|") |
mNo edit summary |
||
| Line 122: | Line 122: | ||
File:Destroy-the-Yiga-Clan-03.jpg|<center>After entering the Yiga Hideout and taking the first path heading towards the first outpost, there are some sparking lights that can be examined.</center> | File:Destroy-the-Yiga-Clan-03.jpg|<center>After entering the Yiga Hideout and taking the first path heading towards the first outpost, there are some sparking lights that can be examined.</center> | ||
File:Destroy-the-Yiga-Clan-04.jpg|<center>In the narrow corridors near the northwest part of the map, examine the pinwheel.</center> | File:Destroy-the-Yiga-Clan-04.jpg|<center>In the narrow corridors near the northwest part of the map, examine the pinwheel.</center> | ||
File:Destroy-the-Yiga-Clan-05.jpg|<center>In the narrow corridors near the northwest part of the map, destroy the wooden | File:Destroy-the-Yiga-Clan-05.jpg|<center>In the narrow corridors near the northwest part of the map, destroy the wooden crate to find the Korok.</center> | ||
File:Destroy-the-Yiga-Clan-06.jpg|<center>In the windy path, before entering the water at the north end of the hideout, examine the pinwheel.</center> | File:Destroy-the-Yiga-Clan-06.jpg|<center>In the windy path, before entering the water at the north end of the hideout, examine the pinwheel.</center> | ||
File:Destroy-the-Yiga-Clan-07.jpg|<center>This is located just east of where the party enters the Yiga Hideout. However, it is not accessible until clearing the bulk of the hideout. Examine the sparkling lights.</center> | File:Destroy-the-Yiga-Clan-07.jpg|<center>This is located just east of where the party enters the Yiga Hideout. However, it is not accessible until clearing the bulk of the hideout. Examine the sparkling lights.</center> | ||
File:Destroy-the-Yiga-Clan-08.jpg|<center>Destroy the wooden | File:Destroy-the-Yiga-Clan-08.jpg|<center>Destroy the wooden crates in the room just before fighting [[Master Kohga]].</center> | ||
</gallery> | </gallery> | ||
<section end=koroks /> | <section end=koroks /> | ||
Latest revision as of 13:09, April 1, 2024
| Spoiler Alert! This article describes a subject that is sensitive to plot development. |
| This article is a stub. You can help the Zelda Dungeon Wiki by expanding it. |

Number | Chapter 4-2 | |
Games | ||
Stage | ||
Previous | ||
Next | ||
Boss | ||
Mini-bosses | ||
Enemies | ||
Key Characters | ||
Battlefield-Specific Materials | ||
Rewards | Raw Prime Meat (10), Raw Bird Thigh (10), Topaz (2), Amber (2) | |
Warriors | Divine Beast Vah Naboris (Urbosa); Ground: Any two unlocked | |
Allies | ||
Recommended Level | Lv. 33 | |
"Reclaiming the Sheikah Tower gives the party an invaluable advantage. With the Yiga Clan's hideout located, Urbosa boards Naboris and prepares to attack."
Destroy the Yiga Clan! is the second scenario of Age of Calamity Chapter 4. It is unlocked by completing Akkala Tower, and must be completed before progressing in the story.
The scenario begins with a Divine Beast Vah Naboris battle, where Urbosa must clear a path to the Yiga Clan Hideout. Once this is done, several members of the party - including Link, Urbosa and Impa - delve into the hideout and systematically dismantle the Yiga Clan and their allies, culminating in a face off with Master Kohga and Sooga.
- Divine Beast Battle
- Victory Condition: Hurry to the Yiga Clan Hideout
- Defeat Condition: No defeat conditions
- Regular Battle
Objectives
Divine Beast Objectives
- Defeat the Yiga Clan while heading for the Yiga Clan Hideout
- Destroy the obstacles to break into the Yiga Clan's hideout!
Regular Objectives
- Capture the Outposts (3)
- Head for the Scout
- Defeat the Yiga Blademasters (2)
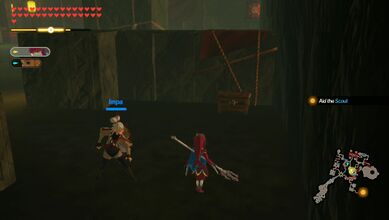
- Aid the Scout
- The Gates have closed and a Yiga Blademaster has appeared! Defeat the Yiga Blademaster!
- The Gates have closed and an Electric Moblin has appeared! Defeat the Electric Moblin!
- Defeat the Yiga Blademaster (1)
- Defeat Sooga
- Head for the deepest level!
- Defeat Master Kohga!
Cutscenes
Destroy the Yiga Clan! (Part 1) [text]
"Now that the network of Sheikah Towers had been restored in full, the Sheikah Slate bestowed upon Zelda's party detailed knowledge of all Hyrule."
Divine Beast Vah Naboris
"In the process of activating the Sheikah Towers in each region of Hyrule, the party learns valuable tactical knowledge, including the location of the Yiga Clan's hideout. Aiming to take them all out in one fell swoop, Urbosa boards Vah Naboris."
Destroy the Yiga Clan! (Part 2) [text]
"Using Purah's insights, Urbosa easily accomplished her mission. Thus were Zelda and the others witness to the immense capability of the Sheikah Towers."
The Mighty Leader of the Yiga Clan!
"The party has finally managed to corner the Yiga Clan, but Master Kohga refuses to go down without a fight–for some reason, he appears incredibly confident. After taunting the party, Kohga rushes to battle, henchmen in tow"
Assigning Blame
"Astor appears before the recently defeated Master Kohga, who is outraged that the Yiga Clan's promised victory did not come to pass. Astor simply smiles, stating that all is as it must be, and he warns the Yiga Clan not to oppose him."
March of Progress
"Having handled the Yiga Clan, Zelda and the party realise how truly valuable the Sheikah Towers are. Purah is eager to continue her research with her newly increased staff. Zelda offers her words of encouragement, though she remains troubled by her own lack of progress."
Dialogue
| Character Speaking | Dialogue |
|---|---|
| . |
Treasure Chests
- See also: Age of Calamity Treasure Chests

There are 8 treasure chests found in Destroy the Yiga Clan!.

300 Rupees In the large square room with floor spikes, on the west side of the room. 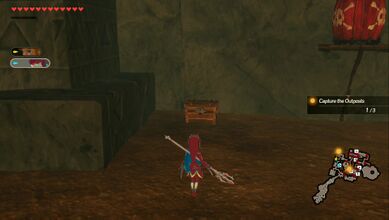
Kakariko Kodachi On the west side of the map in the northeast corner of the room with a Fire Moblin. 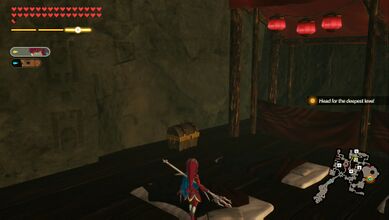
Eightfold Longblade After freeing the scout, return to the northern room that previously had four locked doors, and enter the room to the southeast. 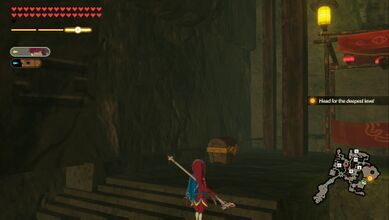
Sapphire x5 After freeing the scout, go to the large square room south of the outside arena. The chest is in the northeast corner of the room. 
Ruby x5 After freeing the scout, the chest is in the small room just before the outside arena. 
Ancient Power Boost After freeing the scout, return to the northern room that previously had four locked doors, and enter the room to the northeast. 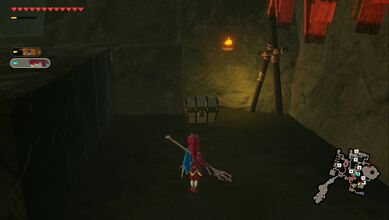
Diamond x5 In the small room just off of the southeast corner of the large square room with floor spikes. 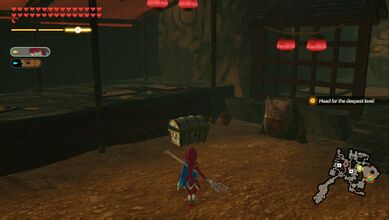
Luminous Stone x10 After freeing the scout, go back to the large square room with floor spikes in the center of the hideout and follow the newly unlocked path to the northeast.


Koroks
- See also: Age of Calamity Koroks

There are 8 Koroks found in Destroy the Yiga Clan!

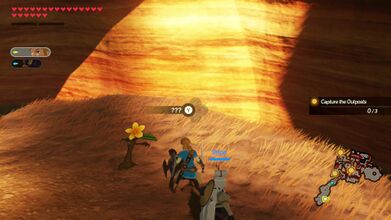
Right at the start, run to the east and locate this yellow flower. 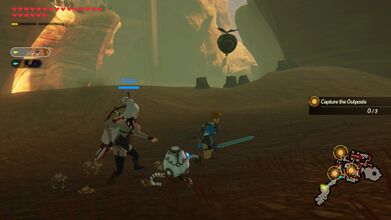
Right near the start, head up and off the path to the left to find a balloon. Use Stasis and hit the balloon to get the Korok. 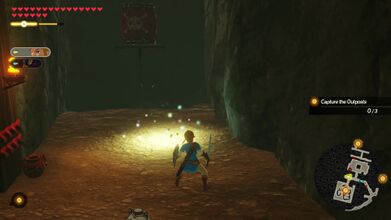
After entering the Yiga Hideout and taking the first path heading towards the first outpost, there are some sparking lights that can be examined. 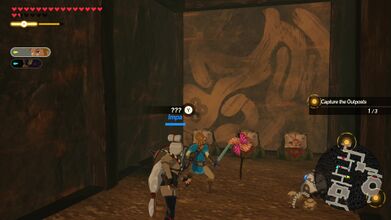
In the narrow corridors near the northwest part of the map, examine the pinwheel. 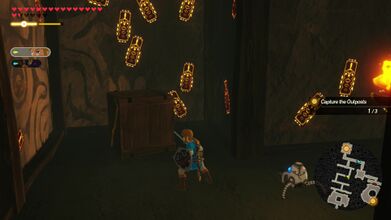
In the narrow corridors near the northwest part of the map, destroy the wooden crate to find the Korok. 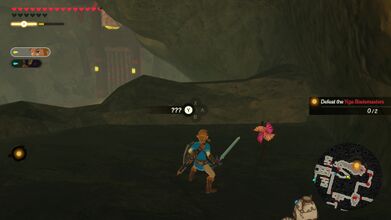
In the windy path, before entering the water at the north end of the hideout, examine the pinwheel. 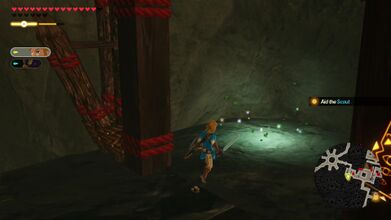
This is located just east of where the party enters the Yiga Hideout. However, it is not accessible until clearing the bulk of the hideout. Examine the sparkling lights. 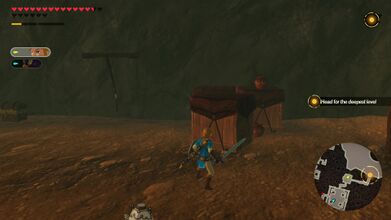
Destroy the wooden crates in the room just before fighting Master Kohga.


Challenges & Quests Unlocked
Trivia
- Purah's speech in the "March of Progress" cutscene is used in the Untold Chronicles From 100 Years Past - Part 1 trailer
- Master Kohga's speech in the "The Mighty Leader of the Yiga Clan!" cutscene is used in the Untold Chronicles From 100 Years Past - Part 2 trailer