Walkthrough:Rito Village (Tears of the Kingdom): Difference between revisions
Jump to navigation
Jump to search
Want an adless experience? Log in or Create an account.
mNo edit summary |
|||
| (30 intermediate revisions by the same user not shown) | |||
| Line 3: | Line 3: | ||
===Traveling to Rito Village=== | ===Traveling to Rito Village=== | ||
*After acquiring the [[Paraglider]] at [[Lookout Landing]] and activating the [[Lookout Landing Skyview Tower]], Link can speak with [[Purah]] again to begin the [[Regional Phenomena]] main quest. While Link can travel to any of the four major regions, the game gives a suggested route. | *After acquiring the [[Paraglider]] at [[Lookout Landing]] and activating the [[Lookout Landing Skyview Tower]], Link can speak with [[Purah]] again to begin the [[Regional Phenomena]] main quest. While Link can travel to any of the four major regions, the game gives a suggested route. | ||
*Next to the Skyview Tower, Link will meet with [[Penn]], a writer for the [[Lucky Clover Gazette]]. He encourages Link to come visit their headquarters, found by the bridge leading to Rito Village, well to the northwest. | *Next to the Skyview Tower, Link will meet with [[Penn]], a writer for the [[Lucky Clover Gazette]]. He encourages Link to come visit their headquarters, found by the bridge leading to [[Rito Village (Tears of the Kingdom)|Rito Village]], well to the northwest. | ||
*The path to Rito Village is not a very troublesome one. From Lookout Landing, the first main travel point should be [[Lindor's Brow Skyview Tower]], which is visible to the northwest. Along the way, Link should stop at [[New Serenne Stable]], found directly on the main path in the direction of the next Skyview Tower. The [[Sinakawak Shrine]] near the stable can be activated for a quick warp point. | *The path to Rito Village is not a very troublesome one. From Lookout Landing, the first main travel point should be [[Lindor's Brow Skyview Tower]], which is visible to the northwest. Along the way, Link should stop at [[New Serenne Stable]], found directly on the main path in the direction of the next Skyview Tower. The [[Sinakawak Shrine]] near the stable can be activated for a quick warp point. | ||
*After reaching the Lindor's Brow Skyview Tower and activating it, Link can launch himself up into the sky and glide to the northwest, along with using his Paraglider. Once he crosses the canyon, the weather will turn cold, requiring Link to need a level of [[Cold Resistance]]. The [[Archaic Warm Greaves]] that were acquired on the [[Great Sky Island]] are sufficient. If Link didn't find those, he can cook a meal using [[Spicy Pepper]]s, which will give him cold resistance. | *After reaching the Lindor's Brow Skyview Tower and activating it, Link can launch himself up into the sky and glide to the northwest, along with using his Paraglider. Once he crosses the canyon, the weather will turn cold, requiring Link to need a level of [[Cold Resistance]]. The [[Archaic Warm Greaves]] that were acquired on the [[Great Sky Island]] are sufficient. If Link didn't find those, he can cook a meal using [[Spicy Pepper]]s, which will give him cold resistance. | ||
*After gliding across the canyon, Link can walk to the west, eventually arriving at the Lucky Clover Gazette, just outside Rito Village. | *After gliding across the canyon, Link can walk to the west, eventually arriving at the Lucky Clover Gazette, just outside Rito Village. | ||
*As an alternative approach, from the Lindor's Brow Skyview Tower, Link can travel southwest, stopping at the [[Tabantha Bridge Stable]]. From there he can be follow the direct path to the west, which winds around and eventually arrives at the Lucky Clover Gazette. | *As an alternative approach, from the Lindor's Brow Skyview Tower, Link can travel southwest, stopping at the [[Tabantha Bridge Stable]]. From there he can be follow the direct path to the west, which winds around and eventually arrives at the Lucky Clover Gazette. | ||
*After arriving at the Lucky Clover Gazette, Link can speak with [[Galli]] or [[Juannelle]] to learn that dropping a Hylian Pine Cone in a fire, it will create a massive updraft. With the bridge leading to Rito Village broken, Link can drop a pine cone by the small fire, where Juannelle is standing. He can then jump up and pull out the Paraglider and use the updraft to glide west to Rito Village. | |||
<gallery widths="400px" heights="220px" perrow=2> | <gallery widths="400px" heights="220px" perrow=2> | ||
| Line 14: | Line 15: | ||
File:Rito-Village-003.jpg|<center>Glide to the northwest, towards the [[Hebra]] region</center> | File:Rito-Village-003.jpg|<center>Glide to the northwest, towards the [[Hebra]] region</center> | ||
File:Rito-Village-004.jpg|<center>Arrive at the [[Lucky Clover Gazette]]</center> | File:Rito-Village-004.jpg|<center>Arrive at the [[Lucky Clover Gazette]]</center> | ||
File:Rito-Village-005.jpg|<center>Drop a [[Hylian Pine Cone]] into the fire</center> | |||
File:Rito-Village-006.jpg|<center>Use the Paraglider to glide over to [[Rito Village (Tears of the Kingdom)|Rito Village]]</center> | |||
</gallery> | |||
===Tulin of Rito Village=== | |||
*When arriving at Rito Village, Link can speak with the three young Rito near the entrance. [[Notts]], [[Molli]] and [[Genli]] can be seen practicing the [[Song of the Stormwind Ark]]. It is a folk tale of the [[Stormwind Ark]] from the past, who saved Rito Village in its time of need during a prior hardship. | |||
*Link can then explore the rest of the town. The [[Brazen Beak]] sells the [[Snowquill Set]], which gives Link [[Cold Resistance]]. If Link can afford to sell off a few materials and pay for at least part of the set, it will help Link when he travels to colder climates. | |||
*At the top of Rito Village, Link can find [[Tulin]], [[Teba]], and [[Saki]]. The three are arguing over Tulin's belief that he can deal with the blizzard that has been threatening the Rito way of life. Tulin will then fly off. Teba instructs Link to visit [[Hart]], found between the bonefires in the distance to the north. This will begin the [[Tulin of Rito Village]] main quest. | |||
<gallery widths="400px" heights="220px" perrow=2> | |||
File:Rito-Village-007.jpg|<center>Speak with [[Tulin]], [[Teba]], and [[Saki]] at the top of Rito Village</center> | |||
File:Rito-Village-008.jpg|<center>The three will argue and Tulin will fly off, beginning the [[Tulin of Rito Village]] quest</center> | |||
</gallery> | |||
==Exploring the Hebra South Summit Cave== | |||
*Glide to the north of Rito Village, in the direction of the bonfires that are viewable in the distance. Inside the [[Hebra Trailhead Lodge]], Link will find [[Harth]]. He will point Link in the direction of where Tulin has gone. He encourages Link to climb up the cliff just outside and head up the mountain road. When Link sees a Bonfire, he'll come across the [[Hebra South Summit Cave]]. | |||
*Outside of the lodge, Link can climb up the ladder and begin scaling up [[Rospro Pass]]. He'll reach a campfire where a [[Rito]] named [[Cecili]] can be found. From here Link can scale up the pass to the northwest, which eventually leads to the [[Rospro Pass Skyview Tower]]. It is worth activating the tower to make navigating the mountains a bit easier. Along the way to the tower, Link can meet with [[Mazli]] and complete [[The Blocked Cave]] quest. | |||
*As Link travels northeast up the Rospro Pass, he'll encounter some enemy [[Ice Chuchu]] and some [[Bokoblin]] at an enemy camp. Further up ahead on the left, Link will find the bonfire that marks the entrance to the Hebra South Summit Cave. | |||
*Inside the cave, Link can speak with [[Laissa]], who mentions that Tulin and [[Gesane]] have gone up ahead, further in the cave. | |||
*Run down the narrow corridor, avoiding the thorns to reach a tall vertical room with an air geyser. Straight ahead to the north, there is an opening up above. Jump into the air geyser and use the [[Paraglider]] to glide up the cave and into the passage. Straight ahead, Link will find the single enemy in this cave, a [[Horriblin]]. | |||
*Straight ahead there is another vertical room with an unlit campfire at the bottom. There is some [[Flint]] and a few barrels that have some [[Hylian Pine Cone]]s. Light a fire, by dropping the Flint near the campefire and striking it with a metal weapon. Then drop a Hylian Pine Cone on the fire to create a massive updraft. Jump up and use the Paraglider to glide up to the top of the room. The passage to the north leads to a room with the [[Bubbulfrog]], where as the path to the east will progress further in the cave. | |||
*Further up ahead, Link will find [[Gesane]]. He mentions that Tulin flew further ahead, chasing monsters. He guides Link out of the cave and from there, to head north to the lone cedar tree on [[Talonto Peak]]. Link can then run down the corridor and exit the cave. | |||
<gallery widths="400px" heights="220px" perrow=2> | |||
File:Rito-Village-009.jpg|<center>Travel north of Rito Village to the two large bonfires</center> | |||
File:Rito-Village-010.jpg|<center>Enter the [[Hebra Trailhead Lodge]] and speak with [[Harth]] to get the whereabouts of Tulin</center> | |||
File:Rito-Village-011.jpg|<center>Find the bonfire, marking the entrance of the [[Hebra South Summit Cave]]</center> | |||
File:Rito-Village-012.jpg|<center>In the tall vertical room, use the [[Paraglider]] along with the air geyser to glide up to the opening</center> | |||
File:Rito-Village-013.jpg|<center>Create a fire and drop a [[Hylian Pine Cone]] to create a strong upward draft</center> | |||
File:Rito-Village-014.jpg|<center>Find [[Gesane]] at the end of the cave, who guides Link to head towards the [[Talonto Peak]]</center> | |||
</gallery> | |||
==Talonto Peak== | |||
*After exiting the Hebra South Summit Cave, there is a nearby enemy Bokoblin camp. Just north of the camp, is Talonto Peak, where the lone pine tree can be found. Link can climb up the cliff to reach the peak. | |||
*Here, Link will find Tulin who is overlooking an [[Aerocuda]] just to the east, who stole his bow. After Link agrees to help him, Tulin will tell Link about [[Tulin's Power of Wind]]. This is when Tulin can create a stream of wind blowing straight forward. This, along with Link's [[Paraglider]], will allow Link to reach the platform in the distance. | |||
*Once Link arrives, he can shoot down the Aerocuda with an arrow and Tulin will retrieve his Bow. Shortly after, more enemies will be dropped off and Link and Tulin can fight side by side to defeat them. | |||
*Once they are defeated, Link and Tulin are joined by Harth and Gesane. Harth tasks Link and Tulin to investigate the cloud up in the sky. | |||
*Hebra Peak can be found to the northeast and there is no clear easy path to reach it. As Link gets closer to the tall mountain, there is are some [[Zonai Ruins]] that Link can climb, clockwise around the mountain. | |||
*At the top of the peak, Link will meet with [[Huck]]. After a short talk, Huck gives his word of encouragement. Huck is looking out at some floating islands ahead. Link, along with Tulin's help, can reach this island. | |||
<gallery widths="400px" heights="220px" perrow=2> | |||
File:Rito-Village-015.jpg|<center>There is a lone pine tree at the top of [[Talonto Peak]] that Link can climb up to</center> | |||
File:Rito-Village-016.jpg|<center>Reach the top and speak with [[Tulin]] who will teach Link about [[Tulin's Power of Wind]]</center> | |||
File:Rito-Village-017.jpg|<center>Use Tulin's gust of wind to reach the platform beneath the [[Aerocuda]]</center> | |||
File:Rito-Village-018.jpg|<center>Shoot the Aerocuda to get Tulin's Bow back and then fight off a horde of enemies</center> | |||
File:Rito-Village-019.jpg|<center>The [[Hebra Peak]] can be found to the northeast after clearing the monsters</center> | |||
File:Rito-Village-020.jpg|<center>After meeting Huck at Hebra Peak, use Tulin's gust to reach the floating island in the distance</center> | |||
</gallery> | |||
==Rising Island Chain== | |||
*Link can use Tulin to fly across the gap and use [[Ascend]] to climb up the platforms here. After using Ascend up a very tall pillar, Link will arrive at the [[Rising Island Chain]]. | |||
*Shortly after arriving, Link and Tulin will hear a voice summoning them up further up in the sky. The [[Mayaumekis Shrine]] can be found nearby. Glide over and access the shrine for a quick warp point. | |||
*From the Mayaumekis Shrine, Link can travel to the northwest, using Tulin as needed. Eventually he'll reach a tall pillar that he must climb, that has some icicles blocking the way. Link can glide over to the tall pillar and slash away at the icicles. Link can then use ascend to climb even higher. | |||
*Continue to travel to the northwest, traveling form floating island to island. A [[Flux Construct I]] can be found on the lower elevation, and it holds an [[Old Map (Rising Island Chain)|Old Map]]. From there, continue to travel northwest. In the area here there is a floating ship, with boulders above it blocking the way. Break the boulders by either shooting with a [[Bomb Flower]] and [[Arrow]] from below, or break it with a rock based weapon if approaching from above. From here, Link can jump on the ship and travel to the southwest to progress even higher. | |||
*At the west end of the island chain, break the circle of ice by jumping on it. From here, jump on the floating ship and glide to the east. Use another ship to eventually glide to a large structure that has a [[Cooking Pot]], along with some [[Chillshroom]]s and [[Chillfin Trout]]s. Continue traveling back east, across a bridge that will collapse when walked on, followed by some enemy Constructs that are fighting with [[Aerocuda]]s. Far to the east you'll encounter some constructs that will attach some dangerous [[Time Bomb]]s to their weapons. | |||
*At the far east area, there is a [[Balloon]], [[Lattice]], and some [[Flame Emitter]]s. Attach the Ballon to the Lattice, and then place the Flame Emitter in the balloon. Ride the balloon and then glide to the northeast. Here Link can ascend up another tall pillar to get even further up. | |||
*Travel further to the northwest, using the floating ships. Break the ice in the circle up ahead and use the ship to fly even higher. At this elevation it becomes even colder, requiring two levels of [[Cold Resistance]] in order to survive. The [[Kahatanaum Shrine]] can be found just ahead, which acts as a good warp point. The shrine itself is one of [[Rauru's Blessing]]s with just a single chest that contains a [[Large Zonai Charge]]. | |||
*Just outside of the shrine, Link can jump on top of the large boat and launch himself much higher up. From here he can glide over to the platform to the south. | |||
*Link will need to glide from ship to ship, climbing higher up. There are platforms where Link can land, where he'll find more ships to launch him even further up. The higher Link goes the ships will change the direction they are moving, going against the wind. At the very top, Link can launch himself so far up, he'll fly above the thunderhead, where the skies are clear. Link can glide to the center of the thunderhead and glide down, entering [[Wind Temple (Tears of the Kingdom)|The Wind Temple]]. | |||
<gallery widths="400px" heights="220px" perrow=2> | |||
File:Rito-Village-021.jpg|<center>Travel northwestward to a large pillar with icicles and then [[Ascend]] up the pillar from the inside</center> | |||
File:Rito-Village-022.jpg|<center>At the far northwest end, break the boulders with a [[Bomb Flower]] from below, or a rock weapon from above</center> | |||
File:Rito-Village-023.jpg|<center>Jump on the ice to crack it, revealing a floating ship just below it</center> | |||
File:Rito-Village-024.jpg|<center>Attach a [[Balloon]], [[Lattice]], and [[Flame Emitter]] to create a floating device</center> | |||
File:Rito-Village-025.jpg|<center>Glide over to the moving ships and use them to continue gliding across the islands</center> | |||
File:Rito-Village-026.jpg|<center>Glide to one of the floating islands that is on the outside of the giant cloud</center> | |||
File:Rito-Village-027.jpg|<center>Jump from ship to ship and glide to the platform way up in the sky</center> | |||
File:Rito-Village-028.jpg|<center>Descend down to the [[Wind Temple (Tears of the Kingdom)|The Wind Temple]]</center> | |||
</gallery> | </gallery> | ||
{{cat|Tears of the Kingdom Walkthroughs}} | {{cat|Tears of the Kingdom Walkthroughs}} | ||
Latest revision as of 22:41, February 15, 2024
The Rito Village Walkthrough is a guide for part of the Regional Phenomena quest, including parts of the Tulin of Rito Village main quest.
Traveling to Rito Village
- After acquiring the Paraglider at Lookout Landing and activating the Lookout Landing Skyview Tower, Link can speak with Purah again to begin the Regional Phenomena main quest. While Link can travel to any of the four major regions, the game gives a suggested route.
- Next to the Skyview Tower, Link will meet with Penn, a writer for the Lucky Clover Gazette. He encourages Link to come visit their headquarters, found by the bridge leading to Rito Village, well to the northwest.
- The path to Rito Village is not a very troublesome one. From Lookout Landing, the first main travel point should be Lindor's Brow Skyview Tower, which is visible to the northwest. Along the way, Link should stop at New Serenne Stable, found directly on the main path in the direction of the next Skyview Tower. The Sinakawak Shrine near the stable can be activated for a quick warp point.
- After reaching the Lindor's Brow Skyview Tower and activating it, Link can launch himself up into the sky and glide to the northwest, along with using his Paraglider. Once he crosses the canyon, the weather will turn cold, requiring Link to need a level of Cold Resistance. The Archaic Warm Greaves that were acquired on the Great Sky Island are sufficient. If Link didn't find those, he can cook a meal using Spicy Peppers, which will give him cold resistance.
- After gliding across the canyon, Link can walk to the west, eventually arriving at the Lucky Clover Gazette, just outside Rito Village.
- As an alternative approach, from the Lindor's Brow Skyview Tower, Link can travel southwest, stopping at the Tabantha Bridge Stable. From there he can be follow the direct path to the west, which winds around and eventually arrives at the Lucky Clover Gazette.
- After arriving at the Lucky Clover Gazette, Link can speak with Galli or Juannelle to learn that dropping a Hylian Pine Cone in a fire, it will create a massive updraft. With the bridge leading to Rito Village broken, Link can drop a pine cone by the small fire, where Juannelle is standing. He can then jump up and pull out the Paraglider and use the updraft to glide west to Rito Village.
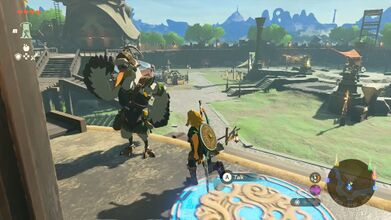
Speak with Penn at the Lookout Landing Skyview Tower 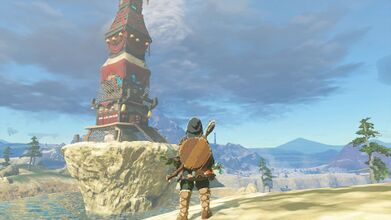
Make your way over and activate the Lindor's Brow Skyview Tower 
Glide to the northwest, towards the Hebra region 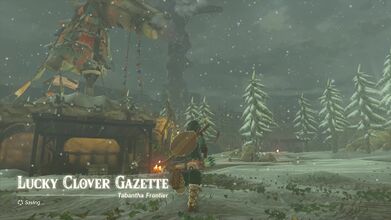
Arrive at the Lucky Clover Gazette 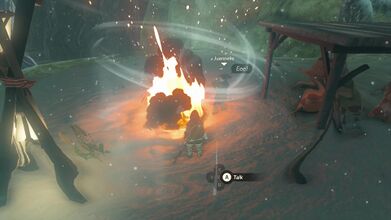
Drop a Hylian Pine Cone into the fire 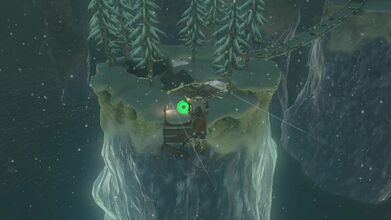
Use the Paraglider to glide over to Rito Village


Tulin of Rito Village
- When arriving at Rito Village, Link can speak with the three young Rito near the entrance. Notts, Molli and Genli can be seen practicing the Song of the Stormwind Ark. It is a folk tale of the Stormwind Ark from the past, who saved Rito Village in its time of need during a prior hardship.
- Link can then explore the rest of the town. The Brazen Beak sells the Snowquill Set, which gives Link Cold Resistance. If Link can afford to sell off a few materials and pay for at least part of the set, it will help Link when he travels to colder climates.
- At the top of Rito Village, Link can find Tulin, Teba, and Saki. The three are arguing over Tulin's belief that he can deal with the blizzard that has been threatening the Rito way of life. Tulin will then fly off. Teba instructs Link to visit Hart, found between the bonefires in the distance to the north. This will begin the Tulin of Rito Village main quest.
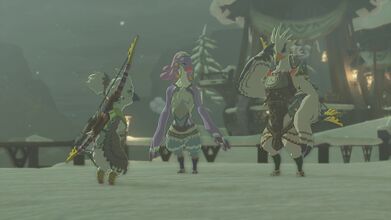
The three will argue and Tulin will fly off, beginning the Tulin of Rito Village quest


Exploring the Hebra South Summit Cave
- Glide to the north of Rito Village, in the direction of the bonfires that are viewable in the distance. Inside the Hebra Trailhead Lodge, Link will find Harth. He will point Link in the direction of where Tulin has gone. He encourages Link to climb up the cliff just outside and head up the mountain road. When Link sees a Bonfire, he'll come across the Hebra South Summit Cave.
- Outside of the lodge, Link can climb up the ladder and begin scaling up Rospro Pass. He'll reach a campfire where a Rito named Cecili can be found. From here Link can scale up the pass to the northwest, which eventually leads to the Rospro Pass Skyview Tower. It is worth activating the tower to make navigating the mountains a bit easier. Along the way to the tower, Link can meet with Mazli and complete The Blocked Cave quest.
- As Link travels northeast up the Rospro Pass, he'll encounter some enemy Ice Chuchu and some Bokoblin at an enemy camp. Further up ahead on the left, Link will find the bonfire that marks the entrance to the Hebra South Summit Cave.
- Inside the cave, Link can speak with Laissa, who mentions that Tulin and Gesane have gone up ahead, further in the cave.
- Run down the narrow corridor, avoiding the thorns to reach a tall vertical room with an air geyser. Straight ahead to the north, there is an opening up above. Jump into the air geyser and use the Paraglider to glide up the cave and into the passage. Straight ahead, Link will find the single enemy in this cave, a Horriblin.
- Straight ahead there is another vertical room with an unlit campfire at the bottom. There is some Flint and a few barrels that have some Hylian Pine Cones. Light a fire, by dropping the Flint near the campefire and striking it with a metal weapon. Then drop a Hylian Pine Cone on the fire to create a massive updraft. Jump up and use the Paraglider to glide up to the top of the room. The passage to the north leads to a room with the Bubbulfrog, where as the path to the east will progress further in the cave.
- Further up ahead, Link will find Gesane. He mentions that Tulin flew further ahead, chasing monsters. He guides Link out of the cave and from there, to head north to the lone cedar tree on Talonto Peak. Link can then run down the corridor and exit the cave.
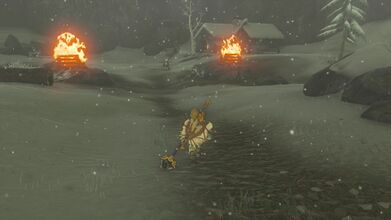
Travel north of Rito Village to the two large bonfires 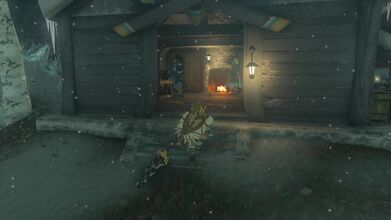
Enter the Hebra Trailhead Lodge and speak with Harth to get the whereabouts of Tulin 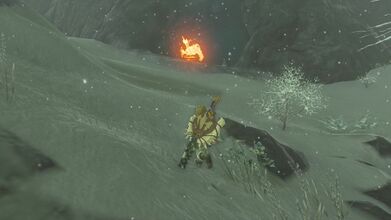
Find the bonfire, marking the entrance of the Hebra South Summit Cave 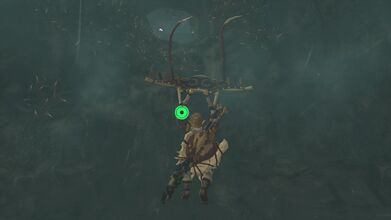
In the tall vertical room, use the Paraglider along with the air geyser to glide up to the opening 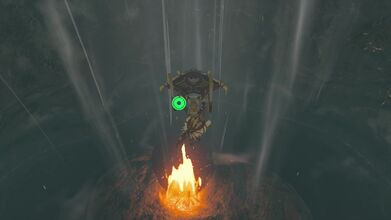
Create a fire and drop a Hylian Pine Cone to create a strong upward draft 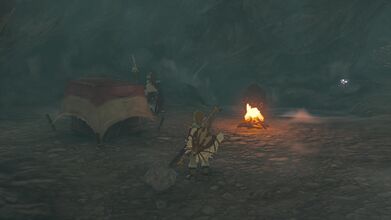
Find Gesane at the end of the cave, who guides Link to head towards the Talonto Peak


Talonto Peak
- After exiting the Hebra South Summit Cave, there is a nearby enemy Bokoblin camp. Just north of the camp, is Talonto Peak, where the lone pine tree can be found. Link can climb up the cliff to reach the peak.
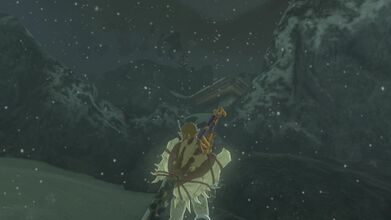
- Here, Link will find Tulin who is overlooking an Aerocuda just to the east, who stole his bow. After Link agrees to help him, Tulin will tell Link about Tulin's Power of Wind. This is when Tulin can create a stream of wind blowing straight forward. This, along with Link's Paraglider, will allow Link to reach the platform in the distance.
- Once Link arrives, he can shoot down the Aerocuda with an arrow and Tulin will retrieve his Bow. Shortly after, more enemies will be dropped off and Link and Tulin can fight side by side to defeat them.
- Once they are defeated, Link and Tulin are joined by Harth and Gesane. Harth tasks Link and Tulin to investigate the cloud up in the sky.
- Hebra Peak can be found to the northeast and there is no clear easy path to reach it. As Link gets closer to the tall mountain, there is are some Zonai Ruins that Link can climb, clockwise around the mountain.
- At the top of the peak, Link will meet with Huck. After a short talk, Huck gives his word of encouragement. Huck is looking out at some floating islands ahead. Link, along with Tulin's help, can reach this island.
There is a lone pine tree at the top of Talonto Peak that Link can climb up to 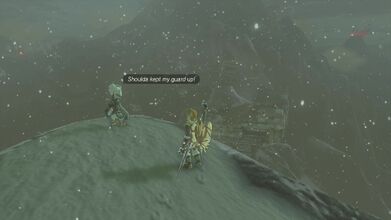
Reach the top and speak with Tulin who will teach Link about Tulin's Power of Wind 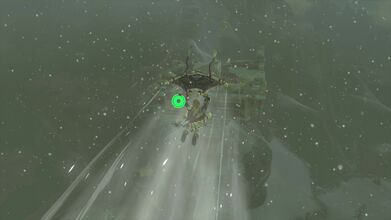
Use Tulin's gust of wind to reach the platform beneath the Aerocuda 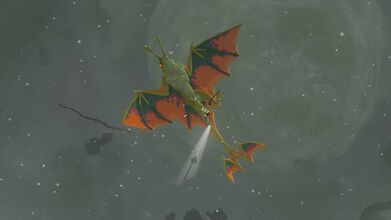
Shoot the Aerocuda to get Tulin's Bow back and then fight off a horde of enemies 
The Hebra Peak can be found to the northeast after clearing the monsters 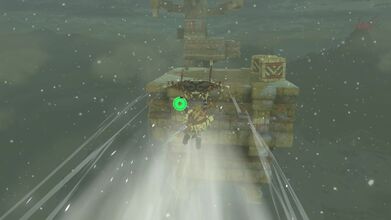
After meeting Huck at Hebra Peak, use Tulin's gust to reach the floating island in the distance


Rising Island Chain
- Link can use Tulin to fly across the gap and use Ascend to climb up the platforms here. After using Ascend up a very tall pillar, Link will arrive at the Rising Island Chain.
- Shortly after arriving, Link and Tulin will hear a voice summoning them up further up in the sky. The Mayaumekis Shrine can be found nearby. Glide over and access the shrine for a quick warp point.
- From the Mayaumekis Shrine, Link can travel to the northwest, using Tulin as needed. Eventually he'll reach a tall pillar that he must climb, that has some icicles blocking the way. Link can glide over to the tall pillar and slash away at the icicles. Link can then use ascend to climb even higher.
- Continue to travel to the northwest, traveling form floating island to island. A Flux Construct I can be found on the lower elevation, and it holds an Old Map. From there, continue to travel northwest. In the area here there is a floating ship, with boulders above it blocking the way. Break the boulders by either shooting with a Bomb Flower and Arrow from below, or break it with a rock based weapon if approaching from above. From here, Link can jump on the ship and travel to the southwest to progress even higher.
- At the west end of the island chain, break the circle of ice by jumping on it. From here, jump on the floating ship and glide to the east. Use another ship to eventually glide to a large structure that has a Cooking Pot, along with some Chillshrooms and Chillfin Trouts. Continue traveling back east, across a bridge that will collapse when walked on, followed by some enemy Constructs that are fighting with Aerocudas. Far to the east you'll encounter some constructs that will attach some dangerous Time Bombs to their weapons.
- At the far east area, there is a Balloon, Lattice, and some Flame Emitters. Attach the Ballon to the Lattice, and then place the Flame Emitter in the balloon. Ride the balloon and then glide to the northeast. Here Link can ascend up another tall pillar to get even further up.
- Travel further to the northwest, using the floating ships. Break the ice in the circle up ahead and use the ship to fly even higher. At this elevation it becomes even colder, requiring two levels of Cold Resistance in order to survive. The Kahatanaum Shrine can be found just ahead, which acts as a good warp point. The shrine itself is one of Rauru's Blessings with just a single chest that contains a Large Zonai Charge.
- Just outside of the shrine, Link can jump on top of the large boat and launch himself much higher up. From here he can glide over to the platform to the south.
- Link will need to glide from ship to ship, climbing higher up. There are platforms where Link can land, where he'll find more ships to launch him even further up. The higher Link goes the ships will change the direction they are moving, going against the wind. At the very top, Link can launch himself so far up, he'll fly above the thunderhead, where the skies are clear. Link can glide to the center of the thunderhead and glide down, entering The Wind Temple.
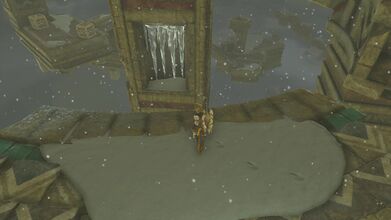
Travel northwestward to a large pillar with icicles and then Ascend up the pillar from the inside 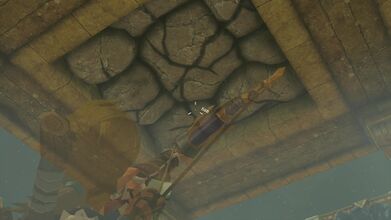
At the far northwest end, break the boulders with a Bomb Flower from below, or a rock weapon from above 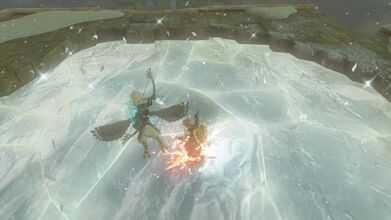
Jump on the ice to crack it, revealing a floating ship just below it 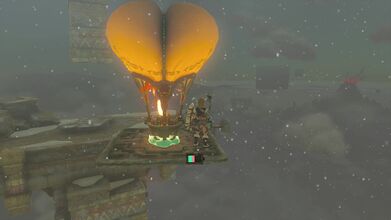
Attach a Balloon, Lattice, and Flame Emitter to create a floating device 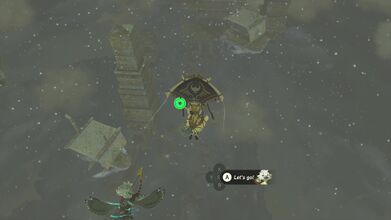
Glide over to the moving ships and use them to continue gliding across the islands 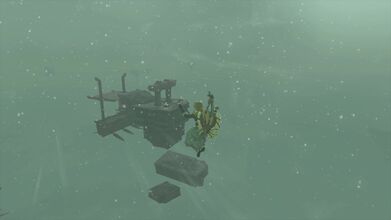
Glide to one of the floating islands that is on the outside of the giant cloud 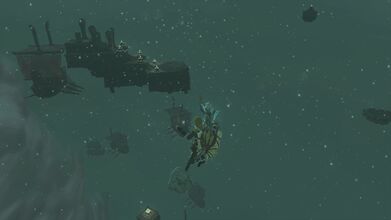
Jump from ship to ship and glide to the platform way up in the sky 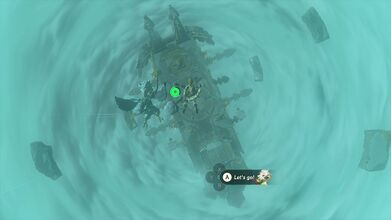
Descend down to the The Wind Temple


