Wasteland Tower Region: Difference between revisions
mNo edit summary |
|||
| (6 intermediate revisions by 3 users not shown) | |||
| Line 4: | Line 4: | ||
| caption = | | caption = | ||
| game = ''[[The Legend of Zelda: Breath of the Wild|Breath of the Wild]]'' | | game = ''[[The Legend of Zelda: Breath of the Wild|Breath of the Wild]]'' | ||
| location = [[Gerudo ( | | location = [[Gerudo (Province)|Gerudo]] | ||
| enemies = [[Molduga]]<br/>[[Blue Bokoblin]]<br/>[[Blue Lizalfos]] | | enemies = [[Molduga]]<br/>[[Blue Bokoblin]]<br/>[[Blue Lizalfos]] | ||
| inhab = [[Gerudo]]<br/>[[Hylian (Race)|Hylians]] | | inhab = [[Gerudo]]<br/>[[Hylian (Race)|Hylians]] | ||
| pointsint = [[Wasteland Tower]]<br/>[[Gerudo Town]]<br/>[[Kara Kara Bazaar]]<br/>[[Yiga Clan Hideout]]<br/>[[Great Fairy Tera]] | | pointsint = [[Wasteland Tower]]<br/>[[Gerudo Town]]<br/>[[Kara Kara Bazaar]]<br/>[[Yiga Clan Hideout]]<br/>[[Great Fairy Fountain]] | ||
| characters= [[Riju]]<br/>[[Great Fairy Tera]] | |||
| item = [[Thunder Helm]]<br/>[[Urbosa's Fury]]<br/>[[Molduga Fin]]<br/>[[Molduga Guts]] | | item = [[Thunder Helm]]<br/>[[Urbosa's Fury]]<br/>[[Molduga Fin]]<br/>[[Molduga Guts]] | ||
| natseason = | | natseason = | ||
| related = [[Gerudo ( | | related = [[Gerudo (Province)|Gerudo]]<br/>[[Gerudo Desert]] | ||
}} | }} | ||
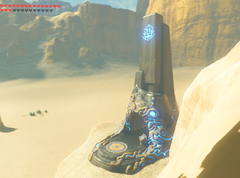
The '''Wasteland Tower Region''' is a tower region in ''[[The Legend of Zelda: Breath of the Wild|Breath of the Wild]]''. | The '''Wasteland Tower Region''' is a tower region in ''[[The Legend of Zelda: Breath of the Wild|Breath of the Wild]]''. | ||
== | ==''Breath of the Wild''== | ||
{{Box| light | left | width=70px | title=[[File:KorokSeed.png|50px]]<br />[[Korok Seed]]s | edit= | hide= | <center><big><big><big>'''68'''</big></big></big></center> }} | {{Box| light | left | width=70px | title=[[File:KorokSeed.png|50px]]<br />[[Korok Seed]]s | edit= | hide= | <center><big><big><big>'''68'''</big></big></big></center> }} | ||
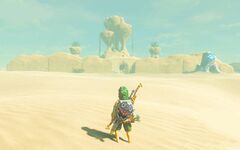
The tower region is bordered by the [[Gerudo Highlands]] in the [[Gerudo Tower Region]], the [[Faron Grasslands]] in the [[Lake Tower Region]], and the edge of [[Hyrule]]. It's the home of the [[Gerudo]], who have made two settlements in the area: [[Gerudo Town]] and [[Kara Kara Bazaar]]. It's also the location of the [[Yiga Clan Hideout]], headquarters of the [[Yiga Clan]] and [[Master Kohga]]. Once [[Divine Beast Vah Naboris]] in the [[East Barrens]] is freed, it makes its way up to [[Spectacle Rock]], next to [[Wasteland Tower]]. | The tower region is bordered by the [[Gerudo Highlands]] in the [[Gerudo Tower Region]], the [[Faron Grasslands]] in the [[Lake Tower Region]], and the edge of [[Hyrule]]. It's the home of the [[Gerudo]], who have made two settlements in the area: [[Gerudo Town]] and [[Kara Kara Bazaar]]. It's also the location of the [[Yiga Clan Hideout]], headquarters of the [[Yiga Clan]] and [[Master Kohga]]. Once [[Divine Beast Vah Naboris]] in the [[East Barrens]] is freed, it makes its way up to [[Spectacle Rock]], next to [[Wasteland Tower]]. | ||
In the southwest corner lies [[Great Fairy Tera]], along with [[Hawa Koth Shrine]] to make accessing the isolated location easy. The only 4 [[Molduga]]s in the game are located in between Miju and Gerudo Town, which can make the area difficult to traverse, especially without the aid of [[Sand Seal]]s; most of the region is desert, except in the east, where the [[South Lomei Labyrinth]], [[Mount Granajh]], and [[Gerudo Canyon]] are. In the | In the southwest corner lies [[Great Fairy Tera]], along with [[Hawa Koth Shrine]] to make accessing the isolated location easy. The only 4 [[Molduga]]s in the game are located in between Miju and Gerudo Town, which can make the area difficult to traverse, especially without the aid of [[Sand Seal]]s; most of the region is desert, except in the east, where the [[South Lomei Labyrinth]], [[Mount Granajh]], and [[Gerudo Canyon]] are. In the northeast, the [[Gerudo Canyon Stable]] borders the region and the Gerudo Tower Region, acting as a gateway to the entire Wasteland Tower Region. | ||
{{clear|left}} | |||
===Settlements=== | |||
<gallery mode=nolines widths=240 heights=150> | |||
File:GerudoCanyonStable.jpg|link=Gerudo Canyon Stable|[[Gerudo Canyon Stable]] (Note: This Stable is on the line between the [[Gerudo Tower Region]] and [[Wasteland Tower Region]]) | |||
File:Gerudo Town.jpg|link=Gerudo Town|[[Gerudo Town]] | |||
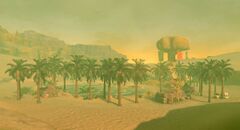
File:Karakarabazaar.jpg|link=Kara Kara Bazaar|[[Kara Kara Bazaar]] | |||
File:Yiga Clan Hideout entrance - BOTW.jpg|link=Yiga Clan Hideout|[[Yiga Clan Hideout]] | |||
</gallery> | |||
== | ===Landmarks=== | ||
*[[Divine Beast Vah Naboris]] | |||
*[[East Gerudo Ruins]] | |||
*[[Gerudo Great Skeleton]] | |||
*[[Great Cliffs]] | |||
*[[Northern Icehouse]] | |||
*[[South Lomei Labyrinth]] | |||
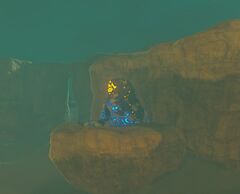
*[[Tera]]'s [[Great Fairy Fountain]] | |||
*[[Toruma Dunes]] | |||
*[[West Gerudo Ruins]] | |||
====Daqo Chisay Shrine==== | ===Shrines=== | ||
====Base Game==== | |||
<gallery mode=nolines widths=240 heights=240> | |||
File:DakoTahShrine.jpg|link=Dako Tah Shrine|[[Dako Tah Shrine]]<br/>'''Electric Path''', monk [[Dako Tah]]. Accessed through [[The Eye of the Sandstorm]] Shrine Quest. | |||
File:DaqoChisayShrine.jpg|link=Daqo Chisay Shrine|[[Daqo Chisay Shrine]]<br/>'''The Whole Picture''', monk [[Daqo Chisay]]. Located immediately outside [[Gerudo Town]]. | |||
File:DilaMaagShrine.jpg|link=Dila Maag Shrine|[[Dila Maag Shrine]]<br/>'''Dila Maag's Blessing''', monk [[Dila Maag]]. Accessed through [[The Desert Labyrinth]] Shrine Quest; located in [[South Lomei Labyrinth]]. | |||
File:HawaKothShrine.jpg|link=Hawa Koth Shrine|[[Hawa Koth Shrine]]<br/>'''The Current Solution''', monk [[Hawa Koth]]. | |||
File:JeeNohShrine.jpg|link=Jee Noh Shrine|[[Jee Noh Shrine]]<br/>'''On the Move''', monk [[Jee Noh]]. | |||
File:KayNohShrine.jpg|link=Kay Noh Shrine|[[Kay Noh Shrine]]<br/>'''Power of Electricity''', monk [[Kay Noh]]. Located at [[Gerudo Canyon Stable]]. | |||
File:KemaZoosShrine.jpg|link=Kema Zoos Shrine|[[Kema Zoos Shrine]]<br/>'''A Delayed Puzzle''', monk [[Kema Zoos]]. Accessed through [[The Silent Swordswomen]] Shrine Quest. | |||
File:KorshO%27huShrine.jpg|link=Korsh O'hu Shrine|[[Korsh O'hu Shrine]]<br/>'''Korsh O'hu's Blessing''', monk [[Korsh O'hu]]. Accessed through [[The Seven Heroines]] Shrine Quest. | |||
File:MisaeSumaShrine.jpg|link=Misae Suma Shrine|[[Misae Suma Shrine]]<br/>'''Misae Suma's Blessing''', monk [[Misae Suma]]. Accessed through [[The Perfect Drink]] Shrine Quest. | |||
File:RaqaZunzoShrine.jpg|link=Raqa Zunzo Shrine|[[Raqa Zunzo Shrine]]<br/>'''Raqa Zunzo's Blessing''', monk [[Raqa Zunzo]]. Accessed through [[The Undefeated Champ]] Shrine Quest and the [[Sand-Seal Rally]]. | |||
File:SumaSahmaShrine.jpg|link=Suma Sahma Shrine|[[Suma Sahma Shrine]]<br/>'''Suma Sahma's Blessing''', monk [[Suma Sahma]]. Accessed through [[Secret of the Snowy Peaks]] Shrine Quest. | |||
File:ThoKayuShrine.jpg|link=Tho Kayu Shrine|[[Tho Kayu Shrine]]<br/>'''Tho Kayu's Blessing''', monk [[Tho Kayu]]. | |||
</gallery> | |||
==== | ====DLC==== | ||
<gallery mode=nolines widths=240 heights=240> | |||
File:Keive Tala Shrine - BOTW Wii U.png|link=Keive Tala Shrine|[[Keive Tala Shrine]]<br/>'''Big or Small''', monk [[Keive Tala]]. Part of [[EX Champion Urbosa's Song]] DLC Main Quest, rewards [[Naboris's Emblem]] rather than [[Spirit Orb]]. | |||
File:Kihiro Moh Shrine - BOTW Wii U.jpg|link=Kihiro Moh Shrine|[[Kihiro Moh Shrine]]<br/>'''Inside the Box''', monk [[Kihiro Moh]]. Part of EX Champion Urbosa's Song DLC Main Quest, rewards Naboris's Emblem rather than Spirit Orb; involves going through [[Yiga Clan Hideout]]. | |||
File:Takama Shiri Shrine - BOTW Wii U.jpg|link=Takama Shiri Shrine|[[Takama Shiri Shrine]]<br/>'''Dual Purpose''', monk [[Takama Shiri]]. Part of EX Champion Urbosa's Song DLC Main Quest, rewards Naboris's Emblem rather than Spirit Orb. | |||
</gallery> | |||
==== | ===Side Quests=== | ||
<gallery mode=nolines widths=240 heights=135> | |||
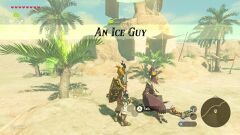
File:An-Ice-Guy-1.jpg|link=An Ice Guy|[[An Ice Guy]] | |||
File:No Image.png|link=Good-Sized Horse|[[Good-Sized Horse]] | |||
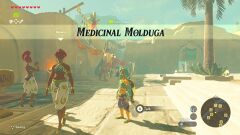
File:Medicinal-Molduga-1.jpg|link=Medicinal Molduga|[[Medicinal Molduga]] | |||
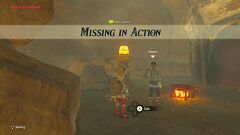
File:Missing-In-Action-1.jpg|link=Missing in Action|[[Missing in Action]] | |||
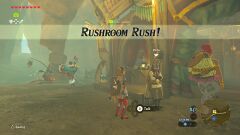
File:Rushroom-Rush-1.jpg|link=Rushroom Rush!|[[Rushroom Rush!]] | |||
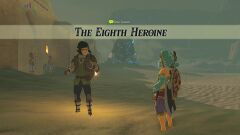
File:The-Eighth-Heroine-1.jpg|link=The Eighth Heroine|[[The Eighth Heroine]] | |||
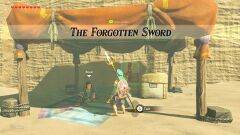
File:The-Forgotten-Sword-1.jpg|link=The Forgotten Sword|[[The Forgotten Sword]] | |||
File:No Image.png|link=The Mystery Polluter|[[The Mystery Polluter]] | |||
File:No Image.png|link=The Search for Barta|[[The Search for Barta]] | |||
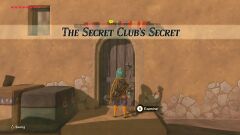
File:The-Secret-Clubs-Secret-1.jpg|link=The Secret Club's Secret|[[The Secret Club's Secret]] | |||
File:No Image.png|link=The Thunder Helm|[[The Thunder Helm]] | |||
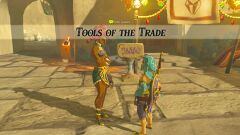
File:Tools-of-the-Trade-1.jpg|link=Tools of the Trade|[[Tools of the Trade]] | |||
</gallery> | |||
{{cat|Breath of the Wild Tower Regions}} | {{cat|Breath of the Wild Tower Regions}} | ||
{{cat|Breath of the Wild Locations}} | {{cat|Breath of the Wild Locations}} | ||
Latest revision as of 06:27, May 17, 2023
| This article is a stub. You can help the Zelda Dungeon Wiki by expanding it. |

Games | ||
Location | ||
Enemies | ||
Inhabitants | ||
Key Characters | ||
Points of | ||
Items | ||
Related | ||
The Wasteland Tower Region is a tower region in Breath of the Wild.
Breath of the Wild

The tower region is bordered by the Gerudo Highlands in the Gerudo Tower Region, the Faron Grasslands in the Lake Tower Region, and the edge of Hyrule. It's the home of the Gerudo, who have made two settlements in the area: Gerudo Town and Kara Kara Bazaar. It's also the location of the Yiga Clan Hideout, headquarters of the Yiga Clan and Master Kohga. Once Divine Beast Vah Naboris in the East Barrens is freed, it makes its way up to Spectacle Rock, next to Wasteland Tower.
In the southwest corner lies Great Fairy Tera, along with Hawa Koth Shrine to make accessing the isolated location easy. The only 4 Moldugas in the game are located in between Miju and Gerudo Town, which can make the area difficult to traverse, especially without the aid of Sand Seals; most of the region is desert, except in the east, where the South Lomei Labyrinth, Mount Granajh, and Gerudo Canyon are. In the northeast, the Gerudo Canyon Stable borders the region and the Gerudo Tower Region, acting as a gateway to the entire Wasteland Tower Region.
Settlements
Gerudo Canyon Stable (Note: This Stable is on the line between the Gerudo Tower Region and Wasteland Tower Region)
Landmarks
- Divine Beast Vah Naboris
- East Gerudo Ruins
- Gerudo Great Skeleton
- Great Cliffs
- Northern Icehouse
- South Lomei Labyrinth
- Tera's Great Fairy Fountain
- Toruma Dunes
- West Gerudo Ruins
Shrines
Base Game
Dako Tah Shrine
Electric Path, monk Dako Tah. Accessed through The Eye of the Sandstorm Shrine Quest.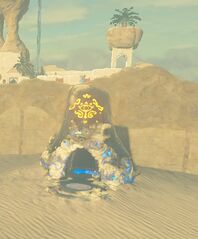
Daqo Chisay Shrine
The Whole Picture, monk Daqo Chisay. Located immediately outside Gerudo Town.
Dila Maag Shrine
Dila Maag's Blessing, monk Dila Maag. Accessed through The Desert Labyrinth Shrine Quest; located in South Lomei Labyrinth.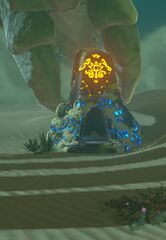
Hawa Koth Shrine
The Current Solution, monk Hawa Koth.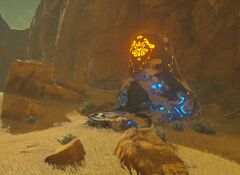
Jee Noh Shrine
On the Move, monk Jee Noh.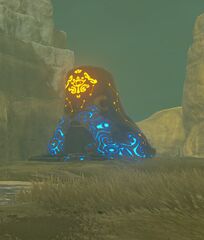
Kay Noh Shrine
Power of Electricity, monk Kay Noh. Located at Gerudo Canyon Stable.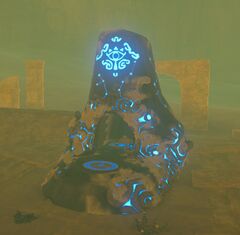
Kema Zoos Shrine
A Delayed Puzzle, monk Kema Zoos. Accessed through The Silent Swordswomen Shrine Quest.
Korsh O'hu Shrine
Korsh O'hu's Blessing, monk Korsh O'hu. Accessed through The Seven Heroines Shrine Quest.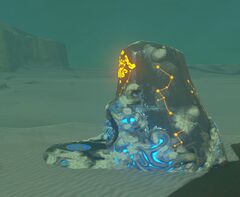
Misae Suma Shrine
Misae Suma's Blessing, monk Misae Suma. Accessed through The Perfect Drink Shrine Quest.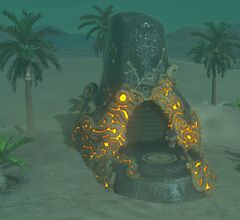
Raqa Zunzo Shrine
Raqa Zunzo's Blessing, monk Raqa Zunzo. Accessed through The Undefeated Champ Shrine Quest and the Sand-Seal Rally.
Suma Sahma Shrine
Suma Sahma's Blessing, monk Suma Sahma. Accessed through Secret of the Snowy Peaks Shrine Quest.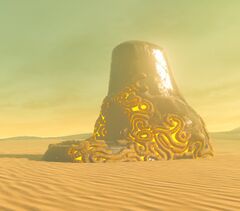
Tho Kayu Shrine
Tho Kayu's Blessing, monk Tho Kayu.
DLC
Keive Tala Shrine
Big or Small, monk Keive Tala. Part of EX Champion Urbosa's Song DLC Main Quest, rewards Naboris's Emblem rather than Spirit Orb.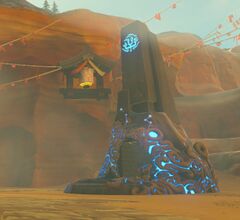
Kihiro Moh Shrine
Inside the Box, monk Kihiro Moh. Part of EX Champion Urbosa's Song DLC Main Quest, rewards Naboris's Emblem rather than Spirit Orb; involves going through Yiga Clan Hideout.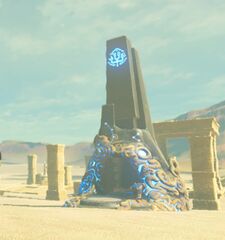
Takama Shiri Shrine
Dual Purpose, monk Takama Shiri. Part of EX Champion Urbosa's Song DLC Main Quest, rewards Naboris's Emblem rather than Spirit Orb.