Ocarina of Time Gold Skulltulas: Difference between revisions
No edit summary |
No edit summary |
||
| Line 11: | Line 11: | ||
| [[Giant's Wallet]] || 30 | | [[Giant's Wallet]] || 30 | ||
|- | |- | ||
| [[Bombchu]] | | [[Bombchu]]s || 40 | ||
|- | |- | ||
| [[Piece of Heart]] || 50 | | [[Piece of Heart]] || 50 | ||
| Line 30: | Line 30: | ||
'''Conditions''': Enter the [[Inside the Deku Tree|Deku Tree]] (Past) | '''Conditions''': Enter the [[Inside the Deku Tree|Deku Tree]] (Past) | ||
Gold Skulltula #2 - After breaking through the | Gold Skulltula #2 - After breaking through the spider web and reaching the lower floor of the Great Deku Tree, turn back and look at the vines leading up. Shoot down the Skulltula with the Slingshot.}}<section end=2 /> | ||
<section begin=3 />{{Gallery/Box|file=OoT-Gold-Skulltula-003.jpg|caption='''Location''': [[Inside the Deku Tree|Inside The Deku Tree]] | <section begin=3 />{{Gallery/Box|file=OoT-Gold-Skulltula-003.jpg|caption='''Location''': [[Inside the Deku Tree|Inside The Deku Tree]] | ||
'''Conditions''': Enter the [[Inside the Deku Tree|Deku Tree]] (Past) | '''Conditions''': Enter the [[Inside the Deku Tree|Deku Tree]] (Past) | ||
Gold Skulltula #3 - After breaking through the | Gold Skulltula #3 - After breaking through the spider web and reaching the lower floor of the Great Deku Tree, look at the grating at the north end of the room to find another Skulltula.}}<section end=3 /> | ||
<section begin=4 />{{Gallery/Box|file=OoT-Gold-Skulltula-004.jpg|caption='''Location''': [[Castle Town]] | <section begin=4 />{{Gallery/Box|file=OoT-Gold-Skulltula-004.jpg|caption='''Location''': [[Castle Town]] | ||
| Line 53: | Line 53: | ||
'''Conditions''': An Empty [[Bottle]] and [[Bottle Bug]]s (Past) | '''Conditions''': An Empty [[Bottle]] and [[Bottle Bug]]s (Past) | ||
Gold Skulltula #6 - In the Graveyard there is a soft soil location on the left side. Drop some bugs from a bottle to get a Skulltula to pop out.}}<section end=6 /> | Gold Skulltula #6 - In the Graveyard, there is a soft soil location on the left side. Drop some bugs from a bottle to get a Skulltula to pop out.}}<section end=6 /> | ||
<section begin=7 />{{Gallery/Box|file=OoT-Gold-Skulltula-007.jpg|caption='''Location''': [[Kakariko Village]] | <section begin=7 />{{Gallery/Box|file=OoT-Gold-Skulltula-007.jpg|caption='''Location''': [[Kakariko Village]] | ||
| Line 77: | Line 77: | ||
'''Conditions''': Reach [[Kakariko Village]] (Past) (Night) | '''Conditions''': Reach [[Kakariko Village]] (Past) (Night) | ||
Gold Skulltula #10 - At nighttime a Gold Skulltula will appear near the top of the watch tower. Shoot it down with your Slingshot.}}<section end=10 /> | Gold Skulltula #10 - At nighttime, a Gold Skulltula will appear near the top of the watch tower. Shoot it down with your Slingshot.}}<section end=10 /> | ||
<section begin=11 />{{Gallery/Box|file=OoT-Gold-Skulltula-011.jpg|caption='''Location''': [[Kakariko Village]] | <section begin=11 />{{Gallery/Box|file=OoT-Gold-Skulltula-011.jpg|caption='''Location''': [[Kakariko Village]] | ||
| Line 89: | Line 89: | ||
'''Conditions''': Reach [[Lon Lon Ranch]] (Past) | '''Conditions''': Reach [[Lon Lon Ranch]] (Past) | ||
Gold Skulltula #12 - Once you enter the Ranch walk forward past the initial buildings and turn left. Roll into the nearby tree and a Skulltula will fall down from the tree.}}<section end=12 /> | Gold Skulltula #12 - Once you enter the Ranch, walk forward past the initial buildings and turn left. Roll into the nearby tree and a Skulltula will fall down from the tree.}}<section end=12 /> | ||
<section begin=13 />{{Gallery/Box|file=OoT-Gold-Skulltula-013.jpg|caption='''Location''': [[Lon Lon Ranch]] | <section begin=13 />{{Gallery/Box|file=OoT-Gold-Skulltula-013.jpg|caption='''Location''': [[Lon Lon Ranch]] | ||
| Line 95: | Line 95: | ||
'''Conditions''': Reach [[Lon Lon Ranch]] (Past) (Night) | '''Conditions''': Reach [[Lon Lon Ranch]] (Past) (Night) | ||
Gold Skulltula #13 - On the outside of the corral, at the southeast part of the area. Just behind the wooden boards a Gold Skulltula can be found here at nighttime.}}<section end=13 /> | Gold Skulltula #13 - On the outside of the corral, at the southeast part of the area. Just behind the wooden boards, a Gold Skulltula can be found here at nighttime.}}<section end=13 /> | ||
<section begin=14 />{{Gallery/Box|file=OoT-Gold-Skulltula-014.jpg|caption='''Location''': [[Gerudo Valley]] | <section begin=14 />{{Gallery/Box|file=OoT-Gold-Skulltula-014.jpg|caption='''Location''': [[Gerudo Valley]] | ||
| Line 107: | Line 107: | ||
'''Conditions''': An Empty [[Bottle]] and [[Bottle Bug]]s (Past) | '''Conditions''': An Empty [[Bottle]] and [[Bottle Bug]]s (Past) | ||
Gold Skulltula #15 - Near the Lakeside Laboratory at the northwest portion of the area you will find a soft soil location. Drop some bugs to get the Skulltula.}}<section end=15 /> | Gold Skulltula #15 - Near the Lakeside Laboratory at the northwest portion of the area, you will find a soft soil location. Drop some bugs to get the Skulltula.}}<section end=15 /> | ||
<section begin=16 />{{Gallery/Box|file=OoT-Gold-Skulltula-015.jpg|caption='''Location''': [[Lake Hylia]] | <section begin=16 />{{Gallery/Box|file=OoT-Gold-Skulltula-015.jpg|caption='''Location''': [[Lake Hylia]] | ||
| Line 119: | Line 119: | ||
'''Conditions''': (Night) (Past) | '''Conditions''': (Night) (Past) | ||
Gold Skulltula #17 - Found only at nighttime in the Kokiri Forest. The Skulltula is on the backside of the [[Know-It-All | Gold Skulltula #17 - Found only at nighttime in the Kokiri Forest. The Skulltula is on the backside of the [[Know-It-All Brothers]]' House, located at the southwest part of the village.}}<section end=17 /> | ||
<section begin=18 />{{Gallery/Box|file=OoT-Gold-Skulltula-018.jpg|caption='''Location''': [[Lost Woods]] | <section begin=18 />{{Gallery/Box|file=OoT-Gold-Skulltula-018.jpg|caption='''Location''': [[Lost Woods]] | ||
| Line 137: | Line 137: | ||
'''Conditions''': An Empty [[Bottle]] and [[Bottle Bug]]s (Past) | '''Conditions''': An Empty [[Bottle]] and [[Bottle Bug]]s (Past) | ||
Gold Skulltula #20 - Right behind the Kokiri Shop you will find a soft soil location. Drop some bugs to get the Skulltula.}}<section end=20 /> | Gold Skulltula #20 - Right behind the Kokiri Shop, you will find a soft soil location. Drop some bugs to get the Skulltula.}}<section end=20 /> | ||
<section begin=21 />{{Gallery/Box|file=OoT-Gold-Skulltula-021.jpg|caption='''Location''': [[Death Mountain Trail]] | <section begin=21 />{{Gallery/Box|file=OoT-Gold-Skulltula-021.jpg|caption='''Location''': [[Death Mountain Trail]] | ||
| Line 155: | Line 155: | ||
'''Conditions''': [[Bomb]]s are Recommended (Past) | '''Conditions''': [[Bomb]]s are Recommended (Past) | ||
Gold Skulltula #23 - From the entrance of the dungeon, head through the southeast door to reach the room with the [[Baby Dodongo]]s. Blast away at the wall with a bomb and head down a room where you will find the Gold | Gold Skulltula #23 - From the entrance of the dungeon, head through the southeast door to reach the room with the [[Baby Dodongo]]s. Blast away at the wall with a bomb and head down a room where you will find the Gold Skulltula.}}<section end=23 /> | ||
<section begin=24 />{{Gallery/Box|file=OoT-Gold-Skulltula-024.jpg|caption='''Location''': [[Dodongo's Cavern]] | <section begin=24 />{{Gallery/Box|file=OoT-Gold-Skulltula-024.jpg|caption='''Location''': [[Dodongo's Cavern]] | ||
| Line 161: | Line 161: | ||
'''Conditions''': [[Bomb]]s (Past) | '''Conditions''': [[Bomb]]s (Past) | ||
Gold Skulltula #24 - In the room with the [[Fire Keese]] towards the end of the dungeon there is a bombable wall at the north end of the room. Blast it open and you'll find a Gold Skulltula behind the [[Armos]] statue.}}<section end=24 /> | Gold Skulltula #24 - In the room with the [[Fire Keese]] towards the end of the dungeon, there is a bombable wall at the north end of the room. Blast it open and you'll find a Gold Skulltula behind the [[Armos]] statue.}}<section end=24 /> | ||
<section begin=25 />{{Gallery/Box|file=OoT-Gold-Skulltula-025.jpg|caption='''Location''': [[Death Mountain Trail]] | <section begin=25 />{{Gallery/Box|file=OoT-Gold-Skulltula-025.jpg|caption='''Location''': [[Death Mountain Trail]] | ||
| Line 191: | Line 191: | ||
'''Conditions''': Acquire [[Bomb]]s (Past) (Night) | '''Conditions''': Acquire [[Bomb]]s (Past) (Night) | ||
Gold Skulltula #29 - At the end of Zora's River, right near the waterfall, there is a ladder leading out of the water. At nighttime a Skulltula can be found here. Shoot it down with a Slingshot and collect the token.}}<section end=29 /> | Gold Skulltula #29 - At the end of Zora's River, right near the waterfall, there is a ladder leading out of the water. At nighttime, a Skulltula can be found here. Shoot it down with a Slingshot and collect the token.}}<section end=29 /> | ||
<section begin=30 />{{Gallery/Box|file=OoT-Gold-Skulltula-030.jpg|caption='''Location''': [[Zora's Fountain]] | <section begin=30 />{{Gallery/Box|file=OoT-Gold-Skulltula-030.jpg|caption='''Location''': [[Zora's Fountain]] | ||
| Line 227: | Line 227: | ||
'''Conditions''': [[Boomerang]] (Past) (Night) | '''Conditions''': [[Boomerang]] (Past) (Night) | ||
Gold Skulltula #35 - At Zora's Fountain, stand on the log just south of Lord Jabu-Jabu. At nighttime there will be a Skulltula crawling around on the wall. Toss your | Gold Skulltula #35 - At Zora's Fountain, stand on the log just south of Lord Jabu-Jabu. At nighttime, there will be a Skulltula crawling around on the wall. Toss your Boomerang at it to defeat it and collect the token.}}<section end=35 /> | ||
<section begin=36 />{{Gallery/Box|file=OoT-Gold-Skulltula-036.jpg|caption='''Location''': [[Inside the Deku Tree|Inside The Deku Tree]] | <section begin=36 />{{Gallery/Box|file=OoT-Gold-Skulltula-036.jpg|caption='''Location''': [[Inside the Deku Tree|Inside The Deku Tree]] | ||
| Line 233: | Line 233: | ||
'''Conditions''': [[Boomerang]] (Past) | '''Conditions''': [[Boomerang]] (Past) | ||
Gold Skulltula #36 - Way back inside of the Great Deku Tree. There was a room in the first | Gold Skulltula #36 - Way back inside of the Great Deku Tree. There was a room in the first basement at the northwest corner of the map that we previously never entered. Burn the spider web and then blast the boulder away with a bomb. Inside, you will find a Gold Skulltula on the wall. Use the Boomerang to snag the token.}}<section end=36 /> | ||
<section begin=37 />{{Gallery/Box|file=OoT-Gold-Skulltula-037.jpg|caption='''Location''': [[Lon Lon Ranch]] | <section begin=37 />{{Gallery/Box|file=OoT-Gold-Skulltula-037.jpg|caption='''Location''': [[Lon Lon Ranch]] | ||
| Line 245: | Line 245: | ||
'''Conditions''': [[Boomerang]] (Past) (Night) | '''Conditions''': [[Boomerang]] (Past) (Night) | ||
Gold Skulltula #38 - At Lon Lon Ranch at nighttime, make your way to the far southwest side of the map. Higher up on the edge you will find a Skulltula. Defeat it and retrieve the token with the Boomerang.}}<section end=38 /> | Gold Skulltula #38 - At Lon Lon Ranch at nighttime, make your way to the far southwest side of the map. Higher up on the edge, you will find a Skulltula. Defeat it and retrieve the token with the Boomerang.}}<section end=38 /> | ||
<section begin=39 />{{Gallery/Box|file=OoT-Gold-Skulltula-039.jpg|caption='''Location''': [[Hyrule Field]] | <section begin=39 />{{Gallery/Box|file=OoT-Gold-Skulltula-039.jpg|caption='''Location''': [[Hyrule Field]] | ||
| Line 257: | Line 257: | ||
'''Conditions''': [[Boomerang]] (Past) (Night) | '''Conditions''': [[Boomerang]] (Past) (Night) | ||
Gold Skulltula #40 - Once you enter Gerudo Valley, walk forward and you'll come to a wooden ramp. If you turn to the right, there is some water coming out of a hole in the wall. At nighttime the Gold Skulltula can be found here.}}<section end=40 /> | Gold Skulltula #40 - Once you enter Gerudo Valley, walk forward and you'll come to a wooden ramp. If you turn to the right, there is some water coming out of a hole in the wall. At nighttime, the Gold Skulltula can be found here.}}<section end=40 /> | ||
<section begin=41 />{{Gallery/Box|file=OoT-Gold-Skulltula-041.jpg|caption='''Location''': [[Lake Hylia]] | <section begin=41 />{{Gallery/Box|file=OoT-Gold-Skulltula-041.jpg|caption='''Location''': [[Lake Hylia]] | ||
| Line 263: | Line 263: | ||
'''Conditions''': [[Boomerang]] (Past) (Night) | '''Conditions''': [[Boomerang]] (Past) (Night) | ||
Gold Skulltula #41 - At the northwest side of Lake Hylia, walk onto the bridge near the Lakeside Laboratory. At nighttime look at the building and you’ll find a Skulltula. Defeat it and use the Boomerang to snag the token.}}<section end=41 /> | Gold Skulltula #41 - At the northwest side of Lake Hylia, walk onto the bridge near the Lakeside Laboratory. At nighttime, look at the building and you’ll find a Skulltula. Defeat it and use the Boomerang to snag the token.}}<section end=41 /> | ||
<section begin=42 />{{Gallery/Box|file=OoT-Gold-Skulltula-042.jpg|caption='''Location''': [[Hyrule Field]] | <section begin=42 />{{Gallery/Box|file=OoT-Gold-Skulltula-042.jpg|caption='''Location''': [[Hyrule Field]] | ||
| Line 269: | Line 269: | ||
'''Conditions''': [[Boomerang]] | '''Conditions''': [[Boomerang]] | ||
Gold Skulltula #42 - Located in Hyrule Field, right near the entrance to Kakariko Village. Just north of the small bridge that is between Castle Town and Kakariko Village, you will find a tree. The Shard of Agony will chime when you are nearby. Inside you will find a Big Skulltula and a Gold Skulltula higher up on the wall.}}<section end=42 /> | Gold Skulltula #42 - Located in Hyrule Field, right near the entrance to Kakariko Village. Just north of the small bridge that is between Castle Town and Kakariko Village, you will find a tree. The Shard of Agony will chime when you are nearby. Inside, you will find a Big Skulltula and a Gold Skulltula higher up on the wall.}}<section end=42 /> | ||
<section begin=43 />{{Gallery/Box|file=OoT-Gold-Skulltula-043.jpg|caption='''Location''': [[Kakariko Village Graveyard|Kakariko Graveyard]] | <section begin=43 />{{Gallery/Box|file=OoT-Gold-Skulltula-043.jpg|caption='''Location''': [[Kakariko Village Graveyard|Kakariko Graveyard]] | ||
| Line 287: | Line 287: | ||
'''Conditions''': [[Hookshot]] (Night) | '''Conditions''': [[Hookshot]] (Night) | ||
Gold Skulltula #45 - The Gold Skulltula is located on top of Impa's House in Kakariko Village. Make your way to the south end of Kakariko Village, next to Impa's House. From here, Hookshot onto the roof of the Skulltula House and then Hookshot onto the roof of Impa's House. At nighttime you will find a Gold Skulltula located here.}}<section end=45 /> | Gold Skulltula #45 - The Gold Skulltula is located on top of Impa's House in Kakariko Village. Make your way to the south end of Kakariko Village, next to Impa's House. From here, Hookshot onto the roof of the Skulltula House and then Hookshot onto the roof of Impa's House. At nighttime, you will find a Gold Skulltula located here.}}<section end=45 /> | ||
<section begin=46 />{{Gallery/Box|file=OoT-Gold-Skulltula-046.jpg|caption='''Location''': [[Ganon's Castle]] | <section begin=46 />{{Gallery/Box|file=OoT-Gold-Skulltula-046.jpg|caption='''Location''': [[Ganon's Castle]] | ||
| Line 305: | Line 305: | ||
'''Conditions''': Plant [[Magic Bean]] (Night) | '''Conditions''': Plant [[Magic Bean]] (Night) | ||
Gold Skulltula #48 - At nighttime in the Meadow of the Lost Woods. From the entrance of the Lost Woods, head right, left, right, left, and left to reach the Meadow. Ride the Magic Bean | Gold Skulltula #48 - At nighttime in the Meadow of the Lost Woods. From the entrance of the Lost Woods, head right, left, right, left, and left to reach the Meadow. Ride the Magic Bean plant up to the top and slash away at the Gold Skulltula.}}<section end=48 /> | ||
<section begin=49 />{{Gallery/Box|file=OoT-Gold-Skulltula-049.jpg|caption='''Location''': [[Sacred Forest Meadow]] | <section begin=49 />{{Gallery/Box|file=OoT-Gold-Skulltula-049.jpg|caption='''Location''': [[Sacred Forest Meadow]] | ||
| Line 329: | Line 329: | ||
'''Conditions''': [[Hookshot]] | '''Conditions''': [[Hookshot]] | ||
Gold Skulltula #52 - In the | Gold Skulltula #52 - In the courtyard northeast of the center room, you'll find a treasure chest on a higher ledge. Use the Hookshot to latch on to the front of the chest, pulling you up to the higher ledge. From here, find the Skulltula right around the corner.}}<section end=52 /> | ||
<section begin=53 />{{Gallery/Box|file=OoT-Gold-Skulltula-053.jpg|caption='''Location''': [[Forest Temple (Ocarina of Time)|Forest Temple]] | <section begin=53 />{{Gallery/Box|file=OoT-Gold-Skulltula-053.jpg|caption='''Location''': [[Forest Temple (Ocarina of Time)|Forest Temple]] | ||
| Line 335: | Line 335: | ||
'''Conditions''': [[Hookshot]] | '''Conditions''': [[Hookshot]] | ||
Gold Skulltula #53 - When you | Gold Skulltula #53 - When you enter the other courtyard northwest of the center room, jump over to the narrow platform with recovery hearts. From there, look up against the wall and you'll find the Gold Skulltula.}}<section end=53 /> | ||
<section begin=54 />{{Gallery/Box|file=OoT-Gold-Skulltula-054.jpg|caption='''Location''': [[Forest Temple (Ocarina of Time)|Forest Temple]] | <section begin=54 />{{Gallery/Box|file=OoT-Gold-Skulltula-054.jpg|caption='''Location''': [[Forest Temple (Ocarina of Time)|Forest Temple]] | ||
| Line 341: | Line 341: | ||
'''Conditions''': [[Hookshot]] | '''Conditions''': [[Hookshot]] | ||
Gold Skulltula #54 - In the | Gold Skulltula #54 - In the basement of the Forest Temple, just before the boss, there is a Gold Skulltula located in the room with the Treasure Chest.}}<section end=54 /> | ||
<section begin=55 />{{Gallery/Box|file=OoT-Gold-Skulltula-055.jpg|caption='''Location''': [[Dodongo's Cavern]] | <section begin=55 />{{Gallery/Box|file=OoT-Gold-Skulltula-055.jpg|caption='''Location''': [[Dodongo's Cavern]] | ||
| Line 347: | Line 347: | ||
'''Conditions''': [[Scarecrow's Song]], [[Hookshot]] | '''Conditions''': [[Scarecrow's Song]], [[Hookshot]] | ||
Gold Skulltula #55 - Re-enter Dodongo's Cavern and make your way to the room at the southeast part of the main room. This is the room with the Baby | Gold Skulltula #55 - Re-enter Dodongo's Cavern and make your way to the room at the southeast part of the main room. This is the room with the Baby Dodongos and if you pay close attention, you'll notice Navi will fly up to a higher ledge and turn green. Play the Scarecrow's Song to summon Pierre and Hookshot up to find a Gold Skulltula.}}<section end=55 /> | ||
<section begin=56 />{{Gallery/Box|file=OoT-Gold-Skulltula-056.jpg|caption='''Location''': [[Goron City]] | <section begin=56 />{{Gallery/Box|file=OoT-Gold-Skulltula-056.jpg|caption='''Location''': [[Goron City]] | ||
| Line 365: | Line 365: | ||
'''Conditions''': Enter Fire Temple | '''Conditions''': Enter Fire Temple | ||
Gold Skulltula #58 - In the large lava room with the broken bridge, found very early in the dungeon, turn to the left and you'll find a | Gold Skulltula #58 - In the large lava room with the broken bridge, found very early in the dungeon, turn to the left and you'll find a Time Block on a higher ledge. Stand on the lower platform and play the Song of Time when Navi turns green. Climb up and enter the room here. Defeat the [[Flying Tile|Floor Tiles]] and [[Like Like]] to find the Gold Skulltula on the back wall.}}<section end=58 /> | ||
<section begin=59 />{{Gallery/Box|file=OoT-Gold-Skulltula-059.jpg|caption='''Location''': [[Fire Temple (Ocarina of Time)|Fire Temple]] | <section begin=59 />{{Gallery/Box|file=OoT-Gold-Skulltula-059.jpg|caption='''Location''': [[Fire Temple (Ocarina of Time)|Fire Temple]] | ||
| Line 389: | Line 389: | ||
'''Conditions''': [[Megaton Hammer]] | '''Conditions''': [[Megaton Hammer]] | ||
Gold Skulltula #62 - In the room just before the second battle with the Flare Dancer, block all the Floor Tiles and defeat the Like | Gold Skulltula #62 - In the room just before the second battle with the Flare Dancer, block all the Floor Tiles and defeat the Like Like. The Skulltula is found on the back wall.}}<section end=62 /> | ||
<section begin=63 />{{Gallery/Box|file=OoT-Gold-Skulltula-063.jpg|caption='''Location''': [[Death Mountain Trail]] | <section begin=63 />{{Gallery/Box|file=OoT-Gold-Skulltula-063.jpg|caption='''Location''': [[Death Mountain Trail]] | ||
| Line 401: | Line 401: | ||
'''Conditions''': [[Megaton Hammer]] (Night) | '''Conditions''': [[Megaton Hammer]] (Night) | ||
Gold Skulltula #64 - Located on the Death Mountain Trail, near the entrance to Goron City. There is boulder located just above Dodongo's Cavern and you'll need the Megaton Hammer to break it. The Skulltula can be found hiding behind it.}}<section end=64 /> | Gold Skulltula #64 - Located on the Death Mountain Trail, near the entrance to Goron City. There is a boulder located just above Dodongo's Cavern and you'll need the Megaton Hammer to break it. The Skulltula can be found hiding behind it.}}<section end=64 /> | ||
<section begin=65 />{{Gallery/Box|file=OoT-Gold-Skulltula-065.jpg|caption='''Location''': [[Zora's River]] | <section begin=65 />{{Gallery/Box|file=OoT-Gold-Skulltula-065.jpg|caption='''Location''': [[Zora's River]] | ||
| Line 407: | Line 407: | ||
'''Conditions''': [[Hookshot]] (Night) | '''Conditions''': [[Hookshot]] (Night) | ||
Gold Skulltula #65 - In Zora's River, located high up on the southern wall. Ride the Magic Bean up to the large plateau in the center of the River. If you never planted the Magic Bean, you can still reach it from the east, by swimming down the narrow stream and climbing a ladder. The Skulltula is on that southern wall. At nighttime, use the Hookshot to snag the token.}}<section end=65 /> | Gold Skulltula #65 - In Zora's River, located high up on the southern wall. Ride the Magic Bean plant up to the large plateau in the center of the River. If you never planted the Magic Bean, you can still reach it from the east, by swimming down the narrow stream and climbing a ladder. The Skulltula is on that southern wall. At nighttime, use the Hookshot to snag the token.}}<section end=65 /> | ||
<section begin=66 />{{Gallery/Box|file=OoT-Gold-Skulltula-066.jpg|caption='''Location''': [[Zora's River]] | <section begin=66 />{{Gallery/Box|file=OoT-Gold-Skulltula-066.jpg|caption='''Location''': [[Zora's River]] | ||
| Line 421: | Line 421: | ||
Gold Skulltula #67 - Found inside of Zora's Domain, there is a Skulltula near the top of the frozen waterfall. Go through King Zora's Chamber and walk right up to the edge. Turn to the left and defeat the Skulltula. This Skulltula will only appear at nighttime.}}<section end=67 /> | Gold Skulltula #67 - Found inside of Zora's Domain, there is a Skulltula near the top of the frozen waterfall. Go through King Zora's Chamber and walk right up to the edge. Turn to the left and defeat the Skulltula. This Skulltula will only appear at nighttime.}}<section end=67 /> | ||
<section begin=68 />{{Gallery/Box|file=OoT-Gold-Skulltula-068.jpg|caption='''Location''': [[Ice Cavern]] | <section begin=68 />{{Gallery/Box|file=OoT-Gold-Skulltula-068.jpg|caption='''Location''': [[Ice Cavern (Ocarina of Time)|Ice Cavern]] | ||
'''Conditions''': [[Hookshot]] | '''Conditions''': [[Hookshot]] | ||
| Line 427: | Line 427: | ||
Gold Skulltula #68 - In the Ice Cavern, make your way to the first spinning blade room with the Silver Rupees. The Skulltula is located high up on the wall, just above one of the silver rupees. Use the Hookshot to snag the token.}}<section end=68 /> | Gold Skulltula #68 - In the Ice Cavern, make your way to the first spinning blade room with the Silver Rupees. The Skulltula is located high up on the wall, just above one of the silver rupees. Use the Hookshot to snag the token.}}<section end=68 /> | ||
<section begin=69 />{{Gallery/Box|file=OoT-Gold-Skulltula-069.jpg|caption='''Location''': [[Ice Cavern]] | <section begin=69 />{{Gallery/Box|file=OoT-Gold-Skulltula-069.jpg|caption='''Location''': [[Ice Cavern (Ocarina of Time)|Ice Cavern]] | ||
'''Conditions''': [[Hookshot]], [[Blue Fire]] | '''Conditions''': [[Hookshot]], [[Blue Fire]] | ||
Gold Skulltula #69 - In the Ice Cavern, located in the room with the [[Compass]]. From the first spinning blade room, use Blue Fire to melt the Red Ice and head east. The Gold Skulltula is hidden up on a higher pillar. Use the Hookshot to grab the | Gold Skulltula #69 - In the Ice Cavern, located in the room with the [[Compass]]. From the first spinning blade room, use Blue Fire to melt the Red Ice and head east. The Gold Skulltula is hidden up on a higher pillar. Use the Hookshot to grab the token.}}<section end=69 /> | ||
<section begin=70 />{{Gallery/Box|file=OoT-Gold-Skulltula-070.jpg|caption='''Location''': [[Ice Cavern]] | <section begin=70 />{{Gallery/Box|file=OoT-Gold-Skulltula-070.jpg|caption='''Location''': [[Ice Cavern (Ocarina of Time)|Ice Cavern]] | ||
'''Conditions''': [[Hookshot]], [[Blue Fire]] | '''Conditions''': [[Hookshot]], [[Blue Fire]] | ||
| Line 445: | Line 445: | ||
Gold Skulltula #71 - Enter the [[Lakeside Laboratory]] and use the Iron Boots to sink down to the bottom of the small pool. Roll into the wooden crate here and and a Skulltula will pop out. Use the Hookshot to defeat it and grab the token.}}<section end=71 /> | Gold Skulltula #71 - Enter the [[Lakeside Laboratory]] and use the Iron Boots to sink down to the bottom of the small pool. Roll into the wooden crate here and and a Skulltula will pop out. Use the Hookshot to defeat it and grab the token.}}<section end=71 /> | ||
<section begin=72 />{{Gallery/Box|file=OoT-Gold-Skulltula-072.jpg|caption='''Location''': [[Water Temple]] | <section begin=72 />{{Gallery/Box|file=OoT-Gold-Skulltula-072.jpg|caption='''Location''': [[Water Temple (Ocarina of Time)|Water Temple]] | ||
'''Conditions''': [[Iron Boots]] | '''Conditions''': [[Iron Boots]] | ||
Gold Skulltula #72 - On the lowest level of the main room, walk through the south path and bomb the floor. Travel to the next room, step on the switch, and | Gold Skulltula #72 - On the lowest level of the main room, walk through the south path and bomb the floor. Travel to the next room, step on the switch, and Hookshot over to the target. Hit the crystal switch and snag the Gold Skulltula. '''NOTE''': In the Nintendo 64 version of this game, the crystal switch is behind the gate. You'll need to use a spin attack to hit the crystal switch.}}<section end=72 /> | ||
<section begin=73 />{{Gallery/Box|file=OoT-Gold-Skulltula-073.jpg|caption='''Location''': [[Water Temple]] | <section begin=73 />{{Gallery/Box|file=OoT-Gold-Skulltula-073.jpg|caption='''Location''': [[Water Temple (Ocarina of Time)|Water Temple]] | ||
'''Conditions''': [[Longshot]] | '''Conditions''': [[Longshot]] | ||
| Line 457: | Line 457: | ||
Gold Skulltula #73 - After acquiring the Longshot and traveling through the area with the vortexes in the water, you'll find a Skulltula on one of the walls. Use the Iron Boots and Longshot to defeat the Skulltula while in the water.}}<section end=73 /> | Gold Skulltula #73 - After acquiring the Longshot and traveling through the area with the vortexes in the water, you'll find a Skulltula on one of the walls. Use the Iron Boots and Longshot to defeat the Skulltula while in the water.}}<section end=73 /> | ||
<section begin=74 />{{Gallery/Box|file=OoT-Gold-Skulltula-074.jpg|caption='''Location''': [[Water Temple]] | <section begin=74 />{{Gallery/Box|file=OoT-Gold-Skulltula-074.jpg|caption='''Location''': [[Water Temple (Ocarina of Time)|Water Temple]] | ||
'''Conditions''': [[Longshot]] | '''Conditions''': [[Longshot]] | ||
| Line 463: | Line 463: | ||
Gold Skulltula #74 - Once you have the Longshot, return to the room west of the main chamber on the highest floor. Use the Longshot to defeat the Skulltula on the wall to the right and snag the Gold Skulltula.}}<section end=74 /> | Gold Skulltula #74 - Once you have the Longshot, return to the room west of the main chamber on the highest floor. Use the Longshot to defeat the Skulltula on the wall to the right and snag the Gold Skulltula.}}<section end=74 /> | ||
<section begin=75 />{{Gallery/Box|file=OoT-Gold-Skulltula-075.jpg|caption='''Location''': [[Water Temple]] | <section begin=75 />{{Gallery/Box|file=OoT-Gold-Skulltula-075.jpg|caption='''Location''': [[Water Temple (Ocarina of Time)|Water Temple]] | ||
'''Conditions''': [[Longshot]] | '''Conditions''': [[Longshot]] | ||
| Line 469: | Line 469: | ||
Gold Skulltula #75 - Inside the large central pillar of the main room, once you have the Longshot, you will be able to defeat a Skulltula all the way at the top of the room and snag the token.}}<section end=75 /> | Gold Skulltula #75 - Inside the large central pillar of the main room, once you have the Longshot, you will be able to defeat a Skulltula all the way at the top of the room and snag the token.}}<section end=75 /> | ||
<section begin=76 />{{Gallery/Box|file=OoT-Gold-Skulltula-076.jpg|caption='''Location''': [[Water Temple]] | <section begin=76 />{{Gallery/Box|file=OoT-Gold-Skulltula-076.jpg|caption='''Location''': [[Water Temple (Ocarina of Time)|Water Temple]] | ||
'''Conditions''': [[Longshot]] | '''Conditions''': [[Longshot]] | ||
Gold Skulltula #76 - In the area of the Water Temple, right before you acquire the [Boss Key]], there is a small waterfall with a Skulltula hiding behind it. Stand on the ledge and inch forward to the edge of the floor. Look to the right to find a Skulltula. Use the Longshot to defeat it and snag the token.}}<section end=76 /> | Gold Skulltula #76 - In the area of the Water Temple, right before you acquire the [[Boss Key]], there is a small waterfall with a Skulltula hiding behind it. Stand on the ledge and inch forward to the edge of the floor. Look to the right to find a Skulltula. Use the Longshot to defeat it and snag the token.}}<section end=76 /> | ||
<section begin=77 />{{Gallery/Box|file=OoT-Gold-Skulltula-077.jpg|caption='''Location''': [[Lake Hylia]] | <section begin=77 />{{Gallery/Box|file=OoT-Gold-Skulltula-077.jpg|caption='''Location''': [[Lake Hylia]] | ||
| Line 503: | Line 503: | ||
'''Conditions''': Enter [[Bottom of the Well]] | '''Conditions''': Enter [[Bottom of the Well]] | ||
Gold Skulltula #81 - At the top-right corner of the Bottom of the | Gold Skulltula #81 - At the top-right corner of the Bottom of the Well, crawl through the small hole and use a key on the locked door. Carefully navigate through this room, avoiding the invisible pits. In the next room with the [[Like Like]], the Skulltula can be found on the wall.}}<section end=81 /> | ||
<section begin=82 />{{Gallery/Box|file=OoT-Gold-Skulltula-082.jpg|caption='''Location''': [[Shadow Temple]] | <section begin=82 />{{Gallery/Box|file=OoT-Gold-Skulltula-082.jpg|caption='''Location''': [[Shadow Temple]] | ||
| Line 509: | Line 509: | ||
'''Conditions''': [[Hover Boots]] | '''Conditions''': [[Hover Boots]] | ||
Gold Skulltula #82 - After going down the pathway with the guillotines and reaching the lone Stalfos, take the path on the left, using the [[Lens of Truth]]. Defeat the [[Like | Gold Skulltula #82 - After going down the pathway with the guillotines and reaching the lone Stalfos, take the path on the left, using the [[Lens of Truth]]. Defeat the [[Like Like]] and all the [[Keese]] to unlock the gate and defeat the Skulltula.}}<section end=82 /> | ||
<section begin=83 />{{Gallery/Box|file=OoT-Gold-Skulltula-083.jpg|caption='''Location''': [[Shadow Temple]] | <section begin=83 />{{Gallery/Box|file=OoT-Gold-Skulltula-083.jpg|caption='''Location''': [[Shadow Temple]] | ||
| Line 521: | Line 521: | ||
'''Conditions''': [[Hover Boots]] | '''Conditions''': [[Hover Boots]] | ||
Gold Skulltula #84 - The Skulltula can be found in the room with the giant skull, where you have to toss a bomb into it to find a small key. There is a | Gold Skulltula #84 - The Skulltula can be found in the room with the giant skull, where you have to toss a bomb into it to find a small key. There is a Gold Skulltula tucked away behind where the skull stood.}}<section end=84 /> | ||
<section begin=85 />{{Gallery/Box|file=OoT-Gold-Skulltula-085.jpg|caption='''Location''': [[Shadow Temple]] | <section begin=85 />{{Gallery/Box|file=OoT-Gold-Skulltula-085.jpg|caption='''Location''': [[Shadow Temple]] | ||
| Line 539: | Line 539: | ||
'''Conditions''': [[Longshot]] or [[Epona]] (Night) | '''Conditions''': [[Longshot]] or [[Epona]] (Night) | ||
Gold Skulltula #87 - In Gerudo Valley, just behind the Carpenters tent, there is a Skulltula on the back wall. Use your Longshot to defeat it and snag the token.}}<section end=87 /> | Gold Skulltula #87 - In Gerudo Valley, just behind the Carpenters' tent, there is a Skulltula on the back wall. Use your Longshot to defeat it and snag the token.}}<section end=87 /> | ||
<section begin=88 />{{Gallery/Box|file=OoT-Gold-Skulltula-088.jpg|caption='''Location''': [[Gerudo Valley]] | <section begin=88 />{{Gallery/Box|file=OoT-Gold-Skulltula-088.jpg|caption='''Location''': [[Gerudo Valley]] | ||
| Line 547: | Line 547: | ||
Gold Skulltula #88 - In Gerudo Valley, once you cross the bridge, there is an archway just to the left. Look up on one of the sides at nighttime to find the Skulltula.}}<section end=88 /> | Gold Skulltula #88 - In Gerudo Valley, once you cross the bridge, there is an archway just to the left. Look up on one of the sides at nighttime to find the Skulltula.}}<section end=88 /> | ||
<section begin=89 />{{Gallery/Box|file=OoT-Gold-Skulltula-089.jpg|caption='''Location''': [[Gerudo Fortress]] | <section begin=89 />{{Gallery/Box|file=OoT-Gold-Skulltula-089.jpg|caption='''Location''': [[Gerudo's Fortress]] | ||
'''Conditions''': [[Longshot]] or [[Epona]] (Night) | '''Conditions''': [[Longshot]] or [[Epona]] (Night) | ||
Gold Skulltula #89 - Located near the top of Gerudo Fortress, against the back wall. The | Gold Skulltula #89 - Located near the top of Gerudo's Fortress, against the back wall. The Skulltula is only there at nighttime. Use your Longshot to snag the token.}}<section end=89 /> | ||
<section begin=90 />{{Gallery/Box|file=OoT-Gold-Skulltula-090.jpg|caption='''Location''': [[Gerudo Fortress]] | <section begin=90 />{{Gallery/Box|file=OoT-Gold-Skulltula-090.jpg|caption='''Location''': [[Gerudo's Fortress]] | ||
'''Conditions''': [[Gerudo Membership Card]] (Night) | '''Conditions''': [[Gerudo Membership Card]] (Night) | ||
Gold Skulltula #90 - At nighttime in the Gerudo Fortress, head to the back area where the archery game is located. Located on the target at the far end of the area is a Gold Skulltula. Use the Longshot to defeat it and collect the token.}}<section end=90 /> | Gold Skulltula #90 - At nighttime in the Gerudo's Fortress, head to the back area where the archery game is located. Located on the target at the far end of the area is a Gold Skulltula. Use the Longshot to defeat it and collect the token.}}<section end=90 /> | ||
<section begin=91 />{{Gallery/Box|file=OoT-Gold-Skulltula-091.jpg|caption='''Location''': [[Haunted Wasteland]] | <section begin=91 />{{Gallery/Box|file=OoT-Gold-Skulltula-091.jpg|caption='''Location''': [[Haunted Wasteland]] | ||
| Line 581: | Line 581: | ||
'''Conditions''': Reach [[Desert Colossus]] (Night) | '''Conditions''': Reach [[Desert Colossus]] (Night) | ||
Gold Skulltula #94 - Near the | Gold Skulltula #94 - Near the oasis at the south end of the Desert Colossus, you'll find the Skulltula at the top of one of the palm trees at nighttime. Use the Longshot to defeat it and grab the token.}}<section end=94 /> | ||
<section begin=95 />{{Gallery/Box|file=OoT-Gold-Skulltula-095.jpg|caption='''Location''': [[Spirit Temple]] | <section begin=95 />{{Gallery/Box|file=OoT-Gold-Skulltula-095.jpg|caption='''Location''': [[Spirit Temple]] | ||
| Line 593: | Line 593: | ||
'''Conditions''': Enter [[Spirit Temple]] (Past) | '''Conditions''': Enter [[Spirit Temple]] (Past) | ||
Gold Skulltula #96 - As a child in the Spirit Temple, the Skulltula is located in the room with the Bombchu puzzle. Once you enter the room, climb the wall where there are two regular | Gold Skulltula #96 - As a child in the Spirit Temple, the Skulltula is located in the room with the Bombchu puzzle. Once you enter the room, climb the wall where there are two regular Skulltulas. Turn around and look down to find the Gold Skulltula. Use the Boomerang to defeat it and snag the token.}}<section end=96 /> | ||
<section begin=97 />{{Gallery/Box|file=OoT-Gold-Skulltula-097.jpg|caption='''Location''': [[Spirit Temple]] | <section begin=97 />{{Gallery/Box|file=OoT-Gold-Skulltula-097.jpg|caption='''Location''': [[Spirit Temple]] | ||
| Line 605: | Line 605: | ||
'''Conditions''': [[Silver Gauntlets]] | '''Conditions''': [[Silver Gauntlets]] | ||
Gold Skulltula #98 - As an adult in the Spirit Temple, the Skulltula is located in the room with rolling boulders and five silver rupees. Play the Song of Time in front of | Gold Skulltula #98 - As an adult in the Spirit Temple, the Skulltula is located in the room with rolling boulders and five silver rupees. Play the Song of Time in front of the Time Block to find the Skulltula hidden right behind.}}<section end=98 /> | ||
<section begin=99 />{{Gallery/Box|file=OoT-Gold-Skulltula-099.jpg|caption='''Location''': [[Spirit Temple]] | <section begin=99 />{{Gallery/Box|file=OoT-Gold-Skulltula-099.jpg|caption='''Location''': [[Spirit Temple]] | ||
Revision as of 15:16, January 6, 2019
This guide shows the locations of the 100 Gold Skulltulas from the Nintendo 64 version and the Nintendo 3DS version. While the Gold Skulltulas are numbered in roughly the order you can collect them in, they are broken down by locations below.
Rewards
| Name | Token) |
|---|---|
| Adult's Wallet | 10 |
| Shard of Agony (3DS) Stone of Agony (N64) |
20 |
| Giant's Wallet | 30 |
| Bombchus | 40 |
| Piece of Heart | 50 |
| Golden Rupee | 100 |
Locations
Location: Inside The Deku Tree
Conditions: Enter the Deku Tree (Past)
Gold Skulltula #1 - In the same room with Compass, raise the platforms and use them to get onto the platform on the left side. The Skulltula is right behind the treasure chest.
Location: Inside The Deku Tree
Conditions: Enter the Deku Tree (Past)
Gold Skulltula #2 - After breaking through the spider web and reaching the lower floor of the Great Deku Tree, turn back and look at the vines leading up. Shoot down the Skulltula with the Slingshot.
Location: Inside The Deku Tree
Conditions: Enter the Deku Tree (Past)
Gold Skulltula #3 - After breaking through the spider web and reaching the lower floor of the Great Deku Tree, look at the grating at the north end of the room to find another Skulltula.
Location: Castle Town
Conditions: Reach the Castle Market (Past)
Gold Skulltula #4 - Once you enter Castle Market, enter the first building where you will find a Soldier. At the back of the room, roll into a wooden crate to get the Skulltula.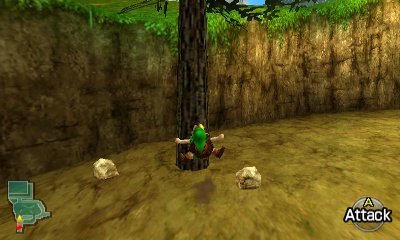
Location: Hyrule Castle
Conditions: Reach the Hyrule Castle (Past)
Gold Skulltula #5 - Exit Castle Town towards Hyrule Castle and you'll find a lone tree nearby. Roll into it to get the Skulltula to pop out.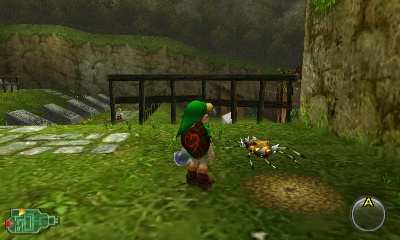
Location: Kakariko Graveyard
Conditions: An Empty Bottle and Bottle Bugs (Past)
Gold Skulltula #6 - In the Graveyard, there is a soft soil location on the left side. Drop some bugs from a bottle to get a Skulltula to pop out.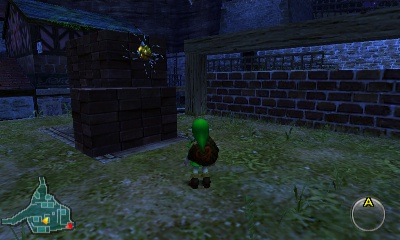
Location: Kakariko Village
Conditions: Reach Kakariko Village (Past) (Night)
Gold Skulltula #7 - There is a building under construction at the center of the village. At nighttime, a Gold Skulltula will appear.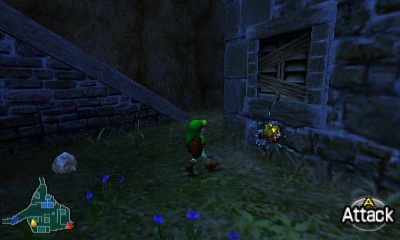
Location: Kakariko Village
Conditions: Reach Kakariko Village (Past) (Night)
Gold Skulltula #8 - At the side of the Skulltula House, there is a Gold Skulltula found here at nighttime.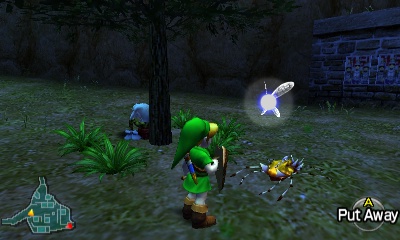
Location: Kakariko Village
Conditions: Reach Kakariko Village (Past) (Night)
Gold Skulltula #9 - Right when you enter the Village, there is a tree straight ahead. Roll into the tree and a Skulltula will pop out.
Location: Kakariko Village
Conditions: Reach Kakariko Village (Past) (Night)
Gold Skulltula #10 - At nighttime, a Gold Skulltula will appear near the top of the watch tower. Shoot it down with your Slingshot.
Location: Kakariko Village
Conditions: Reach Kakariko Village (Past) (Night)
Gold Skulltula #11 - Found at nighttime on the side of the house located closest to the gate that leads to Death Mountain.
Location: Lon Lon Ranch
Conditions: Reach Lon Lon Ranch (Past)
Gold Skulltula #12 - Once you enter the Ranch, walk forward past the initial buildings and turn left. Roll into the nearby tree and a Skulltula will fall down from the tree.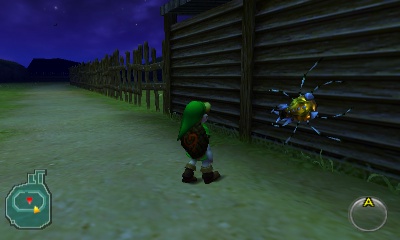
Location: Lon Lon Ranch
Conditions: Reach Lon Lon Ranch (Past) (Night)
Gold Skulltula #13 - On the outside of the corral, at the southeast part of the area. Just behind the wooden boards, a Gold Skulltula can be found here at nighttime.
Location: Gerudo Valley
Conditions: An Empty Bottle and Bottle Bugs (Past)
Gold Skulltula #14 - At Gerudo Valley, grab a Cucco and leap off the ledge towards the water below. Along the west side of the water, you'll find a Gerudo next to a soft soil location. Drop some bugs to get the Skulltula.
Location: Lake Hylia
Conditions: An Empty Bottle and Bottle Bugs (Past)
Gold Skulltula #15 - Near the Lakeside Laboratory at the northwest portion of the area, you will find a soft soil location. Drop some bugs to get the Skulltula.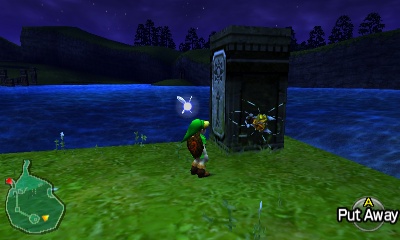
Location: Lake Hylia
Conditions: Reach Lake Hylia (Past)
Gold Skulltula #16 - At Lake Hylia, there is an island at the southeast corner of the map. This Gold Skulltula will only appear at nighttime.
Location: Kokiri Forest
Conditions: (Night) (Past)
Gold Skulltula #17 - Found only at nighttime in the Kokiri Forest. The Skulltula is on the backside of the Know-It-All Brothers' House, located at the southwest part of the village.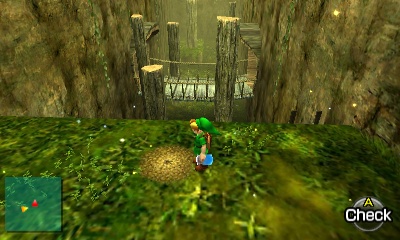
Location: Lost Woods
Conditions: An Empty Bottle and Bottle Bugs (Past)
Gold Skulltula #18 - From the entrance of the Lost Woods, go left and left again. Drop some bugs into the Soft Soil and the Skulltula will pop out.
Location: Lost Woods
Conditions: An Empty Bottle and Bottle Bugs (Past)
Gold Skulltula #19 - From the entrance of the Lost Woods, go right, left, right, left, and left to find yourself in a Meadow. Walk forward and you'll find a Soft Soil location. Drop some bugs and the Skulltula will pop out.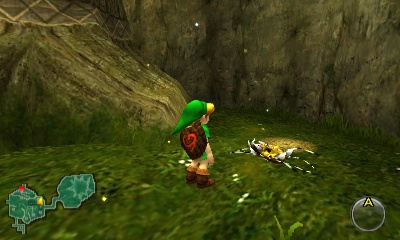
Location: Kokiri Forest
Conditions: An Empty Bottle and Bottle Bugs (Past)
Gold Skulltula #20 - Right behind the Kokiri Shop, you will find a soft soil location. Drop some bugs to get the Skulltula.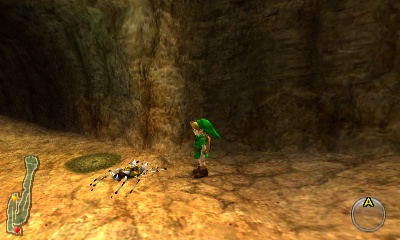
Location: Death Mountain Trail
Conditions: An Empty Bottle and Bottle Bugs (Past)
Gold Skulltula #21 - Right outside of Dodongo's Cavern, there is a Soft Soil location. Drop some bugs into it and the Skulltula will appear.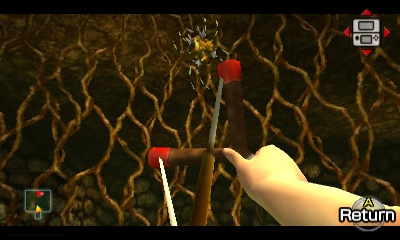
Location: Dodongo's Cavern
Conditions: Reach Dodongo's Cavern (Past)
Gold Skulltula #22 - In the room without the giant staircase, climb up to the very top and walk around to the south part of the room. Use the Slingshot to defeat the Skulltula and climb up to get the token.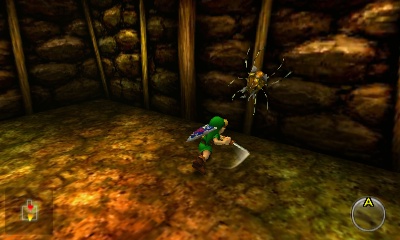
Location: Dodongo's Cavern
Conditions: Bombs are Recommended (Past)
Gold Skulltula #23 - From the entrance of the dungeon, head through the southeast door to reach the room with the Baby Dodongos. Blast away at the wall with a bomb and head down a room where you will find the Gold Skulltula.
Location: Dodongo's Cavern
Conditions: Bombs (Past)
Gold Skulltula #24 - In the room with the Fire Keese towards the end of the dungeon, there is a bombable wall at the north end of the room. Blast it open and you'll find a Gold Skulltula behind the Armos statue.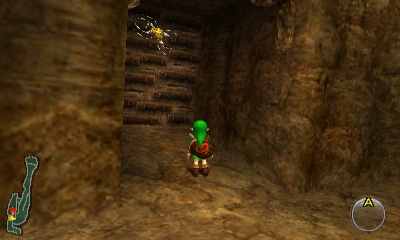
Location: Death Mountain Trail
Conditions: Bombs (Past)
Gold Skulltula #25 - On the trail between Kakariko Village and Dodongo's Cavern, there is a bombable wall on the side where you can hear a Gold Skulltula. Bomb the wall and defeat the Skulltula for the token.
Location: Goron City
Conditions: Bombs (Past)
Gold Skulltula #26 - Once you enter Goron City, bomb the three boulders on the left. This leads to a room where you should bomb the boulders along the right path. Once you reach the back of the room, roll into the wooden crate to find a Gold Skulltula.
Location: Death Mountain Crater
Conditions: Reach Death Mountain Crater (Past)
Gold Skulltula #27 - At the very top of Death Mountain, enter the Death Mountain Crater and you'll find a wooden crate. Roll into it to find a Gold Skulltula.
Location: Zora's River
Conditions: Reach Zora's River (Past)
Gold Skulltula #28 - At the entrance of Zora's River, roll into the first tree and a Gold Skulltula will pop out.
Location: Zora's River
Conditions: Acquire Bombs (Past) (Night)
Gold Skulltula #29 - At the end of Zora's River, right near the waterfall, there is a ladder leading out of the water. At nighttime, a Skulltula can be found here. Shoot it down with a Slingshot and collect the token.
Location: Zora's Fountain
Conditions: Reach Zora's Fountain (Past)
Gold Skulltula #30 - At the southeast portion of Zora's Fountain, roll into the lone tree here and the Skulltula will pop out.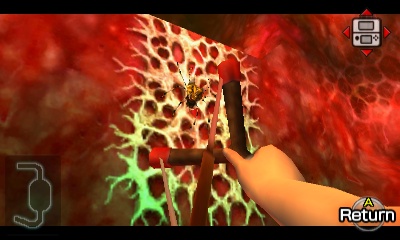
Location: Inside Jabu-Jabu's Belly
Conditions: Reach Jabu-Jaby's Belly (Past)
Gold Skulltula #31 - After meeting Ruto and falling down below, you'll pick her up and bring her to a room with a floor switch. Shoot the Skulltula on the side wall and climb up to get the token.
Location: Inside Jabu-Jabu's Belly
Conditions: Boomerang (Past)
Gold Skulltula #32 - After falling down to the lower floor for a second time, you'll find two Skulltulas on the wall. Defeat them and use the Boomerang to grab the closer token.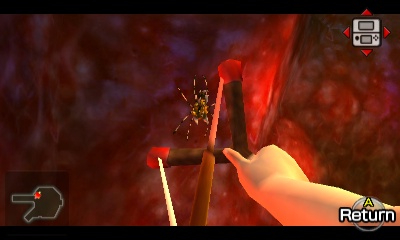
Location: Inside Jabu-Jabu's Belly
Conditions: Boomerang (Past)
Gold Skulltula #33 - After falling down to the lower floor for a second time, you'll find two Skulltulas on the wall. Defeat them and use the Boomerang to grab the further token.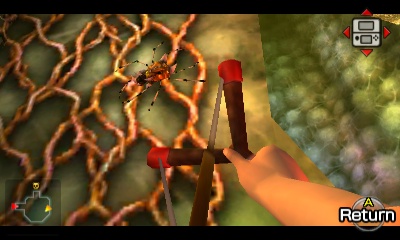
Location: Inside Jabu-Jabu's Belly
Conditions: Boomerang (Past)
Gold Skulltula #34 - In the final room before the boss, there is a Gold Skulltula on the vines. Defeat it and grab the token.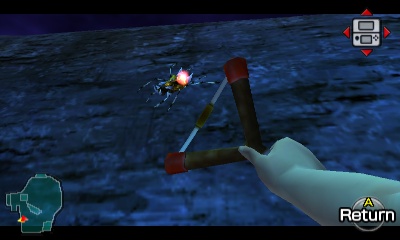
Location: Zora's Fountain
Conditions: Boomerang (Past) (Night)
Gold Skulltula #35 - At Zora's Fountain, stand on the log just south of Lord Jabu-Jabu. At nighttime, there will be a Skulltula crawling around on the wall. Toss your Boomerang at it to defeat it and collect the token.
Location: Inside The Deku Tree
Conditions: Boomerang (Past)
Gold Skulltula #36 - Way back inside of the Great Deku Tree. There was a room in the first basement at the northwest corner of the map that we previously never entered. Burn the spider web and then blast the boulder away with a bomb. Inside, you will find a Gold Skulltula on the wall. Use the Boomerang to snag the token.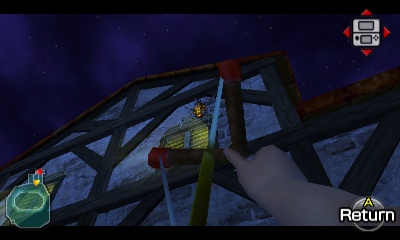
Location: Lon Lon Ranch
Conditions: Boomerang (Past) (Night)
Gold Skulltula #37 - Once you enter Lon Lon Ranch at nighttime, you will find a Gold Skulltula on the window of the building on the left side. Defeat the Skulltula and collect the token with the Boomerang.
Location: Lon Lon Ranch
Conditions: Boomerang (Past) (Night)
Gold Skulltula #38 - At Lon Lon Ranch at nighttime, make your way to the far southwest side of the map. Higher up on the edge, you will find a Skulltula. Defeat it and retrieve the token with the Boomerang.
Location: Hyrule Field
Conditions: Boomerang and Din's Fire
Gold Skulltula #39 - At the west end of Hyrule Field, near the entrance of Gerudo Valley, you will find a circle of rocks. The Shard of Agony will chime if you stand in the middle. Drop a bomb to blast open a hole to reveal an underground grotto. Use Din's Fire to burn all of the spider webs and you’ll find a Cow. Behind the cow up near the top, there is a Gold Skulltula. Use the Boomerang to retrieve the token.
Location: Gerudo Valley
Conditions: Boomerang (Past) (Night)
Gold Skulltula #40 - Once you enter Gerudo Valley, walk forward and you'll come to a wooden ramp. If you turn to the right, there is some water coming out of a hole in the wall. At nighttime, the Gold Skulltula can be found here.
Location: Lake Hylia
Conditions: Boomerang (Past) (Night)
Gold Skulltula #41 - At the northwest side of Lake Hylia, walk onto the bridge near the Lakeside Laboratory. At nighttime, look at the building and you’ll find a Skulltula. Defeat it and use the Boomerang to snag the token.
Location: Hyrule Field
Conditions: Boomerang
Gold Skulltula #42 - Located in Hyrule Field, right near the entrance to Kakariko Village. Just north of the small bridge that is between Castle Town and Kakariko Village, you will find a tree. The Shard of Agony will chime when you are nearby. Inside, you will find a Big Skulltula and a Gold Skulltula higher up on the wall.
Location: Kakariko Graveyard
Conditions: Boomerang (Past) (Night)
Gold Skulltula #43 - Found on the wall at the southeast corner of the Graveyard. The Skulltula can be found at nighttime and you'll need the Boomerang to retrieve the token.
Location: Dodongo's Cavern
Gold Skulltula #44 - The Gold Skulltula is located in Dodongo’s Cavern, within the room with the massive explodable staircase. However, you'll have to go the long route to get this one. Ride the tall pillar up to the second floor and head east a room. Drop down below and climb the staircase at the southwest portion of the room before returning to the main room. Cross the large bridge to get back to the room with the Armos statues. Push the statue, climb the staircase, and step on the switch to unlock the door. At last, you’ll be back in the room with the giant staircase. The Skulltula is located at the top of the staircase in a cubby hole. Either go around the left side and climb the vines or jump off so you land on the steps themselves in order to find this hidden area. You'll need the Boomerang to collect the token.
Location: Kakariko Village
Conditions: Hookshot (Night)
Gold Skulltula #45 - The Gold Skulltula is located on top of Impa's House in Kakariko Village. Make your way to the south end of Kakariko Village, next to Impa's House. From here, Hookshot onto the roof of the Skulltula House and then Hookshot onto the roof of Impa's House. At nighttime, you will find a Gold Skulltula located here.
Location: Ganon's Castle
Conditions: Hookshot
Gold Skulltula #46 - Return to the Market and make your way to where Hyrule Castle used to be. You'll find that it is now Ganon's Castle. Follow the path to the right passed the archway and then turn around. The Skulltula can be found on the backside. Use the Hookshot to defeat it and grab the token.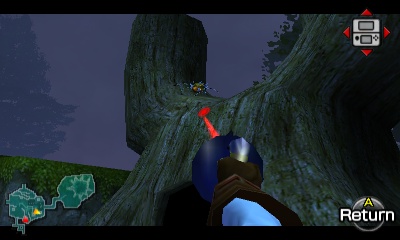
Location: Kokiri Forest
Conditions: Hookshot (Night)
Gold Skulltula #47 - At nighttime in Kokiri Forest, make your way over to the Twins' House, located at the southeast part of the forest. Use your Hookshot to defeat a Skulltula that is located above the building.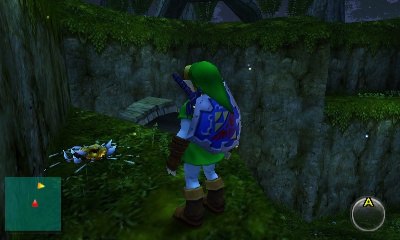
Location: Lost Woods
Conditions: Plant Magic Bean (Night)
Gold Skulltula #48 - At nighttime in the Meadow of the Lost Woods. From the entrance of the Lost Woods, head right, left, right, left, and left to reach the Meadow. Ride the Magic Bean plant up to the top and slash away at the Gold Skulltula.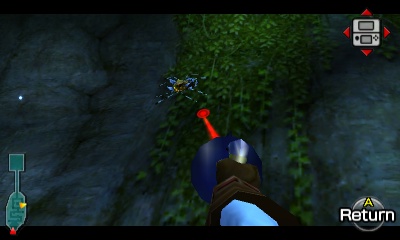
Location: Sacred Forest Meadow
Conditions: Hookshot (Night)
Gold Skulltula #49 - At nighttime in the Sacred Forest Meadow, climb up the ladder to the higher ledge and look up at the east wall. There is a Gold Skulltula that you can defeat with the Hookshot.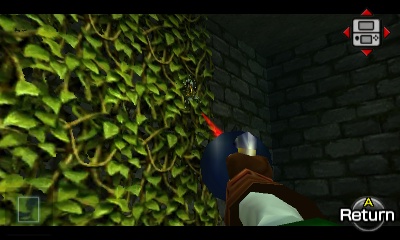
Location: Forest Temple
Conditions: Hookshot
Gold Skulltula #50 - In the first room of the Forest Temple, climb the vines on the right side. Use the Hookshot to defeat the Gold Skulltula.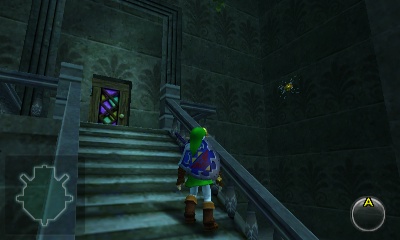
Location: Forest Temple
Conditions: Hookshot
Gold Skulltula #51 - In the large central room, run straight ahead to the north door. Look at the wall to the right and you'll find the Gold Skulltula.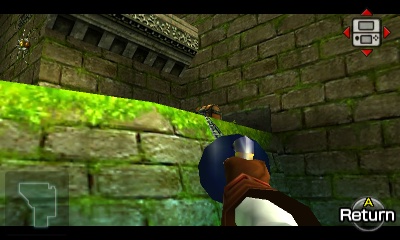
Location: Forest Temple
Conditions: Hookshot
Gold Skulltula #52 - In the courtyard northeast of the center room, you'll find a treasure chest on a higher ledge. Use the Hookshot to latch on to the front of the chest, pulling you up to the higher ledge. From here, find the Skulltula right around the corner.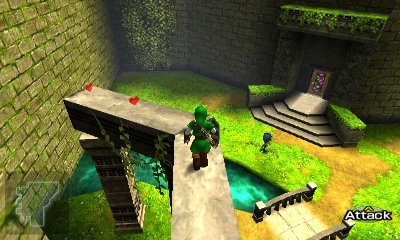
Location: Forest Temple
Conditions: Hookshot
Gold Skulltula #53 - When you enter the other courtyard northwest of the center room, jump over to the narrow platform with recovery hearts. From there, look up against the wall and you'll find the Gold Skulltula.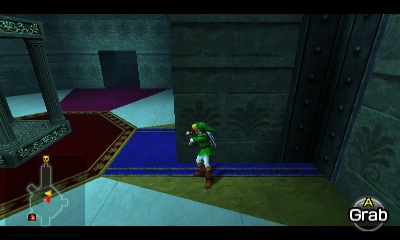
Location: Forest Temple
Conditions: Hookshot
Gold Skulltula #54 - In the basement of the Forest Temple, just before the boss, there is a Gold Skulltula located in the room with the Treasure Chest.
Location: Dodongo's Cavern
Conditions: Scarecrow's Song, Hookshot
Gold Skulltula #55 - Re-enter Dodongo's Cavern and make your way to the room at the southeast part of the main room. This is the room with the Baby Dodongos and if you pay close attention, you'll notice Navi will fly up to a higher ledge and turn green. Play the Scarecrow's Song to summon Pierre and Hookshot up to find a Gold Skulltula.
Location: Goron City
Conditions: Hookshot
Gold Skulltula #56 - Once you enter Goron City, walk across the tightropes that are straight ahead. On the backside of the pedestal located at the top of the City, you will find a Gold Skulltula.
Location: Death Mountain Crater
Conditions: Learn Bolero of Fire and Prelude of Light, Bottle Bugs
Gold Skulltula #57 - Once you have learned the Bolero of Fire, warp to the Death Mountain Crater as a child. Drop some bugs into the soft soil location to get the Skulltula to appear.
Location: Fire Temple
Conditions: Enter Fire Temple
Gold Skulltula #58 - In the large lava room with the broken bridge, found very early in the dungeon, turn to the left and you'll find a Time Block on a higher ledge. Stand on the lower platform and play the Song of Time when Navi turns green. Climb up and enter the room here. Defeat the Floor Tiles and Like Like to find the Gold Skulltula on the back wall.
Location: Fire Temple
Conditions: Enter Fire Temple
Gold Skulltula #59 - In the boulder maze room of the Fire Temple, there is a bombable wall near the northeast portion of the room. It is located on the bottom floor, right beneath the overhang. You can slash your sword against the wall and the false sound of the wall will indicate it can be bombed. Drop a bomb and defeat the Skulltula.
Location: Fire Temple
Conditions: Scarecrow's Song
Gold Skulltula #60 - In the boulder maze room of the Fire Temple, once you are on the higher level after passing through the room where the fire is chasing you, turn to the right and play the Scarecrow's Song. Hookshot to Pierre and then Hookshot to the secret elevator. Go through the door and climb the grate to find the Skulltula.
Location: Fire Temple
Conditions: Scarecrow's Song
Gold Skulltula #61 - In the boulder maze room of the Fire Temple, once you are on the higher level after passing through the room where the fire is chasing you, turn to the right and play the Scarecrow's Song. Hookshot to the secret elevator and continue to climb up until you reach the large open room. Walk close to the edge and turn to the left to find a Skulltula on the wall.
Location: Fire Temple
Conditions: Megaton Hammer
Gold Skulltula #62 - In the room just before the second battle with the Flare Dancer, block all the Floor Tiles and defeat the Like Like. The Skulltula is found on the back wall.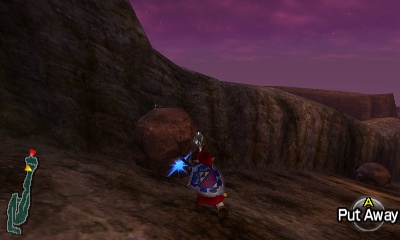
Location: Death Mountain Trail
Conditions: Megaton Hammer (Night)
Gold Skulltula #63 - Located on the Death Mountain Trail, in the area where there were falling boulders as a child. There are three rocks on this trail that you cannot break with bombs. The closest one to the summit has a Gold Skulltula hiding behind it. At nighttime, break the boulder and collect the token.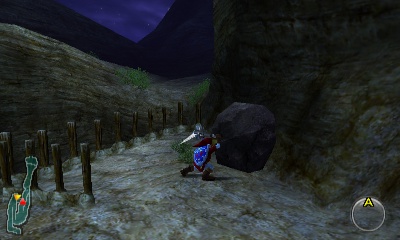
Location: Death Mountain Trail
Conditions: Megaton Hammer (Night)
Gold Skulltula #64 - Located on the Death Mountain Trail, near the entrance to Goron City. There is a boulder located just above Dodongo's Cavern and you'll need the Megaton Hammer to break it. The Skulltula can be found hiding behind it.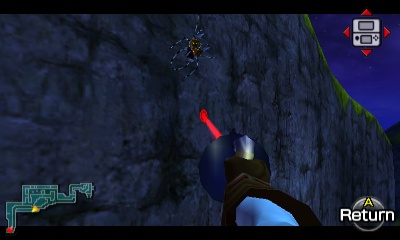
Location: Zora's River
Conditions: Hookshot (Night)
Gold Skulltula #65 - In Zora's River, located high up on the southern wall. Ride the Magic Bean plant up to the large plateau in the center of the River. If you never planted the Magic Bean, you can still reach it from the east, by swimming down the narrow stream and climbing a ladder. The Skulltula is on that southern wall. At nighttime, use the Hookshot to snag the token.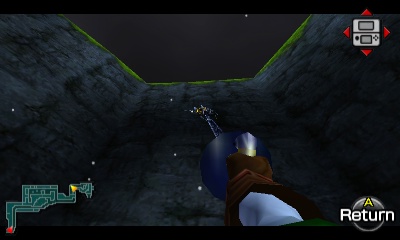
Location: Zora's River
Conditions: Hookshot (Night)
Gold Skulltula #66 - In Zora's River, once you cross the small river, heading towards Zora's Domain, if you look up high at the wall at nighttime, you'll find a Gold Skulltula. It is just out of reach from when you are standing on the ground. Jump onto the fence and your Hookshot will be able to reach it. Snag the token.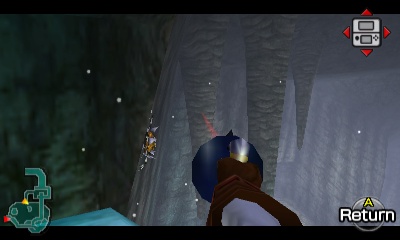
Location: Zora's Domain
Conditions: Hookshot (Night)
Gold Skulltula #67 - Found inside of Zora's Domain, there is a Skulltula near the top of the frozen waterfall. Go through King Zora's Chamber and walk right up to the edge. Turn to the left and defeat the Skulltula. This Skulltula will only appear at nighttime.
Location: Ice Cavern
Conditions: Hookshot
Gold Skulltula #68 - In the Ice Cavern, make your way to the first spinning blade room with the Silver Rupees. The Skulltula is located high up on the wall, just above one of the silver rupees. Use the Hookshot to snag the token.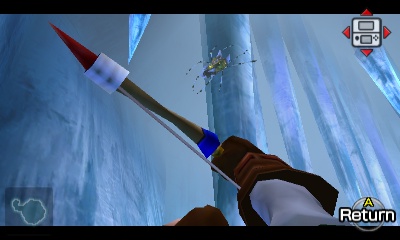
Location: Ice Cavern
Conditions: Hookshot, Blue Fire
Gold Skulltula #69 - In the Ice Cavern, located in the room with the Compass. From the first spinning blade room, use Blue Fire to melt the Red Ice and head east. The Gold Skulltula is hidden up on a higher pillar. Use the Hookshot to grab the token.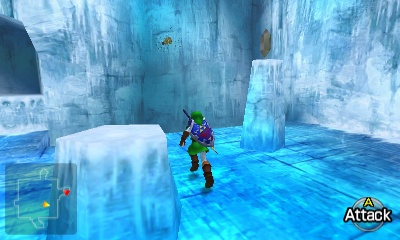
Location: Ice Cavern
Gold Skulltula #70 - In the large block pushing room of the Ice Cavern, the Gold Skulltula is found waiting on one of the higher walls.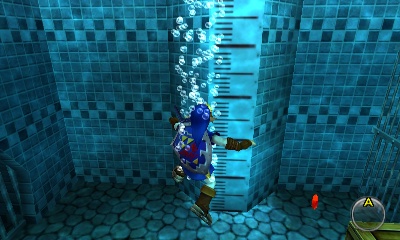
Location: Lake Hylia
Conditions: Iron Boots
Gold Skulltula #71 - Enter the Lakeside Laboratory and use the Iron Boots to sink down to the bottom of the small pool. Roll into the wooden crate here and and a Skulltula will pop out. Use the Hookshot to defeat it and grab the token.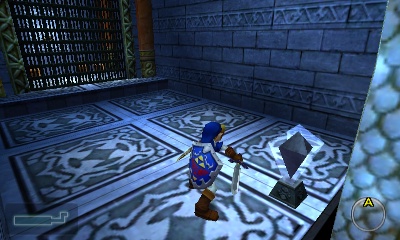
Location: Water Temple
Conditions: Iron Boots
Gold Skulltula #72 - On the lowest level of the main room, walk through the south path and bomb the floor. Travel to the next room, step on the switch, and Hookshot over to the target. Hit the crystal switch and snag the Gold Skulltula. NOTE: In the Nintendo 64 version of this game, the crystal switch is behind the gate. You'll need to use a spin attack to hit the crystal switch.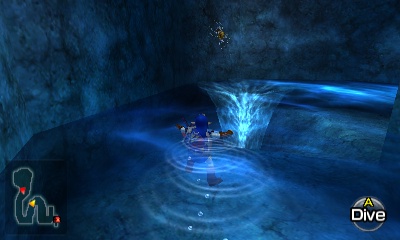
Location: Water Temple
Conditions: Longshot
Gold Skulltula #73 - After acquiring the Longshot and traveling through the area with the vortexes in the water, you'll find a Skulltula on one of the walls. Use the Iron Boots and Longshot to defeat the Skulltula while in the water.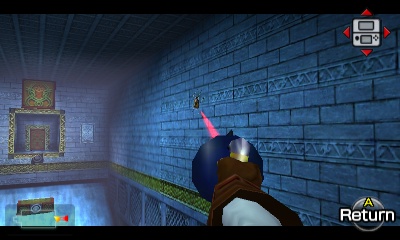
Location: Water Temple
Conditions: Longshot
Gold Skulltula #74 - Once you have the Longshot, return to the room west of the main chamber on the highest floor. Use the Longshot to defeat the Skulltula on the wall to the right and snag the Gold Skulltula.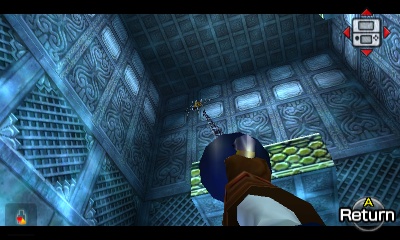
Location: Water Temple
Conditions: Longshot
Gold Skulltula #75 - Inside the large central pillar of the main room, once you have the Longshot, you will be able to defeat a Skulltula all the way at the top of the room and snag the token.
Location: Water Temple
Conditions: Longshot
Gold Skulltula #76 - In the area of the Water Temple, right before you acquire the Boss Key, there is a small waterfall with a Skulltula hiding behind it. Stand on the ledge and inch forward to the edge of the floor. Look to the right to find a Skulltula. Use the Longshot to defeat it and snag the token.
Location: Lake Hylia
Conditions: Longshot (Night)
Gold Skulltula #77 - After acquiring the Longshot, grapple up to the top of the tree, located on the island just above the entrance to the Water Temple. At nighttime, you'll find a Gold Skulltula up here.
Location: Hyrule Castle
Conditions: Song of Storms (Past)
Gold Skulltula #78 - After learning the Song of Storms, return to the pathway that leads to Hyrule Castle. Just outside Hyrule Castle, there is a tree in the corner of the gate. Stand next to it and play the Song of Storms. Drop down the hole, bomb the wall on the left, and collect the Skulltula.
Location: Bottom of the Well
Conditions: Enter Bottom of the Well
Gold Skulltula #79 - In the center room of the Bottom of the Well, there are two locked doors. The room on the left has a Deku Baba and some flying pots. The Skulltula can be found along the back wall.
Location: Bottom of the Well
Conditions: Enter Bottom of the Well
Gold Skulltula #80 - In the center room of the Bottom of the Well, there are two locked doors. The room on the right has a bunch of Keese. Defeat them and then use the Lens of Truth to find the path that leads to the Skulltula.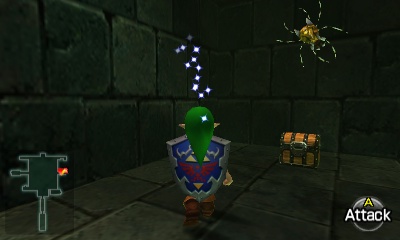
Location: Bottom of the Well
Conditions: Enter Bottom of the Well
Gold Skulltula #81 - At the top-right corner of the Bottom of the Well, crawl through the small hole and use a key on the locked door. Carefully navigate through this room, avoiding the invisible pits. In the next room with the Like Like, the Skulltula can be found on the wall.
Location: Shadow Temple
Conditions: Hover Boots
Gold Skulltula #82 - After going down the pathway with the guillotines and reaching the lone Stalfos, take the path on the left, using the Lens of Truth. Defeat the Like Like and all the Keese to unlock the gate and defeat the Skulltula.
Location: Shadow Temple
Conditions: Hover Boots
Gold Skulltula #83 - In the room with the falling spike traps, use the Lens of Truth to find a block hidden in the wall. Push the block so that it prevents both of the falling traps from hitting the ground. Check behind the fence on the left side to find the Gold Skulltula.
Location: Shadow Temple
Conditions: Hover Boots
Gold Skulltula #84 - The Skulltula can be found in the room with the giant skull, where you have to toss a bomb into it to find a small key. There is a Gold Skulltula tucked away behind where the skull stood.
Location: Shadow Temple
Conditions: Scarecrow's Song
Gold Skulltula #85 - Once you arrive on top of the large moving boat, look back to where the shortcut is located, which is by the fencing. Navi will fly up and turn green. Play the Scarecrow's Song and Longshot over to this ledge where you will find the Skulltula.
Location: Shadow Temple
Conditions: Hover Boots
Gold Skulltula #86 - In the room with the invisible walls, just before acquiring the Boss Key, head to the room to the west where you will find three spinning skulls. The Skulltula is hidden just behind them.
Location: Gerudo Valley
Gold Skulltula #87 - In Gerudo Valley, just behind the Carpenters' tent, there is a Skulltula on the back wall. Use your Longshot to defeat it and snag the token.
Location: Gerudo Valley
Gold Skulltula #88 - In Gerudo Valley, once you cross the bridge, there is an archway just to the left. Look up on one of the sides at nighttime to find the Skulltula.
Location: Gerudo's Fortress
Gold Skulltula #89 - Located near the top of Gerudo's Fortress, against the back wall. The Skulltula is only there at nighttime. Use your Longshot to snag the token.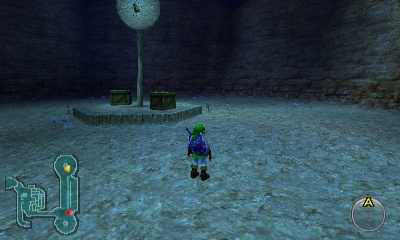
Location: Gerudo's Fortress
Conditions: Gerudo Membership Card (Night)
Gold Skulltula #90 - At nighttime in the Gerudo's Fortress, head to the back area where the archery game is located. Located on the target at the far end of the area is a Gold Skulltula. Use the Longshot to defeat it and collect the token.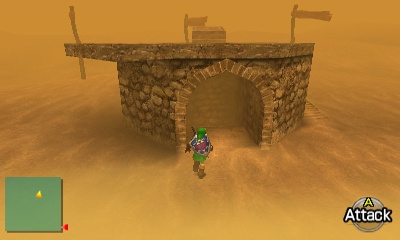
Location: Haunted Wasteland
Conditions: Gerudo Membership Card
Gold Skulltula #91 - When traveling through the Haunted Wasteland, you'll come to a lone structure right in the middle of the Desert. Drop down into the below chamber and you'll find the Skulltula ahead, right between the two torches.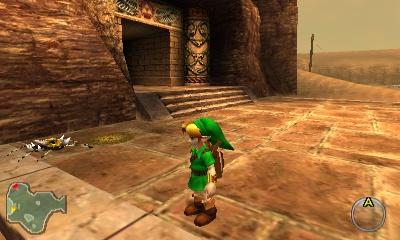
Location: Desert Colossus
Conditions: Requiem of Spirit, Bottle Bugs (Past)
Gold Skulltula #92 - As a child, drop some bugs into the Soft Soil location just outside of the Spirit Temple to get a Gold Skulltula to appear.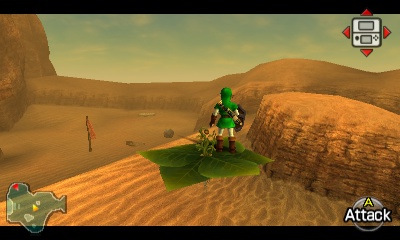
Location: Desert Colossus
Conditions: Requiem of Spirit, Magic Bean (Night)
Gold Skulltula #93 - In the Desert Colossus, ride the Magic Bean plant to a large rock, near the north-central potion of the map. Play the Sun's Song to make it nighttime and you'll find a Skulltula right here.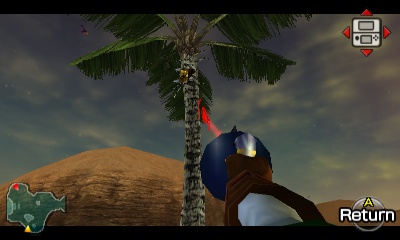
Location: Desert Colossus
Conditions: Reach Desert Colossus (Night)
Gold Skulltula #94 - Near the oasis at the south end of the Desert Colossus, you'll find the Skulltula at the top of one of the palm trees at nighttime. Use the Longshot to defeat it and grab the token.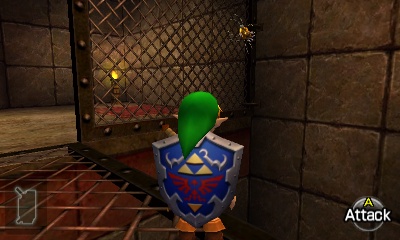
Location: Spirit Temple
Conditions: Enter Spirit Temple (Past)
Gold Skulltula #95 - As a child in the Spirit Temple, the Gold Skulltula is located in the room found early on with the five silver rupees and a Wallmaster. Grab the rupees to drop the bridge and then use your Boomerang to snag the token from the Skulltula.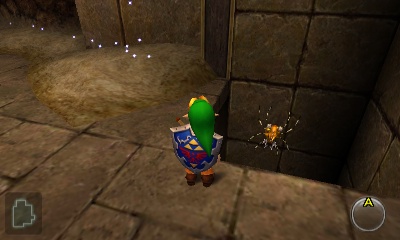
Location: Spirit Temple
Conditions: Enter Spirit Temple (Past)
Gold Skulltula #96 - As a child in the Spirit Temple, the Skulltula is located in the room with the Bombchu puzzle. Once you enter the room, climb the wall where there are two regular Skulltulas. Turn around and look down to find the Gold Skulltula. Use the Boomerang to defeat it and snag the token.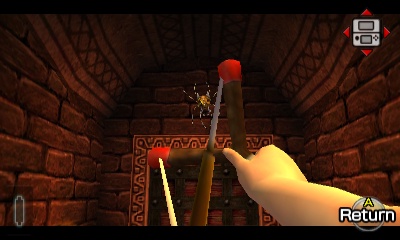
Location: Spirit Temple
Conditions: Enter Spirit Temple (Past)
Gold Skulltula #97 - As a child in the Spirit Temple, the Skulltula is located in the room just before the Iron Knuckle battle. In this narrow hallway, turn around and look at the door you came through and the Skulltula is located just above.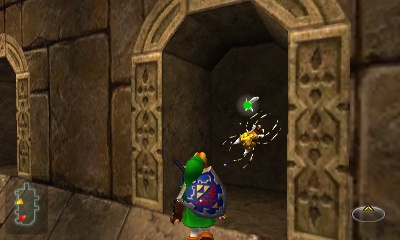
Location: Spirit Temple
Conditions: Silver Gauntlets
Gold Skulltula #98 - As an adult in the Spirit Temple, the Skulltula is located in the room with rolling boulders and five silver rupees. Play the Song of Time in front of the Time Block to find the Skulltula hidden right behind.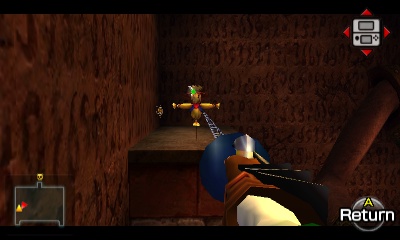
Location: Spirit Temple
Conditions: Silver Gauntlets, Scarecrow's Song
Gold Skulltula #99 - In the large Colossus room where the giant statue, climb up to the top on the west of the room. Navi will float over to a platform in the distance, so play the Scarecrow's Song. Longshot over and defeat the Skulltula here.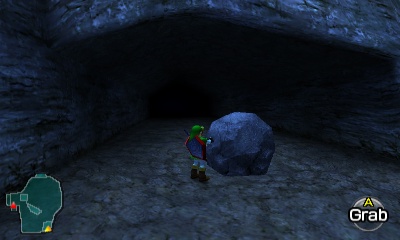
Location: Zora's Fountain
Conditions: Silver Gauntlets (Night)
Gold Skulltula #100 - At nighttime, make your way to Zora's Fountain and then head on over to the southeast corner, where the Great Fairy was located. There is a lone silver boulder here and now that you have the Silver Gauntlets, you can lift it up. Do so and then bomb the regular boulder that is underneath. Drop down and then use the Lens of Truth to navigate through this passageway. Climb up the at the end and the Gold Skulltula will be found on the wall at nighttime.


