Sonapan Shrine: Difference between revisions
Jump to navigation
Jump to search
Video Walkthrough of Sonapan Shrine
Want an adless experience? Log in or Create an account.
No edit summary |
|||
| Line 20: | Line 20: | ||
==Missing Pathways== | ==Missing Pathways== | ||
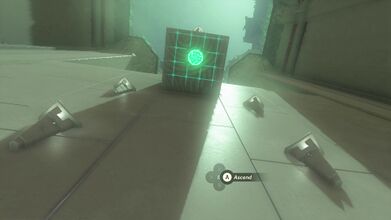
*Run forward and use [[Ascend]] to climb up to the higher area. | *Run forward and use [[Ascend]] to climb up to the higher area. | ||
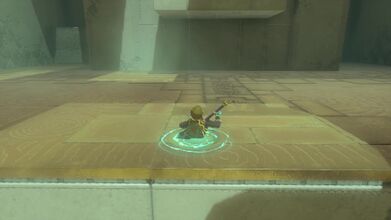
*On the right side of the room there is a box platform that you can freely move around. Grab it with Ultrahand and bring it to the center of the room. There is a platform right up on the ledge. Use Ultrahand and drop the box above the ledge. | *On the right side of the room there is a box platform that you can freely move around. Grab it with [[Ultrahand]] and bring it to the center of the room. There is a platform right up on the ledge. Use Ultrahand and drop the box above the ledge. | ||
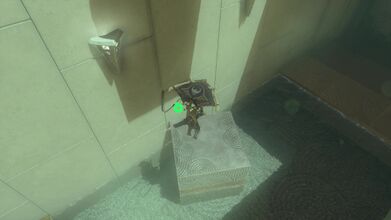
*On the left side of the room, there is a [[Treasure Chest]] in the wall. Grab the nearby platform with | *On the left side of the room, there is a [[Treasure Chest]] in the wall. Grab the nearby platform with Ultrahand and move it so it is in front of the chest. | ||
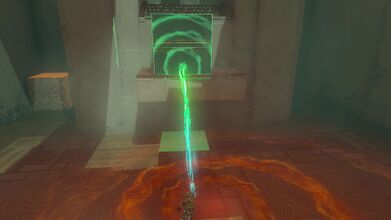
*Now return to the center of the room and use | *Now return to the center of the room and use [[Ascend]] to travel through the ledge and the box and exit on top. | ||
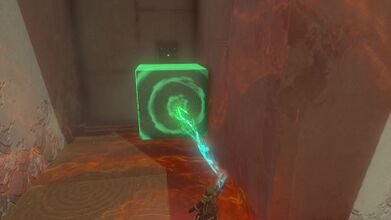
*From this higher vantage point, you can jump and use the [[Paraglider]] to get around the corner and over to that treasure chest we previously saw. Open the chest to give five [[Arrow]]s. | *From this higher vantage point, you can jump and use the [[Paraglider]] to get around the corner and over to that treasure chest we previously saw. Open the chest to give five [[Arrow]]s. | ||
*Use Ascend again to get back up and continue onward to the next room. | *Use Ascend again to get back up and continue onward to the next room. | ||
| Line 38: | Line 38: | ||
File:Sonapan-Shrine-04.jpg|On the left side, move the block so that is in front of the [[Treasure Chest]] | File:Sonapan-Shrine-04.jpg|On the left side, move the block so that is in front of the [[Treasure Chest]] | ||
File:Sonapan-Shrine-05.jpg|Use Ascend to get to the top of the box | File:Sonapan-Shrine-05.jpg|Use Ascend to get to the top of the box | ||
File:Sonapan-Shrine-06.jpg| | File:Sonapan-Shrine-06.jpg|Paraglide over to the chest to get five [[Arrow]]s | ||
File:Sonapan-Shrine-07.jpg|Grab the block with Ultrahand and place it in the water against the back wall | File:Sonapan-Shrine-07.jpg|Grab the block with Ultrahand and place it in the water against the back wall | ||
File:Sonapan-Shrine-08.jpg|Use ascend where the block was to get up to the higher ledge | File:Sonapan-Shrine-08.jpg|Use ascend where the block was to get up to the higher ledge | ||
Latest revision as of 09:21, November 23, 2023
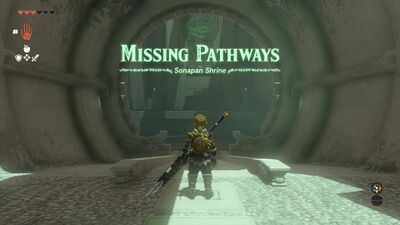
Sonapan Shrine

Games | ||
Depths Counterpart | ||
Items | 5 Arrows | |
Rewards | ||
| Attributes | ||
|---|---|---|
Type | ||
Sonapan Shrine, also known as Missing Pathways, is a Shrine of Light from Tears of the Kingdom.
The Shrine is located east of Satori Mountain.
Missing Pathways
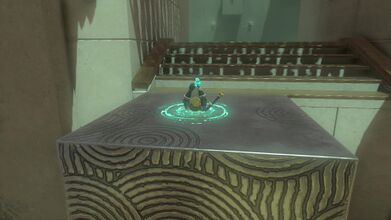
- Run forward and use Ascend to climb up to the higher area.
- On the right side of the room there is a box platform that you can freely move around. Grab it with Ultrahand and bring it to the center of the room. There is a platform right up on the ledge. Use Ultrahand and drop the box above the ledge.
- On the left side of the room, there is a Treasure Chest in the wall. Grab the nearby platform with Ultrahand and move it so it is in front of the chest.
- Now return to the center of the room and use Ascend to travel through the ledge and the box and exit on top.
- From this higher vantage point, you can jump and use the Paraglider to get around the corner and over to that treasure chest we previously saw. Open the chest to give five Arrows.
- Use Ascend again to get back up and continue onward to the next room.
- Use Ultrahand to grab the box and place it right in the center of the water, against the back wall. It should be positioned so it is right beneath the platform way up above.
- Back where the box originally was, use Ascend to climb up to the higher ledge. From there, glide over and land on top of the box. Then use Ascend once again to reach the very top of the shrine. Run over to the altar to collect the Light of Blessing.
Video Walkthrough
Video Walkthrough of Sonapan Shrine
Gallery
Run forward and use Ascend to get to the higher ledge
Grab the block on the right with Ultrahand and place it on top of the platform
On the left side, move the block so that is in front of the Treasure Chest
Use Ascend to get to the top of the box
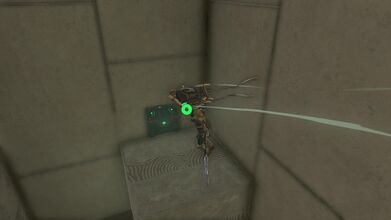
Paraglide over to the chest to get five Arrows
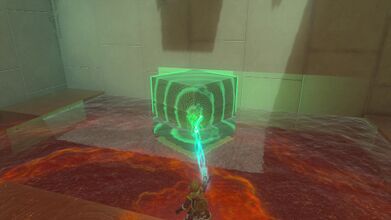
Grab the block with Ultrahand and place it in the water against the back wall
Use ascend where the block was to get up to the higher ledge
Paraglide over and land on top of the block
Look up and use ascend to reach the top of the shrine


