Mayausiy Shrine
Jump to navigation
Jump to search

Video Walkthrough of Mayausiy Shrine
Want an adless experience? Log in or Create an account.
Mayausiy Shrine

Games | ||
Location | ||
Inhabitants | ||
Depths Counterpart | ||
Items | ||
Rewards | ||
| Attributes | ||
|---|---|---|
Type | ||
Mayausiy Shrine, also known as Building Blocks, is a Shrine of Light from Tears of the Kingdom.
The Shrine is located in the Forgotten Temple.
Building Blocks
- In the first room there is a finished block structure on the left that is 2x2x3. The one on the right however, is missing pieces. The are two loose "L" shaped pieces. Use Ultrahand to grab the pieces and put them in the proper arrangement to solve the puzzle. Both pieces need to be turned so there is one block on the ground, and two blocks in the air. Once completed, the door up ahead will open.
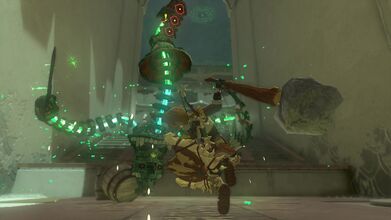
- Run up ahead and defeat the Soldier Construct.
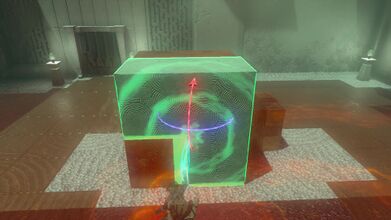
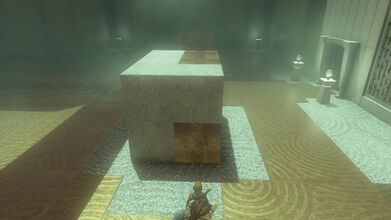
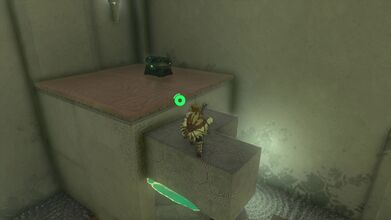
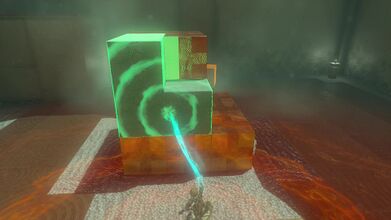
- In the next room there is a 3x3x3 finished block structure on the left, but the one on the right needs to be pieced together. Before doing so, there is a treasure chest in the corner for us to collect. You can use the loose pieces to create a staircase to reach the chest. You can also climb up the incomplete structure and glide over to make it easier. The chest here contains a Large Zonai Charge.
- There are three shapes to fit in, one is a simple "L"-shaped corner piece. A second one is an "L"-shaped corner piece, but it has a 4th block attached to the middle piece. The last block is a strange looking one, with it being an "L"-shaped corner piece, and a 4th piece attached to one of the ends.
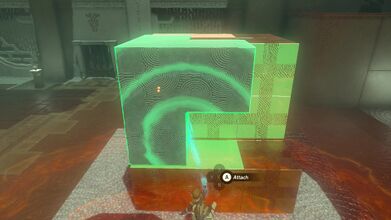
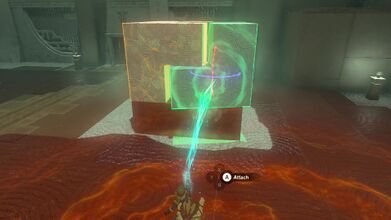
- We want to first place that odd shaped one, turn it and place it so it covers all the blocks that are closest to the closed gate of the shrine.
- We then want to turn the other 4-block piece, overlapping with the previous piece we just placed.
- Lastly, place the "L" shaped piece in, furthest from the gate. This will complete the puzzle and open the gate. Run ahead and collect the Light of Blessing.
Video Walkthrough
Video Walkthrough of Mayausiy Shrine
Gallery
Place the first "L" Shaped Block
Complete the Puzzle
Defeat the Soldier Construct
Move the blocks to reach the chest that contains a Large Zonai Charge
Place the 4-piece block, closest to the closed gate
Place the next 4-piece block adjacent to it
Finish the puzzle with the "L" shaped Block


