Demise
| Spoiler Alert! This article describes a subject that is sensitive to plot development. |

Title | Demon King | |
Race | ||
Games | ||
Location | ||
Threat | ||
Attacks |
| |
Effective | ||
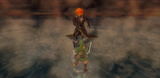
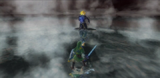
Demise is the final boss and overarching antagonist of Skyward Sword, and the franchise as a whole, the final form of The Imprisoned, and is the master of Demon Lord Ghirahim. Ghirahim successfully revives him in the World of the Past, and Link must defeat him.
Battle
First Phase

In the first phase, Demise will perform simple slashes and punches. It is easy to see when he is about to attack, but he attacks very quickly (despite his size), so this is where your skills with the Shield Bash are needed. Even with the Shield Bash, Demise won't be stunned at all; however, his guard will be down long enough to deal one or two slashes before he recovers. Also, don't overuse spin attacks, as a standard spin attack is slower than a regular sword slash.

In other words, if Demise blocks your Spin Attack and decides to counterattack, you'll probably get hit and knocked back. The main goal during the first phase is to deal a few hits without getting killed. Don't be too risky, as you'll need your hearts for the second form. Demise takes a LOT of hits during his first phase, so just play it safe and don't waste your hearts in a hurry.
Second Phase

The second phase is a lot more dangerous, so restock on your hearts with potions if you're low. This time, Demise's sword is charged with lightning, meaning you can't attack blindly or you'll lose a heart through electrocution. Demise will be able to block nearly all sword attacks, so recklessly slashing at him is a bad idea. If you stay close to him, he'll mainly hack at you three times with his electrified sword, which you'll have to shield bash or dodge. His sword won't lose its power, though, so don't bother going into close combat at the moment. Instead, keep your distance and hold your sword up into Skyward Strike position (you can charge up lightning Skyward Strikes just like Demise).

While you're at a distance, Demise uses devastating attacks that you must avoid at all costs. The first is a charge, where he leaps at you and slashes with his sword. This attack takes out two hearts, but can be stopped with a shield bash or by leaping backward. The second is trickier to handle; he sends out a lightning-charged Skyward Strike, dealing two hearts of damage. Unlike most attacks in Skyward Sword, you can't block this with a shield. Even worse, he sends it horizontally most of the time, making it tricky to dodge. You can evade this attack by dodging sideways, but it's often tricky to see which of the attacks he uses (his charge looks similar to the Skyward Strike before he attacks).

To defeat him, you can defeat him like you did in the previous phase (beware the lightning sword), or you can use Skyward Strikes against him. However, the Skyward Strike in this stage is different from the rest of the game, as it charges up at random. Remember that waiting for the Skyward Strike will leave you vulnerable to Demise, so get ready to dodge or block at any time. Once you send a Skyward Strike at him, he will be stunned long enough for you to run up and hack away until he recovers. At this point, you can keep charging up Skyward Strikes and slashing at him until he falls to the ground. Alternatively, you can use the Bug Net to reflect the electric sword beams which will stun him.

After this, switch to your sword and hack away until he falls down. The first time you see the "finishing blow" interface, you will ALWAYS miss. However, every time you knock him to the ground, his recovery time grows longer, so it becomes easier to finish him the more you knock him down. You can use the "finishing blow" on him after you knock him down a second time, however you must use the attack IMMEDIATELY after he gets knocked down, otherwise it will be too late. If you don't use the "finishing blow" quickly enough, Demise will dodge your attack and you will be left defenseless for a few seconds, so get him quickly.
Advanced Tactics
Defeating Demise Quickly
It's possible to beat Demise's first form very quickly if you have very fast reactions. This is great for the Thunder Dragon's Lightning Round, if you want to improve your best time for Demise. (Note that you can only do this on Hero Mode.)
The first thing to know is that despite his skill with the blade, you can still slip past his guard without having to use the shield bash. Slash at his left side, then the right side, then the left again very quickly to deal a hit; he will block the first two slashes, but the third will get him if done quickly enough. However, it's much faster to use your shield to shield bash and counterattack.
There are two ways to fight Demise using the shield bash: safe and slow, or quick and dangerous. It's best to play safe at first, but once you get used to his attacks, it's much faster to fight him the risky way. To beat him quickly, shield bash one of his attacks and immediately counterattack. Slash at him several times until he attacks again, then block. While seemingly simple, Demise will attack faster and faster if you don't retreat every now and then. It's very tricky to keep up a long combo of hits without getting hit and knocked back, but you'll finish him very quickly. Another key point is to aim at his legs (his left leg may be easier to hit for right-handed people). Hitting him there continuously will make him fall down, leaving him defenseless for several seconds.
Defeating Demise Without A Shield
If you want to prove your skill with the Master Sword, or prefer leaping away from attacks than cowering behind a shield, you can take on Demise with only a sword. While slower, you may conserve more hearts this way, and you'll be able to master the art of dodging.
Almost all of Demise's attacks can be dodged with a backflip, but a sidestep won't allow you to dodge some of his attacks since he slashes horizontally or diagonally very often. In fact, the backflip works for every attack except for his Skyward Strike (in the 2nd phase). For this attack, you must dodge sideways. Be careful not to confuse his Skyward Strike with the charging attack, as a sidestep won't let you dodge his charge.
For the first form, attack his left side, then his right, then his left again. Provided you do this quickly, you'll be able to land a hit. For the second form, there's not much difference with or without a shield as it can't block Demise's Skyward Strikes anyway.
Connection to Ganon/Ganondorf
| This section contains non-canon fan theory and speculation. |
After he is defeated, he vows that his hatred will manifest itself time and time again, and it will pursue the descendants of Link and Zelda as long as Hyrule is in existence; possibly hinting that he is the origin of Ganondorf.
Gallery
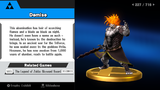
Demise trophy from Super Smash Bros. for Wii U
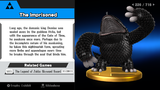
The Imprisoned trophy from Super Smash Bros. for Wii U


Trivia
- Demise uses the same voice as Scervo and Dreadfuse.
- Though Demise himself doesn't appear in Hyrule Warriors, there is a reference to him when Ghirahim compares Ganondorf to him at the end of the Ganondorf's Return scenario.

